
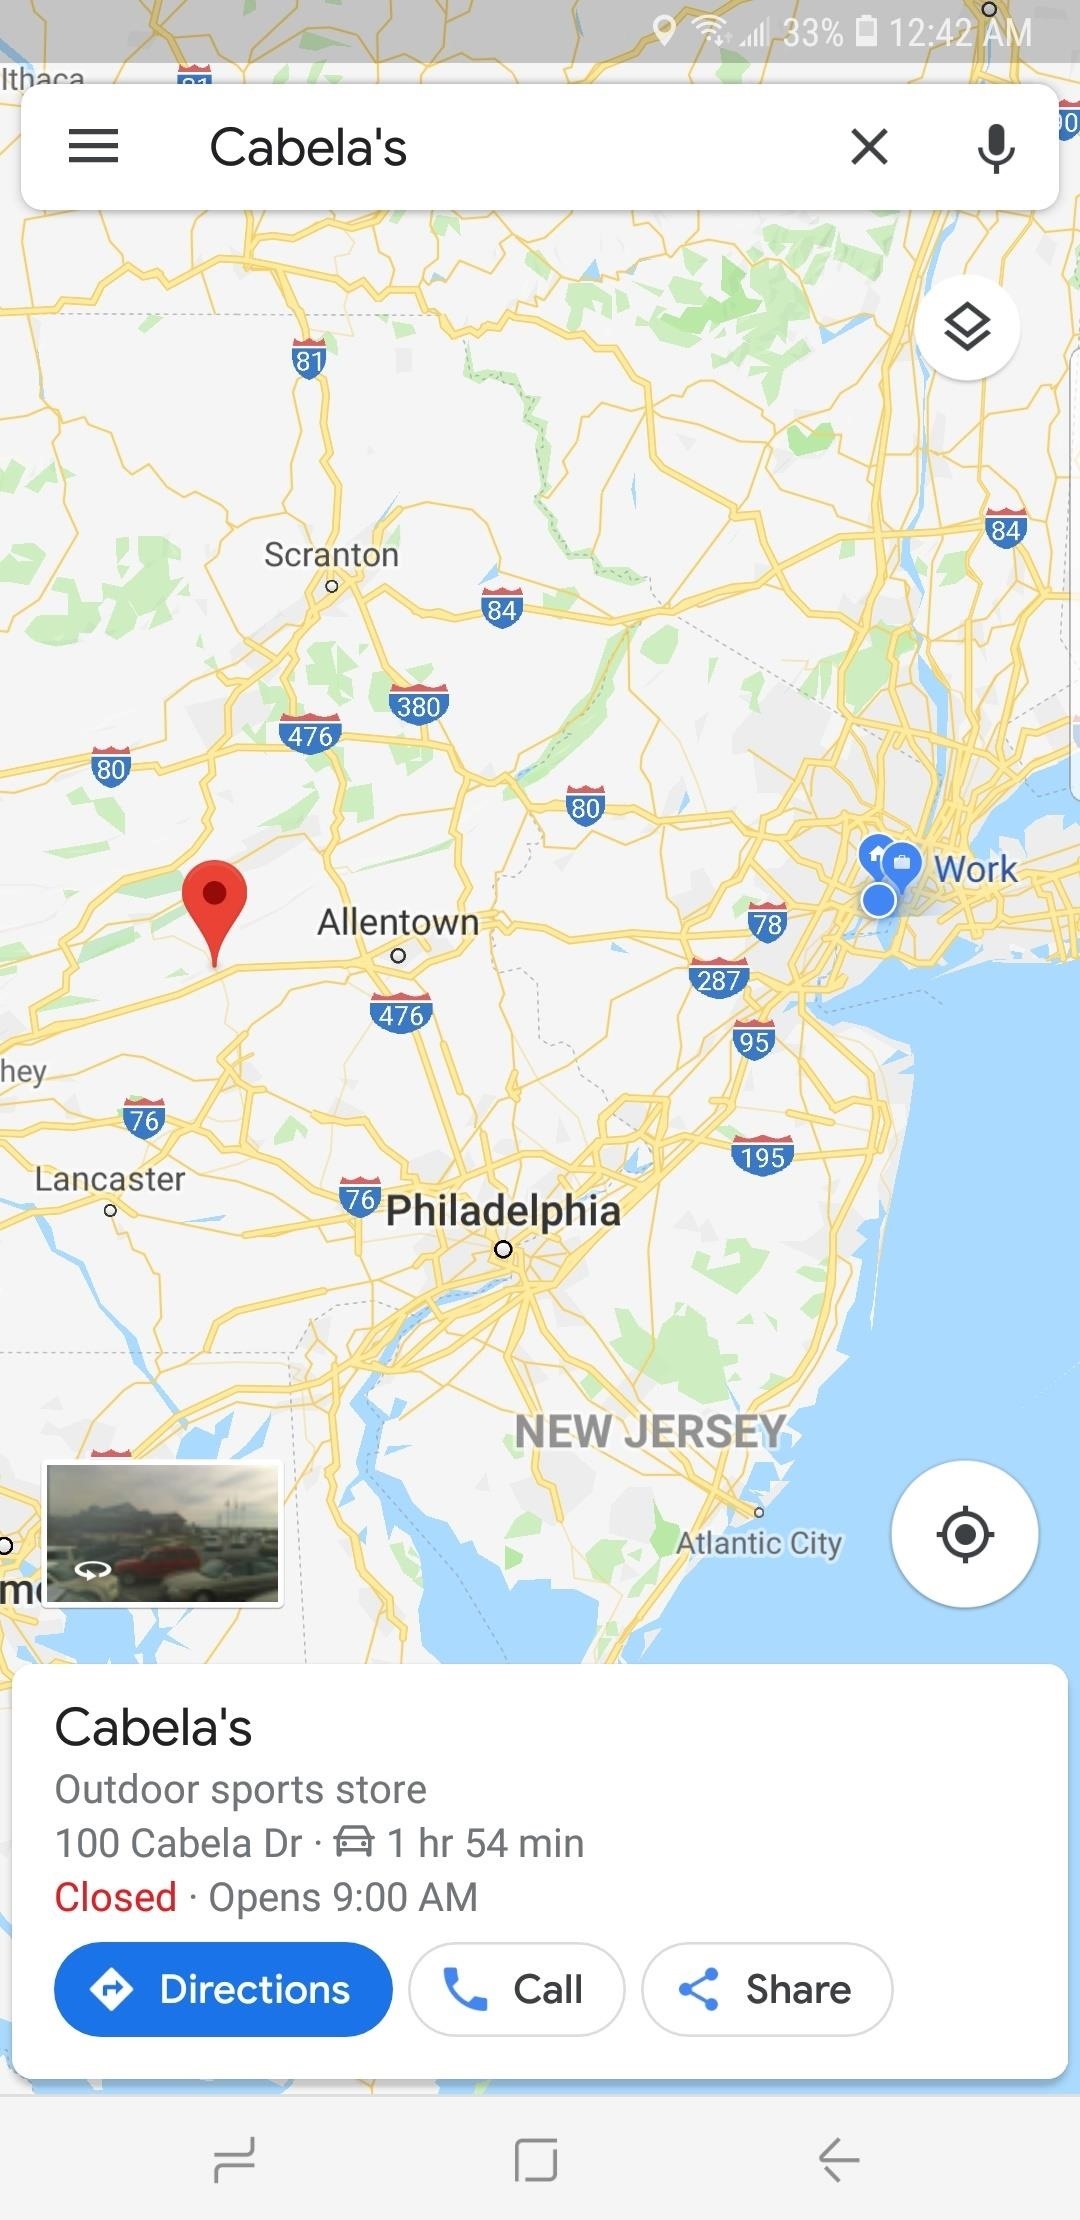
Google Maps now lets you travel back in time on iPhone and Android
If you buy through a BGR link, we may earn an affiliate commission, helping support our expert product labs.
Google is celebrating 15 years of Street View support in Google Maps by adding an exciting feature to the iPhone and Android versions of the app. You can now travel back in time using Street View, and access available imagery for various locations from different points in time. That’s not the only new Street View improvement. Google also unveiled a brand new, more portable camera system that can take 360-degree imagery. The camera will further improve Street View imagery support, allowing Google to travel to more places while offering better visuals.
Historical Google Maps imagery coming to iPhone and Android
Street View is one of the most useful Google Maps features. It allows you to inspect visual images of your route and destination. It makes it easier to find the various places you need to travel to, especially if you’ve never been there before.
Google announced in a blog post the Street View feature that will be immediately obvious to any iPhone and Android user familiar with the Google Maps functionality.
Tech. Entertainment. Science. Your inbox.
Sign up for the most interesting tech & entertainment news out there.
By signing up, I agree to the Terms of Use and have reviewed the Privacy Notice.
To see older images of a location, you need to tap anywhere on the photo. You’ll get a See more dates menu option that gives you access to historical imagery that can date back to 2007 for those places that were part of Google’s early Street View mapping.
The new Street View camera
The camera will be ready next year, bringing a lot more versatility to Google’s Street View program. At less than 15 pounds, the camera can be shipped anywhere, including places where a car doesn’t fit.

How Google harnesses Street View data
Perhaps more interesting than exploring the historical Street View images on Google Maps is what Google does with the information in those photos. Google uses artificial intelligence to extract data from Street View photos automatically. It then uses that information to update the Google Maps information that users might be looking for.
Additionally, Google uses Street View imagery to power the Live View feature that brings an augmented reality (AR) experience to Google Maps. Simply power your camera in Google Maps, and the app will overlay information on top of the real world.
Indoors Google Maps Street View imagery
The virtual sightseeing tour also features indoor Street View imagery that lets you walk virtually inside various touristic attractions. The Burj Khalifa, Eiffel Tower, The Duomo in Milan, Les Invalides in Paris, the International Space Station, and even the Pacific Ocean are just some of the locations that support Street View virtual tours. You’ll find all of them at this link .
This article talks about:
Chris Smith has been covering consumer electronics ever since the iPhone revolutionized the industry in 2008. When he’s not writing about the most recent tech news for BGR, he brings his entertainment expertise to Marvel’s Cinematic Universe and other blockbuster franchises.
Outside of work, you’ll catch him streaming almost every new movie and TV show release as soon as it's available.
- The road to Apple AR Glasses is paved with Vision Pro headsets
- iPhone 16 case leak might confirm Apple's only big design change
- iOS 18 public beta is probably coming soon to an iPhone near you

LG and Google are partnering with Hyatt to finally fix the horrible hotel TV experience

Here’s why I ditched AirPods Max and switched to Beats Studio Pro instead

macOS Sequoia beta 2 now available with iPhone Mirroring and other 9 features

visionOS 2 beta 2 now available to Apple Vision Pro users
Latest news.

In Pixar’s Inside Out 2, life is literally a battle between anxiety and joy

An asteroid larger than 99% of near-Earth asteroids will pass Earth this week

3 new Netflix documentary releases to add to your watchlist in July

You’ll need an Apple TV+ subscription to binge Apple’s next hit podcast
Sign up for the most interesting tech & entertainment news out there.
How-To Geek
How to time travel in google street view.

Your changes have been saved
Email Is sent
Please verify your email address.
You’ve reached your account maximum for followed topics.
7 Signs an Online Seller Is Running a Scam
Today's nyt connections hints and answer for june 24 (#379), i put up with messy passwords too long, here's what the cleanup looked like, quick links, how to view old street view images, some areas are better served than others, do more with google maps.
Google Street View is a great way to see a map from a first-person perspective. You can use this to help find an address, do a bit of virtual sightseeing, or use historic Street View data to travel back in time.
Google will refresh its Street View data every few years in many areas, and you can see older Street View imagery using the desktop version of Google Maps. To do this, head to maps.google.com in a web browser on a computer (This won't work on a smartphone.).
Now, bring up Street View by clicking and dragging the Street View icon (pictured below) and then releasing it while hovering over a street or road. You can also click on a location and then click again on the Street View thumbnail that appears at the bottom of the screen.
To view historic Street View imagery, look at the top-right corner of Google Maps. If older Street View imagery is available, you'll see a clock icon with a downward arrow in this box.
Click on the arrow to see images taken by Street View teams in the past. You can click and drag the slider to move backward and forward through time. You can move around and change perspective and the view will update in real-time. Click on a captured image to see it in full-screen.
To get back to present-day Street View, drag the slider all the way to the right and click on the image again.
Google Maps as a service has some of the best (if not the best) coverage in the world, with an ever-expanding cache of Street View data. Where you live ultimately decides how much historical Street View data you'll have available to you.
The streets around Mountain View in California, where Google is based, have Street View data dating back to 2007 when the service first launched. Many cities and routes were added in the following years, although much of the imagery from the late 2000s is low resolution compared to modern Street View data.
If you don't see the clock icon with a drop-down arrow while in Street View, it means that you're looking at the only pass that the Street View team has made.
Google Maps is an amazing resource, whether you're planning a trip or bored on your lunch break. You can use it to create your own custom maps or plan a road trip with multiple destinations, and you can access it all on your smartphone.
You can even use it to keep track of your friends and family .
Related: How to Find Your Family and Friends Using Google Maps
- Microsoft's Promise of Easy AI
- Walmart's Killer Tech Deals This Week
How to Go Back in Time on Google Maps
This feature only goes back to 2007, but it works on desktop and mobile
:max_bytes(150000):strip_icc():format(webp)/SamCostello-d7fcf106ec2048ccb06d1e2190b3396d.jpg)
- Ithaca College
In This Article
Jump to a Section
- Go Back in Time on Mobile
- Go Back in Time on the Web
- Frequently Asked Questions
What to Know
- Web: Search for a location or drop a pin > photo > See more dates > scroll through dates and click one.
- Mobile: Search for location or drop pin > Street View preview > tap screen > See more dates > tap one to view.
- You can only go back to 2007 when this feature was first introduced.
The Street View feature in Google Maps lets you see what a place looks like from the street before you go there. But check this out: Google Maps has a historical view that lets you see every photo of a given location! Here's how to try this somewhat-hidden feature on a mobile device or from the web.
How to Go Back in Time with Google Maps on iOS and Android
Follow these steps to go back in time with Google Maps on iPhone and iPad. While the screenshots below are from an iPhone, the steps are the same in Google Maps for Android.
In the Google Maps app, search for an address or tap and hold to drop a pin on the location you want to view.
Tap the Street View preview window.
Tap the center of the image.
In the small tab at the bottom, tap See More dates .
Swipe back and forth to see the available photos of that location. Tap the photo you want to view.
When you do that, you can access all Street View options from that time. That means you can swipe around for a 360-degree view and use the arrows to move up and down streets.
How to Use Google Maps Historical View on the Web
Whether you use a Mac or Windows, follow these steps to use the Google Maps historical view on a computer:
On the Google Maps website, search for a location or click to drop a pin.
Click the photo of the location.
Click See more dates .
Scroll back and forth through the available dates and photos for the location. Click the historical photo you want to view. When you do this, just like on a smartphone, you can use all Street View features, including a 360-degree view or clicking the arrows to move up and down the street.
To return from the past to the most recent photo of the location, click See latest date in the box from step 3.
Directions give you the distance you'll travel along a route (i.e., road miles), but you can also get straight-line distances . In the app, tap and hold a spot on the map, and then select Measure distance under the Overview tab. Drag the map to put the other end of a straight line on the second point; the distance will appear in the lower-left corner (you can add multiple points. On the web, right-click a point and select Measure distance , and then click a second point to find the distance between them.
You can tap or click anywhere on Google Maps to place a pin, but it won't stay around if you click somewhere else. To save a location in the app, select Save after you've tapped. In a browser, click Save on the left side of the screen. You can see your list of saved locations in the Saved tab (mobile) or on the left side of the screen (website).
Get the Latest Tech News Delivered Every Day
- How to Use Google Maps to Find EV Charging Stations
- How to Plan an Alternate Route With Google Maps
- The 5 Best Ways to Use Google Maps Trip Planner
- How to Rotate Google Maps
- How to Measure Distance on Google Maps
- How to Find Your House on Google Street View
- 5 Tips for Using Google Maps Street View
- How to Change the Google Maps Navigation Voice
- How to Get Street View on Google Maps
- What Is Google Sky Map?
- How to Drop a Pin on Google Maps
- How to Save a Location on Google Maps
- Google Maps: Tips, Tricks, and Hidden Features
- How to Find Alternate Routes on Google Maps on iPhone
- How to Use Apple Maps Street View
- How to Check Your iPhone Location History
How to view your Google Maps Timeline on iPhone, iPad, and web
In this tutorial, we will show you how to view your Google Maps Timeline on your iPhone, iPad, and computer to go through your past travels. We will also explain how this information can be useful to you.
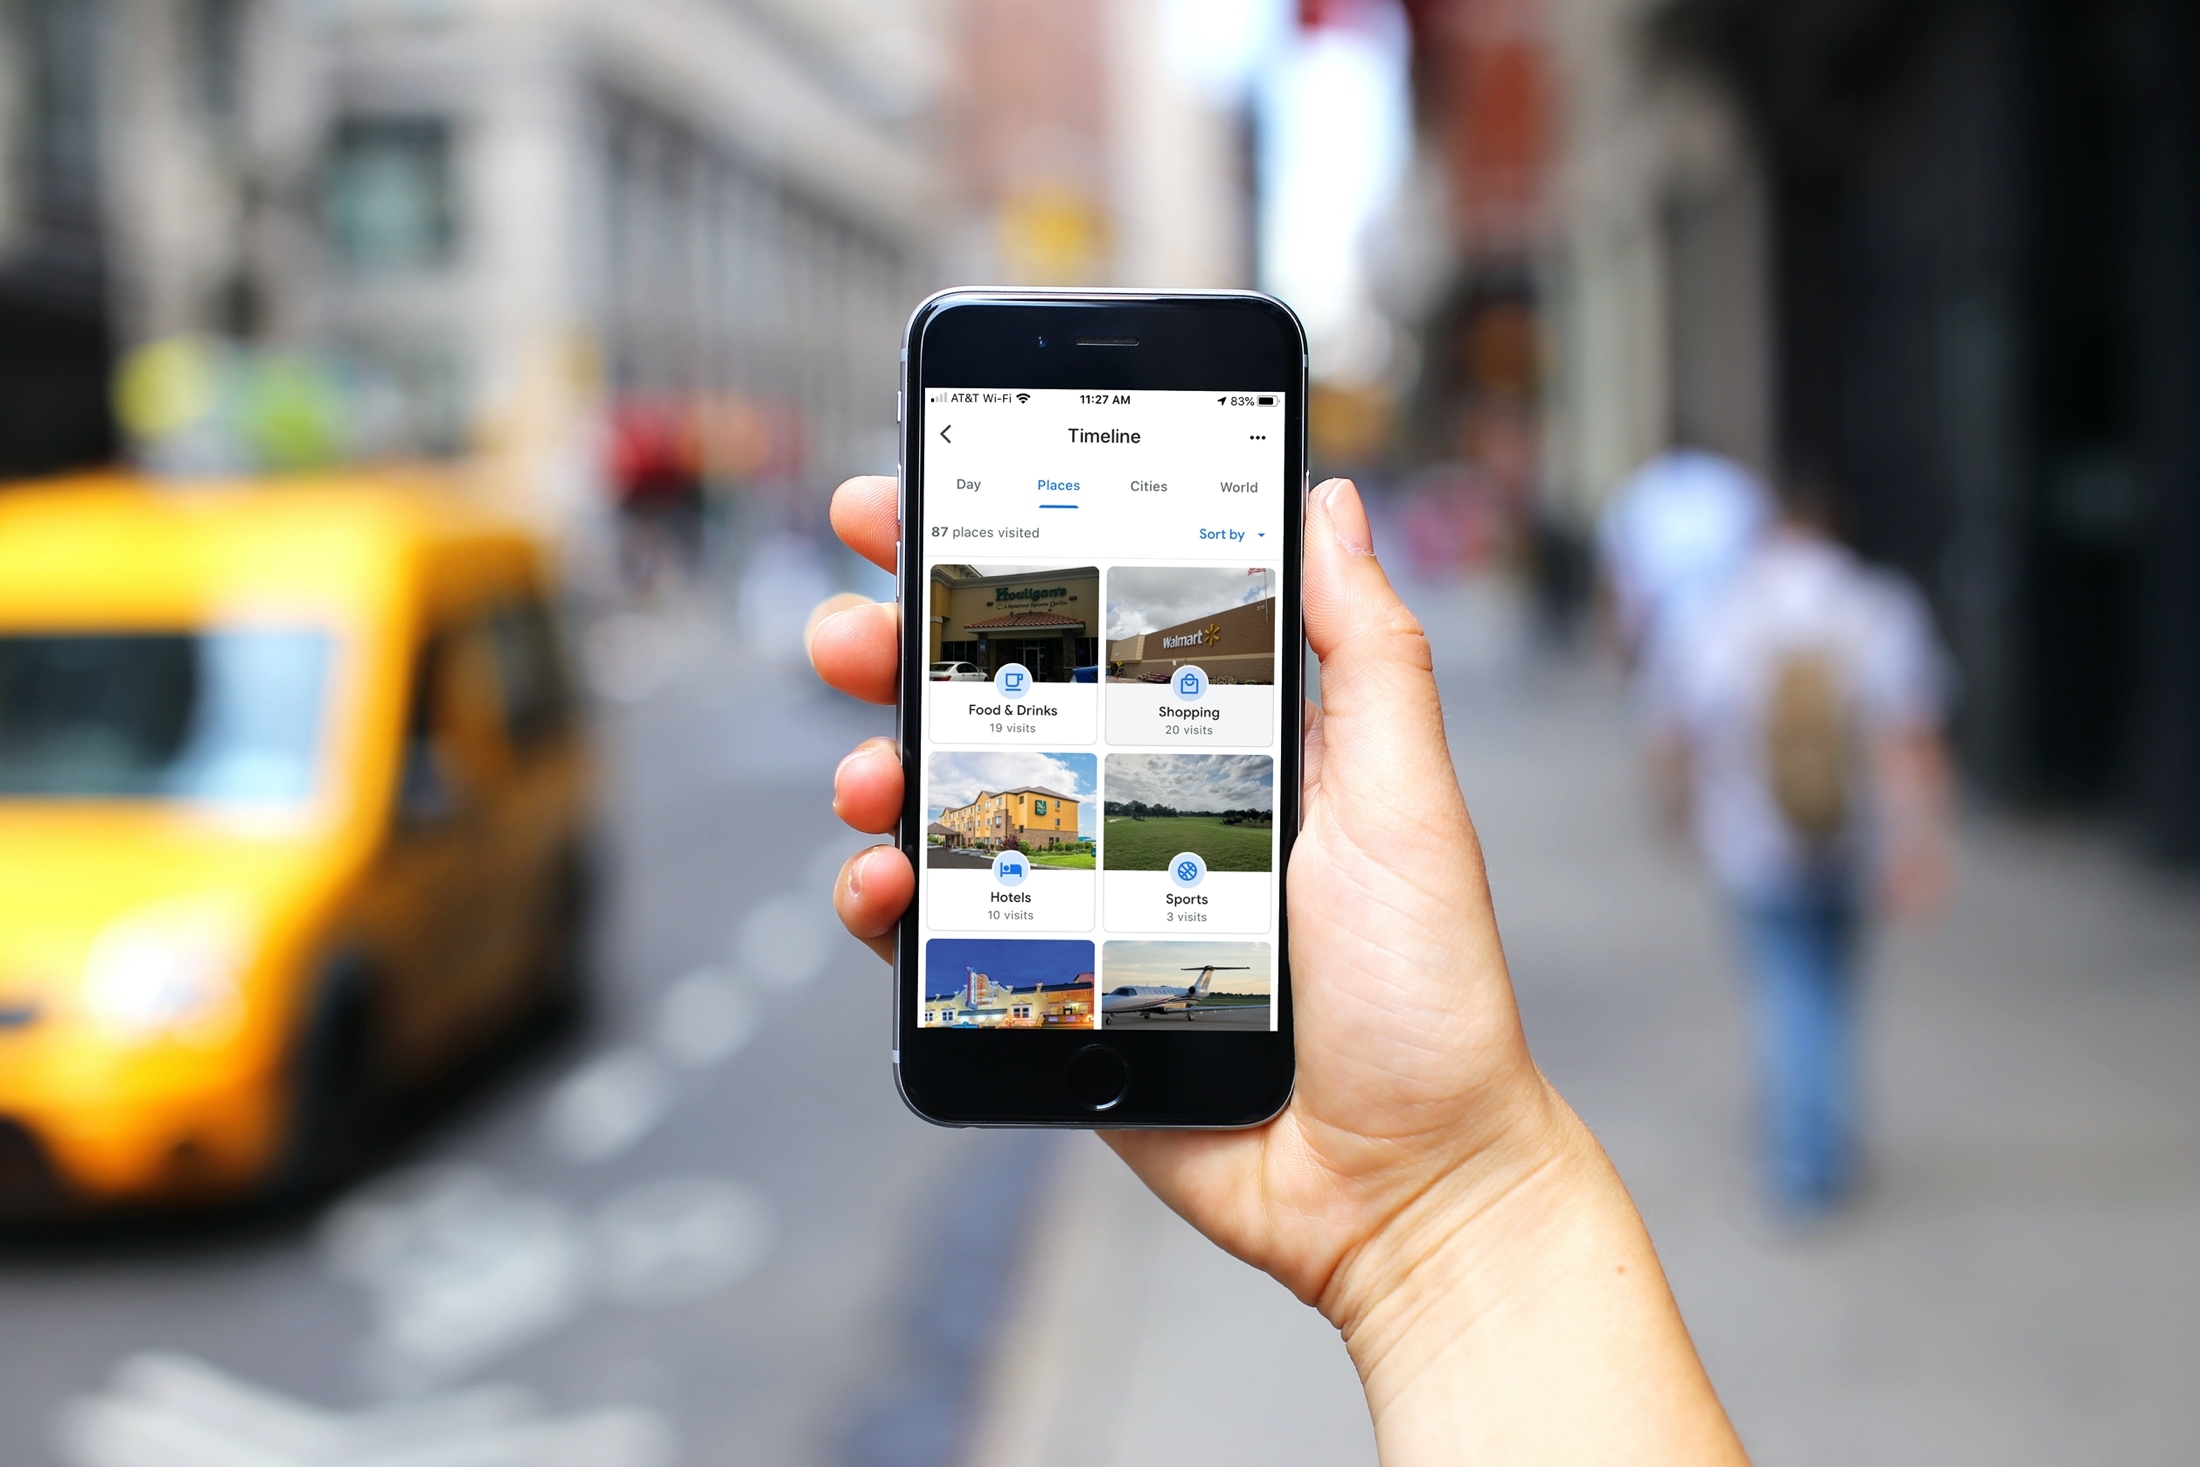
When you use Google Maps and have your Location Services turned on, every place you visit ends up in your Google Maps history. And along with your Location History is your Google Maps Timeline.
While many people don’t want every spot they travel to recorded, others can find it helpful. If you’re in the latter group, then this article is for you.
View your Google Maps Timeline
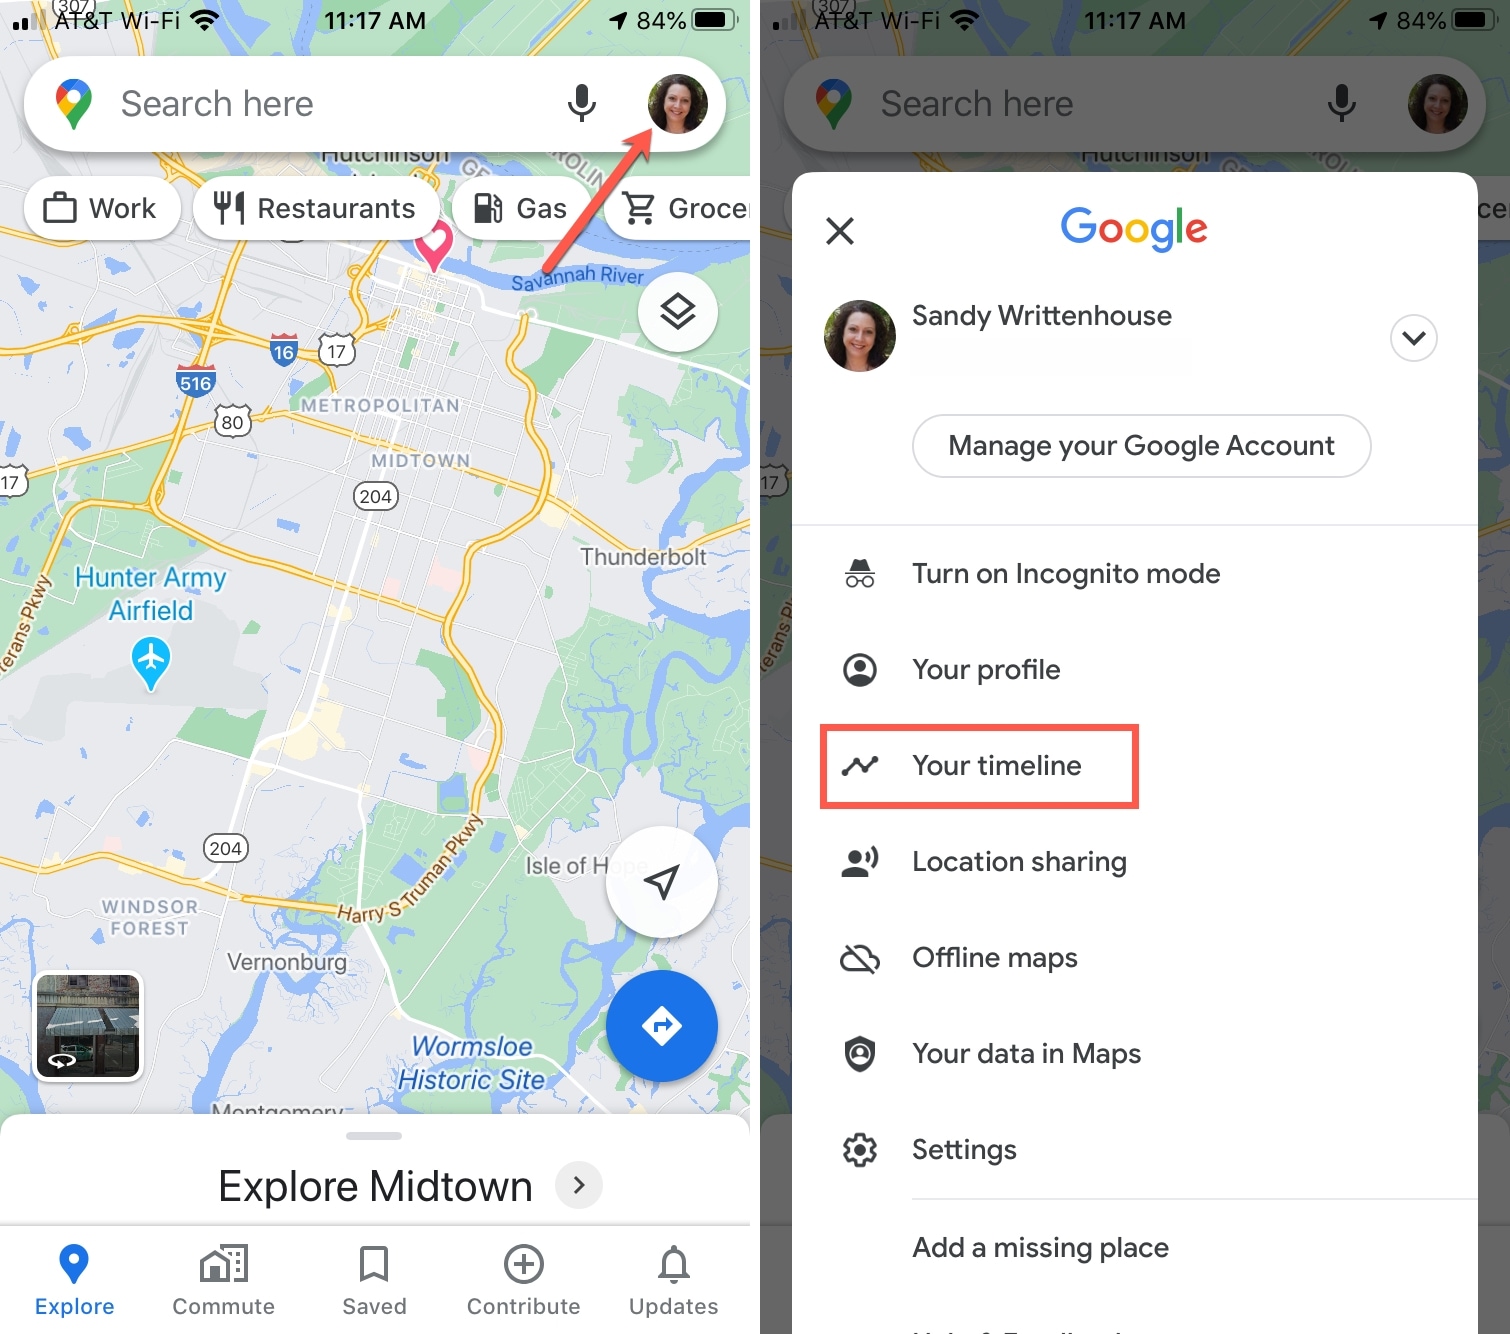
If you’re using the Google Maps app, tap your profile photo and select Your timeline from the list.
Your Timeline is only visible to you. Therefore, no one else can visit it, and you can keep the information to yourself.
Review your Timeline details
You can view your Timeline by date and place. Depending on what you’re interested in seeing, select the option that works best for you.
Browse your Timeline by date
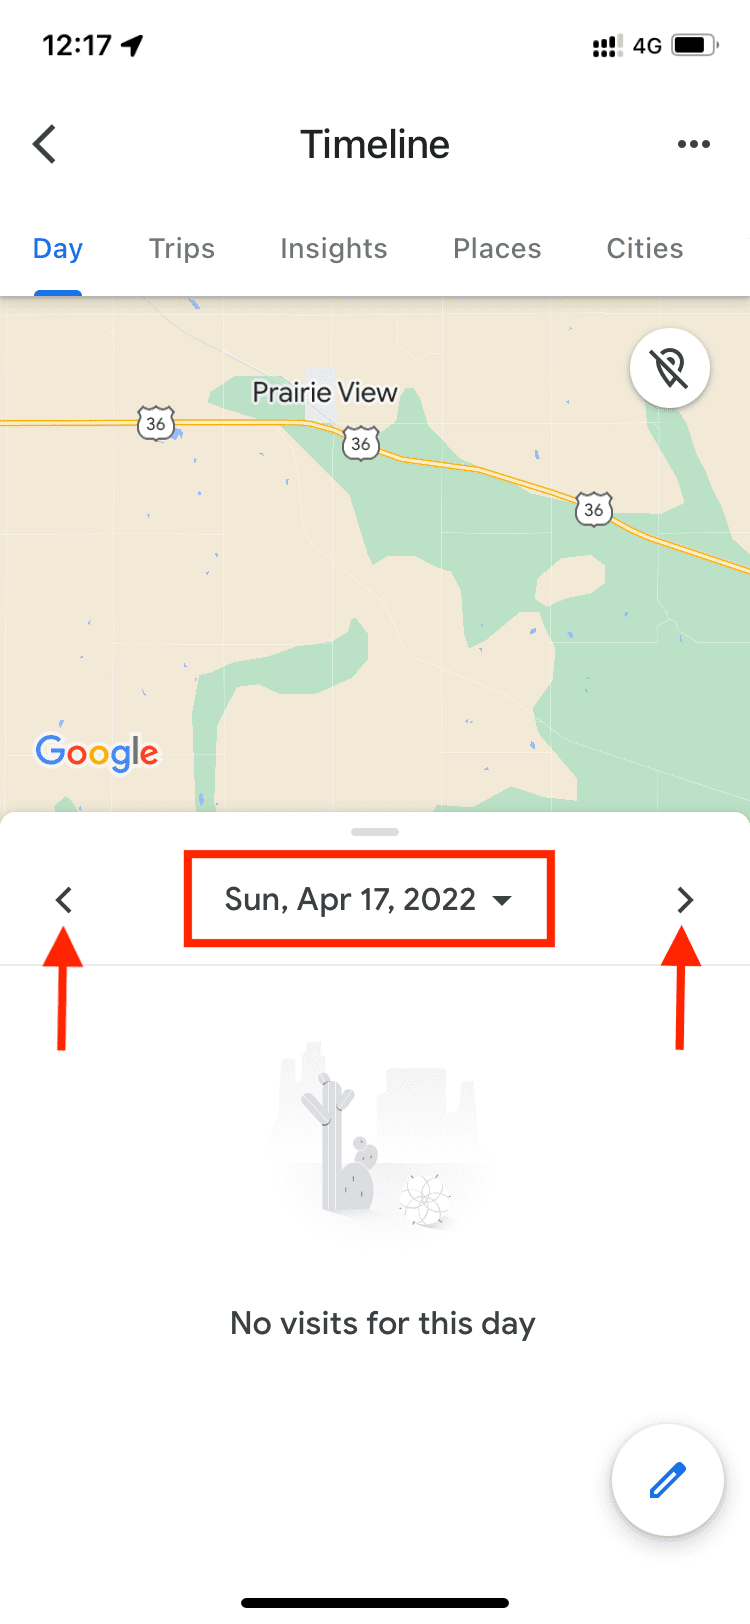
On iOS, tap Day at the top. By default, the current day will display. Use the arrows to move through months and years, or tap Today or the visible date between the arrows to pick a date from the calendar view. When you see a highlighted date, that means you have a location tracked for that day. Tap it to get the details.
You can then swipe left and right on the location details section of the screen to move between days. This makes it easy if you have location history for many days in a row.
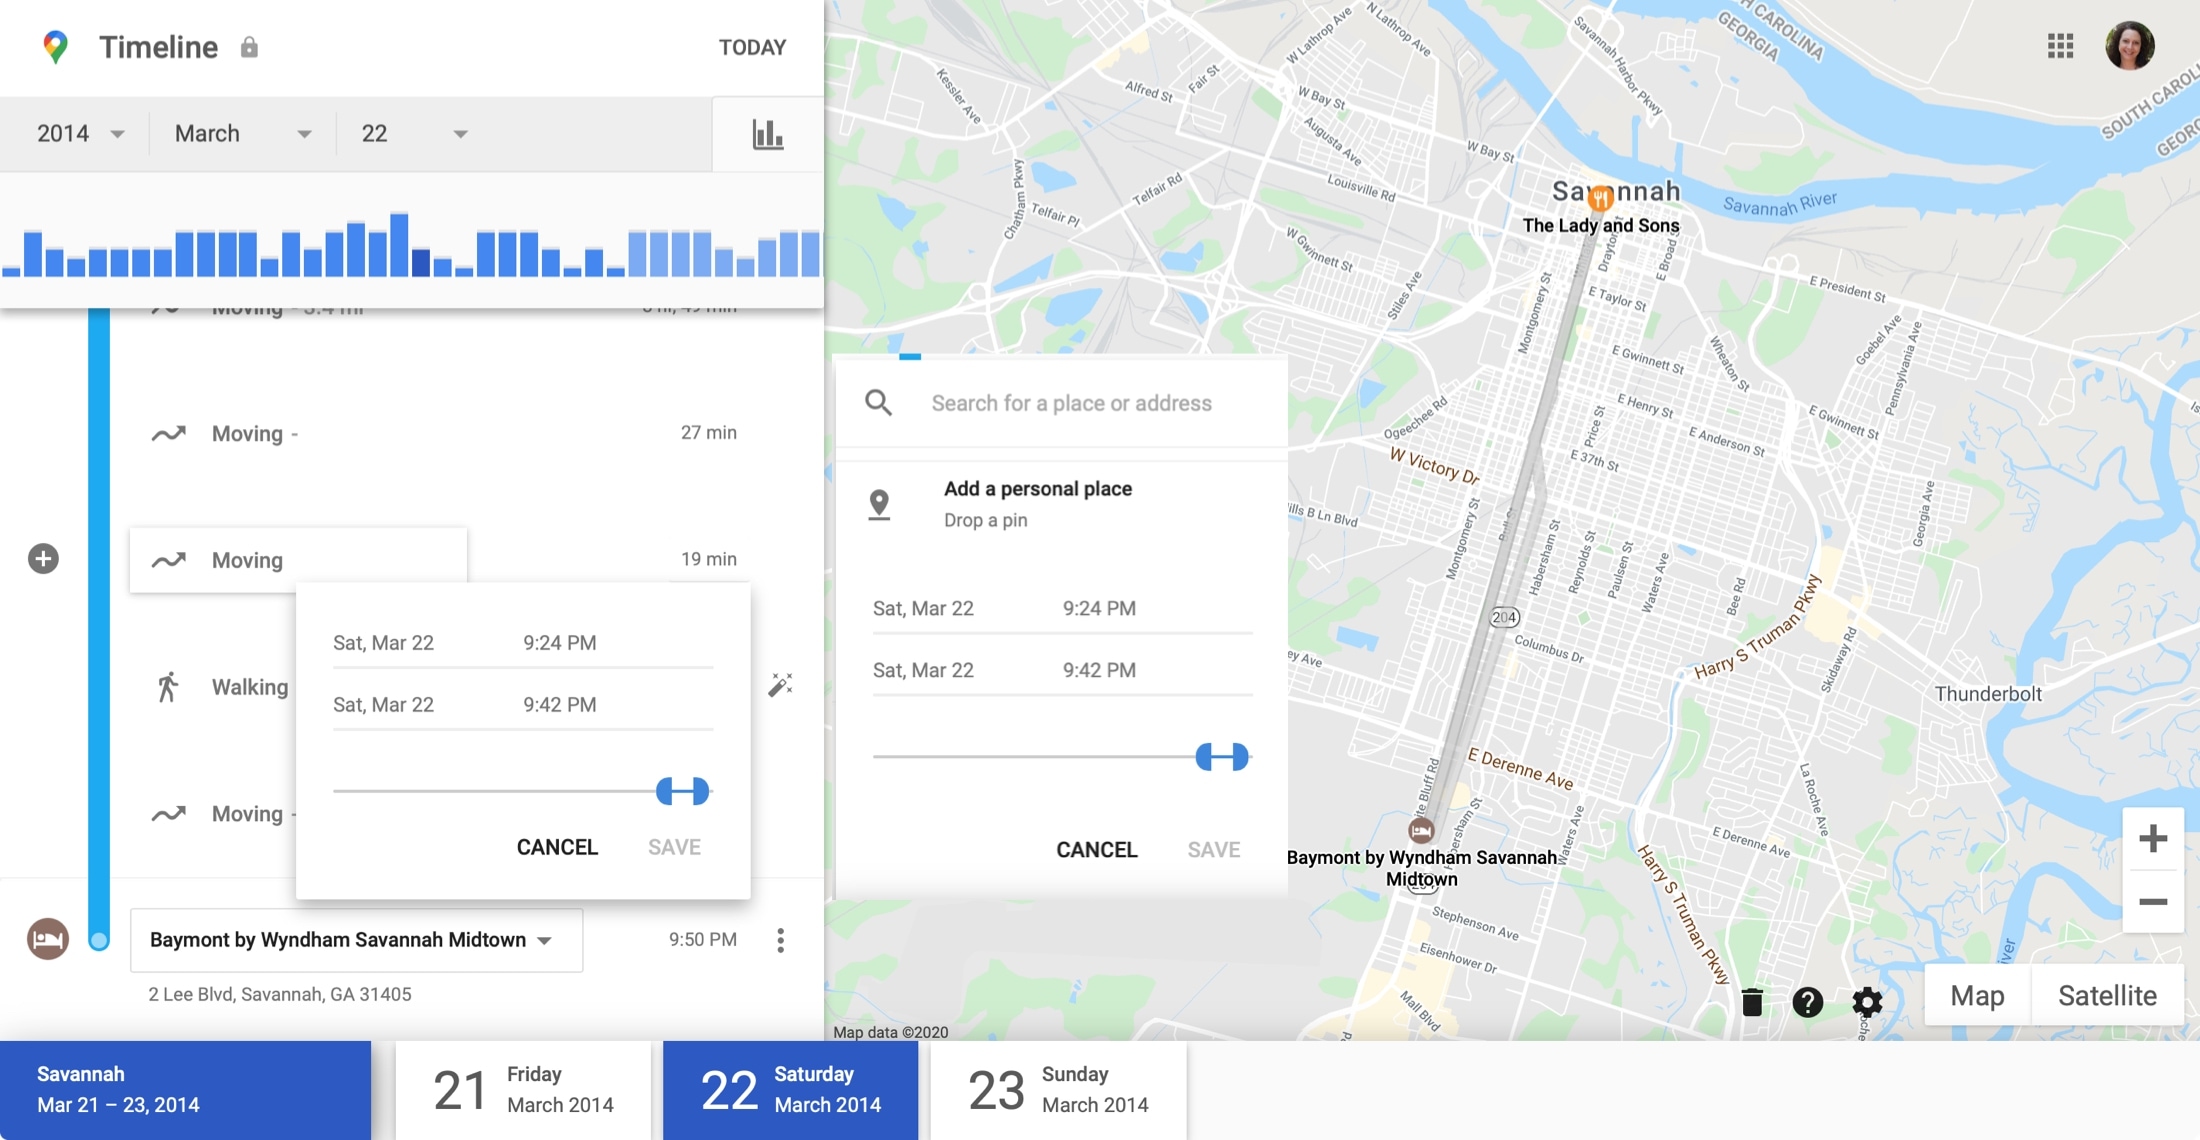
On the web, browsing your timeline by date is a bit easier. You have a date picker on the top left which lets you quickly jump to a specific year, month, and date. And it’s simple to see all of your travels for the year or a month. Use the drop-down boxes to select the year, month, or date as well as the bar graph.
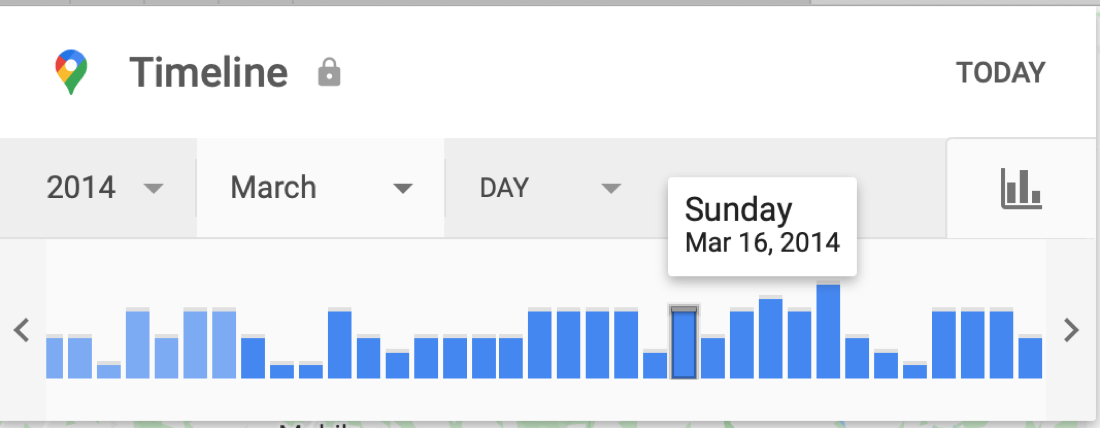
Another great feature for using the date in Google Maps online is that you can see all the places you’ve visited. Click the Year drop-down from the date picker at the top and pick All Time .
Browse your Timeline by location
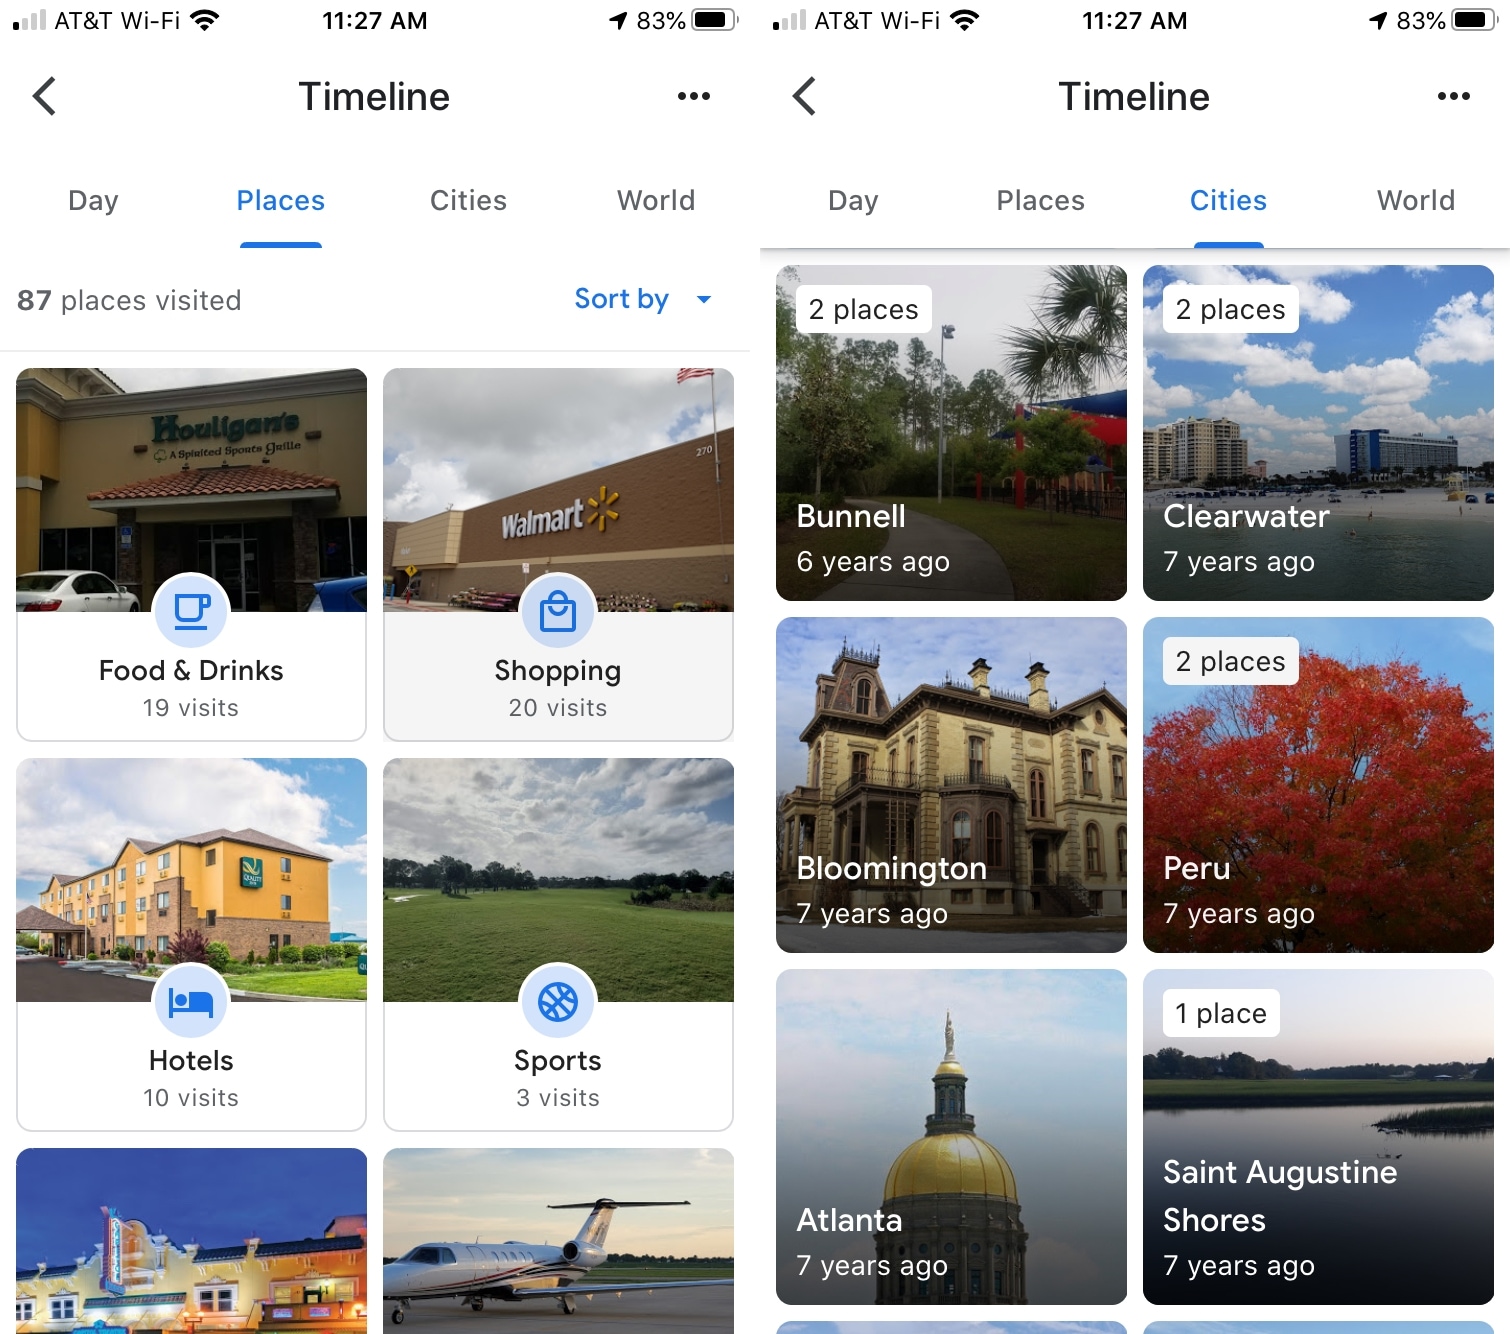
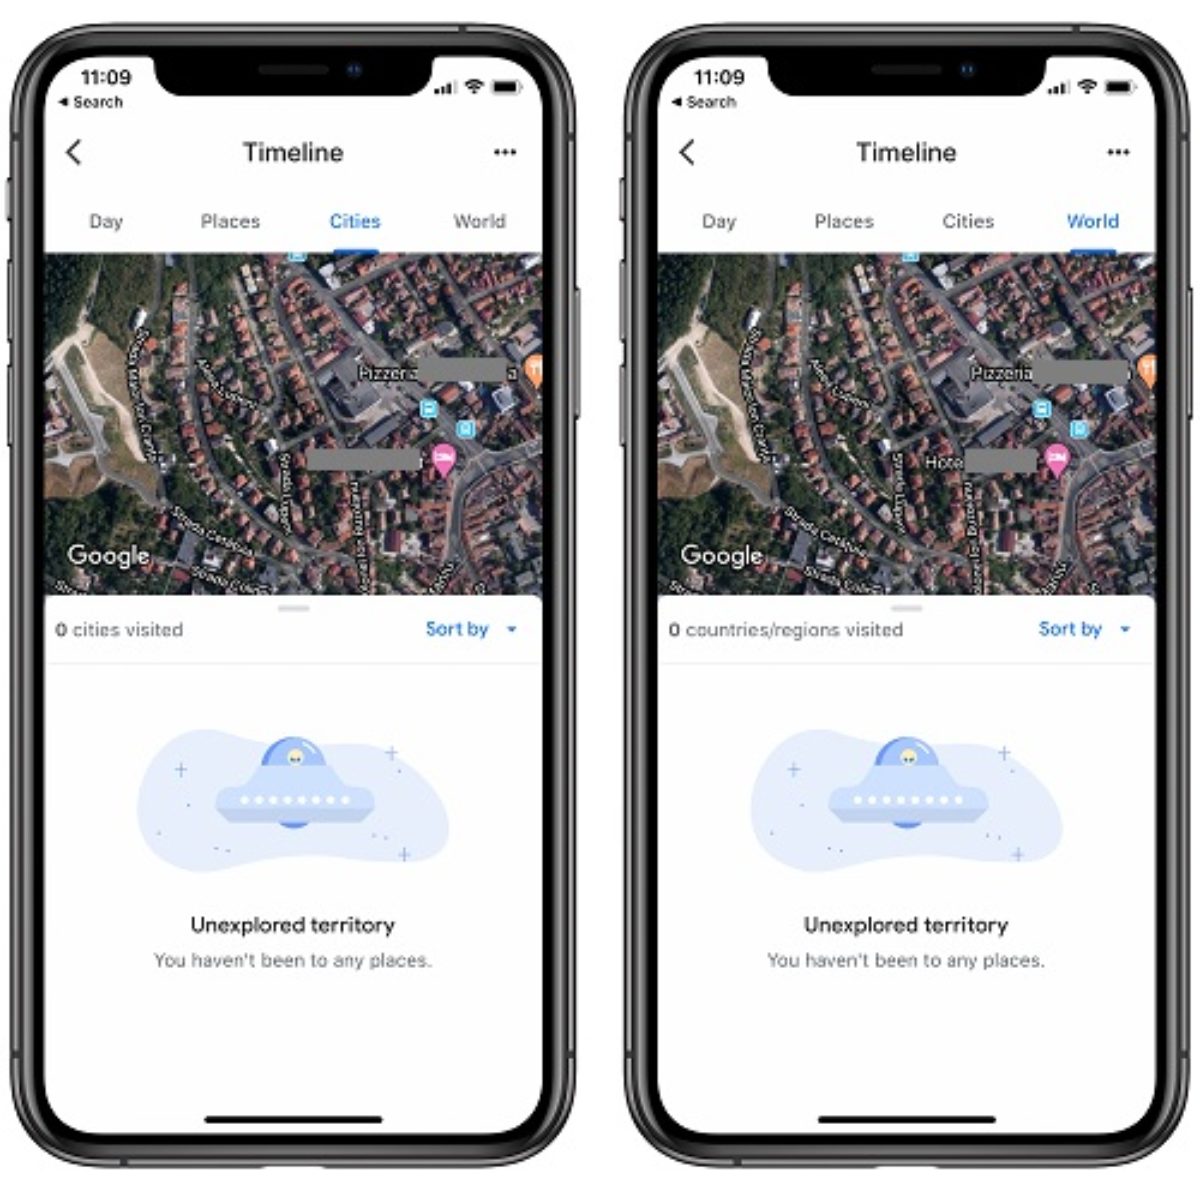
On iOS, viewing your Timeline by place is super easy. At the top, you can tap Places , Cities , or World per your preference. Then below, you’ll see the number of locations, categories for them, and you can sort by Most recent or Most visited.
If you drill down to specific location, you can see its details along with when you last visited it and how many times you were there. You can also save a spot to one of your Google Map Lists . Tap the three dots next to a location and you can view your last visit on the timeline or remove all visits to that spot.
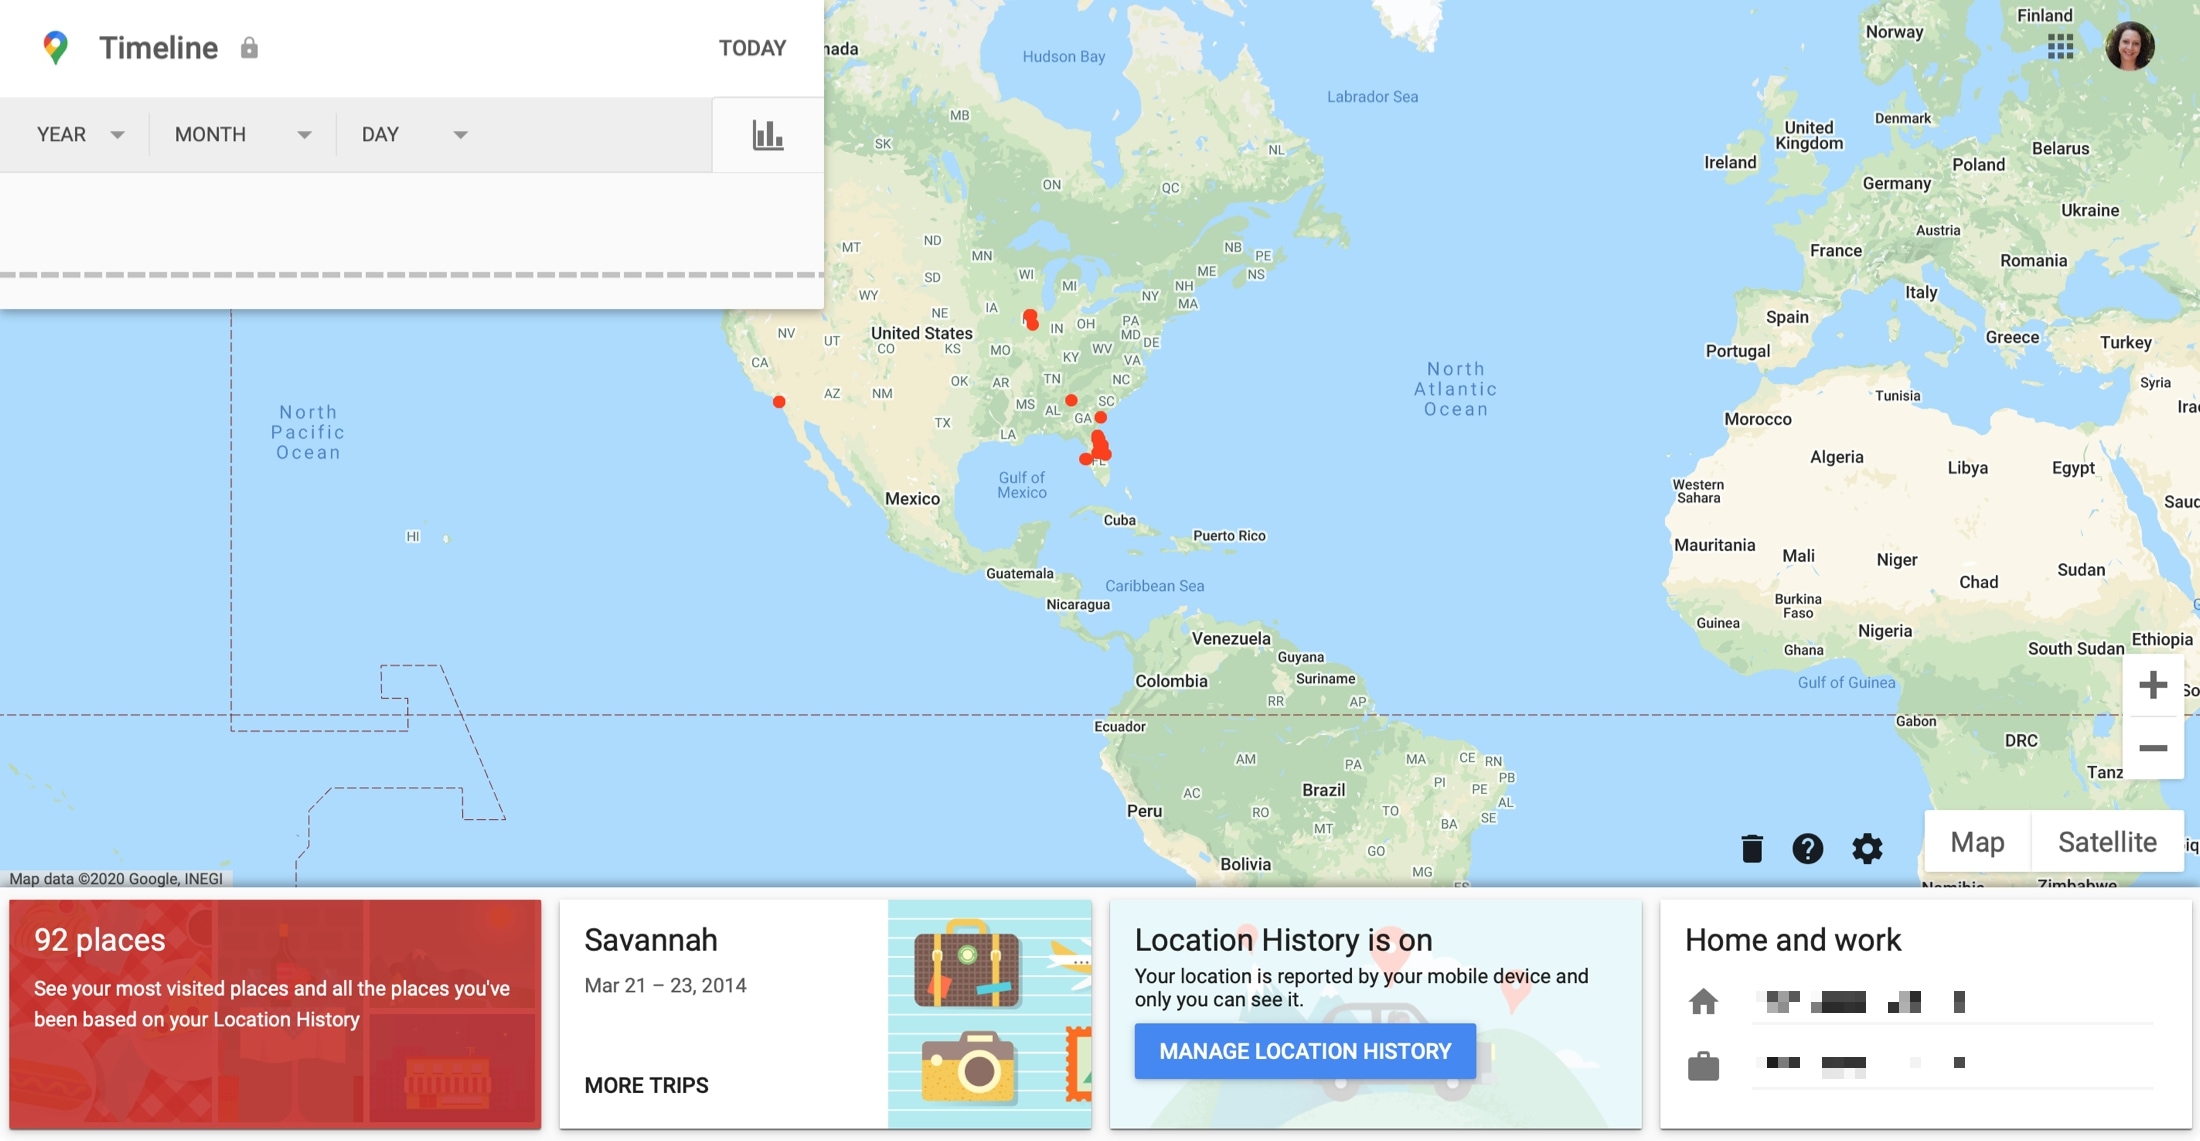
On the web, you can see all of your visited locations by selecting All Time from the Year drop-down list in the date picker at the top. In a row at the bottom, you’ll see the number of places in your Location History with options to select the most visited or all those visited.
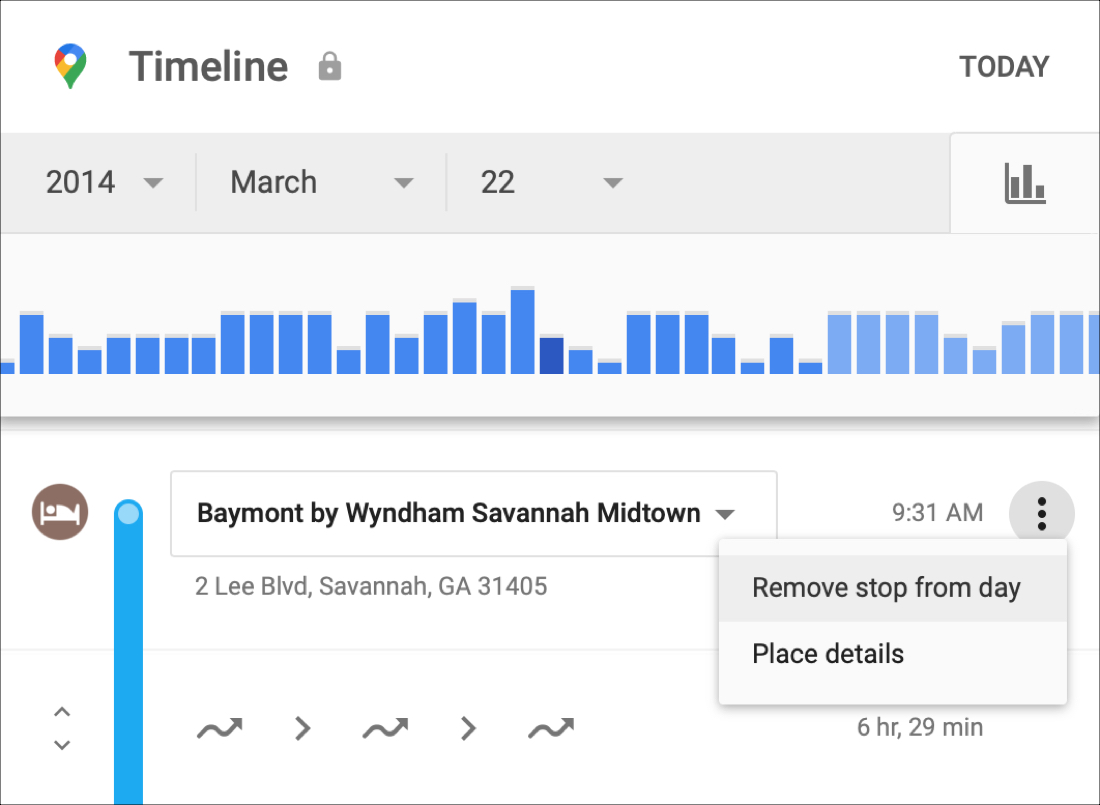
Like on iOS, you can see when you last visited a spot and how many times you were there. Click a location and it’ll pop up on the map and click the three dots next to it to see the last visit in your timeline or get details for the place.
To remove a location from your timeline online, click it and pick Last Visit in Your Timeline . Click the three dots next to the location in the list on the left and choose Remove Stop From Day .
View trips and visited spots
A very cool feature of the Google Maps Timeline is that you can view entire trips you’ve taken. So, if you’ve ever said, “ Hey, what’s the name of that awesome restaurant we ate at when we went to Chicago? ” — your timeline can help.
Locate your trip using either the day or places feature on your iPhone, iPad, or online. You should then see a list of places you visited on your trip.
If you do this on the Google Maps website, you can review places you stopped by date using the options at the bottom.
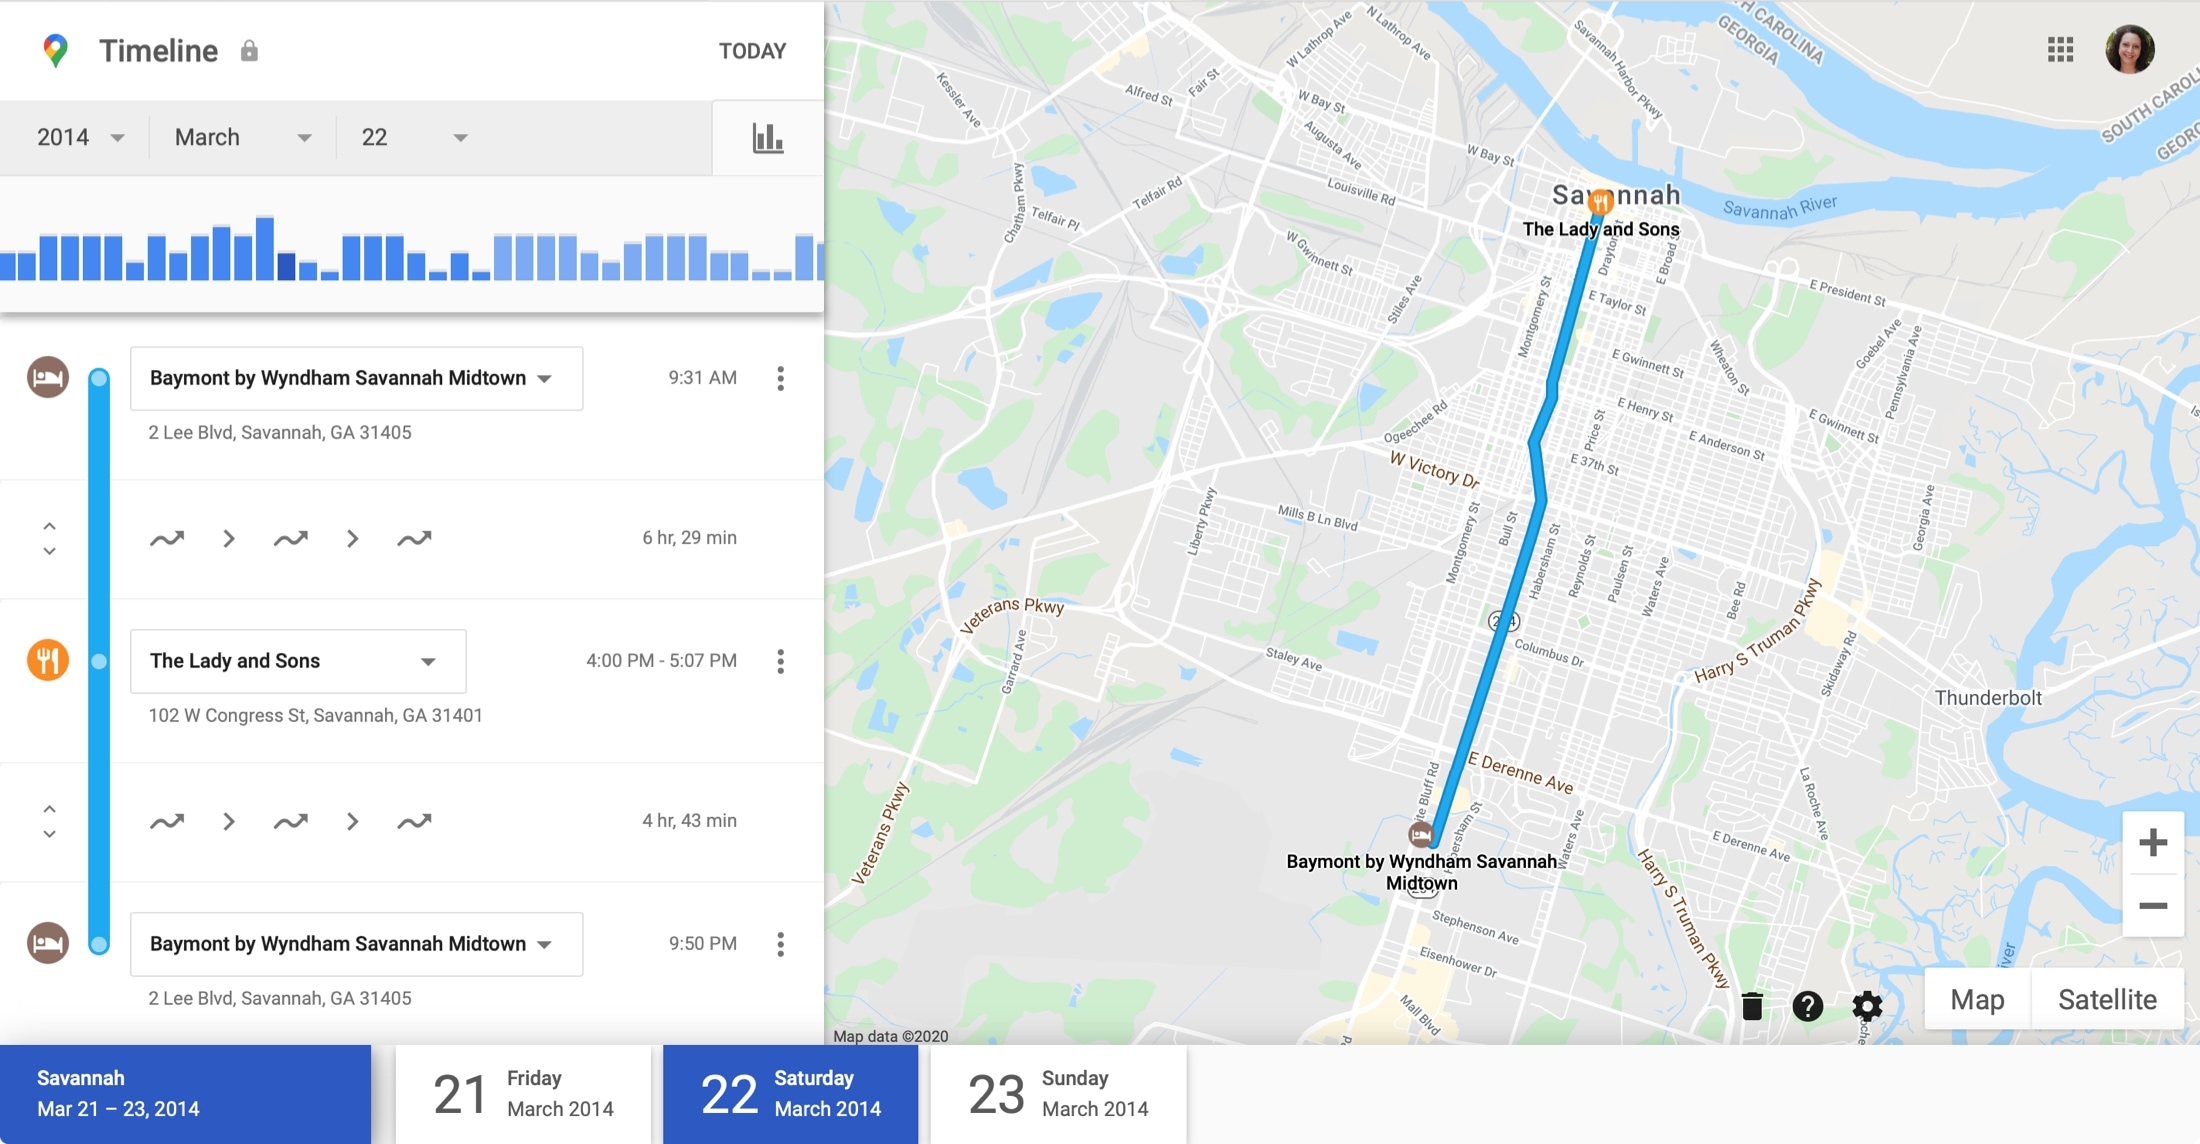
Another feature of viewing trips is seeing how you were traveling through the trip. With each day you select, you can see if you were walking, cycling, or traveling in a vehicle. You’ll even see the distance and timeframe. Click or tap the arrows on the left of the blue line to expand how you were moving.
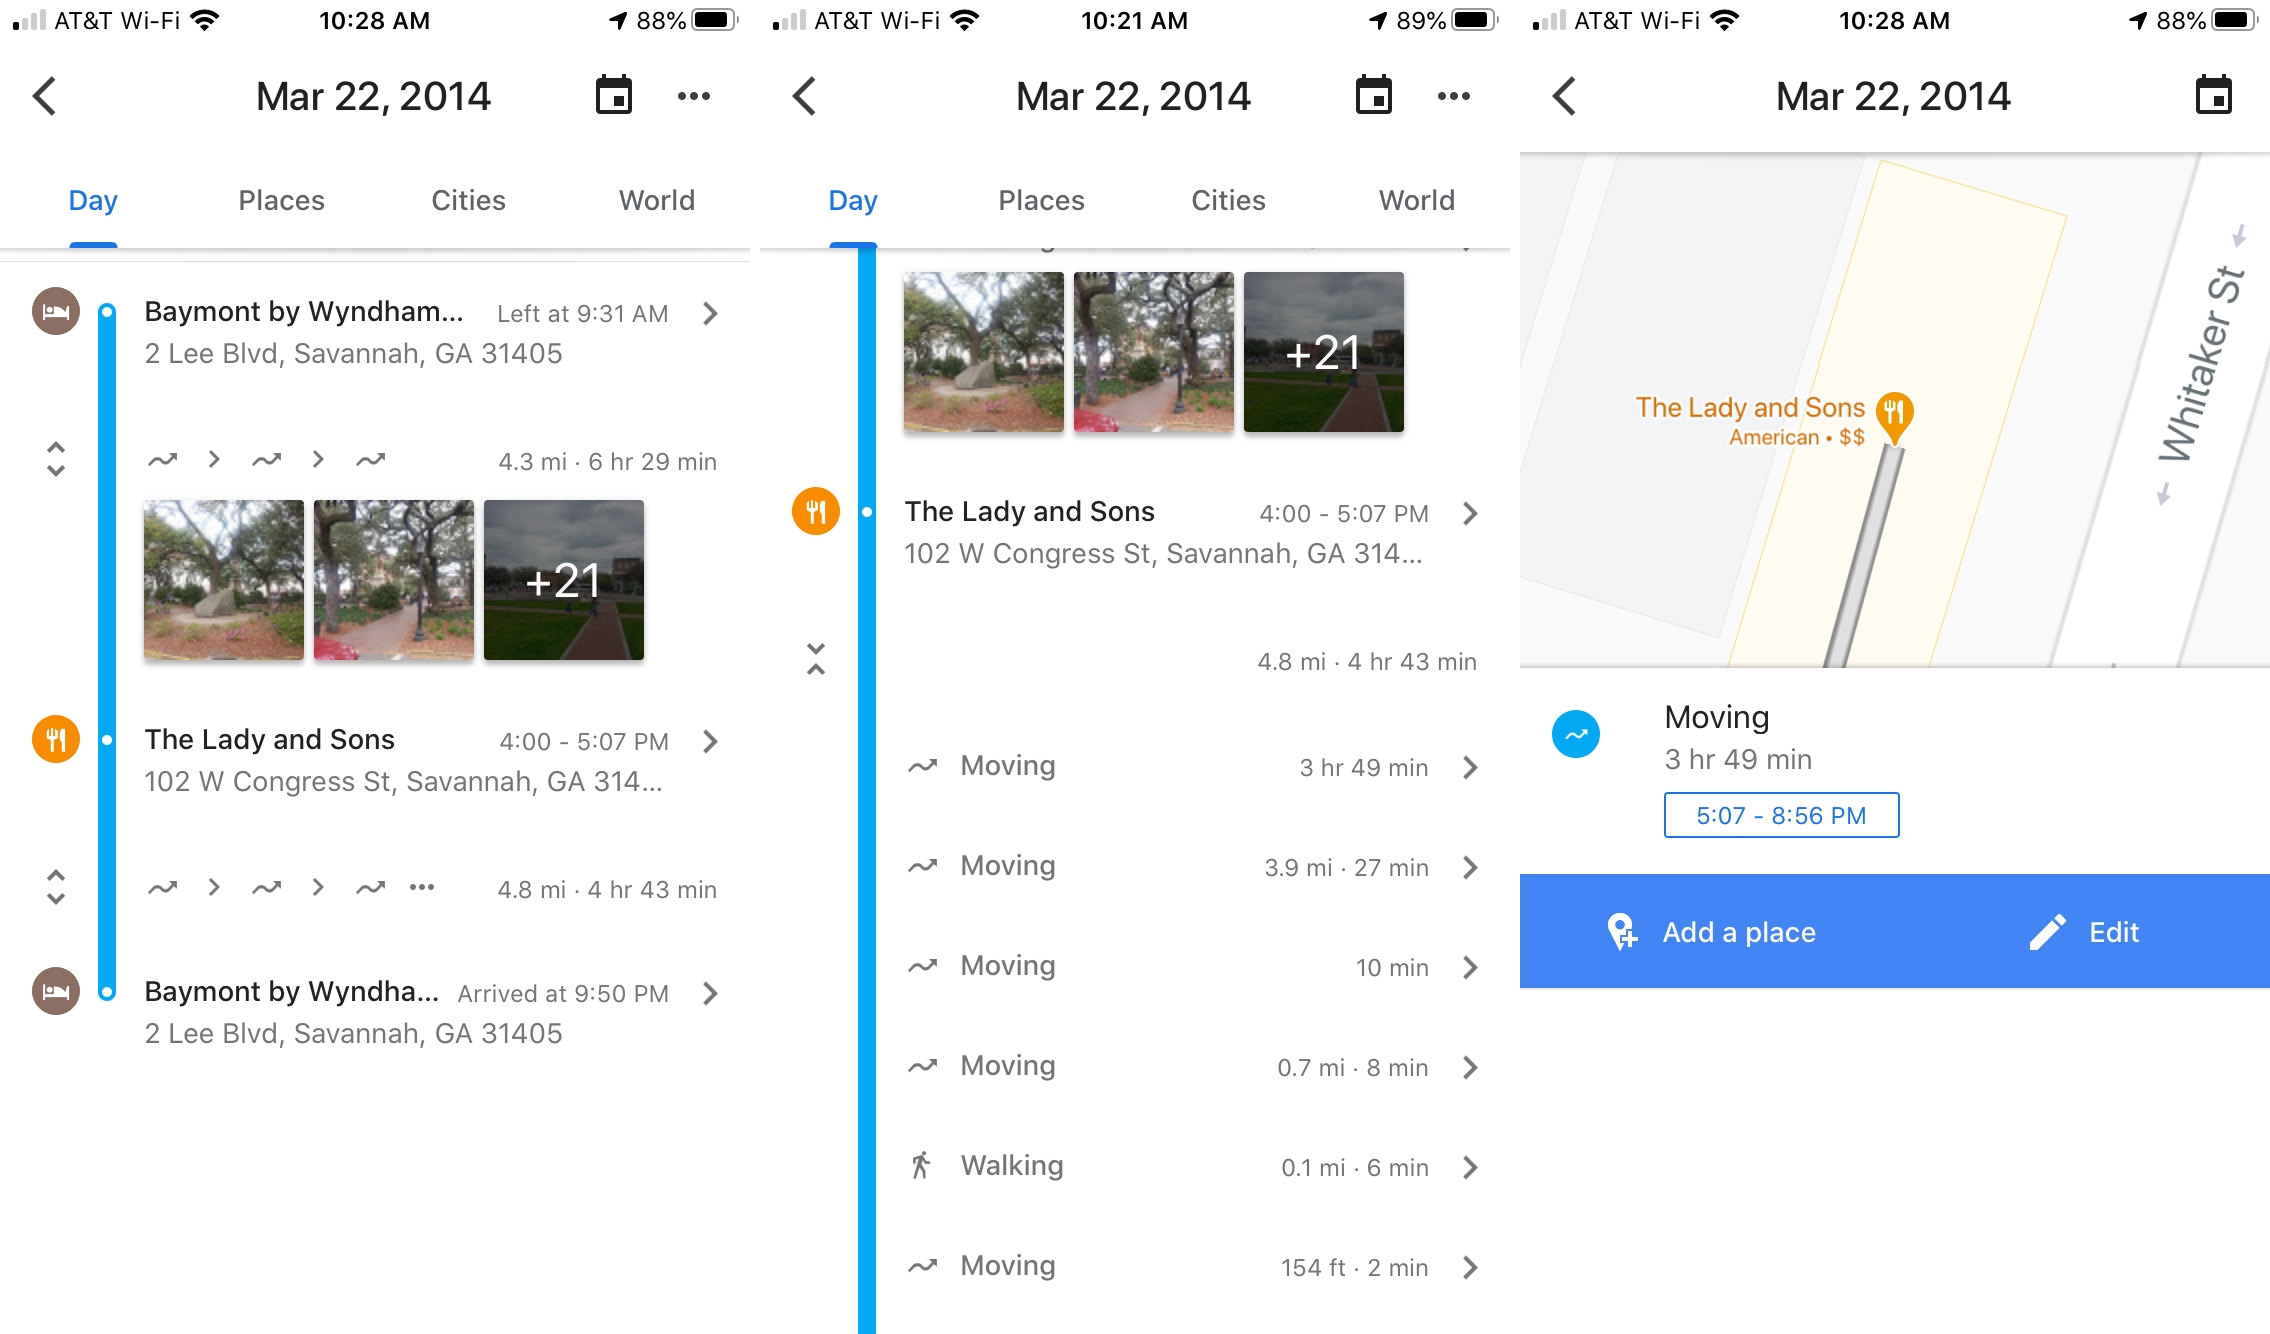
You can edit the details, such as the method of travel and timeline, add personal notes to spots with pins, and include Google Photos from that trip right on your timeline.
Adjust the Timeline settings
You can adjust a couple of settings for your Google Maps Timeline.
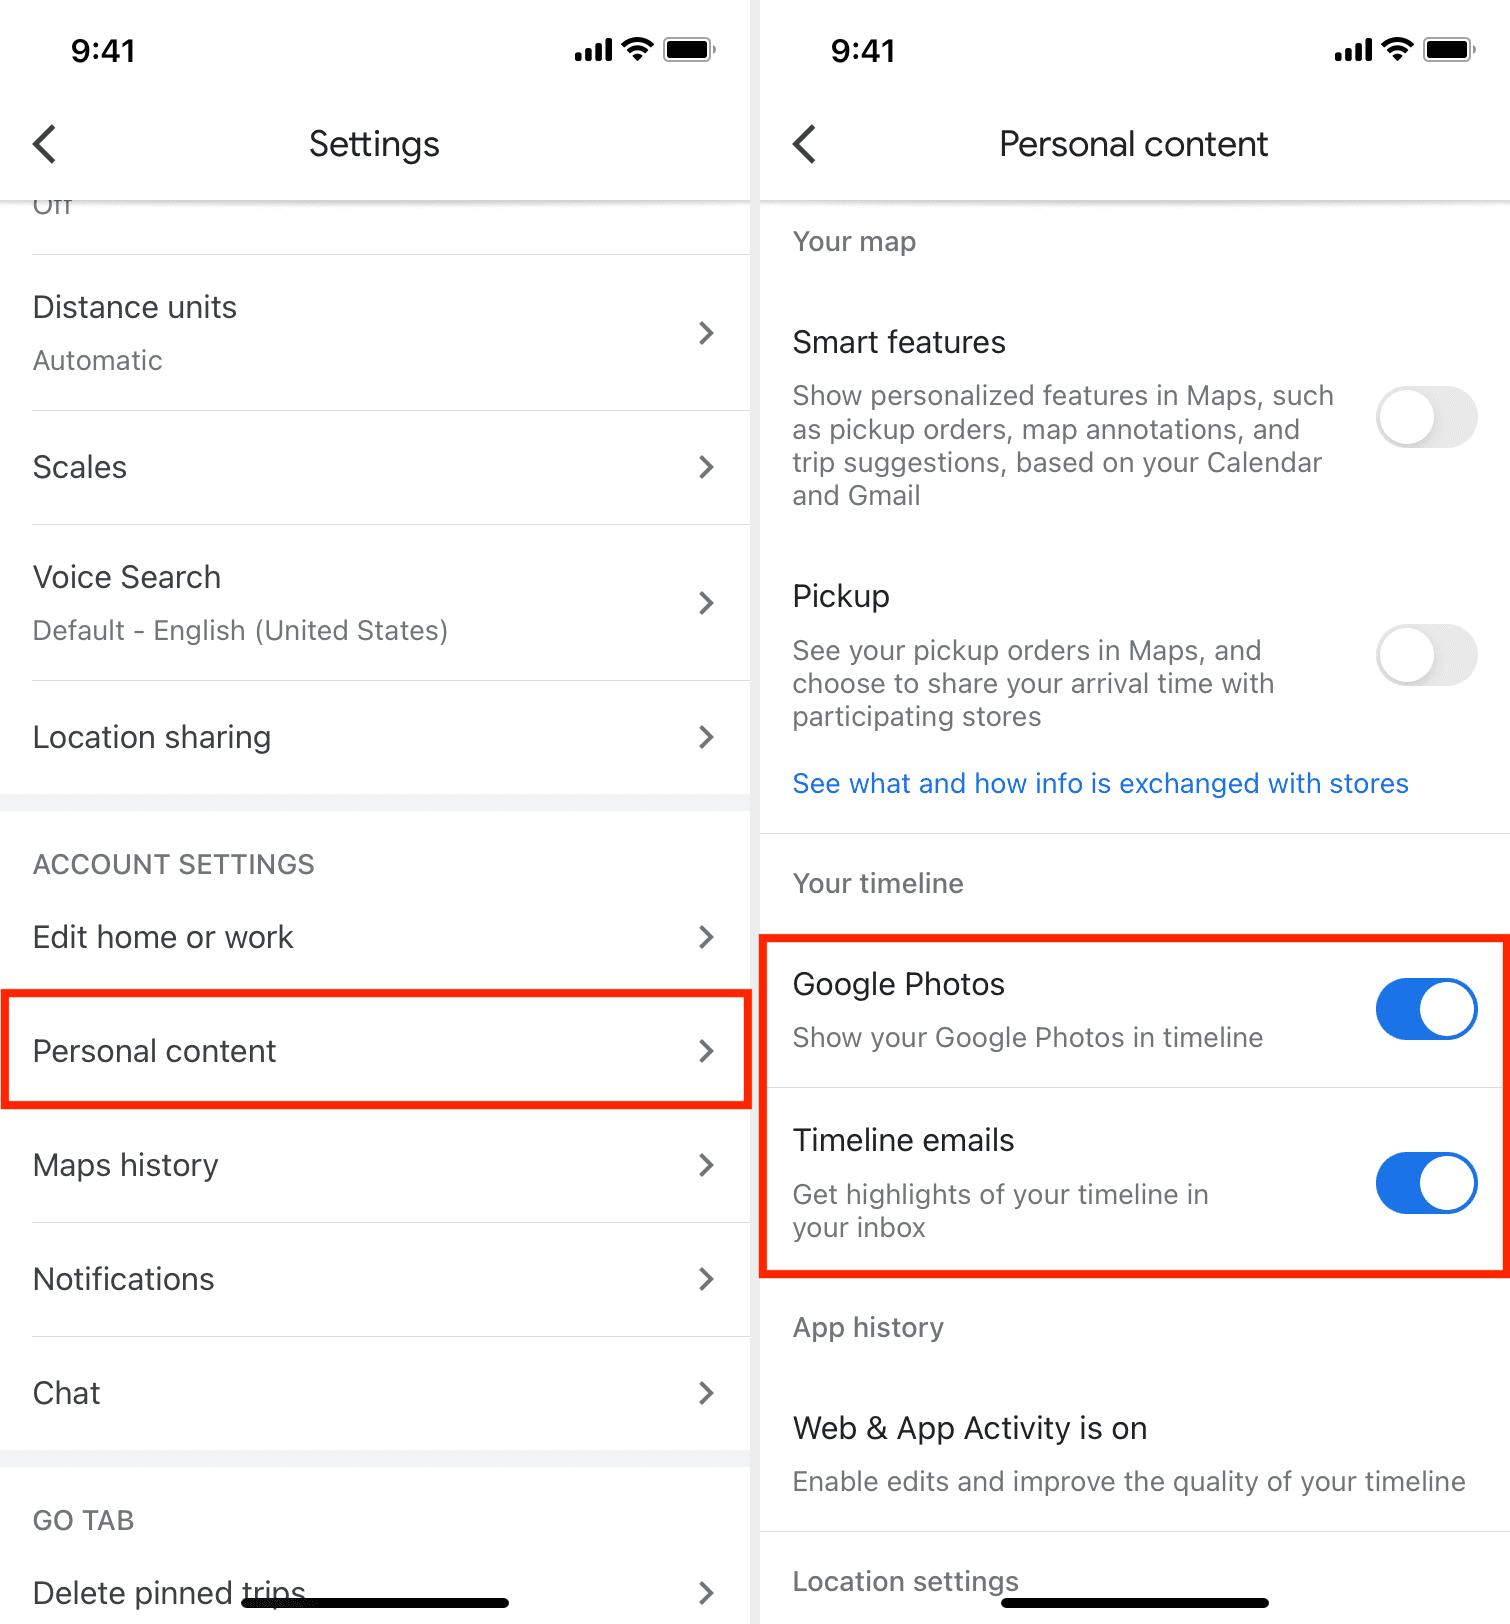
On iOS, tap your profile picture and pick Settings > Personal content . On the web, click the gear icon and pick Timeline settings .
Then enable or disable options for showing Google Photos on your Timeline and getting highlights of your Timeline via email.
Tips for your Google Maps Timeline
Here are a few helpful tips and tricks for using your Google Maps Timeline.
- If you want to use the date feature for reviewing your Timeline, it’s best to use Google Maps online. The date picker on the web is much easier to use than the one in the Google Maps app on iPhone and iPad.
- When you want to browse places, the iOS app makes this simpler than the website. Each city and location you visit is categorized so you can find what you want much faster.
- Take time to explore! Even though we’ve shown you how to use the Timeline, there’s always more. You can edit details for places you’ve visited, trips you’ve taken, and your methods of travel. So take your time and click or tap your way around your Timeline!
You might think of your Google Maps Timeline as sort of a travel diary. View cities and towns you’ve visited, save spots you stopped at so you can visit them again, and maybe even relive some memories of your travels by including Google Photos.
Are you going to check out your own Google Maps Timeline? Let us know what you think of this cool tool and if you’ll keep using it!
On a related note:
- How to send a place in Google Maps from your computer to your iPhone or Android phone
- How to see, delete, and turn off your location history on iPhone
- How to get your house, car, or face blurred out in Apple and Google Maps for increased privacy
How to See Where You've Been With the Google Maps Timeline

Your changes have been saved
Email Is sent
Please verify your email address.
You’ve reached your account maximum for followed topics.
I Tried Android 15 on My Pixel 8: Here Are My Favorite Features
7 factors that affect your smartphone's resale value, the best android tablets of 2024.
Google Maps boasts loads of features, making it stand out from the competition. Although having a variety of features is a plus, for a regular user, it can be tough to know how to use all of them. The Google Maps Timeline is one of the platform's essential features, allowing you to view places you've been to in the past and the routes you used to get there.
The Timeline feature leverages the fact that Google tracks your whereabouts in the background. We will show you how to see your location history on Google Maps on your phone.
How to See Your Google Maps Location History
It's no longer a secret that Google tracks you in the background. The Timeline feature capitalizes on this, giving you a way to check your location history.
The critical thing to note is you must have your Google account's Location History turned on to use the feature. With Location History enabled, you can view the countries, cities, and other places, like restaurants, malls, etc., that you've been to in the past.
Follow these steps to check whether you have your Location History enabled:
- Open Google Maps and tap your profile icon or letter in the top right.
- Select Your data in Maps from the pop-up menu.
- If you see On under Location History , that means you have it enabled. Otherwise, tap Off , and Google will take you to a page where you can switch it back on by tapping Turn on .
If you have just enabled your Location History at the moment, or you deleted your past data to protect your privacy in Google Maps , there won't be anything in your Timeline.
However, if you have some other settings like Web & App Activity enabled, you may still see some location history data. Our tips on troubleshooting Google Maps issues on Android should come in handy if you're experiencing issues with the app.
How to View Your Google Maps Timeline
Otherwise, with that out of the way, here's how you can see where you've been in the Google Maps app:
- Inside Google Maps, tap your profile icon or letter in the top right.
- Select Your Timeline from the pop-up menu. Google will take a few seconds to load the Timeline page.
- The Timeline page will show today's location history by default at the bottom. It provides additional data like how you went to a specific location, the amount of time used during the commute, and an estimate of your time in an area. Tap Today to select a particular date in the past.
- If you want to see your past trips, select the Trips tab at the top. Google will show you the number of trips you've been on, how long they were, and in which month and year.
- The Places tab showcases specific places you've gone to presented in different categories like Shopping, Hotels, Attractions, and more. You can also go to the Cities and World tabs to view the cities and countries you have traveled to in the past, respectively.
In the Day tab, nearby places you've visited in the past will be shown as dots of different colors on the map. Each color hints at the kind of activity done at the place.
The amount of data in your Google Maps Location History depends on how long the Location History feature has been enabled on your account. If you have set up your account to auto-delete your history, or if you chose to instantly delete your location data in Google Maps recently, the data will be much less.
Learn more about using the app in Google Maps tips to turn you into a pro user .
Track Your Location History in Google Maps
The Google Maps timeline is an excellent way to see where you've been in the past and on which day. The app presents data in an easy-to-understand manner. Additionally, it adds richer details like the routes you took to a place and an estimate of your time in a location.
While some might ignore the feature or disable it due to privacy issues, there's no way to deny its importance. If you're more privacy-conscious, you can still use the feature and instruct Google to delete your data after three, 18, or 36 months.
- Google Maps
Google Maps 4+
Places, navigation & traffic.
- #1 in Navigation
- 4.7 • 6M Ratings
Screenshots
Description.
Navigate your world faster and easier with Google Maps. Over 220 countries and territories mapped and hundreds of millions of businesses and places on the map. Get real-time GPS navigation, traffic, and transit info, and find what you need by getting the latest information on businesses, including grocery stores, pharmacies and other important places. Get where you need to go efficiently: • Find the best route with automatic rerouting based on live traffic, incidents, and road closure Find important businesses: • Know what’s open in your area and their latest business hours • Find local restaurants offering delivery and takeout • Create lists of your important places Get there faster with real-time updates • Beat traffic with real-time ETAs and traffic conditions • Catch your bus, train, or ride-share with real-time transit info • Save time with automatic rerouting based on live traffic, incidents, and road closure • With Live View in Google Maps, see the way you need to go with arrows and directions placed right on top of your world. There’s no second guessing or missing another turn. More experiences on Google Maps • Offline maps to search and navigate without an internet connection • Street View and indoor imagery for restaurants, shops, museums and more • Indoor maps to quickly find your way inside big places like airports, malls and stadiums Some features not available in all countries Navigation isn't intended to be used by oversized or emergency vehicles
Version 6.121.1
Thanks for using Google Maps! This release brings bug fixes that improve our product to help you discover new places and navigate to them.
Ratings and Reviews
Get this app.
This app is amazing! It has everything Apple Maps has and more! It comes with street view good enough it’s almost as good as Google Earth itself, multiple maps, the equator, the International Date Line, coordinates, the current time, weather, description, and photos of the country/territory/city/prefecture you clicked on, and the ability to find places such as restaurants, hotels, parks, attractions, stores, gas stations, etc. There’s also a feature you can use called live where you can point your camera at places around you(as long as you’re outside of a building near stores, buildings, signs, etc.,) and it can try to find your exact location to help you get places and find the direction of where you’re trying to get to. I have not used this app for directions while driving yet, so I don’t know how that is, but so far everything else about this app has been amazing! The only downside is that you need a strong Wi-Fi connection to get the most out of this app, but you can just use cell if you need to. Overall though, I very highly recommend this app!
Cycling Maps feature unnecessarily falls short
Map doesn’t display on screen when I’m using step by step navigation but it does when you’re driving. So you can’t see where you’re going…you get notifications on your screen for each direction instead, something you have to try to read and pedal and steer simultaneously, unless you enjoy stopping to see what your next direction is after every single one you complete. That’s the other thing, it gives you directions literally the moment you need them. When you drive, if it says go left, you turn left and it tells you your next street and turn to look for and the distance before you reach it. In cycling mode, in the same scenario, it would say turn left as you reached the street and continue to say turn left until you reach your next turn. So you have no idea at all what to look for, can’t anticipate anything, and you’re basically riding blind between each step. And if you miss a step, it automatically re routes you, so I rode about three miles uphill needlessly in the rain yesterday because I couldn’t hear my phone over the road and rain noise, nor had any idea what turn to look for, when to look for it, or how to rectify all of those failures in real time, I was pretty much being led astray in the pouring rain by an app that doesn’t have any of these problems in driving mode…
Progressively gone downhill
The changes that Google has made to their maps seems to be in favor of traffic CONTROL rather than the best routes for the individual user, less options for personal control and a stronger push towards getting you to go through state toll roads when no toll roads (that are a faster option to boot) are available. I'm a longtime user of Google maps and Keen to their tactics of late. I've been wanting to get a couple of old Rand McNally road maps for a while,we're going to need them! An app should be a tool of assistance and yes,convenience,but when an app is trying to control you,it's time to boot it. This may sound crazy to some of you,but pay attention,especially to the so called "better route available" options that pop up,watch your estimated times,this option is being used to herd you like cattle for reasons other than your travel benefits and more for clearing roadways and such. And even crazier,it sure seems like a social experiment to see what kind of "order follower" you are. I've seen this with my own eyes and ears, so call me crazy,but for those of you who are intuitive and catch on to patterns quickly,see for yourself,this is the world we live in now? With all the A.I. And apps on your phone,what was a tool is using you as a tool,or so it sure seems. I think the cost of convenience has become a bit too high for me.
App Privacy
The developer, Google , indicated that the app’s privacy practices may include handling of data as described below. For more information, see the developer’s privacy policy .
Data Linked to You
The following data may be collected and linked to your identity:
- Financial Info
- Contact Info
- User Content
- Search History
- Browsing History
- Identifiers
- Diagnostics
Privacy practices may vary, for example, based on the features you use or your age. Learn More
Information
English, Albanian, Arabic, Armenian, Azerbaijani, Burmese, Catalan, Croatian, Czech, Danish, Dutch, Finnish, French, Georgian, German, Greek, Hebrew, Hindi, Hungarian, Indonesian, Italian, Japanese, Korean, Lithuanian, Malay, Norwegian Bokmål, Polish, Portuguese, Romanian, Russian, Serbian, Simplified Chinese, Slovak, Spanish, Swahili, Swedish, Thai, Traditional Chinese, Turkish, Ukrainian, Uzbek, Vietnamese
- Developer Website
- App Support
- Privacy Policy
More By This Developer
YouTube: Watch, Listen, Stream
Gmail - Email by Google
Google Chrome
Google Drive
Google Docs: Sync, Edit, Share
You Might Also Like
Waze Navigation & Live Traffic
GPS Live Navigation
Moovit: All Transit Options
GPS Live Navigation & Live Map
Sygic GPS Navigation & Maps
MapQuest GPS Navigation & Maps

Google Timeline on iPhone: A Detailed Guide to Tracking Your Travels
In today’s digital age, our smartphones have become an essential tool for navigation and keeping track of our daily activities. Google Maps, one of the most popular navigation apps, offers a handy feature called “Timeline” that allows users to track their travels and view their location history. While this feature has been available on Android devices since 2015, it has now made its way to iPhones and iPads. In this article, we will explore how to access and utilize Google Timeline on your iPhone.
To begin using Google Timeline on your iPhone, you need to have the Google Maps app installed on your device. If you don’t have it already, head to the App Store and download it. Once installed, follow these steps to get started:
1. Launch the Google Maps app on your iPhone or iPad. 2. Tap your profile picture or initial, which can be found at the top right corner of the app. 3. From the drop-down menu, select “Your Timeline.”
Now, you will be able to view your location history on a specific day or month. If you want to explore a different time period, simply tap on “Show calendar” and swipe left or right to choose the desired day. This feature allows you to track the places you have visited over the past days, weeks, or even months. It can be a great tool to reminisce about your past travels or to keep a record of your frequent destinations.
However, it’s important to note that Google Timeline relies on your location data, which means you need to have location services enabled on your iPhone. To do this, follow these steps:
1. Open the Settings app on your iPhone. 2. Scroll down and tap on “Privacy.” 3. Select “Location Services.” 4. Scroll to the bottom of the screen and tap on “System Services.” 5. Look for “Significant Locations” (in some iOS versions, it may be called “Frequent Locations”) and tap on it.
Here, you will find a list of significant or frequent locations that your iPhone has recorded. This is the data that Google Maps uses to create your Timeline. You can tap on each location to view more details or delete individual entries if you wish.
It’s worth mentioning that Google takes privacy seriously and provides options to control the information stored in your Timeline. If you wish to disable this feature, you can do so by following these steps:
1. Open the Google Maps app on your iPhone or iPad. 2. Tap your profile picture or initial. 3. Select “Your Timeline.” 4. Tap the three horizontal dots at the top right corner. 5. Choose “Settings and Privacy.” 6. From here, you can adjust your Timeline settings, including turning it off if desired.
Google Timeline on iPhone is a useful feature for tracking and visualizing your travel history. By enabling location services and using the Google Maps app, you can easily access your Timeline and view your past journeys. Whether you want to reminisce about your adventures or keep a record of your favorite spots, Google Timeline provides a convenient way to do so. So, next time you reach for your iPhone, remember to explore your Timeline and relive your travel memories.
How Do You View Your Google Timeline On iPhone?
To view your Google Timeline on your iPhone, you can follow these steps:
1. Open the Google Maps app on your iPhone or iPad. 2. Look for your profile picture or initial at the top right corner of the app and tap on it. 3. From the drop-down menu, select “Your Timeline.” 4. Your Timeline will now open, showing you a map with your previous locations and activities. 5. To view a different day or month, tap on “Show calendar” located at the top left corner of the screen. 6. You can then swipe left or right to navigate between different days and months. 7. Once you’ve selected the desired day, tap on it to view the details of your activities for that particular day.
By following these steps, you will be able to view your Google Timeline on your iPhone and access information about your past travels and locations.
Does Google Timeline Work On Apple?
Google Timeline does work on Apple devices. However, it is worth noting that the feature has been available on Android devices since 2015. To access Google Timeline on an Apple device, you need to launch the Google Maps app and then navigate to the main menu. Within the menu, you will find a prompt for “Your Timeline.” By selecting this option, you will be able to track and view the places you have visited over various time periods, including days, weeks, or even months.
Does iPhone Have An Equivalent to Google Timeline?
IPhone does have an equivalent to Google Timeline. It is called “Significant Locations” and is a feature built into the iOS operating system. This feature tracks and records the places you visit most frequently and the duration of your visits. It can be accessed through the Settings app on your iPhone. To view your Significant Locations, follow these steps:
1. Open the Settings app on your iPhone. 2. Scroll down and tap on “Privacy.” 3. Tap on “Location Services.” 4. Scroll down and tap on “System Services.” 5. Scroll further down and tap on “Significant Locations.” You may be prompted to enter your passcode or use Touch ID/Face ID for authentication. 6. Here, you will see a list of locations you have visited, ordered by date and time. You can tap on each location to view more details, such as the date and time of your visit, the duration of your stay, and a map showing the location. 7. If you want to disable the Significant Locations feature, you can toggle off the switch next to “Significant Locations” at the top of the screen.
It’s important to note that Significant Locations is only available if you have enabled Location Services on your iPhone. Additionally, the data collected by this feature is stored locally on your device and is not shared with Apple or any third parties.
Can You Track Your Location History On iPhone?
You can track your Location History on an iPhone. Here’s how you can do it:
1. Open the Settings app on your iPhone. 2. Scroll down and tap on Privacy. 3. In the Privacy menu, tap on Location Services. 4. Scroll to the bottom of the Location Services screen and tap on System Services. 5. Look for the option called Significant Locations (in some versions of iOS, it may be called Frequent Locations). 6. Tap on Significant Locations to access your location history.
Once you are in the Significant Locations menu, you will see a list of places you have frequently visited. The list will be organized by city or area names. Each location will have a date and time stamp indicating when you were there.
If you tap on a specific location, you can view more details about your visits to that place. This includes the dates and times of your visits, as well as the duration of each visit.
To ensure privacy, your Location History is only accessible by you and is stored securely on your device. It is not shared with any external parties unless you explicitly choose to share it.
Tracking your Location History can be useful for various reasons, such as remembering places you have been, analyzing your travel patterns, or managing location-based reminders and notifications.
Please note that in order for your iPhone to track your Location History accurately, you need to have Location Services enabled and be connected to a Wi-Fi or cellular network.
Google Timeline on iPhone is a valuable feature that allows users to track and view their location history. By accessing the Google Maps app and tapping on Your Timeline, users can easily find information about their travels on specific days or months.
It is worth noting that while this feature is relatively new on Apple devices, it has been available on Android devices since 2015. This means that Android users have been able to track their visited places for a longer period of time.
To access Google Timeline on iPhone, users need to open the Google Maps app, tap on their profile picture or initials, and then select Your Timeline. From there, they can swipe left or right to navigate through different days and tap on a specific day to see their travel history.
Alternatively, iPhone users can also access their location history through the iPhone’s system settings. By going to Settings > Privacy > Location Services > System Services, users can find the Significant Locations option (Frequent Locations in some iOS versions) to view their location history.
Google Timeline on iPhone provides a convenient way for users to keep track of their travels and easily access information about their visited places. Whether for personal use or for keeping a record of business trips, this feature offers a useful tool for users to stay organized and informed about their past locations.
Related posts:

Sanjeev Singh
- How to enable Location History in Google Maps
How to see your Google Maps timeline in the mobile app
How to see your google maps timeline on the website, how to check your google maps timeline and see every place you've traveled.
- Your Google Maps timeline shows all the countries, cities, and attractions you've visited.
- You can see your timeline in the Google Maps mobile app and on the website.
- You'll need to make sure you have Location History enabled on your Google account for the timeline to work.
Nearly every major app tracks your location in some way. And while most try to keep this a secret (and won't even tell you why they need it), Google Maps is pretty public when it comes to using your location.
But Google Maps doesn't just use it to give you directions and show your current location . If you have it enabled, you can also create a Google Maps timeline , which lets you see where you traveled on a specific day, any attractions or restaurants you've visited, towns you've been to, and countries that you've traveled in.
Here's how to check your Google Maps timeline — and how to enable Location History so you can make a timeline in the first place.
1. Open Google Maps on your iPhone or Android, and tap your profile picture in the top-right corner.
2. Tap Your timeline .
The screen will change, and a large menu will appear with a variety of options at the top. They'll be a bit different depending on whether you're using an iPhone or Android.
On both devices, you'll see:
- Day: Here, you can see all the places you've visited in a single day. It'll also show you how you got there (via subway, car, etc.) and how long you spent at each location.
- Places: This shows the different restaurants, attractions, shops, hotels, and more you've visited. They'll be sorted into different categories, which you can tap to see a full list.
- Cities: You'll get a list of all the towns and cities you've visited, and when you visited them. Tap a city name to see where you went in that city and how often.
- World: A list of all the countries you've traveled to. Tap a country in the list to see which cities you've gone to.
If you're using an Android, you'll also see Trips and Insights . Trips shows (as the name suggests) the vacations and getaways you've taken. Insights tracks how much time you've spent walking, driving, and taking public transit every month, along with how far you've traveled and what you spent your time doing.
You can find the timeline on the Google Maps website too, but it looks a bit different.
1. Open Google Maps on your computer and click the three stacked lines in the top-left corner.
2. Select Your timeline .
You'll be brought to the Timeline page. Here, you can:
- Click one of the blue bars at the top-left of the screen or enter a specific day to see all the places you traveled on that day.
- Click the red Places option in the bottom-left to see every business, attraction, and place of interest you've visited.
- Click the More Trips box to check out the vacations and get-aways you've been on.
You can also double-click a red dot on the map to check out the exact day you traveled to that spot.
If you clicked something and want to reset the map, click Timeline in the top-left to return to your main Timeline page.
- Main content
- Accessories
- Meet the team
- Advertise with us

- Editorial Guidelines
How to use Google Maps as a trip planner on iPhone
How about planning your long drive beforehand and choosing places to explore.? Now you can set future travel time and make a route plan with multiple stops using Google Maps trip planner. It shows the traffic conditions for the day and hour you want to depart with route planning. So, plan your journey accordingly. Let’s know how to use the trip planner in Google Maps on iPhone.
Explore popular points of interest on Google Maps
Save places you want to go, add multiple stops in a single trip in google maps on iphone, create your map or directions and share it with others, set departure and arrival times in google maps on iphone.
When I plan my road trip, at first, I look for places to explore. In Google Maps, You may search for cafes, restaurants, shopping malls, parks, etc., at your destination location, like “cafes near LA.” It will show you a complete list of cafes with customer ratings, estimated pocket pinch, opening time, etc. Choose any one and tap Reviews . Now you can read reviews, see the photos, and decide whether you want to go there.
I hope you have selected the places you want to visit on your road trip. But how to remember all the places? I save them on Google Maps trip planner. The Places feature allows bookmarking locations and creating lists like Favorites, Want to go, Travel plans, and Starred places. Also, you may add a note about the place to remember.
Google Maps is among the best route planners for multiple stops. Setting a road trip map between cities is easy, but what if you want to stop in between? Like Apple Maps’ multi-stop routing , you can add multiple stops in one road trip on Google Maps. Therefore, it lets you check the distance and drive time between each stop.
- Open Google Maps , search for your destination, and tap Directions . It will show you the time and distance.
- Tap the three-dots icon .
- Choose Add stop from the context menu.
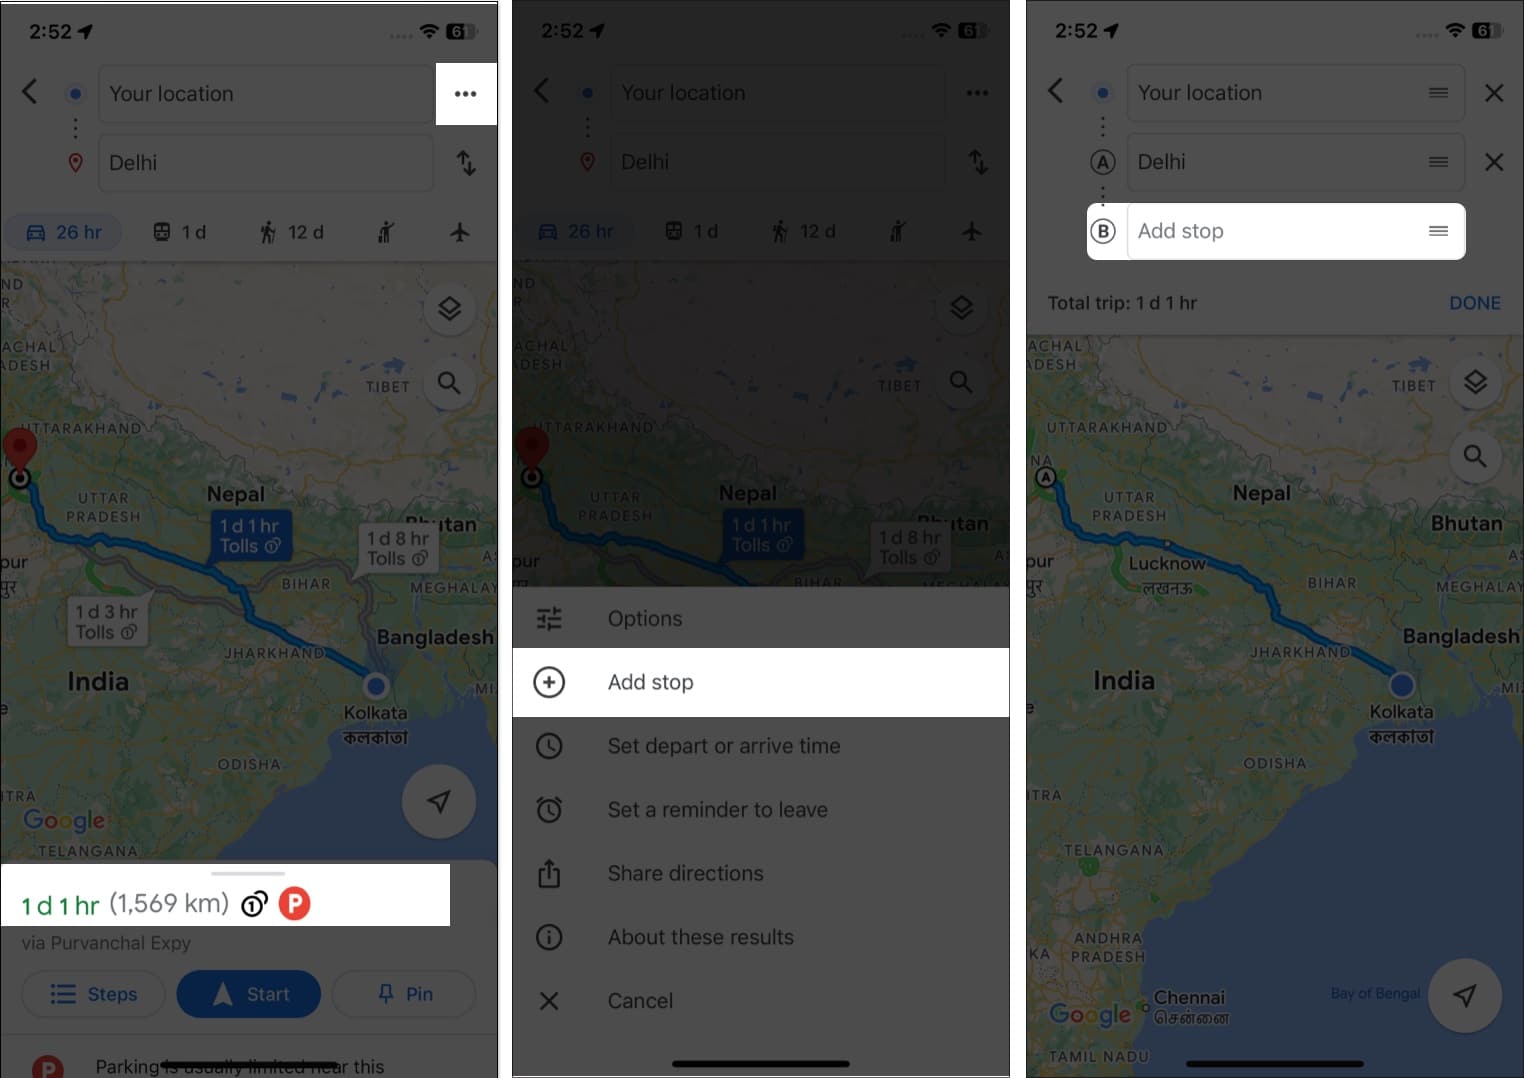
Google offers a cool feature called My Maps to create customized maps and share them with others. You can add multiple stops, choose your preferred routes, and save them.
- Launch Safari on your iPhone and visit Google My Maps .
- It will show your created maps. Tap the red plus sign to make a new one.
- Now search for your destination location and tap Add to map . It will save the place. Also, you can add as many locations as you want.
- From the side menu, rename your map by tapping Untitled Layer. You may also add multiple lists of locations on the same map using Add layers . Just give different names to the layers.
- If you want to show navigation on the map, tap the curved arrow icon. It will add a new layer with a start and end location.
- After you have finished, select Share or Preview . Sharing the map will ask for a map title and description. Then you can copy the link and set who can see the map.
Whenever I drive anywhere, I first check the distance , set the departure time, and check the arrival time on Google Maps. The app then predicts how much traffic will be on that route. So, I can leave at the right time and reach the destination at the right time.
- Launch Google Maps on your iPhone.
- Tap Search here → enter your destination and tap Directions .
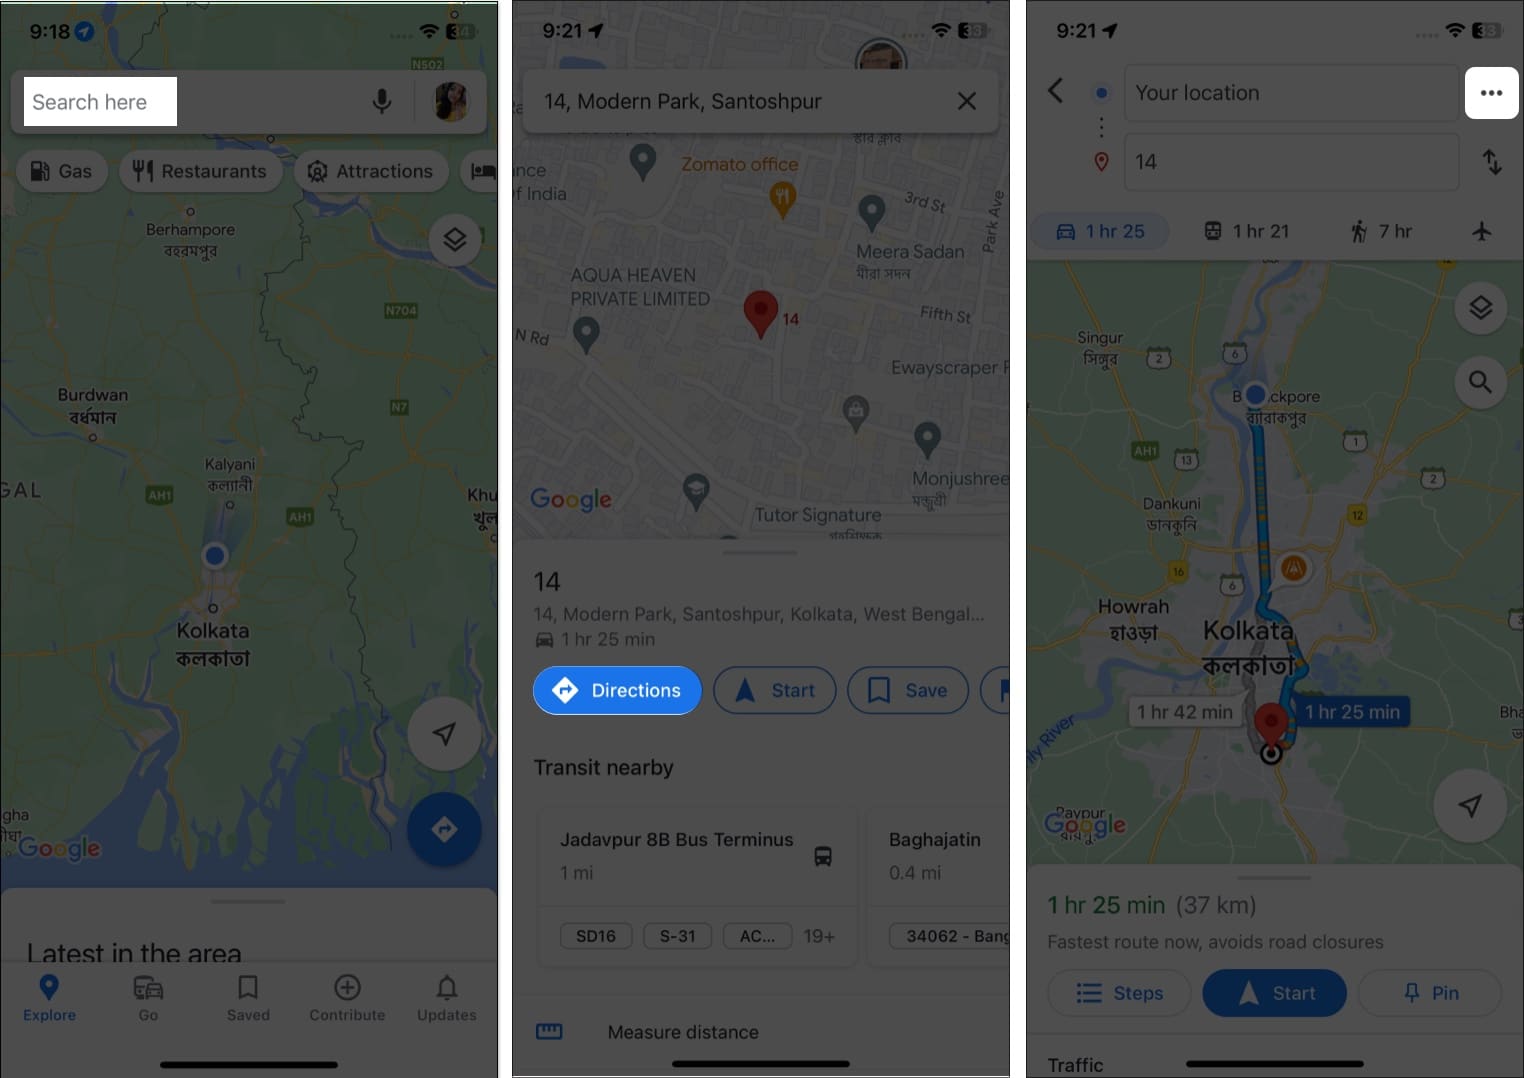
- Tap Set depart or arrive time .
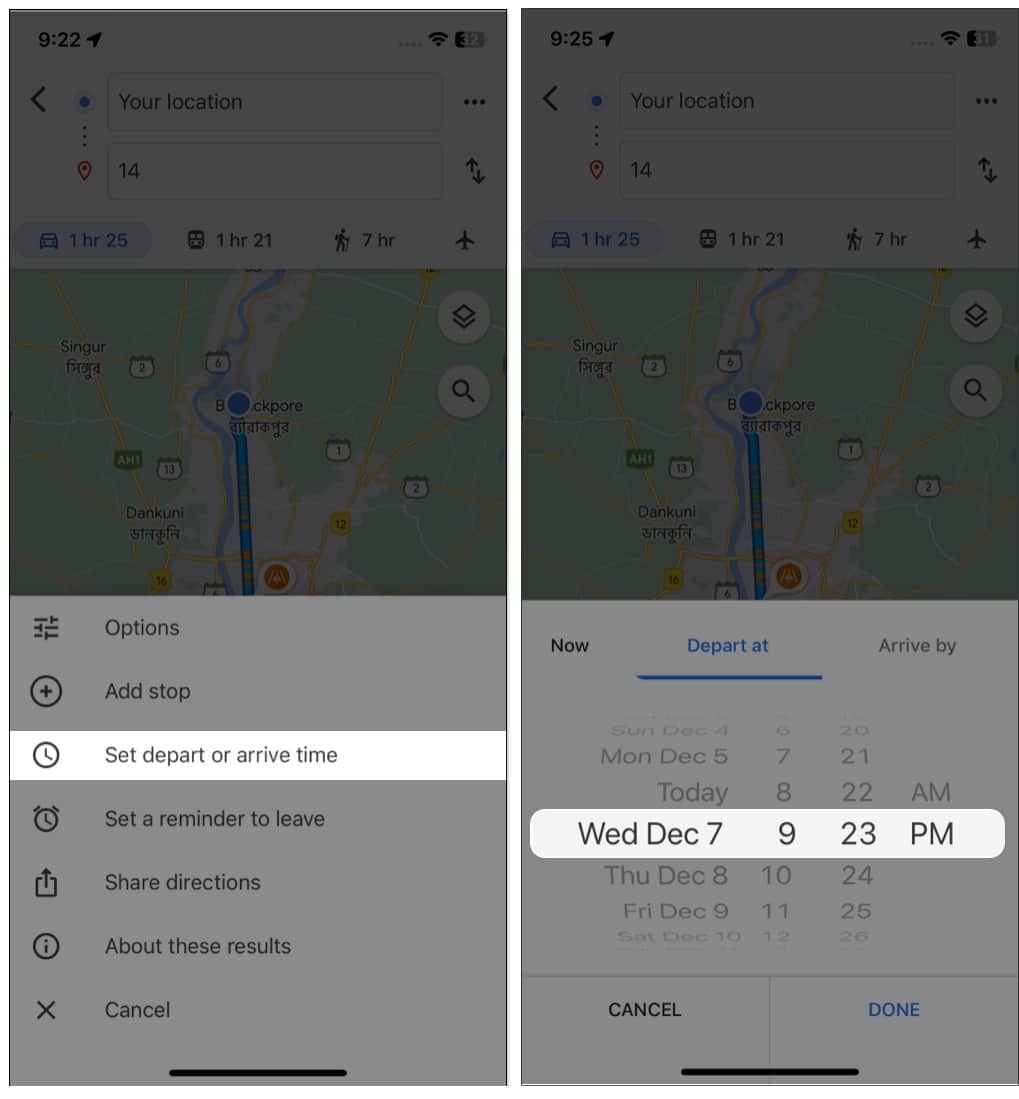
The Depart by option will show you when you will arrive at the destination, and the Arrive by option will tell you when you should leave. If Google Maps departure time is missing, you must update your app.
So, that’s all for today, folks!
Besides future travel time settings, Google Maps lets you set a reminder to leave. Therefore, you’ll never be late! Have you enjoyed the tip? Read more tips and tricks for using Google Maps.
Explore more…
- How to make Google Maps the default on iPhone
- How to turn on dark mode in Google Maps on iPhone
- How to download and use offline maps in Google Maps on iPhone
- How to use Incognito mode in Google Maps for iPhone and iPad
Ava is a die-hard Apple aficionado and seasoned writer with a knack for breaking down complex tech concepts into easily digestible content. Having honed her writing and editing skills over 3 years at renowned media houses like TechBurner, Ava crafts informative and engaging articles including troubleshooting guides, product reviews, editorials at iGeeksBlog. When not typing, you can find her exploring the latest Apple releases or pondering the future of tech innovation.
🗣️ Our site is supported by our readers like you. When you purchase through our links, we earn a small commission. Read Disclaimer .
LEAVE A REPLY Cancel reply
Save my name, email, and website in this browser for the next time I comment.
Related Articles
How to set timer on iphone camera to take hands-free photos, how to use ios 18 eye tracking to control your iphone, how to lock facebook profile on your iphone or pc, whatsapp payments on iphone: how to set it up to send and receive money.
How To : See What Traffic Will Be Like at a Specific Time with Google Maps

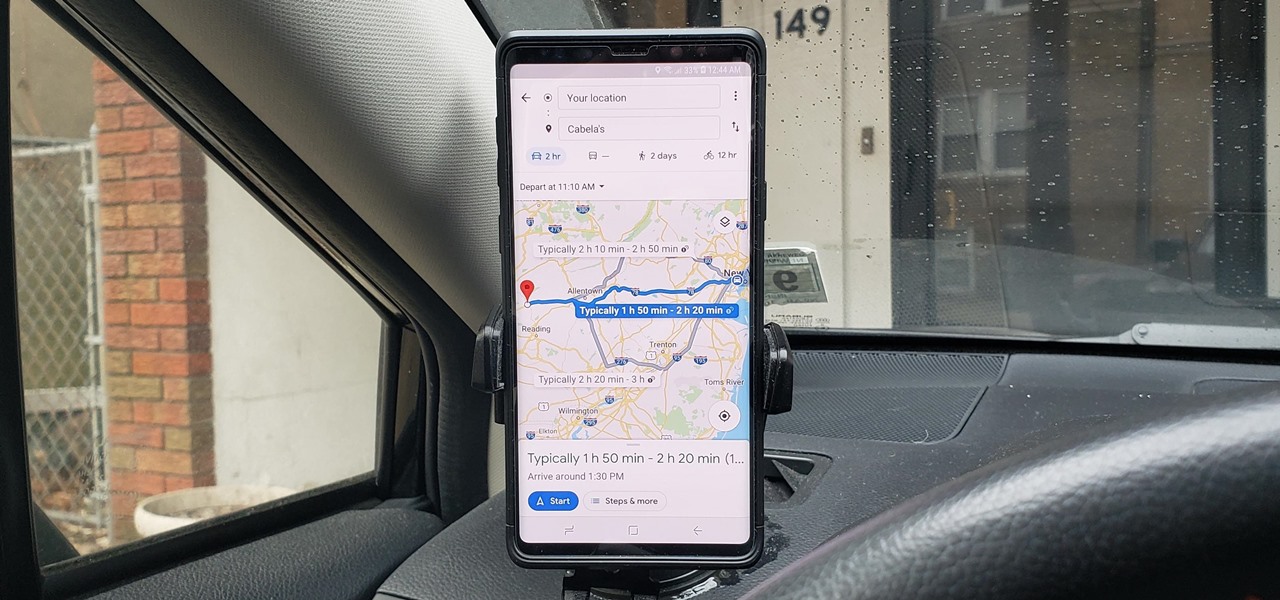
As intuitive as Google Maps is for finding the best routes, it never let you choose departure and arrival times in the mobile app. This feature has long been available on the desktop site, allowing you to see what traffic should be like at a certain time and how long your drive would take at a point in the future. Fortunately, Google has finally added this feature to the app for iPhone and Android.
To try this out, you'll need to update your Google Maps app, which you can do with the links below. When you do, you'll be able to plan ahead by choosing arrival and/or departure times, which is ideal for seeing when you'll need to leave if you want to get to your destination by a specific time.
- Get the latest version of Google Maps: Android | iOS
Setting Departure or Arrival Times
Scheduling a trip based on either when you'd like to leave for, or arrive to a desired location couldn't be easier with Google maps — simply input your destination as you normally would within the the search field along the top of the screen. Tap on "Directions" after doing so to yield available routes.
Afterward, choose the best route a from the selections given. From there, tap on the three-dot menu button on the upper-right and hit "Set depart & arrive time" (Android) or "Set a reminder to leave" (iOS) from the prompt.
Now, either set the time and date you want to "Depart At" on the time table given, or tap on the "Arrive By" tab on the upper-right and adjust the time and date the same way if you want to arrive by a certain time. Hit "Set" once you're done, and Google Maps will yield average travel times for the route, along with either an ETA if you picked the former, or a suggested time for departure if you chose the latter.

As handy as this new feature is, it's worth noting that it does have some limitations. Google Maps currently won't alert you via a notification if you set a departure time. Besides that, traffic conditions aren't updated in real-time, so arrival times can vary, and drastically change due to unforeseen events like traffic accidents and sudden weather downturns.
Just updated your iPhone? You'll find new features for Podcasts, News, Books, and TV, as well as important security improvements and fresh wallpapers. Find out what's new and changed on your iPhone with the iOS 17.5 update.
Be the First to Comment
Share your thoughts, how to : make spoofed calls using any phone number you want right from your smartphone, how to : the trick that lets you link to specific start times in youtube videos right from your phone, how to : use voice commands in google maps to start navigation or add a stop, how to : add your home, work & favorite places to uber to get rides faster, how to : prevent people who have your contact information from finding your instagram account, google photos 101 : how to track down & buy anything in your pictures with google lens, how to : see who's viewed your tiktok profile (and how to stop them from knowing you visited theirs), how to : find out whether your phone has an lcd or amoled display (& why it matters), how to : hide facebook messenger groups without letting other people know you left, news : artemis smart mirror shows off ar vanity for coty's wella professionals salons, snapseed 101 : use the 'healing' tool to remove unwanted elements from a photo, how to : import apple calendar events into google calendar on iphone or android, how to : make the perfect finsta that no one will ever find, how to : easily remove unwanted people and objects in your photos with google's magic eraser, how to : get your lost item back from an uber driver (& what to do if they don't respond), how to : copy & share a link to your instagram story that you can post anywhere, how to : unsend messages in facebook messenger chats so your recipients can't view them, how to : use this gmail trick to see when apps & sites sell your data, plex 101 : how to create & manage playlists.
- All Features
- All Hot Posts
How to Create Routes in Google Maps on iPhone: A Step-by-Step Guide
Creating routes in Google Maps on your iPhone is a straightforward process. Simply open the app, search for your destination, tap ‘Directions’, select your mode of transportation, and choose the route that best suits your needs. After doing so, you’ll be on your way with turn-by-turn directions to guide you.
After you complete the process, you’ll receive a detailed route with estimated travel time and distance. The app will provide you with step-by-step navigation to ensure you reach your destination without any hitches.

Introduction
Google Maps is one of the most popular navigation apps available today, and for good reason. It provides users with accurate, up-to-date information on routes, traffic, and public transportation options. For iPhone users, creating routes in Google Maps is a simple yet powerful way to plan your travels, whether you’re driving, walking, biking, or taking public transit. Knowing how to navigate this feature can save you time and hassle, ensuring you get where you need to go efficiently.
Creating routes in Google Maps is especially relevant for individuals who travel frequently or are exploring new areas. It’s also a valuable tool for planning your daily commute, running errands, or coordinating a road trip with multiple stops. Understanding how to use Google Maps effectively on your iPhone makes you a more confident and prepared traveler, allowing you to focus on your journey rather than worrying about getting lost.
Step by Step Tutorial: Creating Routes in Google Maps on the iPhone
Before we dive into the steps, it’s important to know that by following this guide, you’ll learn how to create custom routes in Google Maps on your iPhone. This will allow you to get directions tailored to your specific transportation needs and preferences.
Step 1: Open Google Maps
Launch the Google Maps app on your iPhone.
When you open the app, make sure you have a good internet connection, and your location services are turned on to get accurate directions.
Step 2: Search for Your Destination
Use the search bar to find the location you want to create a route to.
Once you’ve found your destination, the app will display it on the map. You can also add more details like the specific address or a point of interest to refine your search.
Step 3: Tap ‘Directions’
Select the ‘Directions’ button to start creating your route.
The ‘Directions’ button usually appears at the bottom of the screen. If you can’t see it, you may need to tap on the location name or address to make it appear.
Step 4: Select Your Mode of Transportation
Choose your preferred mode of transportation from the options provided.
Google Maps offers several modes of transportation, including driving, walking, cycling, and public transit. Pick the one that suits your situation the best.
Step 5: Choose Your Route
Select the route you want to take from the options Google Maps provides.
Google Maps may offer you multiple routes. Consider factors like distance, estimated travel time, and current traffic conditions when making your choice.
Additional Information
When it comes to creating routes in Google Maps on the iPhone, there are a few extra tips and tricks that can enhance your experience. For instance, you can add multiple stops to your route if you’re running errands or going on a road trip. Simply tap on the three dots in the top right corner after you’ve gotten directions to your first stop and select ‘Add stop’. You can reorder the stops by pressing and holding the three-line icon next to each destination and dragging them to your preferred order.
Traffic conditions can change rapidly, so it’s always a good idea to start navigation a few minutes before you plan to leave. This way, Google Maps can provide you with the most current information and reroute you if necessary. Remember to keep an eye on the estimated arrival time as you travel, as it can adjust based on real-time traffic updates.
- Open Google Maps
- Search for your destination
- Tap ‘Directions’
- Select your mode of transportation
- Choose your route
Frequently Asked Questions
Can i create a route with multiple stops.
Yes, Google Maps allows you to add multiple stops to your route. Tap on the three dots after selecting your first destination and choose ‘Add stop’.
Can I save a route for later use?
You can save a route by tapping the three dots in the top right corner and selecting ‘Save route’. This way, you can access it quickly in the future.
How accurate is the estimated travel time?
Google Maps provides an estimated travel time based on current traffic conditions, but it can change due to unforeseen circumstances like accidents or road closures.
Can I use Google Maps offline?
Google Maps offers an offline maps feature. You can download a map of an area ahead of time and use it when you don’t have an internet connection.
How do I change the transportation mode after creating a route?
Tap on the transportation icons at the top of the ‘Directions’ screen to switch between driving, walking, cycling, or public transit.
Creating routes in Google Maps on the iPhone is an essential skill for anyone who relies on navigation to get around. It’s not only convenient and accurate but also offers a level of customization that caters to the diverse transportation needs of users. Whether you’re planning a trip across town or across the country, Google Maps has you covered.
Remember to take advantage of features like adding multiple stops, checking traffic updates, and using offline maps to make your travels even smoother. Now that you’re equipped with this knowledge, go forth and explore with confidence, knowing that Google Maps will guide you every step of the way.

Matthew Burleigh has been writing tech tutorials since 2008. His writing has appeared on dozens of different websites and been read over 50 million times.
After receiving his Bachelor’s and Master’s degrees in Computer Science he spent several years working in IT management for small businesses. However, he now works full time writing content online and creating websites.
His main writing topics include iPhones, Microsoft Office, Google Apps, Android, and Photoshop, but he has also written about many other tech topics as well.
Read his full bio here.
Share this:
Join our free newsletter.
Featured guides and deals
You may opt out at any time. Read our Privacy Policy
Related posts:
- iOS 17: How to Install Google Maps on Your iPhone
- How to Connect Spotify with Google Maps on an iPhone 11
- 15 iPhone Settings You Might Want to Change
- How Do I Add a Google Calendar to My iPhone?
- How to Turn Off Maps on Apple Watch
- How to Avoid Highways on iPhone Maps
- Why Is My iPhone Battery Yellow (2024 Guide)
- How to Get Google Maps on an iPhone
- How to Make All Columns the Same Width in Excel 2013
- How to Do a Hanging Indent on Google Docs
- How to Select Multiple Files in Google Drive
- How to Get Walking Directions in Maps on the iPhone
- How to Subscript in Google Docs (An Easy 4 Step Guide)
- How to Delete a Table in Google Docs (A Quick 5 Step Guide)
- How to Download a Google Sheet as an Excel File
- How to Change the Maps Navigation Volume on the iPhone 5
- How to Show Weather Conditions in Apple Maps on iPhone
- How to Always Show Scale in Google Maps on an iPhone
- How to Get iPhone Discord Map Links to Open in Google Maps
- How to Insert Text Box in Google Docs
Google Maps vs. Apple Maps: Which navigation app is best?
Is Google or Apple the best option to get you from A to B?
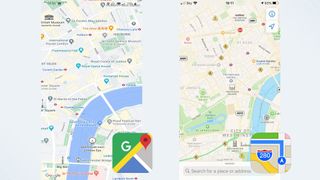
Should you get your directions from Google Maps or Apple Maps ? It's a decision all iPhone users have to make at some point — regardless of whether you're a long-time iPhone user or just picked up your first Apple phone. In the past Google Maps was the king of navigation, while Apple Maps was met with eye-rolls and stiffled laughter. These days that's no longer the case
Apple Maps has come leaps and bounds in the years since launch, with regular updates each year, and the people have started to notice . The fact Apple Maps is pre-installed on every iPhone also gives it a narrow edge over Google. And with essential feature like offline navigation now on offer, and topographic maps with hiking support on the way , the gap between the two is smaller than ever.
But picking between the two navigation apps isn't easy. Google Maps and Apple Maps both have a lot to offer, and the two don't really have many unique features any more. So to help you decide which one if right for you, we're pitting Google Maps vs Apple Maps. Here's how the two compare.
Google Maps vs. Apple Maps: Availability
Like most Apple services, Apple Maps is exclusive to the company’s own line of products. They don’t call it a walled garden for nothing. That means anyone not using an iPhone, Mac, or some other Apple-made device has zero way of accessing it.
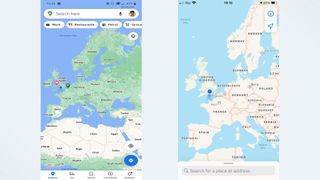
Google Maps is the complete opposite, and is available in some form on just about every device out there. Android, Windows, iPhone, Mac, even Apple’s CarPlay. Should you ever find yourself with a new device and in need of directions, your existing familiarity with Google Maps is going to serve you well. Logging in with your Google account also automatically syncs all your data, including journey history and favorite locations.
While Apple does have a lot of devices, all of which have some form of Apple Maps available, it’s not enough to beat Google’s near-universal availability.
Winner: Google Maps
Sign up to get the BEST of Tom’s Guide direct to your inbox.
Upgrade your life with a daily dose of the biggest tech news, lifestyle hacks and our curated analysis. Be the first to know about cutting-edge gadgets and the hottest deals.
Google Maps vs. Apple Maps: Interface
After several years of refinement, Apple Maps and Google Maps both offer a very focused interface that’s easy to use. That said, the way they present that information is quite different.
Apple Maps takes a very simple approach to this, with an interface that keeps pretty much everything in one place for ease of use. Recent search history, saved locations, and information about businesses and places can be found when you expand the search bar.
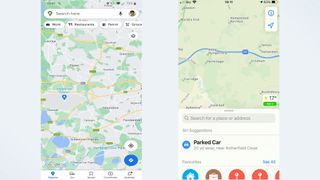
Crucially, that search bar stays where it is until you click on a place, and if you want to get rid of it all you have to do is tap the X button in the corner.
Google on the other hand, has buttons and toolbars all over the place. At the top of your phone screen is the search bar, which also houses account information and sits above dedicated buttons for finding local amenities. If you’re ever needing to find a restaurant or gas station fast, that’s likely to be very useful.
Likewise at the bottom of the screen is a menu giving you access to the Explore and Commute features, saved locations, local news, and the option to contribute to Google’s mapping database. All of these things will vanish if you tap the middle of the screen, so you can see a pure uncluttered map, but it’s still all a bit much.
Winner: Apple Maps
Google Maps vs. Apple Maps: Map Design
Like its interface, Apple Maps has opted for a more minimalist approach to its map design. While it has a lot of information at its disposal, Apple Maps doesn’t actually show you very much unless you zoom all the way in. Similarly, Google shows you more information when you zoom further in, but it does start showing a lot of that information much sooner than Apple Maps does.
That said, both of them always show the essentials no matter how you’re viewing the map. Roads, locations, landmarks, it’s all there. The only real difference is how much surplus information is on display, including businesses, smaller road names, and so on. Likewise both of them use a dark mode that makes it easier on your eyes during any late-night driving you need to be doing.
iOS 18 will also see Apple Maps add a topographical map interface , with support for hiking trails. That includes turn-by-turn directions, just like you'd get on the road, and the ability to tweak the route yourself. Google Maps does have a terrain layer, but nothing quite so extensive.
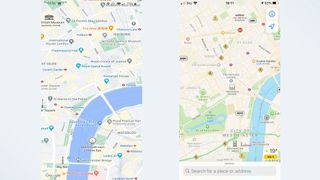
Both apps have the information you need, but Apple Maps’ less-is-more approach makes it much easier on the eyes. Google Maps’ excess information can be distracting sometimes, and that’s the last thing you need if you’re lost and struggling to orient yourself.
Winner : Apple Maps
Google Maps vs. Apple Maps: Navigation
There’s very little difference in how Apple Maps and Google Maps actually gets you places. Both services follow your progress as you travel, including travel time and journey distance, your current ETA, and the most relevant instruction at that point in time. So if you need to stay on the freeway for another ten miles, that’s what it’ll say. But as soon as you have a turn coming up it’ll change and let you know.
Both services are capable of telling you what current conditions are like on your route, including traffic, road closures, and so on. Both apps will also suggest alternate routes if the one you’re on is particularly congested, though neither of them are as aggressive as the Google-owned Waze.
It doesn’t matter how you intend to travel either, since Apple Maps and Google Maps can generate directions for drivers, walkers, cyclists, and those travelling by public transport.
As far as navigation goes, the differences between Google Maps and Apple Maps can be almost identical, or they can be as different as any route between two points can get.
For instance, driving from my house to our London office generated identical 51 mile routes and an ETA of 1 hour and 13 minutes. Going by train is a little different: Google Maps thought I’d get there in 58 minutes, versus 57 minutes on Apple.
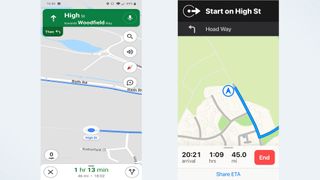
Neither app gave me much option to alter the routes. Apple Maps skipped the toll road, even when I’d set it to allow tolls, and wouldn’t give me the option of taking it. Likewise Google didn’t have any suggestions that involved leaving the freeway one exit later. Instead the only alternate routes on offer were so wildly different that all three routes diverged almost as soon as I left home.
It’s a bit strange that both apps offer primary routes that are similar, but the alternates were so wildly different.
Regardless of which one you have, you can be sure that the optimal route will get you to your destination in roughly the same amount of time.
However, Google Maps has the added advantage of letting you add multiple stops to your route ahead of time. Apple Maps does allow you to add pit stops mid-route, but that’s only really to let you get gas, or have something to eat. It’s not for, say, setting up a route to your Mom’s house to pick her up, and then carrying on to your grandparents without starting a brand new route.
Google Maps is also updating the way it calculates its routes, with the aim of prioritizing safety and optimizing fuel consumption. So it's going to use a number of factors, including real-time traffic data, to find you a route that uses less fuel and is less likely to cause an accident, but without affecting your final ETA too much.
So Google very narrowly clinches the win thanks to the added convenience of journey planning.
Google Maps vs. Apple Maps: Traffic
Both Google Maps and Apple Maps have access to real-time traffic data, and can let you know if you’re going to face any problems along your route. Whether it’s road closures, heavy traffic, or something else entirely, it shouldn’t come as a huge surprise. Naturally both apps let you report problems on the road, be they accidents, speed cameras, or general hazards that may affect travel times.
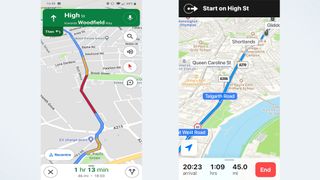
Google does have an edge here, thanks to the presence of its “Commute” feature. Once you’ve set up your work and home locations in the settings, tapping commute shows you what sort of journey you can expect. It’ll tell you how long the journey will take, what major roads you’ll be taking, and how busy those roads are. If that route isn’t to your liking then you can pick one of a number of different options.
Google Maps will also let you adjust your departure or arrival time in the app itself, something Apple Maps does not do. The apple Calendar has a “travel time” feature that can do much the same thing, but that relies on you setting up a calendar event with the Travel Time feature turned on. Convenient in some contexts, sure, but it’s also a convoluted process that definitely could do with some streamlining.
Apple Maps lets you save your work and home addresses as well, among other locations. It makes it faster to generate directions for places you go to regularly, but it requires a few extra steps that Google Maps’ Commute skips out. Google also has the advantage of all that extra historical and real-time data.
Google Maps vs. Apple Maps: Public transportation
If travelling by car isn’t your thing, both Google Maps and Apple Maps can include public transportation information in their directions. In both apps it’s as simple as picking a destination and then hitting the “public transport” option at the top of the screen.

Both services include data from multiple transit authorities, timetables, ride-sharing services, and status updates, but Google still has the advantage. Because it has data on where Google Maps users are, plus a mix of historical and crowdsourced data, Google can estimate just how busy the public transport system is at any given time.
Google Maps is even expanding this feature to show you how crowded particular areas or neighbourhoods are later this year . Like the Commute feature, all of this means you can see exactly what to expect and change your route accordingly.
But Apple Maps has started catching up in iOS 15. Apple Maps now prominently displays station information at the top of the screen and lets you pin your favorite transit route for easy access. The update also prompts users when they're approaching their stop, so they make sure to get off at the right time.
Both services are able to offer real-time transit information, including live departure times, schedules, outages and delays. Apple Maps can also tell you the location of a bus or train that's en-route, so you know just how far away it is.
However Apple Maps still doesn't feature information on how busy a particular service is, which puts it at a disadvantage. While this feature was first hinted at in the iOS 14.5 beta, nothing has materialized as of the release of iOS 16.
This system seemed to work in a similar fashion to Google, crowd-sourcing the rough location of Apple Maps users to gauge how many of them are in any particular place. But, thanks to Apple's privacy stance, this information would be anonymized and encrypted before it gets sent off to Apple servers. It's un clear why this feature hasn't been publicly released yet, but it's possible the privacy features aren't quite up to scratch.
Winner: Google Maps, for now
Google Maps vs. Apple Maps: Discovery
There’s more to navigation apps than finding directions from point A to B. Both Google Maps and Apple Maps have features that lets you see what’s around, helping you find restaurants, gas stations, parking lots, and any other businesses or points of interest for those times you don’t know where you’re going.
Google Maps puts this in plain view, with buttons underneath the search bar and a larger list of categories if you scroll to the end. There’s a button for pretty much anything you’d need, while the Explore tab at the bottom of the screen gives you a more generalized overview of the area.
Upcoming changes to this feature will also see Google offer more specific recommendations when you're looking for things. For example searching for restaurants in the morning will be more likely to show up coffee shops and places serving breakfast, rather than locations only open for lunch and dinner.
Apple Maps does something similar, which you’ll see if you tap and expand the search bar. “Find Nearby” works in exactly the same way, letting you pick a category that’s relevant to the area you’re looking at. Sadly there’s no full list like Google has, and you’ll only see a handful of options which will change depending on which specific area you’re looking at. Apple Maps also has something called “Guides” which imports relevant editorial content that should help familiarize you with any given area.
Google Maps’ Explore results can capitalize on a wealth of Google’s information, which is collected first hand and through crowdsourcing. Contact information, opening hours, whether business is limited thanks to the pandemic, it’s all there. Google knowing where people are at any given time also means it can estimate how busy a place is. So if a restaurant or a supermarket is particularly congested, you’ll be able to see that ahead of time.
Google also has future plans to expand this feature by letting you see how busy the foot traffic is in certain neighbourhoods or locations. Plus you'll be able to see this from the map itself, rather than a business's page.
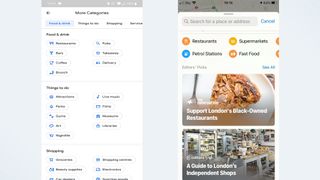
Apple Maps has a lot of that information thanks to partnerships with third party services like Yelp, Foursquare, and TripAdvisor, but not as much as Google Maps does. It doesn’t offer live updates on how busy a business is, and despite hints in the iOS 14.5 beta this feature is still missing as of the launch of IOS 16.
Apple also offers a 'Curated Guides' option, which arrived as part of iOS 15, offering recommendations on places to go when you're in a specific city. These guides can be saved and update automatically, so you're always up to date. Alternatively you can choose to create your own personal guide to share with friends and family.
Google has something similar in the works in the form of " Vibe Check ", a crowd-sourced tool that's designed to help newcomers discover hidden gems in an unfamiliar area. It highlights things you should check out, and showcases information submitted by the locals.
This feature also reveals the "vibe" of an area, so you can figure out what the general feel of the place is. However Google Maps is yet to launch the feature, promising only that it will arriver "in the coming months".
Apple Maps’ less-is-more approach does ensure a much cleaner interface, however. Whereas Google's insistence on including as much as possible means things can feel a little cluttered at times. Likewise Apple currently has the edge for quickly finding out what's worth checking out when you visit a new place — though that may change fairly soon.
Despite the potential for information overload, Google still comes out on top in this instance. The app is able to put its data collection to good use by ensuring you know if you’re heading somewhere at the wrong time. The fact the app doesn’t pick and choose Explore categories for you is also a win, and something Apple Maps definitely needs to copy. But Apple Maps appears to be catching up, and Google’s dominance may not be so certain for much longer.
Google Maps vs. Apple Maps: Hands-free control
Hands-free control is important if you’re driving, because you can’t be constantly tapping your phone to get things done. Apple Maps and Google Maps both have hands-free control, though they do work differently.
Apple Maps is connected to Siri , which is installed on every iPhone by default. That means you can get everything set up right away, without any unnecessary extra steps.
Siri does work with Google Maps now, but you have to specify where you want to send the command. Otherwise Siri will default to Apple Maps, and there's currently no way to change this. So you’ll have to say “Hey Siri, get me directions to work with Google Maps” because simply asking for directions to work will open up Apple Maps instead.
Alternatively you can download and set-up Google Assistant, or turn off Siri in Google Maps' navigation settings. That lets you use "Ok Google" commands while Google Maps is open. Similarly you can toggle voice commands by tapping the microphone button on screen.
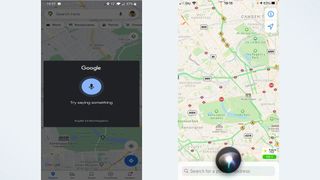
Over on Android both Google Maps and Google Assistant are pre-installed, meaning you can set up hands-free commands right away. Obviously Apple Maps isn’t available there, though again you do have the choice to skip the assistant and toggle voice commands with an on-screen button.
Tapping the screen every time you want to tell Maps to do something isn’t the best scenario, because you’re supposed to be concentrating on the road. It doesn’t matter which device you’re using.
Apple Maps has the edge if you use an iPhone, because everything is interconnected and you don’t need to deal with the hassle of downloading a new assistant or specifying which service you want to use every time. Google Maps has the edge on Android, but that’s primarily down to the fact Apple Maps isn’t available.
Winner: Tie
Google Maps vs. Apple Maps: Street view
If you need a different way of looking at the world, then Street View is a very helpful tool as it shows a location from your own point of view, rather than a map’s standard top-down perspective. It’s particularly helpful for orienting yourself in a strange location.
Google’s Street View has been around since 2007, and over the past 14 years it’s expanded across the world. Not everywhere, and you’ll find large portions of countries like Germany and South Korea don’t have Street View coverage, nor does mainland China. Still it’s in a lot of places.
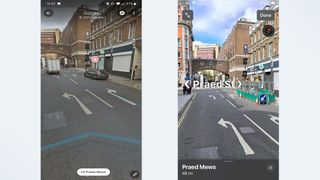
Accessing it is easy, and all you have to do is change the map type to the Street View option, and click an area highlighted in blue. You then have the choice to either navigate in a split-screen mode that relies on you tapping locations on the map to get around, or by tapping and swiping within Street View itself.
There's also the added advantage of Live View directions, which uses AR to overlay directions on what your phone can see — helping you navigate more effectively. Live View is also set to get upgrades in the near future, which should add even more value to this mode. That includes seeing business information and busyness levels, and the ability to search for specific services or locations . All from street level.
Eventually Google's 'Immersive View' will let you view the interior of business or location from your phone. But so far this feature is still officially "coming soon".
The downside to Live View is that relies on there being Street View coverage. Which is fine in a lot of public places, thanks to Street View's extensive coverage. But if you find yourself not covered, AR directions won't be available.
Apple Maps’ equivalent is called “Look Around,” and since it only launched in late 2019, it’s nowhere near as extensive. You’ll only find Look Around spots in major cities in the U.S., U.K., Japan, Ireland, and Canada right now. Accessing and navigating this mode used to be a little different, but things have changed.
In the past navigating meant physically selecting a spot on the map and scrolling around to go from place to place. That's no longer the case, and while the method still works you can now explore in much the same way as Google Maps. Tap a spot on screen and Apple Maps will take you there. Nice and easy.
iOS 15 also saw the launch of AR directions, with Apple users able to raise their iPhones to scan nearby buildings to work out exactly where you are — and show you where to go in a real world context. It's pretty much identical to how Google Maps does it, if you're already familiar with Google's equivalent.
With these two changes it means Google Maps and Apple Maps are functionally identical. However Google Maps still wins on account of its head start, and the sheer number of locations it's managed to document. Still, don't expect Apple Maps to stay on the sidelines for too long.
Google Maps vs. Apple Maps: Privacy
Apple has gone all in with privacy over the past few years, and Apple Maps is no exception. While privacy and live navigation seem pretty incompatible, Apple has developed a process called “fuzzing” that ensures anonymity.
Rather than requesting a route from A to B, Apple Maps sends off multiple requests with multiple identifiers that masks where you’re trying to go. The app also converts your precise location to a less-exact one after 24 hours, and Apple itself doesn’t store any information about where you’ve been or what you’ve been searching for. Plus none of the information that reaches an external server is associated with your Apple ID.

Any personalized data Apple Maps does have is stored on your device, rather than a server where it’s out of your control. That means you can go into the settings and delete it at any time, safe in the knowledge that it is gone for good.
Data can still be backed-up and synced across multiple devices, via your personal iCloud storage, but this doesn’t happen automatically. Because uploading that data to a server, no matter how secure, is riskier than keeping it on your device, you have to deliberately opt in first.
Google Maps does none of that. Instead pretty much everything you do gets routed through Google’s servers, and the information gleaned from your travels and searches can be used to better personalize Google’s ads. Because that’s how the company makes its money, and the more relevant the ads are to you the more valuable they become.
Measures are taken to ensure advertisers don’t learn too much about you as an individual, but it’s not entirely anonymized in the same way Apple Maps’ navigation requests are.
Google Maps does have an Incognito Mode, just like the Chrome browser, which limits the amount of data that is saved. However that doesn’t stop the fact everything has to go through Google servers first, so the only way to actively avoid Google Maps from keeping tabs on you is to stop using it and delete the app.
Google Maps vs. Apple Maps: Bottom Line
Google’s practice of data collection is key to making Google Maps a superior service to Apple Maps. Or that’s one way of looking at it. Since Apple Maps is run with a focus on user privacy, Apple can’t utilize data to make improvements. So Google can offer real time updates showing how busy a store or train might be, that’s always going to be well out of Apple’s reach.
But at the same time using Google Maps means knowing everything you do, and everything you search for, is being collected and analyzed for Google’s own benefit. When it comes to GPS and your actual location, that’s going to be too much for the more privacy-conscious.
Discovering new places is easy on Google Maps, but only just. Apple just needs to offer a full list of categories, rather than just giving you what it thinks is the most relevant. Similarly Google Street View is more widespread, but it also had a 12-year head start that puts Apple’s Look Around at a clear disadvantage. Apple Maps does offer a cleaner design and simpler interface, which is much more appealing than Google Maps’ relatively cluttered approach.
Most of these comparisons are arbitrary in the long run. Google Maps may well have won more categories than Apple Maps, but numbers don’t tell us everything. The most important thing to consider is the actual navigation, and it turns out there isn’t really a wrong answer here.
Google Maps’ and Apple Maps’ navigation performances were basically identical, and it means whichever one you pick you’ll be well served. It’s just up to you to decide which is right for you and what sort of journeys you plan to take.
If you value privacy above all else, or are happy with the default Mapping app on your iPhone, go with Apple Maps. However if you prefer a service that offers more information and puts your data to work improving what you see, then go for Google Maps. It’s all up to you.
Tom is the Tom's Guide's UK Phones Editor, tackling the latest smartphone news and vocally expressing his opinions about upcoming features or changes. It's long way from his days as editor of Gizmodo UK, when pretty much everything was on the table. He’s usually found trying to squeeze another giant Lego set onto the shelf, draining very large cups of coffee, or complaining about how terrible his Smart TV is.
Chrome on Android is rolling out a useful new feature — this'll save you time
Google Play Apps with 2 billion installs pose privacy risk — delete these right now
Samsung Galaxy Tab S10 Ultra leak shows giant iPad Pro rival
- Yazzoo7 Has anyone else noticed how poor the Google Maps graphics on Android Auto are compared to the Google Maps graphics on Apple CarPlay? For example, the search box in "Auto" is always visible which causes your vehicle travel to always be displayed significantly off-center. The result is seeing more of the traffic history from where you already passed instead of where you are headed. Also, the traffic flow definitions (green, amber, and red) in Auto are much thinner than in CarPlay and not as easy to see. For these reasons, I purchased a used, non-activated iPhone 6S, pair it with my Galaxy S9+ hotspot and use Google Maps in CarPlay for my navigating needs. Reply
- Porrotu I prefer Google just because you can skip to the next steps/turns. I like seeing beforehand the street where I should be turning, etc, with a map of it (not just a list). Reply
- CmdrBozo I'm now using Apple maps because I prefer a few of the navigation features not available with Waze or Google, like "turn left at the next stop sign,." Also I appreciate more warning for the next step, e.g. after a turn, " in 1 mile turn right at the traffic light" There are some Google advantages, such as better lane markings. I use all three depending on the situation. Reply
- Ronald Quint As a long haul Truck Driver, I use both. Google maps navigation has a more realistic E.T.A. Apple maps navigation has a persistent dedicated distance to go feature. If Apple maps could dial down their E.T.A., I believe it would increase highway safety. Reply
- hg0428 Apple maps now has Multi-stop routing as of September 2022 Reply
- MistyMu Apple Maps also has an "Arrive By" feature now built in. I think one area Apple Maps could improve is discoverability. Also, I would like the see offline map support. One thing that did impress me with Apple Maps is walking directions. Both have walking directions, but I live in a rural area and Apple Maps suggested the public footpath, Google Maps takes you a 15 min detour by road. You can't actually see the path on the Apple Maps interface (you'll need something else for that like Ordnance Survey, but at least it knows there is a path. Apple Maps is still very limited with cycling directions though and only works in a few major cities right now, whereas Google Maps works everywhere. I can't speak for using either for public transport. I do like that on Google Maps you can drag different routes out with the web app with a mouse, but while you can send the route to your phone (you can send route to phone on Apple Maps as well) it won't send the custom route you dragged out. It is interesting to see both apps getting EV support now as well, which will be useful for those with non-Tesla EVs to help plan journeys with charging stops, because the built-in car nav either doesn't have this built in or it is bad. Reply
- Joe Bowers Just upgraded. + Does now do multi stop route, including the total time AND distance, which Google refuses to provide on Apple app platform. - Once you start navigating, you cannot go back and Edit the route to change, add or remove a stop, instead you get a blank editor and have to start again. Apple Map very hard to share and only a single stop journey. Also saving routes is not provided to recall later., Google is great at this. Reply
- View All 7 Comments
Most Popular
- 2 Razer Blade 16 (2024) review: A great gaming laptop with a major OLED upgrade
- 3 5 best LGBTQ romantic comedies to stream during Pride Month
- 4 9 unexpected uses for your French press
- 5 How do you sleep with a sunburn? We ask an expert
New Mexico wildfire map: Track growing fires as Ruidoso area residents forced to evacuate
Two wildfires in New Mexico have prompted evacuations in southern New Mexico.
As of Wednesday, June 19, the Salt Fire and the South Fork Fire had spread over 20,000 acres:
- South Fork Fire: 16,335 acres; containment: 0%.
- Salt Fire: 7,071 acres; containment: 0%.
New Mexico wildfire map and smoke tracker
The fire tracker provides a map with pinpoint locations of each fire and shows where red flag warnings are in effect, among other information. You can also click on each point to see detailed information on the fire in that area.
SEE: Photos of South Fork Fire
View more: South Fork Fire continues to burn near Ruidoso. Here's what the fire looks like in NM
New Mexico communities ordered to evacuate
The Village of Ruidoso, with a population of nearly 8,000, is under mandatory evacuation orders as the wildfires rapidly spread and have caused property damage. Portions of US Highway 70 are also closed. Residents were urged not to try and save their belongings and to get out as quickly as possible.
The following evacuation centers are available to local residents, according to the New Mexico Forestry Division :
- Evacuation Center in Eastern New Mexico University-Roswell's gym: 52 University Blvd, Roswell, NM 88203
- Residents and visitors who want to voluntarily evacuate can now seek shelter at Capitan High School at 519 Smokey Bear Blvd., Capitan, NM 88316
- Those with livestock and RV may go to the Eastern New Mexico state fairgrounds: 2500 SE Main St, Roswell, NM 88203
- Pets can be cared for at the Humane Society of Lincoln County: 25962 US-70, Ruidoso, NM 88345
- The Mescalero Tribe’s evacuation center for Reservation residents is at the Community Center Gymnasium: 512 Mescal Loop, Mescalero, NM 88340
The Ruidoso Convention Center has reached capacity, and those who are there will shelter in place should its status change.
Other shelters in Roswell include:
- Church on the Move: 901 W. Brasher
- NMMI Godfrey Center: 101 W. College
- NM Dream Center: 2700 W. Second Street
- Roswell Convention Center: 900 N. Main
- Roswell Aquatic Center: 1500 W. College
People may call the Emergency Operations Center at 575-258-6900 for information or assistance regarding the South Fork Fire or other emergencies.
The Salt Fire has forced the evacuations of the following communities, as of Tuesday morning:
- Chatto Bluff
- Apache Summit
- Fantasy Lane
- Homes along Highway 70 from Highway 244 to the east Reservation line, Bear Canyon, and Snow Canyon.
The wildfire threatens multiple structures. On Tuesday morning, it was unclear how many had been lost.
If you can't see the map above, click on this link .
Ruidoso live webcams: See the fires in real-time
These live views from Ruidoso are courtesy of ruidoso.net . Additional webcams are available here .
- svg]:stroke-accent-900">
How to share your ETA in Google Maps or Apple Maps
By David Nield
Posted on Jun 14, 2024 7:03 AM EDT
4 minute read
When traveling from point A to point B, there may be someone waiting for you at the other end, whether it’s a friend, family member, colleague, date, or another person. And that’s where the ability to share your estimated time of arrival through Google Maps or Apple Maps can be really helpful.
It means the other person (or people) won’t be stressing about what time you’re turning up or worried about your safety. The cooking, or the meeting, or the drinks order, or whatever is waiting for you at the other end can be perfectly timed to fit in with whenever you’re arriving at your destination. This is a little different to sharing your location more generally, which you can also do through Google and Apple apps. If your friends and family members can already see where you are on a map, there’s maybe not the same need to have them track on a particular journey.
Rather, this is sharing your location and in particular your ETA with a specific contact or group of contacts, for a specific trip. Here’s how to do it no matter which navigation app you happen to be using.
Share ETA in Google Maps
If you’re navigating to another place through Google Maps—whether on foot, in the car , or on public transit—you can share your location by tapping on the card at the bottom of the screen.
Choose Share trip progress , and you’ve got two options:
- Select a Google contact from the list and Share , and they get an alert actually inside Google Maps.
- Or tap an app other than Google Maps, and then a contact inside that app, which sends a link to the Google Maps app.

Whichever way you share, to the other person you’ll then be a dot that can be tracked on a map until the trip comes to an end. To stop sharing before then, tap the card at the bottom of the navigation screen, then Stop sharing .
If you’re using Google Maps on Android Auto, the same option is available: On the card showing your estimated time of arrival, tap the three dots and pick Share journey , then choose a contact to share it with.
Share ETA in Apple Maps
Should Apple Maps be your navigation app of choice, once you’re underway on a trip via foot, car, bike, or public transport, you’ll see a Share ETA link on screen. Tap on this and choose a contact to share the ETA with.
If you’ve been traveling for a while, the Share ETA button will disappear, but you can tap on the arrow at the bottom (next to the arrival time) to find it again. If you’re sharing with someone with an iPhone and iMessage, they’ll get a link that opens up inside Apple Maps, otherwise they’ll get a plain text stating your ETA, with text updates if it changes.
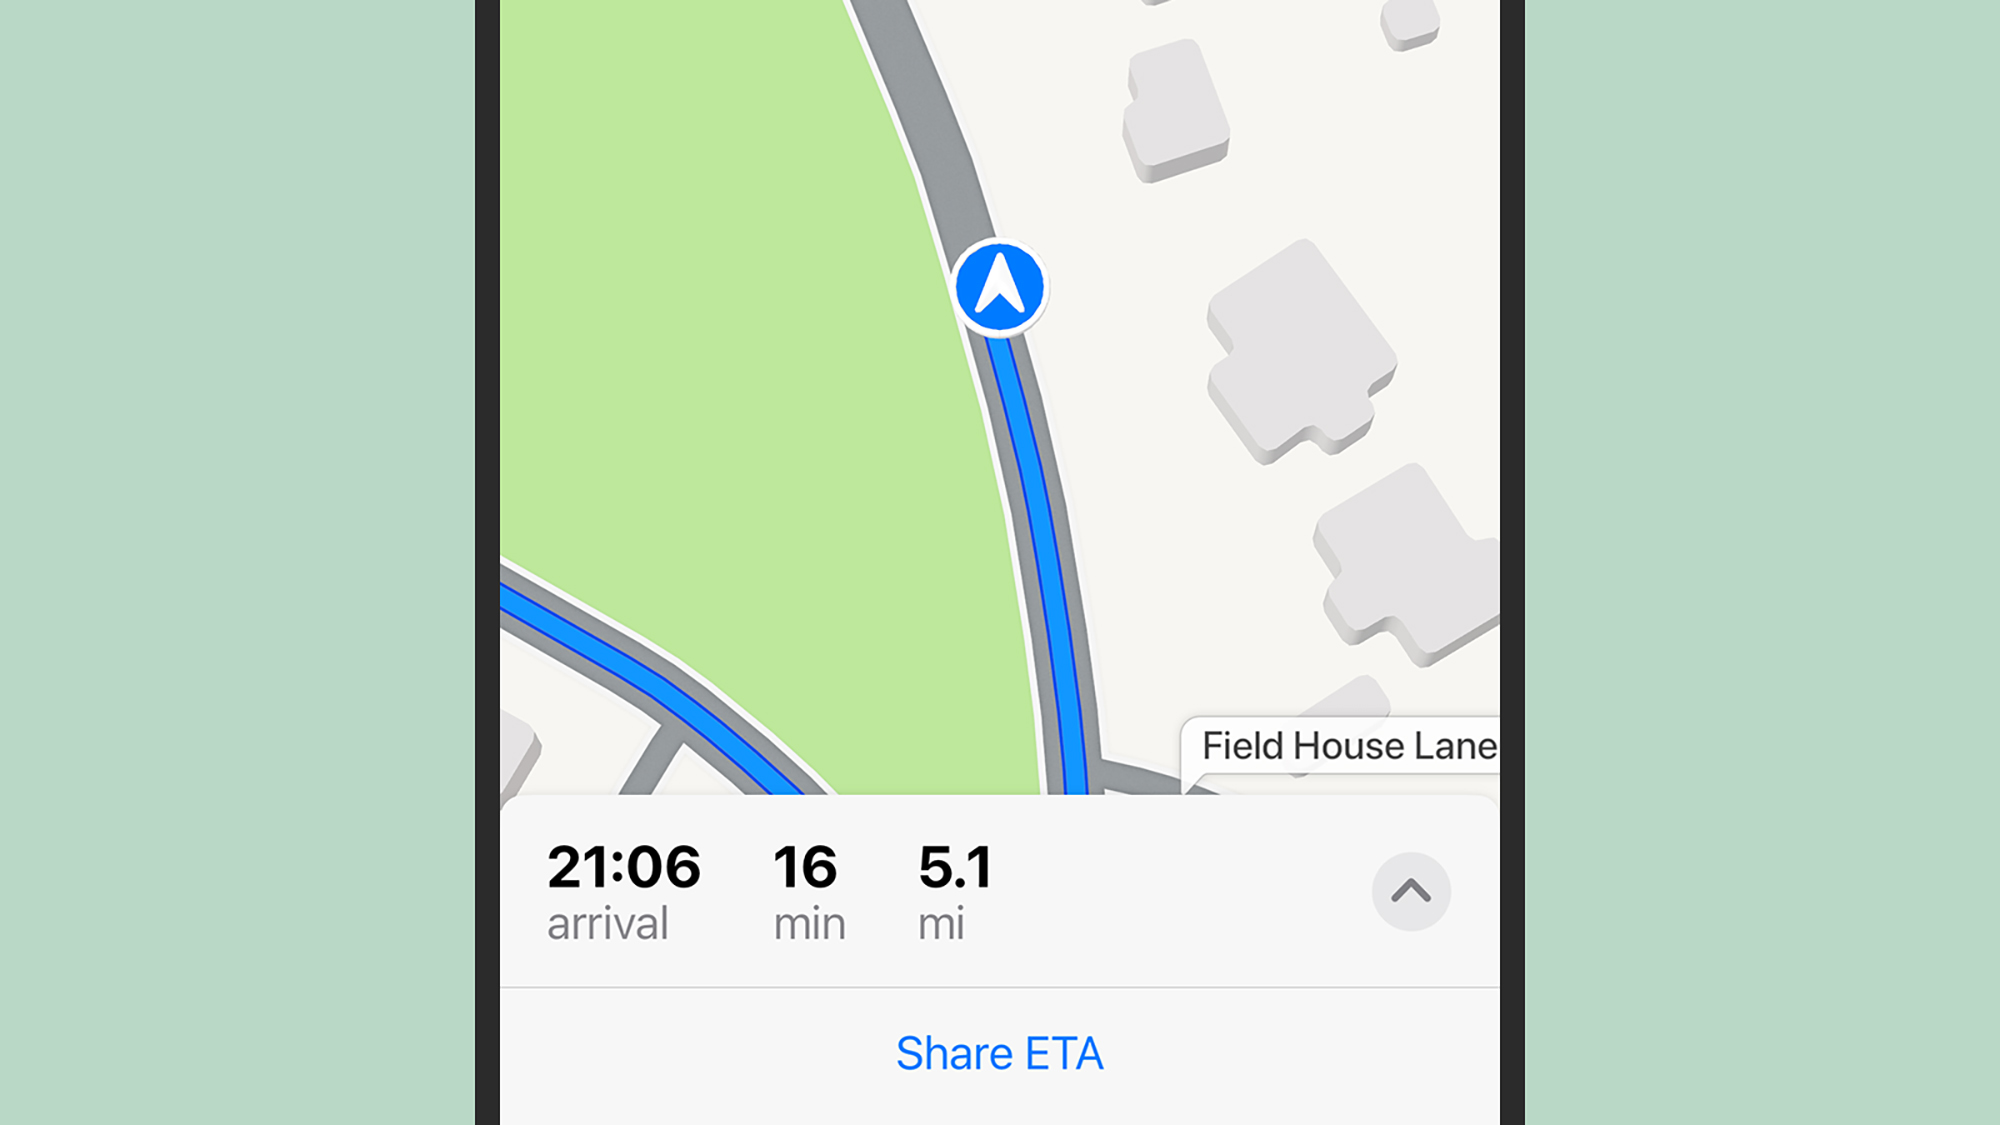
The sharing automatically comes to an end when you reach your destination, but if you want to stop sharing your location before that happens, you can tap the Stop Sharing ETA button that stays visible at the bottom of the screen.
When you’re using CarPlay, you’ll see the same option. You can tap Share ETA right at the start of your trip or the small arrow on the details card and then Share ETA if you’re mid-journey. Tap Share to pick a contact. To stop sharing, tap the arrow on the details card, then Sharing ETA and Stop Sharing ETA .
Other ETA sharing options
You don’t have to stay inside Google Maps or Apple Maps, but note that other apps have broader location sharing options that don’t automatically end when your journey does.
One third-party app worth checking out is ETA , though it’s only available for the iPhone (and the Apple Watch) and not Android. Its primary aim is to let you quickly know when you’re going to be at places, but you can easily share this information with someone else via the message (bubble icon) in the lower right corner of the destination screen.
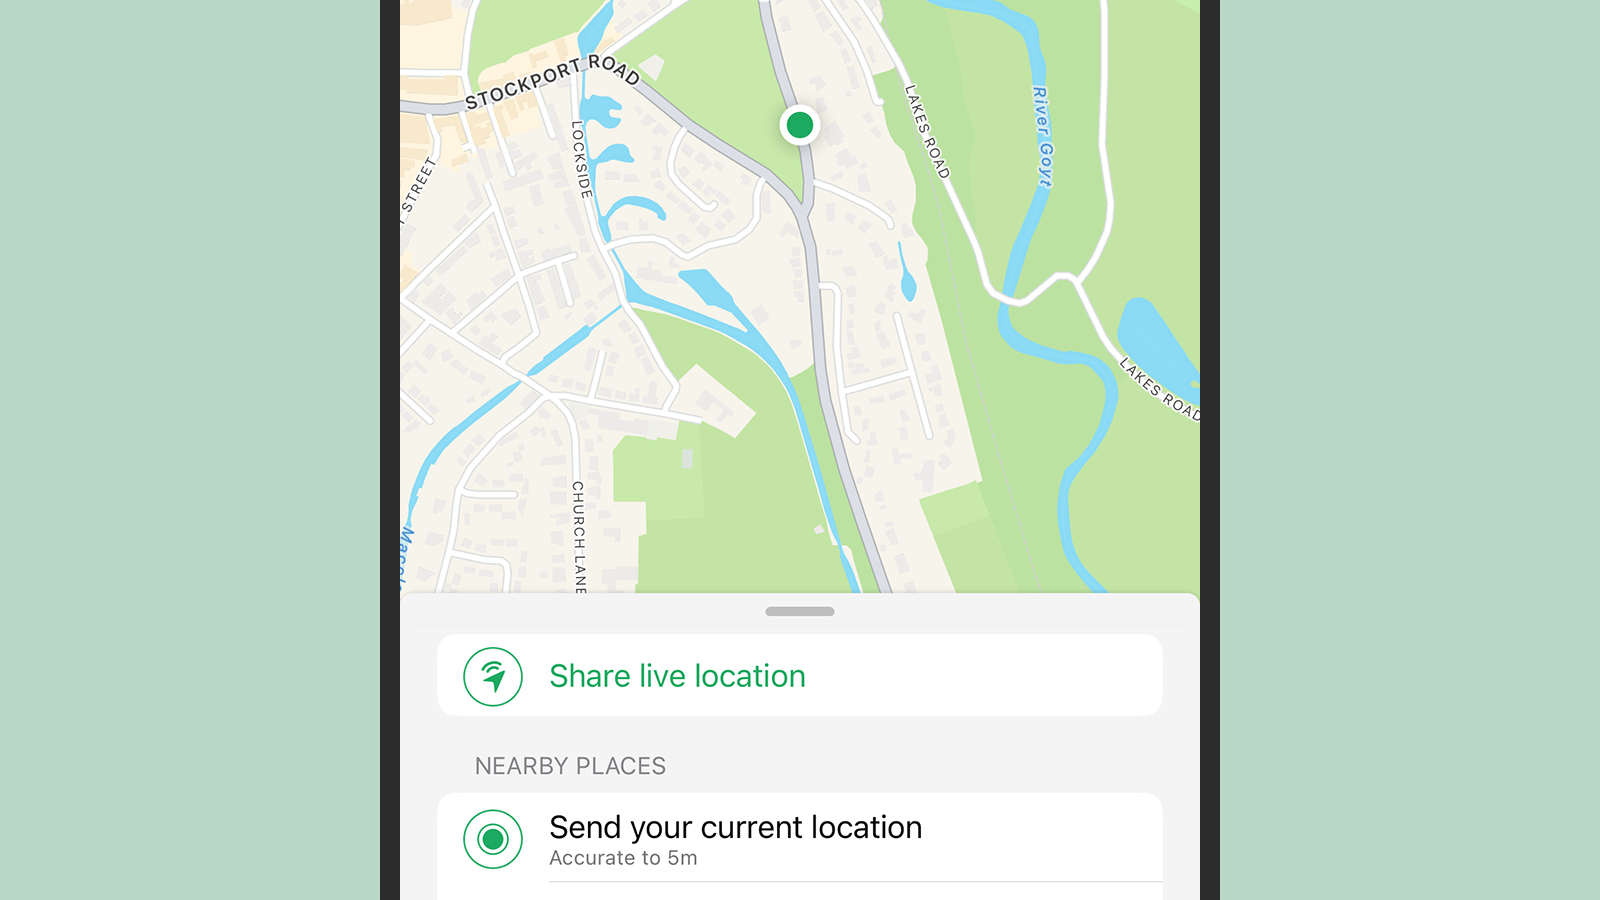
WhatsApp (for Android or iOS ) provides you with a reliable way of sharing your location. At the bottom of a chat, tap the paperclip icon on Android, or the + (plus) icon on iOS, then Location and Share live location —you can choose to share it for 15 minutes, an hour, or 8 hours.
Facebook Messenger (for Android or iOS ) is another app with similar functionality that may come in handy when you’re traveling and people are expecting you. On Android, tap the four dots on the left at the bottom of a chat, then Location ; on iOS, it’s a + (plus) button rather than four dots. You’ll then see the option to share your live location for a set 60 minutes.
Latest in Tech Hacks
How to customize screensavers on your tv how to customize screensavers on your tv, how to use linkedin ai tools to find a job how to use linkedin ai tools to find a job.
- Election 2024
- Entertainment
- Newsletters
- Photography
- Personal Finance
- AP Investigations
- AP Buyline Personal Finance
- AP Buyline Shopping
- Press Releases
- Israel-Hamas War
- Russia-Ukraine War
- Global elections
- Asia Pacific
- Latin America
- Middle East
- Election Results
- Delegate Tracker
- AP & Elections
- Auto Racing
- 2024 Paris Olympic Games
- Movie reviews
- Book reviews
- Personal finance
- Financial Markets
- Business Highlights
- Financial wellness
- Artificial Intelligence
- Social Media
One Tech Tip: Use a roaming eSIM on your summer travels to avoid cellphone data fees
A SIM card is shown next to a cellphone in this photo taken on Tuesday, June 11, 2024 in London. Physical SIM cards are going away, replaced by eSIMs which make switching cell carriers easier. AP Photo/Kelvin Chan)
A SIM card is shown in this photo taken on Monday, June 10, 2024 in London. Physical SIM cards are going away, replaced by eSIMs which make switching cell carriers easier. AP Photo/Kelvin Chan)
- Copy Link copied
LONDON (AP) — For summer trips overseas, a smartphone is essential for most people. How else will you check Google Maps to find your Airbnb, post an Instagram video from the Eiffel Tower, or WhatsApp friends and family back home?
Of course, if you’re using apps that gobble up data while traveling in a foreign country, there’s always a risk of racking up hefty roaming fees from your phone carrier. The solution? An international travel eSIM for your smartphone.
How do you use this technology? Here are some tips.
What’s an eSIM?
If you’ve ever bought a new cellphone, you’re probably familiar with the SIM card. Short for subscriber identity module, the SIM is a little chip the size of a fingernail that fits into a slot on most phones. Without it, you couldn’t get cell service because it contains your account information and phone number.
But physical SIM cards are slowly being replaced by eSIMs — the e stands for embedded — built into newer phones. These digital versions do the same thing and can make life easier, though people used to physical SIMs might find them confusing at first.
Why should I use an eSIM?
They make switching cell carriers easier. And if you’ve bought a new phone recently, you might not even have a choice: Apple got rid of the SIM card tray starting with the iPhone 14 released in September 2022.
They’re especially beneficial for travelers. If you’ve got a compatible cellphone, you can add an eSIM from a virtual carrier that has better data roaming rates than your home network. Many phones will allow you to add more than one eSIM, making it easy to switch back and forth, or — for phones with the capability — use two at the same time.
Think of the convenience: Gone are the days of arriving in a strange country after a long flight, looking for a local phone company’s airport kiosk, carefully popping open the SIM tray with a pin to swap in the new chip, and trying not to lose the existing one.
Where do I get a roaming eSIM and how much will I pay?
The eSIM market is booming. Kester Mann, director of consumer research at CCS Insight, says there are dozens of providers that can be found online, with names like Nomad, Holafly, Easysim, Airhub and Airalo.
“These guys have a role to play because I think they offer a very affordable and attractive opportunity for international travelers,” Mann said.
The boom means there’s plenty of competition keeping rates low. Prices are typically clearly displayed online, either through a menu of packages on the provider’s website or a calculator based on the amount of data needed and trip length.
Some 800 carriers support eSIMs, according to CCS, so international coverage is extensive. Many eSIM providers offer packages based on country or region, so you can check which ones have good rates for the place you’ll be visiting and sign up in advance. Traveling to Europe and need data for a month covering 30 countries? Airalo offers, for example, 10 gigabytes at $37 while Holafly’s package has unlimited data for 69 euros ($75).
For an upcoming trip to Prague, I bought 5 gigabytes of data for just $5 from Global Yo. I was slightly put off by some negative reviews professing problems buying, installing or activating the company’s eSIMs, but I didn’t have any problems myself.
How do I put an eSIM on my phone?
You’ll need a phone that’s unlocked for use with different wireless carriers.
If you’re not setting up a new phone, the typical activation method is with a QR code, or a more conventional string of numbers and letters. If you’re planning a trip and buy one before you leave, it’s a good idea to print out the code if you don’t want to activate right away.
For iPhones, go to your Settings menu, then to either the Cellular or Mobile Service section, then tap Add eSIM. You’ll be prompted to scan the code, or manually enter it. The process is similar for Android users. Samsung has a guide for Galaxy devices, and Google has a help page for Pixel users, while eSIM carriers have step-by-step instructions. Apple has a YouTube video , as well as tip sheets on using eSIMs for international travel and on using two eSIMs simultaneously.
If you’ve got a phone that supports dual eSIMs, you “can pick potentially the best network based on price and or coverage” while traveling, said Mann.
Some carriers have their own apps to manage eSIMs and track data usage.
How do I know if my cellphone can use an eSIM?
More than 200 devices support the technology, CCS Insight says. U.K. phone company Vodafone has a list of compatible devices. Or dial *#06# — an EID code indicates it’s compatible.
For iPhone users, it’s any model released since the XS, XS Max or XR, as well as recent iPads. They’re compatible with any Samsung Galaxy devices released since 2020, and Google Pixel 4 and newer models will work; some Pixel 3 devices also support them.
Does it always make sense to use a travel eSIM?
First check your own carrier’s roaming costs for the places you’re visiting. Sometimes it’s not worth it.
“Roaming costs these days are far lower and less prohibitive than they once were,” said Mann. They’ve even been abolished for European Union residents crossing the 27-nation bloc’s internal borders. But travelers in Britain, which has left the EU, are facing them again for travel to the continent.
Is there a tech challenge you need help figuring out? Write to us at [email protected] with your questions.
Apple Maps in iOS 18: Here’s everything new coming this fall
iOS 18 is a huge release for iPhone users, not only with a new Siri and Apple Intelligence but also big system app updates for Notes , Reminders , Photos , and more. One of the built-in apps getting upgraded is Apple Maps.
Here’s everything new coming to Maps in iOS 18 this fall.
Saved places feature
Building on the existing Guides feature, Maps in iOS 18 lets you save places with a quick tap of the + button on their Maps listing.
Saved places are accessible from the new Library menu, where you’ll also find your Guides, Pinned locations, and more.
All locations you’ve previously saved in some way—such as adding them to a Guide—will automatically get added to your new saved Places.
You can search all saved Places, plus sort them by Date added, Name, or Distance, and view them in a List or Grid. You can also add new saved Places directly from the Library.
Personal notes for saved places
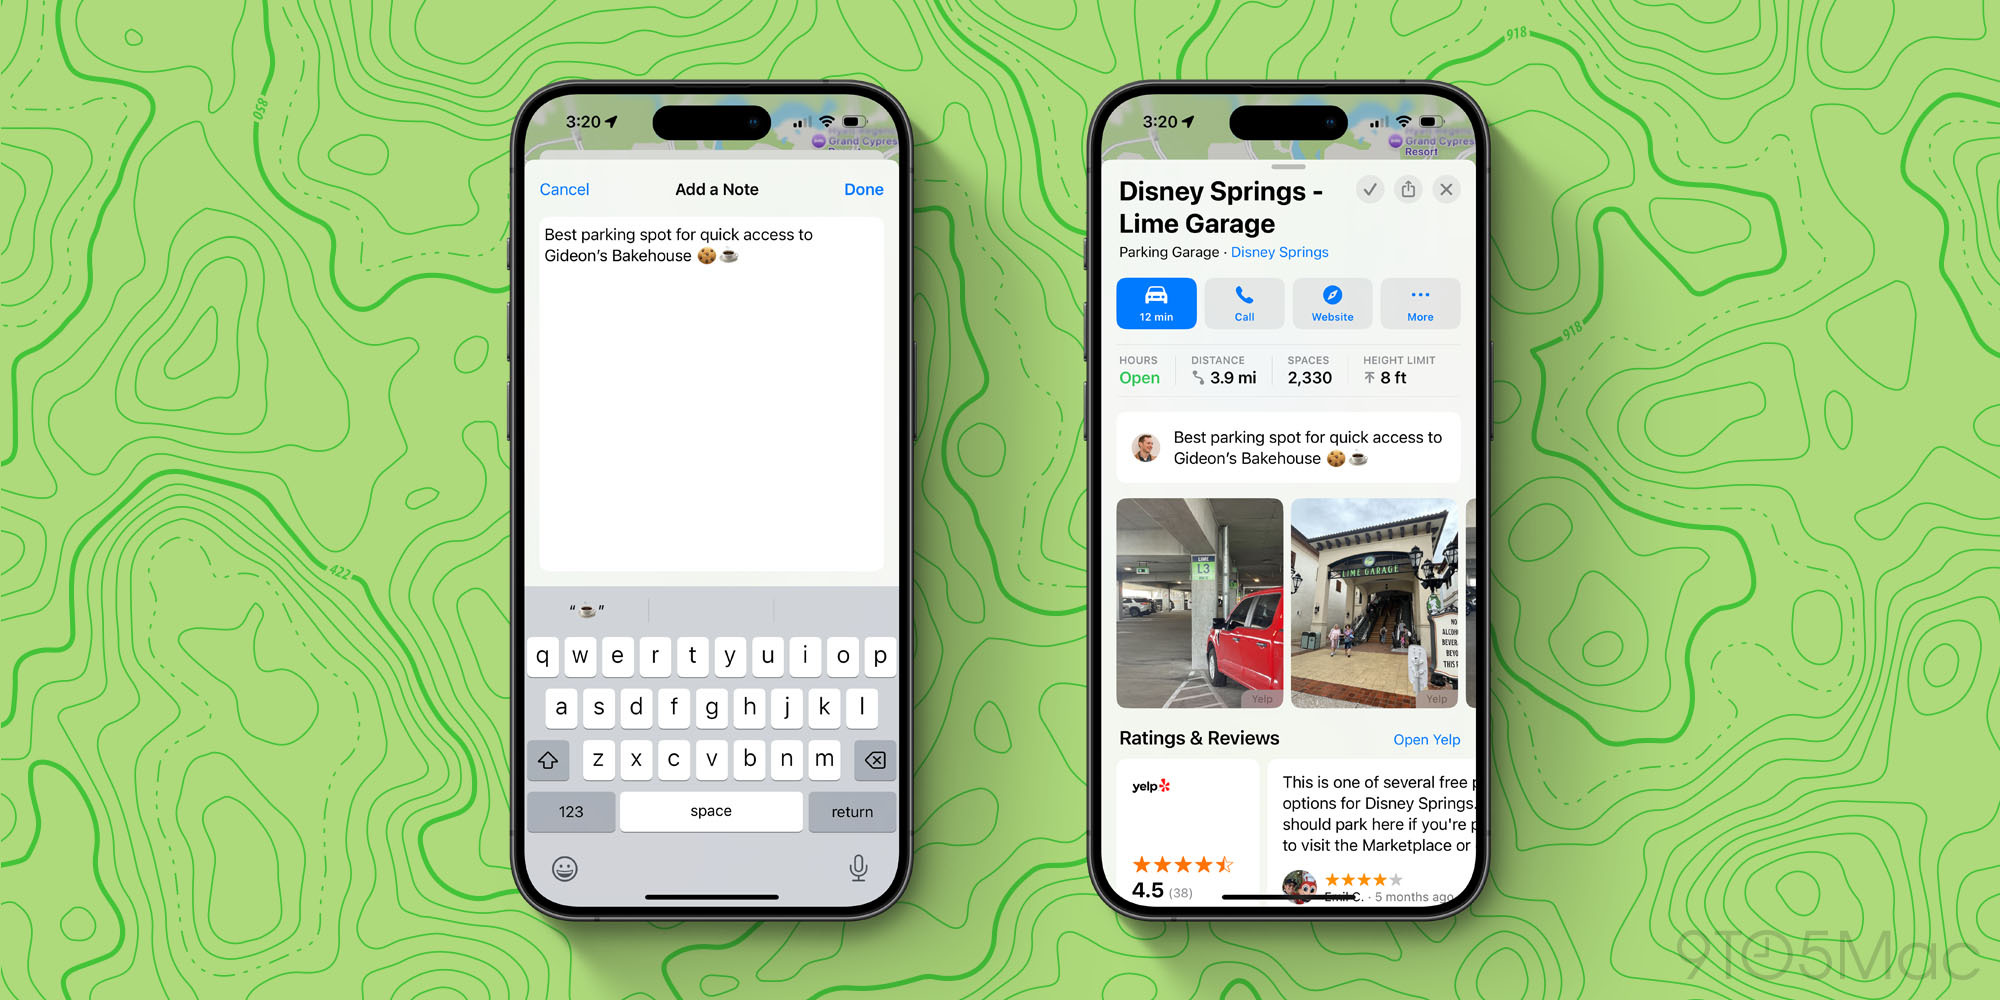
A great component of saving a place is that you can then add a personal notes to it. Once you add a note, you’ll see it every time you view the location’s Maps listing.
Notes are a great way to save key reference info about a given location, and I’ve started using them a lot during my brief time with the iOS 18 beta.
Custom walking routes
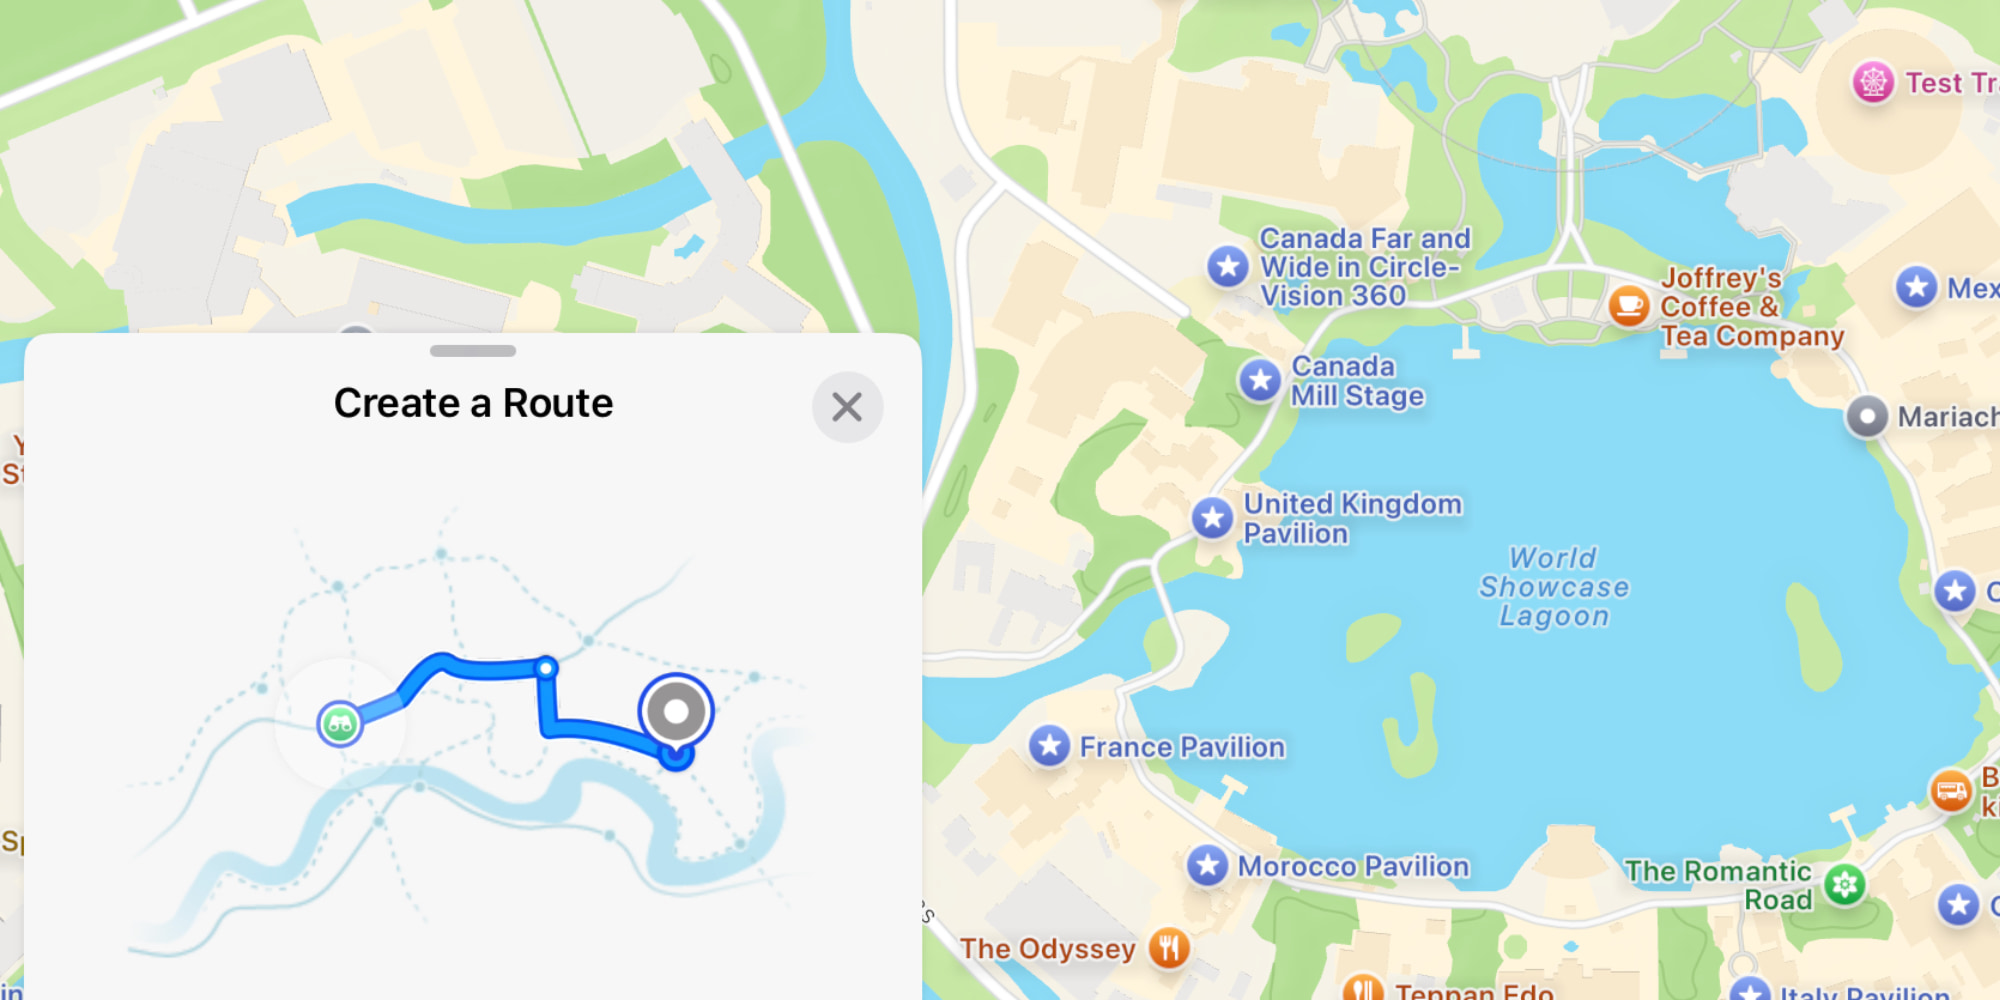
Sometimes Apple’s recommendations for routes to take aren’t the way you want to go. Now, you can create your own custom routes—at least for walking.
When routing to a location via walking directions, you’ll see a new option to create your own custom route. From here, you’ll tap on the map to build out the exact route you want to take. This can be especially nice for a variety of reasons, such as purposely taking a more scenic route, or one that’s intentionally longer so you can get more steps in.
Custom routes can be saved for re-use later, so you won’t have to build them every time.
Hiking features
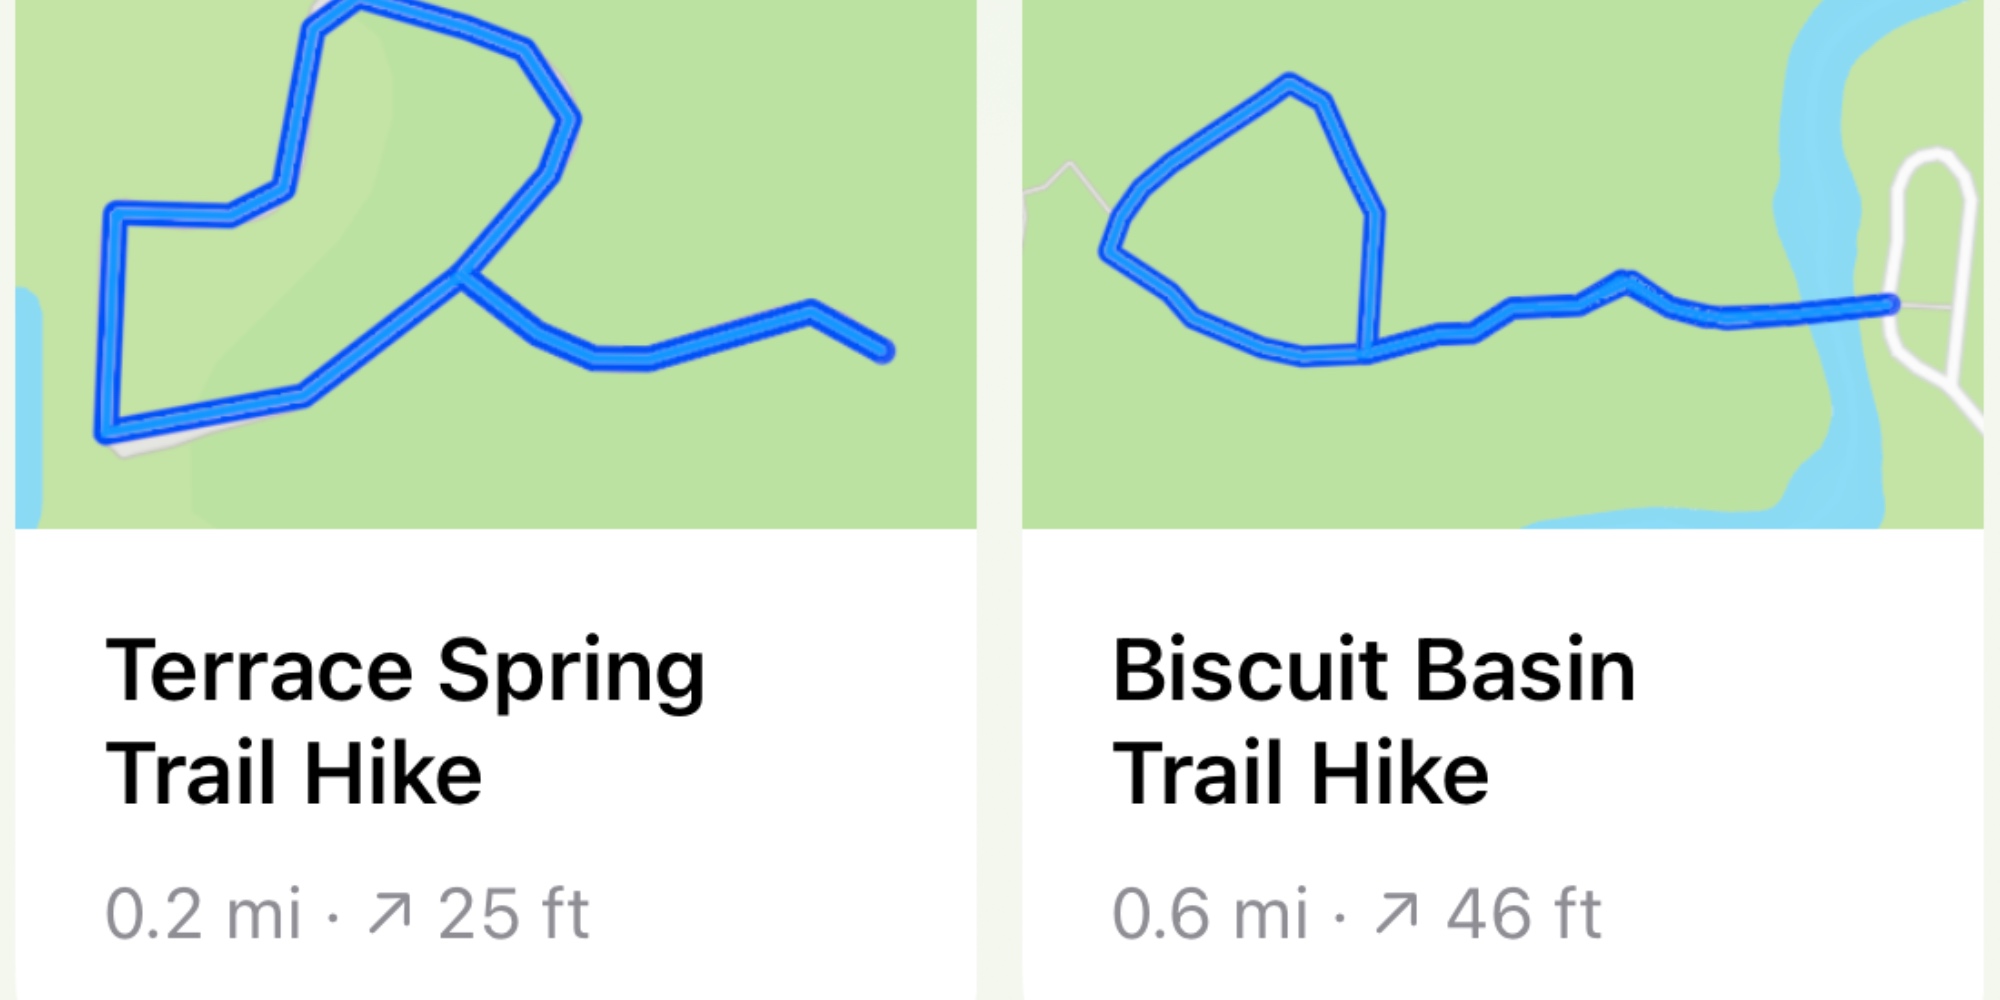
A big focus of iOS 18’s Maps update is better serving hikers. Here’s what’s new:
- Topographic maps : Maps now features topographic maps to better guide you during a hike, with detailed trail networks including info for all U.S. national parks. At launch this feature is limited to the US and Japan.
- Offline hikes : There are thousands of hikes now built into Maps in iOS 18, and you can download any of them for offline access.
- Create your own hikes : Similar to the walking route creation, Maps also lets you create your own custom hiking routes, opening opportunities to build your own adventure.
- Save notes for trails : Like you can with any saved places in iOS 18, you’ll be able to save personal notes about any trails you’ve saved, helping you better navigate them on future return trips.
Maps gets better year after year, and with iOS 18 that streak looks set to continue. The variety of additions serves a diverse set of needs, and offers more versatility in the app that many iPhone users rely on each day.
What Maps features are you looking forward to in iOS 18? Let us know in the comments.
FTC: We use income earning auto affiliate links. More.

Check out 9to5Mac on YouTube for more Apple news:

Apple Maps is Apple's map application that's pre…

Ryan got his start in journalism as an Editor at MacStories, where he worked for four years covering Apple news, writing app reviews, and more. For two years he co-hosted the Adapt podcast on Relay FM, which focused entirely on the iPad. As a result, it should come as no surprise that his favorite Apple device is the iPad Pro.

Manage push notifications
- Help Center
- Google Maps
- Privacy Policy
- Terms of Service
- Submit feedback
In the coming months, the Location History setting name will change to Timeline. If Location History is turned on for your account, you may find Timeline in your app and account settings. Learn more .
Google Maps Timeline
Manage your Timeline
Google Maps Timeline is a personal map that helps you remember routes and trips you've taken and places you've been based on your Location History. You can edit your Timeline at any time and delete your Location History in Timeline.
If you have settings like Web & App Activity turned on and you turn off Location History or delete location data from Location History, you may still have location data saved in your Google Account as part of your use of other Google Sites, apps, and services. This activity can include info about your location from your device’s general area and IP address. For example, location data may be saved as part of activity on Search and Google Maps when your Web & App Activity setting is on, and included in your photos, depending on your camera app settings.
Find your travels
You can find how far you've traveled and the way that you traveled, such as walking, biking, driving, or on public transport. Timeline measures distances in miles or kilometers is based on your country or region.
- On your computer, open Google Maps .
- Sign in with the same Google Account that you use on your mobile device.
- To find another date, at the top, choose a day, month, and year.
Find your home & work on Timeline
If you've saved your home and work addresses, they show up on Timeline. In addition to Timeline, this information may also be used in other Google products and services.
Learn how to set your home and work addresses .
Edit Timeline
If a place is wrong on Timeline, you can edit the location and when you were there.
- On your computer, go to Timeline .
- Choose the correct place or search for a place in the search box.
- To edit when you were there, click the time.
- Click the day that you want to delete.
- Click Delete day .
To delete Location History:
- Click Delete Location History .
Automatically delete your Location History
You can automatically delete Location History that’s older than 3 months, 18 months, or 36 months.
- Follow the on-screen instructions.
Turn Location History on or off
When you turn on Location History, your precise device location is regularly saved — to your devices and Google’s servers, even when Google apps aren’t being used, and creates your Timeline.
Learn more about how to manage your Location History .
You’re in control
You can always review your data, and any choices you make here, at activity.google.com or your Timeline .
Was this helpful?
Need more help, try these next steps:.

Google Maps introduces Travel Time: A game changer for trip planning
A useful feature, Travel Time, has appeared in Google Maps, which allows you to estimate the area you can reach on foot or by car in a given time.
Google Maps is an extremely popular service that we often use during trips to get to our destination quickly and efficiently. In addition to standard route planning, the application also enables us to monitor real-time traffic, helping to avoid traffic jams and delays, and to locate the nearest service points such as petrol stations or restaurants.
However, not everyone is familiar with all the features Google Maps offers. Useful options like setting alternative routes, which can bypass road obstacles, or the ability to view streets in Street View mode, allow you to better prepare for your trip. Additionally, using the offline mode is an ideal solution for situations where there is no internet access, ensuring uninterrupted application operation even in difficult conditions. Discovering these features can significantly improve and facilitate any journey.
New feature in Google Maps – Travel Time
A useful feature for planning spontaneous trips can be the "Travel Time" option, which allows you to determine where you can reach in a given time. Not all users realize that such functionality exists, and it can greatly facilitate travel organization.
Simply select the "Layers" menu, "More" and in the "Map tools" section, choose "Travel Time." By clicking on a town or object, the function allows you to determine the area you can reach on foot or by car in the given time.
At the bottom of the map, a menu will appear that allows you to choose between walking and driving. For walking, travel times of 15 or 30 minutes are available, whereas for driving, you can choose times ranging from 15 minutes to 6 hours. The available area will be marked with a blue zone.
It is worth noting that the "Travel Time" feature only works when viewing Google Maps in a browser on a computer (it does not work on the mobile app).
Unlocking the full potential of Google Maps for savvy travellers
Google Maps now displays 3D buildings to Android Auto users: an update or clutter?
Discover hidden Google Maps feature to avoid stairs on holiday trips


IMAGES
VIDEO
COMMENTS
Help Center. Community. Google Maps. In the coming months, the Location History setting name will change to Timeline. If Location History is turned on for your account, you may find Timeline in your app and account settings.
Google is celebrating 15 years of Street View support in Google Maps by adding an exciting feature to the iPhone and Android versions of the app. You can now travel back in time using Street View ...
Click on the arrow to see images taken by Street View teams in the past. You can click and drag the slider to move backward and forward through time. You can move around and change perspective and the view will update in real-time. Click on a captured image to see it in full-screen. To get back to present-day Street View, drag the slider all ...
Follow these steps to go back in time with Google Maps on iPhone and iPad. While the screenshots below are from an iPhone, the steps are the same in Google Maps for Android. In the Google Maps app, search for an address or tap and hold to drop a pin on the location you want to view. Tap the Street View preview window. Tap the center of the image.
Open the latest version of the Google Maps app on your iPhone. Go to any location that has a street view available. Hit the button "See more dates.". Select any older street view from a carousel. You'll now see the historical street view imagery of that place. If you've missed the splash screen, don't worry about it—you can access ...
On your iPhone or iPad, open the Google Maps app . Tap your profile picture or initial Your Timeline . Find the wrong place on Timeline and tap it. Tap Edit place. Tap Search for a place or address, or scroll and select the right place from the list. To edit when and how long you were there, tap the time. Tip: If Web & App Activity is turned ...
Plan for your next trip using your iPhone or iPad to make sure you arrive on time. On your iPhone or iPad, open the Google Maps app . At the top, type a destination. In the bottom left, tap Directions. It'll show a car, bus, bike, a person waving, or a person walking. Choose your transportation mode.
Find local businesses, view maps and get driving directions in Google Maps.
Tips for your Google Maps Timeline. Here are a few helpful tips and tricks for using your Google Maps Timeline. If you want to use the date feature for reviewing your Timeline, it's best to use Google Maps online. The date picker on the web is much easier to use than the one in the Google Maps app on iPhone and iPad.
Google Maps is the Swiss Army Knife of apps, chock-full of navigation, geospatial-search, and customization tools. ... On an iPhone, make sure you have ... 17. Time Travel With Google Maps (Credit ...
Otherwise, with that out of the way, here's how you can see where you've been in the Google Maps app: Inside Google Maps, tap your profile icon or letter in the top right. Select Your Timeline from the pop-up menu. Google will take a few seconds to load the Timeline page. The Timeline page will show today's location history by default at the ...
Get there faster with real-time updates. • Beat traffic with real-time ETAs and traffic conditions. • Catch your bus, train, or ride-share with real-time transit info. • Save time with automatic rerouting based on live traffic, incidents, and road closure. • With Live View in Google Maps, see the way you need to go with arrows and ...
Once installed, follow these steps to get started: 1. Launch the Google Maps app on your iPhone or iPad. 2. Tap your profile picture or initial, which can be found at the top right corner of the ...
1. Open Google Maps on your iPhone or Android, and tap your profile picture in the top-right corner. 2. Tap Your timeline. You can find your timeline in this menu. Google; William Antonelli ...
Launch Google Maps on your iPhone. Tap Search here → enter your destination and tap Directions . Select the three-dots button from the top right corner. Tap Set depart or arrive time. Now scroll down the date and time and tap Done to change the departure time.
iPhone: Google Maps got a handy new update today that adds in an extension so you can quickly check the travel time to your home or work from the Notification Center. It also adds in improved ...
A new feature called "Travel Time" has appeared in Google Maps, allowing users to estimate the area they can reach on foot or by car within a given time frame. Google Maps is an extremely popular ...
How to use Google Maps, Waze and Apple Maps to avoid traffic. ... leaving at 20:10 reduces the overall travel time to one hour. ... iOS 18 Notes — 5 biggest changes coming to your iPhone.
As intuitive as Google Maps is for finding the best routes, it never let you choose departure and arrival times in the mobile app. This feature has long been available on the desktop site, allowing you to see what traffic should be like at a certain time and how long your drive would take at a point in the future. Fortunately, Google has finally added this feature to the app for iPhone and ...
On your iPhone or iPad, open the Google Maps app . Open Google Maps. If you don't yet have the app, download it from the App Store. ... Each route shows the estimated travel time on the map. Google Maps transportation modes. You can get directions for different modes of transportation in Google Maps. Learn about the differences in features ...
Step 3: Tap 'Directions'. Select the 'Directions' button to start creating your route. The 'Directions' button usually appears at the bottom of the screen. If you can't see it, you may need to tap on the location name or address to make it appear.
The fact Apple Maps is pre-installed on every iPhone also gives it a narrow edge over Google. And with essential feature like offline navigation now on offer, and topographic maps with hiking ...
The fire tracker provides a map with pinpoint locations of each fire and shows where red flag warnings are in effect, among other information. You can also click on each point to see detailed ...
Traffic data: Google Maps, adjusting travel time and "Commute" feature. Public transportation: Google Maps, notes where crowds are. Discovery: Google Maps as Google itself has more information ...
Select a Google contact from the list and Share, and they get an alert actually inside Google Maps. Or tap an app other than Google Maps, and then a contact inside that app, which sends a link to ...
For summer trips overseas, a smartphone is essential for most people. How else to check Google Maps to find your Airbnb, or post an Instagram video of the view from the Eiffel Tower? ... Apple got rid of the SIM card tray starting with the iPhone 14 released in September 2022. ... or — for phones with the capability — use two at the same ...
Maps gets better year after year, and with iOS 18 that streak looks set to continue. The variety of additions serves a diverse set of needs, and offers more versatility in the app that many iPhone ...
Google Maps Timeline is a personal map that helps you remember routes and trips you've taken and places you've been based on your Location History. You can edit your Timeline at any time and delete your Location History in Timeline. If you have settings like Web & App Activity turned on and you turn off Location History or delete location data from Location History, you may still have location ...
Google Maps is an indispensable app for navigating the world. Its accurate maps, real-time traffic updates, and turn-by-turn directions make getting around effortless. The search function is robust, helping users find businesses, restaurants, and attractions with ease.
A useful feature, Travel Time, has appeared in Google Maps, which allows you to estimate the area you can reach on foot or by car in a given time. Google Maps is an extremely popular service that ...