


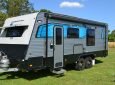
Most Common Problems with Jayco Journey & Their Solutions
Every travel trailer has problems, and it’s essential to have a clear idea about the problems and their solutions. When discussing the Jayco Journey, you may also have to deal with some issues. Some problems are minor, whereas others can cost you a lot of money.
But what are the most common Jayco Journey problems? The most frequent problems with the Jayco Journey are water leakage, a cracked or leaky roof, a noisy water pump, stuck windows, rusting gas cover handle, unfinished edges, and more. So doesn’t the Jayco journey seem pretty problematic?
Once you discover issues with your Jayco Journey RV, you must act to resolve them. Fortunately, this blog covers the troubleshooting guide for the most common Jayco Journey problems.

What Are The Common Problems With The Jayco Journey?
It’s natural to face some issues with the Jayco Journey travel trailer. However, after serious discussions with the users, we have sorted out some of the critical Jayco Journey issues.
Moreover, the Jayco Journey is known to have some difficulties within a short time. Let’s see the most irritating problems below.
- Water leakage
- Faulty braking system
- Unfinished edges
- Leaky/cracked roof
- The door comes inside the caravan
- Oil spots beside the kitchen area
- Noisy water pump
- Scrubbed out tires
- Wear and tear on the exterior
How Do You Troubleshoot and Fix Jayco Journey Problems?
You’ve got some ideas about the possible problems with the Jayco Journey caravan.
Now, you will find a lot of ease while troubleshooting the issues. We will also demonstrate the causes and symptoms of the issues below.
Read Also: 4 Common Jayco Eagle Problems & Solutions
Problem 1: Water Leakage
Water leakage is one of the significant problems with any travel trailer. Unfortunately, the issues have become more frequent regarding the Jayco Journey as well.
Extreme water leakage can cause many problems. For example, you may notice flooring damage and corrosion in different parts of the RV.
What Causes Water Leakage On Jayco Journey?
Many possible reasons can cause water leakage problems on the Jayco Journey. However, if the water pump of the Jayco Journey goes bad or is damaged, it will cause the issue of water leakage.
Some of the symptoms of water leakage include:
- Broken water pipe.
- Damaged roof seals and loose sealant.
- Faulty window or door seals.
- Cracks and gaps on the walls.
How To Fix Water Leakage On Jayco Journey?
You should start the water leakage troubleshooting by discovering the source of the leakage. If the water pump or tank goes bad, you should also inspect it.
- Check where the water comes from by checking all the possible leakage sources.
- Next, check the water pump to see any additional damage.
- Repair the roof seams if they go bad or there are significant gaps.
- Replace the door and window sealants if they are leaking.
- If the water pump becomes faulty, replace it with a new one.
- Finally, repair or replace the leaky water pipe.
- Repair the kitchen sink with tape if it becomes damaged.
How Much Does It Cost To Fix Water Leakage On Jayco Journey?
The cost will depend on what causes the water leakage problem on the Jayco Journey. However, you may need to spend around $500-$600 on average. The cost increases because of the faulty water pump or tank.
- Mechanical Cost: $250-300$
- Parts/Replacement Cost: $250-300$
Read Also: Common Jayco Outback Problems & Solutions
Problem 2: Faulty Brake Control System
Unfortunately, you will notice the braking system of the Jayco North Point being faulty on some occasions. Moreover, the majority of the problems are with the electrical braking controller.
One of the most common symptoms of a faulty electrical braking system is that it weakens over time. So, this type of problem needs to be fixed immediately.
What Causes A Faulty Brake Control System On A Jayco Journey?
Before that, let us remind you of an important fact: the Jayco Journey has one brake for its four wheels. However, the electronic braking system Jayco Journey has always been a disturbing fact.
One of the most common reasons for this problem is broken wires. Some of the other causes of the issues are:
- Poor electrical connection
- Broken wires.
- Corroded connection.
- Undersized brake cabling
- Broken brake component.
- Faulty brake controller.
How To Fix A Faulty Brake Control System On A Jayco Journey?
First, you need to check the electrical connection of your Jayco journey brake system. No change in the braking system functions appropriately if there is insufficient connection.
- Cheek the electrical connection of the brake to see whether there is enough voltage.
- If there is voltage loss, you must supply additional voltage to the electrical magnet.
- Check whether there is a corroded connection.
- Clean and repair the corroded connection.
- Check the brake cabling.
- Replace the undersized brake cabling with 100% copper.
- Check all the brake components and parts.
- Check the broken wire.
- Repair or replace it based on the type of damage.
- Replace the brake component if there is severe damage.
- Test the brake controller.
- Replace or repair the controller based on its condition.
How Much Does It Cost To Fix A Faulty Brake Control System On A Jayco Journey?
The repair cost will vary because there are quite a few issues that can cause a faulty brake system on the Jayco Journey. But, on average, fixing the braking system issues can cause you around $300-$600.
- Mechanical Cost: $100-$200
- Parts/Replacement Cost: $200-400
Read Also: Common Jayco North Point Problems & Solutions
Problem 3: Unfinished Edges
The unfinished edges can be another most visible issue regarding the Jayco Journey. Nonetheless, some users find it unexpected to discover a case like this with Jayco. You can notice the unfinished edges around the buck beds.
However, the unfinished edges sometimes decrease the interior beauty of the travel trailer. Besides, if you have children, the unfinished edges can also hurt them.
What Causes Unfinished Edges On The Jayco Journey?
Users find the problem of the unfinished edge in different stages of their user journey. However, if the wood around the bunk bed area is This is more likely to happen due to careless finishing while manufacturing the travel.
But, it can also happen that, as time passes, the finished wood becomes damaged and causes unfinished edges.
How To Fix Unfinished Edges On Jayco Journey?
First, you need to check the condition of the edges. Based on that, you should repair the edges. In most cases, you will find unfinished wood edges around the bunk area of the caravan.
So, in this case, you need to repair the edges and give them perfect shapes. Furthermore, repairing won’t do; it would be better if you made new edges and fitted them around the bunk area.
How Much Does It Cost To Fix Unfinished Edges On Jayco Journey?
Luckily, you don’t need to spend too much money to fix unfinished edges on the Jayco Journey. On average, it costs around $50-$100, depending on the finished problems.
- Mechanical Cost: $20-$30.
- Parts/Replacement Cost: $30-$70.
Read Also: Common Jayco White Hawk Problems & Solutions
Problem 4: Leaky Roof
Roof leakage is another irritating problem, and it becomes more acute when heavy rain or damage occurs. However, we have seen this issue with most Jayco travel trailers.
The most common symptom of a leaky roof is that you will notice water drops from the roof down to the floor when there is rain. You may also see the crack from the inside part of the roof.
What Causes a Leaky Roof On A Jayco Journey?
Among the few important causes, the harsh weather conditions are a culprit behind roof leakage or cracked issues.
You need regular maintenance to keep the roof protected from bad weather. So, lack of care can be another reason for roof leakage. Other possible causes are:
- Unexpected damage.
- Poor roof seals.
- Puncture in the roof membrane.
How To Fix a Leaky Roof On A Jayco Journey?
One thing is clear: you need to be careful about the roof maintenance on Jayco’s journey. Use the travel trailer roof cover when it is extremely hot or rainy.
Furthermore, follow the below steps carefully.
- Clean the roof.
- Check the damage.
- If the damage or crack is extreme, you must apply the proper sealant to the roof.
- Use the rubberized leak stopper if you find tiny holes in the roof. You can also use tape as well.
- Replace the roof seals if they are damaged.
How Much Does It Cost To Fix A Leaky Roof On A Jayco Journey?
It depends on the level of leakage. However, if there are significant issues, fixing a leaky or cracked roof will cost you anywhere from $700-$1500. If you can fix some of the causes on your own, you will save a lot of money.
Always take enough time to fix any of the Jayco Journey Problems . It will be better if you start with the basic causes of any problem. Furthermore, most issues have more than one symptom. So, make sure you are pretty sure about them as well.
Most users often make a mistake waiting for the warranty period to take further steps to fix any problems. But, this is not a good approach. Instead, once you notice the symptoms, you should start troubleshooting the issues.
Besides, never mind calling a professional in this case to fix the Jayco Journey Problems. If you DIY, you’re welcome.
Read Also: Common Jayco Caravan Problems & Solutions

Zayan is an accomplished author and a go-to expert for all things RV and camper-related. With a passion for adventure and a knack for problem-solving, he has spent years exploring the open road and fine-tuning his knowledge of recreational vehicles.
Zayan’s writing is a testament to his expertise, offering readers practical solutions to common RV dilemmas. Whether it’s troubleshooting mechanical issues, optimizing space, or planning the perfect road trip, Zayan’s insightful advice and engaging storytelling make him an invaluable resource for both seasoned travelers and newcomers to the world of RVing.
Similar Posts

5 Common Problems with Nash Travel Trailer and Their Fixes
Nash travel trailers are a great choice of RV if you want to give you both quality and durability. The thick aluminum walls and shock absorbent foam make this a solid unit. However, occasionally Nash…

9 Common Problems with Alpha Wolf RV (Troubleshooting Tips)
Many avid campers opt for spacious vehicles like Alpha Wolf RVs and motorhomes. These RVs are equipped with premium features to make the campers’ trip enjoyable and comfortable. However, even this remarkable vehicle is not…

What are the Reasons For Jayco Fridge Not Working?
With a Jayco motorhome, you can enjoy your weekend or vacation more comfortably. It might, however, occasionally run into a few refrigerator issues. Some issues are easy to solve, while some require professional help. The…
![5 Common Little Guy Trailer Problems [Solutions Included]](https://campertroop.com/wp-content/uploads/2021/11/Little-Guy-Trailer-Problems-768x509.jpg "jayco journey water tank switch")
5 Common Little Guy Trailer Problems [Solutions Included]
The Little Guy travel trailer manufacturing company is well-known for making small-sized trailers for road trips and camps. Even if these small trailers are very affordable and have so many benefits for you. However, they…

7 Most Common Cruiser RV Problems & Their Solutions
Cruiser RV is popular among users for its best user experience and combined features. They are also very well known for their amazing looks and gorgeous interior design and floor plans. However, they are also…

5 Most Common Problems with Cedar Creek Cottages
Whether you are a frequent visitor to Cedar Creek Cottages or are considering a trip to this beloved vacation spot, it is important to be aware of the potential pitfalls and take steps to ensure…
- Advertise |
- eMagazine Subscription
- Printed Subscription
- Caravan Reviews
- Camper Trailer Reviews
- Motorhome Reviews
- Classic and Vintage Caravans
- Classic Collectors
- Celebrity Campers
- Environment Heroes
- People & History

Review: Jayco Journey Outback
In 2014 Jayco combined the best of two models, the Destiny and the Sterling, into a new caravan, the Journey. It’s grown to become the most popular in the range of Jayco’s pop-tops, and continues to find new fans thanks to a line-up of sought-after features.
The Journey range is divided into two basic groups, those designed more for highway touring and those equipped for tougher operations on less accommodating tracks. Designated as the 17.55-8 and -9 or Outback models, these are the biggest sellers in the Journey range.
Jayco’s pop-top vans have always been popular with those looking for a lower roof line for enhanced aerodynamics, fuel consumption or storage reasons. They are also sought after by buyers who don’t want to fork out for a larger tow vehicle.
Today they’re increasingly an option for couples moving up from something like a camper trailer, or those moving up from tent camping and looking for more creature comforts. With good ground clearance in the Outback models, tougher set-up and a smaller travelling profile than most caravans, they can still be taken to many of the places you once sought with your camper trailer or tent.
The Outback kit including Jayco’s popular JTECH independent trailing arm suspension package with heavy duty drawbar (120mm deep instead of 100mm), a front jerry can holder, black checkerplate panelling over the lower portion of the body, external 12-volt power outlet, galvanised rear bumper bar, gas bayonet fitting to the exterior for use with an external barbecue and 120 watt roof-mounted solar panel. These vans have a much better resale value and give you that element of extra flexibility no matter what circumstances might throw at you.
The Outback fitout also introduces larger 235/75R15 tougher all-terrain tyres on alloy rims in place of the touring 185R14 rubber found on the highway models.
The downside to this is the weight increases by an extra 150kg and the ball weight increases by 25kg, although neither is excessive.
Since they have a shower fitted they come standard with a 100 amp-hour gel battery for the water pump, a second 82-litre water tank, and a second 9kg gas bottle to run the water heater unit.

image by: Brett Goldsmith
All of the 17ft vans, including the 17.55-8 and -9, also come equipped with a Truma air conditioning system. These excellent German-made units do a much better job in extreme conditions and are worth having.
Like all Jayco vans, the tandem axle shower-equipped models have a 475kg of carrying capacity to accommodate the extra water.
The fitout provides for a range of features that are worth having. There are 12 internal layout styles to choose from across the range. One of the attributes brought over from the Sterling was the higher walls. This allows for tinted Dometic double glazed windows built-in blinds and insect mesh.
With the larger windows, zip-out panels in the pop-top walls and a roof-mounted skylight over the bed, the interiors of these vans are bright and sunny.
The fully separate all-in-one bathroom across the rear is the stand out feature. It comes with comfortable layout, plenty of storage spaces and the shower has been improved with a single-piece unit eliminating the risk of leaks.
There are a range of bathroom and kitchen options to choose from. The Outback model as tested came without a normal oven to allow for extra storage, but it is an option. There is a microwave, Smev three-burner gas hotplates and single electric hot plate gas stove with griller underneath.
The extra electric hotplate comes in handy, saving gas when mains power is available, as does the dual-mode water heater. The fridge, which was 110 litres capacity in the Sterling, has now gone up to a standard 150 litre three-way unit.
For sleeping, there’s either an island orthopaedic double bed or two singles, with inner spring mattresses. For peace of mind, all the Journey vans are equipped standard with a Camec security door.
While the Outback vans are designed basically for two, there is a $299 option to purchase an additional cushion and baseboard, which converts the dinette into another bed.
A stand out feature certainly not available in the 1970s is the electrical and entertainment systems. Lighting is all LED and completely wireless. This eliminates the risk of any wiring problems and also means you never have to get out of bed to switch off a light – there’s a remote for that. A USB charging point is standard as well as an 18-inch LED television/DVD player with mounting bracket and wind-up antenna. There’s a Fusion CD/radio system, complete with external speakers.

To complete the outside living experience there’s an optional external shower (with free-standing shower tent if desired) and an external TV socket. To extend your options all Jayco outlets offer an annexe kit.
All the Journey models come with a white Euro-style fibreglass body, with sloping aerodynamic nose. Smart graphics set off the finish and give a sharp style to these vans.
There are so many options to choose from across the range. One certainly worth considering for off roaders is the Coast to Coast Control Panel ($207) which monitors water levels in up to four tanks (two standard plus optional third and waste water tanks) as well as battery charge levels There is also the excellent Al-Ko Electronic Stability Control to keep your van where it belongs, as well as a longer A-frame, Tregg offroad polyblock coupling, and leather seat coverings.
Pop-tops have come a long way since the first humble camper was introduced by Jayco in the 1970s and they remain as popular as ever. The reason for that is undoubtedly due to their value for money in terms of quality, resale value and great list of standard features.
At $41,563 RRP as tested, it is excellent value.
Link: Read the full review and specs in Issue 15 of Time to Roam .
Review by David Cook.
REDARC Lithium In-Vehicle Charger
Uniden jump start kit, related posts.
Review: Coromal Element E661s Slide Out

Review: Winnebago Burke

Review: Living Edge Venetian

Review: Jayco Conquest Renault
STARCRAFT POP TOP
Journey pop top, all-terrain pop top, all terrain, basestation, jrv campervan, optimum campervan, all terrain campervan, conquest motorhome, optimum motorhome, a guide to your jayco rv: how to use your water tank hand pump.
A hand pump is a great addition to any RV and is perfect to use when off-grid camping.
It allows you to access the water tank onboard without having a mains water connection.
In the following video, Chris will be demonstrating how to use the hand pump fitted in a Swan Outback camper trailer.
These instructions are applicable to all Jayco Camper Trailers .
Step-by-step guide to using the hand pump:
To operate the hand pump, simply pump it up and down slowly.
Keep in mind that it may take some time for the water to come through.
That’s how you operate the hand pump.
For more information, tips, or guides, please visit https://www.jayco.com.au/community/category/how-to-guides
Jayco E-Newsletter
IMAGES
VIDEO
COMMENTS
Date: 05:11 PM May 5, 2015. Permalink. hi Steve , the pointer at 12 o'clock = both tanks off , pointer at 3 o'clock = front tank , pointer at 6 o ,clock = both tanks on, (water being drawn from both tanks at once ) pointer at 9 o'clock = rear tank. when trying to fill one tank only do not have both tanks turned on as you will find that one tank ...
homer1959. Senior Member. Join Date: Dec 2014. Location: Lachute. Posts: 936. no power at pump, water heater switch panel. jayflight 29rks. I have the common switch panel containing the tank level indicator and the 3 switches for the water pump and the water heater electric/gas . went to turn the on the water pump switch today and noticed that ...
Posts: 7. Water pump switch. I have a 2022 Jayco Seneca 37K that we recently purchased. Getting ready to travel and was sorting out the water system and found that the only switch for the water pump is on the nautilus panel. Sounds a little unusual to not have any switches in the kitchen or restroom so you could turn it on inside.
About Press Copyright Contact us Creators Advertise Developers Terms Privacy Policy & Safety How YouTube works Test new features NFL Sunday Ticket Press Copyright ...
Then look to see what the fuse # is for. If no one can answer what this switch is for, contact Jayco with your vin number and ask for the 12 volt drawing. If they ask why, say you have a switch that you cannot determine what it is for, and the dealer does not know ether. I am confident they will send you the schematic.
The More you Know with Jayco - Tanks & Plumbing - Jayco RVFeaturing:Randy Zonker | Towable Factory Service ManagerDoug Moats | Communications and Public Rela...
Step 3. Remove the protective cap and insert your hose. Step 4. Turn on the tap to begin filling up your tank. The tank is full once water begins to trickle out of the breathers above the water fillers. Step 5. Once your tank is full, turn your tap off and pull the hose out. Step 6. Cover the inlet and shut the door.
All Jayco RVs are fitted with a single, double, or triple water filler.In this guide, Chris show's you how to fill your water tanks and connect to the water ...
Jayco , Silverline grey water tank mods, Inspection port ---- done that, Float switch and LED light ----- done that. Further mounted grey water tank between suspension N-S, Fitted a buffer tank to the washing machine outlet, and connected then via grey water tank, only one grey water hose required, Fitted grey water outlets on both sides of the van.
2022 Jayco Precept. Table of Contents Operating the Leveling System 41 Manual Operation 42 ... 12-volt Water Pump and Switch 100 Draining The Fresh Water System 101 Exterior Fresh Water Drain ... Black/Grey Water System and Tanks 116 Black and Grey Tank Drains 118 Black/Grey Tank Drain and Valves
2022 Jayco Swift Section 1: Warranty & Service About This Manual 4 Warranty Packet 4 ... Automatic Transfer Switch (ATS) 48 Load Center 49 120-Volt Circuit Breakers 49 ... Black/Grey Water System and Tanks 78 Black and Grey Tank Drains 80 Black Tank Flush (if so equipped) 81
Water Pump Switch. Purchased a 2013 26BH new last year. Love the camper, used it often. Never used the water tank/pump combo as we always had domestic potable water available. Planning a trip in a couple of weeks to a place that has water available but you can't stay hooked to it. You must fill your tank and draw from that.
Here is a step-by-step guide to filling the water tanks and connecting the water supply to your Jayco.Visit our website for all of your caravanning needs: ww...
Step 2. To turn on your hot water system, simply press the 'HWS' button. This will provide you with access to hot water. Step 3. To operate your water pump, press on the 'PUMP' button. In this case, the battery is sitting at 13.3 volts (6.9 amps). Underneath this, the battery type is displayed on the screen.
Moreover, the Jayco Journey is known to have some difficulties within a short time. Let's see the most irritating problems below. Water leakage. Faulty braking system. Unfinished edges. Leaky/cracked roof. The door comes inside the caravan. Oil spots beside the kitchen area. Noisy water pump.
Calculate their value and see how Jayco measures up. At Jayco, we pack a ton of extra value and standard features into our units that other manufacturers don't, making travel more fun for owners while saving them time and money in the long run. We call it the Jayco Difference.
Aqua Hot Overflow Tank Switch fail I guess a few weeks ago when I cleaned the system and replaced the control thermostat, I did not completely get the system filled properly to capacity. Having only used the water heater function and basement heater, never had the chance to run the zone 1 and 2 flows/circulation pumps long enough.
At $41,563 RRP as tested, it is excellent value. Link: Read the full review and specs in Issue 15 of Time to Roam. Review by David Cook. REDARC Lithium In-Vehicle Charger. Uniden Jump Start Kit. In 2014 Jayco combined the best of two models, the Destiny and the Sterling, into a new caravan, the Journey. It's grown to become the most popular in...
The hand pump gives you access to your water tank in your Jayco Camper Trailer. It's perfect for off grid camping! Here's how to operate the pump.Follow our ...
Just bought a used 2012 X213. You think I can find the switch to turn the hot water tank on? Can anyone help.? I see the manual lighting method with the pilot light etc. Is there not an electronic toggle switch somewhere? My old trailer had one on the control panel where the pump switch was. This trailer diesnt have on there. Please help. Pete
Blanchy demonstrates how to fill & empty the water tanks on your Jayco. For further information please contact us on 02 4028 0111 or at [email protected]...
These instructions are applicable to all Jayco Camper Trailers. Step-by-step guide to using the hand pump: Step 1. To operate the hand pump, simply pump it up and down slowly. Keep in mind that it may take some time for the water to come through. That's how you operate the hand pump.
Join Date: Mar 2016. Location: Colorado Springs. Posts: 29. Tank Heater Switch. Greetings all, In the bathroom of my 2015 Greyhawk 29MV is a rocker switch that is labeled "Tank Heater". (I am sure it is not the hot water heater because my unit came w=equipped with the tankless hot water system ...) The manual doesn't say which tanks is/are ...