- Entertainment
- PlayStation
- Elden Ring Guides
- Roblox Codes
- Pokemon Legends Arceus
- Privacy Policy
- Terms of Use


Warzone 2 DMZ Pathfinder Mission Guide: How to Travel to Every POI in Al Mazrah in One Deployment
Contrary to talk about easier missions , the Pathfinder mission in Warzone 2 DMZ is quite the task. You first need to know where the Zaya Observatory dead drop is, then travel to every POI in Al Mazrah, then successfully exfil. All of this is easier said than done in DMZ , but that’s why you have us.
Where to Find the Zaya Observatory Dumpster Dead Drop in DMZ
For specific instructions on where to find the Zaya Observatory dead drop , check out our pinpointed guide .
For your convenience, the Zaya Observatory dead drop is located in the northeast section of the POI, directly under a burger sign . See the image below for the exact location.

Once you’ve located the Zaya Observatory dead drop, open it and stow the GPS in your backpack . With this stored, you can now visit all 17 POIs for the next task.
How to Travel to Every POI in Al Mazrah While Carrying the GPS Tracker in One Deployment in DMZ
While traveling to all 17 POIs in Al Mazrah may seem too challenging, it’s doable if you follow these specific instructions .
For starters, you need to get an armored vehicle . This will help you not take personal or vehicle damage that will end your trip abruptly.
Related: Warzone 2 DMZ Convenience Mission Guide: Where to Find a Gas Can
With the Zaya Observatory POI checked off, drive your vehicle through Al Sharim Pass and then up through Mawizeh Marshland . You are now ready to hit the rest of the POIs in an orderly manner.
Visit Al Mazrah City and the rest of the POIs by rotating counter-clockwise . Be sure to not miss any POIs as the last thing you want is to see 16 out of 17 POIs after you thought you found them all.
The best pieces of advice to keep in mind is to skim the outsides of POIs looking for the “POI visited” message . When you get that, you can move on to another POI. Also, visit gas stations that don’t have enemies as often as possible. If you want to make it in one trip, you’ll need more gas and health.
How to Extract the GPS Tracker in DMZ
Once you have visited all 17 POIs, you now need to exfil as soon as possible . If you don’t exfil successfully, you’ll need to restart this mission from the beginning.
Look for an exfil location that isn’t particularly hot with NPCs or online players. Patiently wait for your exit helicopter, board the bird, and you’re home free. It’s as easy (and as difficult) as that!


How to Travel to Every POI in Al Mazrah in Warzone 2 DMZ

In the first season of DMZ, you get to chase Weapons Cases, eliminate enemy squads, solve Building 21, and more.
The path to the season 2 update contains new locations, a refresh and reset, and a new faction.
Ashika Island is a brand-new Exclusion Zone where players will invade the shores before making their way inland.
The occupying force, Shadow Company, and operators are concealed under heavy fog.
In season 1, Building 21 has an access card and a timed infiltration window.
Operators will return to Building 21 in season 2 and if you need access cards, you need to look for them in Al Mazrah of Ashika Island.
The update also includes developments to Al Mazrah with updated intel.
In this guide, you’ll learn how to travel to every POI in Al Mazrah while carrying the GPS tracker in one deployment in Call of Duty: Warzone 2 DMZ.
How to travel to every POI in Al Mazrah in Warzone 2 DMZ
To travel to every POI in Al Mazrah Warzone 2 DMZ, you must first loot the GPS tracker from the Dead Drop in Zaya Observatory.
After you’ve looted the GPS tracker, you need to travel to every point of interest (Zaya Observatory, Ahkdar Village, etc.).
It’s highly recommended that you pilot a Light Halo for this.
- Loot the GPS tracker
- Travel to every POI in Al Mazrah
1. Loot the GPS tracker

Screenshots: GuidingLight
How to loot the GPS tracker (expand the screenshots above):
- Go to the northeast of Zaya Observatory (F5).
- Loot the GPS tracker in the white dumpster.
2. Travel to every POI in Al Mazrah

How to travel to every POI in Al Mazrah:
- Find and pilot a Light Halo or a ground vehicle.
- Travel to all 17 points of interest.
- Extract the GPS tracker to complete the mission.
List of the 17 POI:
- Taraq Village
- Al-Mazrah City
- Zarqwa Hydroelectric
- Al-Safwa Quarry
- Mawizeh Marshlands
- Sattiq Cave Complex
- Al Sharim Pass
- Zaya Observatory
- Sa’id City
- Ahkdar Village
- Al Malik Airport
- Al Samman Cemetary
- Sawah Village
- Al Bagra Fortress
Further reading
How to Loot the GPS Tracker from the Dumpster Dead Drop in Warzone 2 DMZ
How to Place Tactical Cameras Watching 2 of the Entrances in One Deployment in Warzone 2 DMZ
How to Drop the Hard Drive in the Waterways Dead Drop on Ashika Island in Warzone 2 DMZ
You may also like

How to “Wait for Mizhi to wake up” in Wuthering Waves

How to Get or Use Casket Sonar and Sonar Circuit in Wuthering Waves

How to Get Exile Commoner Access Card in Wuthering Waves
About the author.

Lim How Wei
Lim How Wei is the founder of followchain.org, with 8+ years of experience in Social Media Marketing and 4+ years of experience as an active investor in stocks and cryptocurrencies. He has researched, tested, and written thousands of articles ranging from social media platforms to messaging apps.
Lim has been quoted and referenced by major publications and media companies like WikiHow, Fast Company, HuffPost, Vice, New York Post, The Conversation, and many others. One of his articles about the gig economy was quoted by Joe Rogan who hosts The Joe Rogan Experience (arguably the most popular podcast in the world), in the This Past Weekend podcast by Theo Von.
In his free time, Lim plays multiple games like Genshin Impact, League of Legends, Counter-Strike, Hearthstone, RuneScape, and many others. He creates guides, walkthroughs, solutions, and more on games that he plays to help other players with their progression.

- World of Warcraft
- Baldur's Gate
- League of Legends
- Counter-Strike
- Ethics Policy
- Ownership Policy
- Fact Checking Policy
- Corrections Policy
- Affiliate Policy

How to complete the Pathfinder mission in DMZ
In Call of Duty DMZ , you get to complete missions, take on different contracts, and explore different areas on the Al Mazrah and Ashika Island maps. There are four factions in DMZ including White Lotus, Legion, Black Mous, and Crown. Each of these factions offers five tiers of unique missions that you can complete by finishing the objectives. Some of these objectives require you to complete them in a single deployment, making them trickier than others.
The Pathfinder is a Tier Two White Lotus faction mission, and it has three different objectives that you need to complete. This mission takes place entirely on Al Mazrah, so you need to select the map while queuing into the match. For the first part of this mission, you must visit the Zaya Observatory dead drop to collect a GPS tracker. After that, you’ll need to visit all the POIs on Al Mazrah in a single extraction. While it sounds easy enough, this mission can be exceptionally tough if you don’t know how to navigate around the map quickly.
Here’s how to complete the Pathfinder mission in Call of Duty DMZ .
Where to find the GPS tracker in Zaya Observatory dead drop in DMZ
At the start of DMZ , you’ll only have access to Tier One missions from White Lotus. Completing them will unlock Tier Two for White Lotus and Tier One for Legion. The Pathfinder is a Tier Two faction mission, and you need to complete the following three objectives.
- Loot the GPS tracker from the dumpster dead drop in Zaya Observatory
- Travel every POI in Al Mazrah while carrying the GPS tracker in a one deployment
- Extract the GPS tracker

For the first part of the mission, you need to travel to the Zaya Observatory POI and visit the dumpster dead drop on the northern side of the POI. Check the yellow circle on the map image above to see its exact location. Keep in mind that this POI is swarming with AI combatants, and we highly recommend not engaging them before you collect the GPS tracker.
After reaching the area, look for the dumpster dead drop. Open it and you’ll find a GPS tracker. Put that tracker in your backpack. With the GPS tracker in your backpack, you need to visit all 17 POIs on the Al Mazrah map. However, before visiting Zaya Observatory, we suggest you find a vehicle first, preferably a helicopter.
How to travel to every POIs on Al Mazrah in one deployment in DMZ

Traveling to every POI on the Al Mazrah map can be exceptionally difficult if you are on a land vehicle. It is best to find a helicopter for this mission. Some of the POIs where you will find helicopters are Al Malik Airport, Akhdar Village, Al Safwa Quarry, Al Mazrah City, Al Bagra Fortress, and more. After spawning in the game, open your Tac-Map and check around to see a helicopter. Mark the helicopter, and find another vehicle to travel to it quickly.

Before getting on the helicopter, it’s best to find as many gas cans as you can. This will allow you to refuel the helicopter without having to visit any gas station. If you are with teammates, we recommend carrying five gas cans to complete the entire trip around the Al Mazrah map. Alternatively, you can lower the helicopter in front of a gas station to repair and refuel the vehicle.

As for flying around the map, it’s best to maintain a certain height with the helicopter so that enemy operators and AI forces cannot target you easily. After getting the GPS tracker, it is ideal to head south toward the Al Malik Airport, Sariff Bay, and Al Bagra Fortress. This way, you’ll get to travel and visit almost six POIs including Mawizeh Marshlands, Al Sharim Pass, and Akhdar Village.

Keep in mind that there are more POIs on the western half of the Al Mazrah map, so it’s best to cover the ones on the east first. This way, you can fly over the POIs on the west, and eventually visit an extraction point. In case you do not find a vehicle, we recommend getting an ATV and changing it while traveling across the POIs. Remember, Al Mazrah has 17 major POIs and you must visit them in a single deployment to progress in the mission.
Since it is imperative to extract with the GPS tracker to complete this mission, you can head to an extraction point and scout for a while before heading in. Opposing operators tend to camp near exfil points, so you need to check these areas thoroughly. Try not to get eliminated with the GPS tracker in your backpack.

Welcome back!
Sign in or create an account to enjoy GINX perks, enter competitions and access exclusive features.
Your status: free member
Your status: friend, your status: supporter, your status: super fan, your status: producer.
- Counter-Strike 2
- EA Sports College Football
- Dead by Daylight
- Marvel Snap
- Madden NFL 25

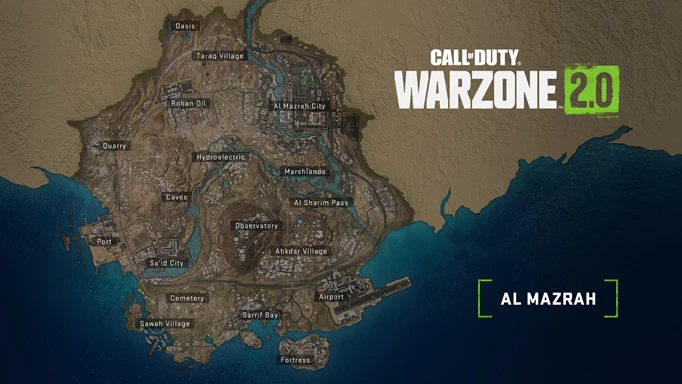
Warzone 2 Map Al Mazrah Guide - All POI Locations
The new Call of Duty Warzone 2.0 map has now been revealed as Al Mazrah. Players will drop into this location and scour the new areas to find Points of Interest (POIs).
Al Mazrah is a large urban area with many houses and winding rivers that allow underwater combat. Players will need to survey every inch of the map to find the POIs, and our guide is designed to help you along the way.
Warzone 2 Al Mazrah POIs List

The new Call of Duty Warzone map Al Mazrah will feature 18 POIs. This has been confirmed by the official Call of Duty website , which also announced that more information surrounding these major points of interest will be coming "closer to the launch of Call of Duty Warzone: 2.0."
Players will need to travel to all these POIs to complete a variety of missions, including:
- Four-player special operations.
- 6v6 squad battles.
- Ground War operations
- 150-player Battle Royales.
- And more...
Find a list of all the major POIs in Warzone 2 Al Mazrah below, complete with images and an official description of each:

"Several pools of fresh water and palm trees offer respite from the desert beyond it. Note the ancient ruins — this small area was once a means of life in a bygone age."
Taraq Village

"A United Offensive reduced this once peaceful village to mere Rust and rubble. The tight confines of these areas make it conducive to small squad combat, especially duels."

"One of the largest employers in the region, the Rohan Oil refinery is positioned strategically near some of Adal’s oldest petroleum derricks. Note the living quarters to the north and south of this otherwise sprawling factory."
Quarry (Al Safwa Quarry)

"Massive deposits of limestone make the Quarry one of the three largest industrial areas in Al Mazrah, with nearly a dozen warehouses and hundreds of individually chiseled stone blocks."
Al Mazrah City

"The past 100 years of Adal history encapsulated: High rises and modern buildings are at the core of the largest point of interest in Al Mazrah. It was planned to be the ideal city — it soon welcomed nearly a million people, who were pushed out to the slums on the outskirts."
Hydroelectric (Zarqwa Hydroelectric)

"The cradle of civilization now comes full circle to the modern era with the advent of renewable energy. A mix of historical landmarks, midcentury living arrangements, and modern industrial buildings are scattered around the rivers that create electricity for this small town, as well as for the entire region."
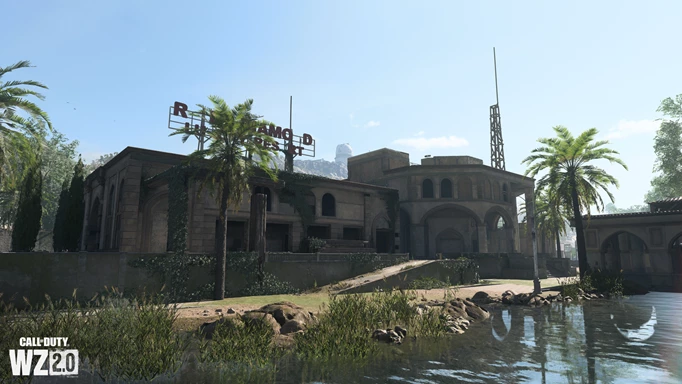
Marshlands (Mawizeh Marshlands)

"The Marshlands was once the home of the ambitious River Diamond Luxury Resort in the 20th century. Now, due to rising river levels, it and the town around it are completely flooded, both with water from the rivers and trash flowing from the city to the north."
Caves (Sattiq Caves)

"A deep network of underground hideouts lies in plain sight of a small village — where a plane once crashed — built on the mountainside. Elsewhere, a tall communications tower and small collection of homes span back toward the Quarry."
Observatory (Zaya Observatory)

"Atop the tallest mountain in Al Mazrah, several Domed structures, including a destroyed one, help the region chart out the stars. Note the research facilities between each of the observation buildings."
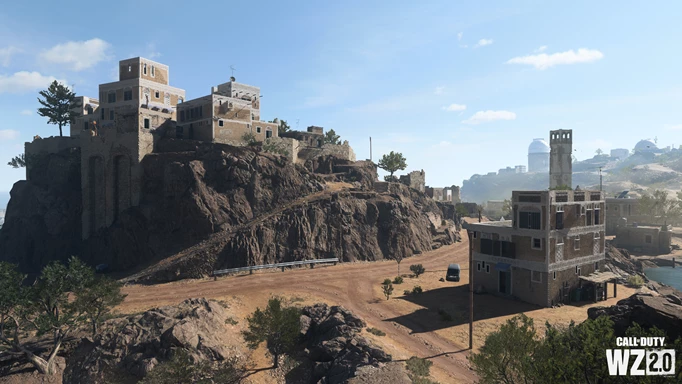
Al Sharim Pass

"This old monastery and mausoleum overlook a modern village and zoo. The tallest hill contains several modernized buildings over the rest of the area, partially destroyed due to the elements and the war."
Ahkdar Village

“'An Old Town Fit for a Showdown,' as one writer covering an old coup once wrote. The world heritage site consists of a central courtyard, and market areas define the western half, while more modern apartments make up the east."
Sa’id City

"An extensive modern mall is juxtaposed by old apartments that housed generations of port workers. The area also contains a medieval-themed carnival and a minor league football stadium."
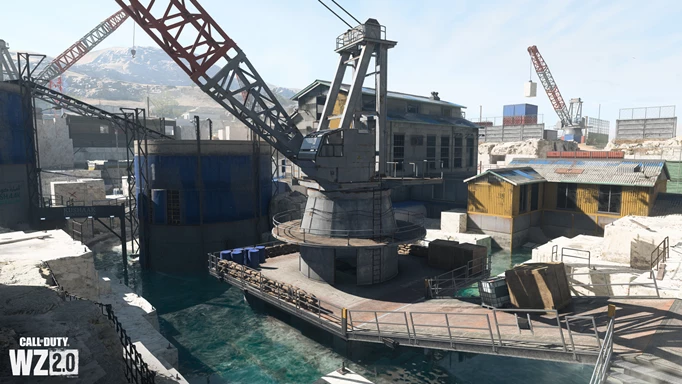
Port (Hafid Port)

"The Port is the economic gemstone of Al Mazrah, ending the Rohan Oil pipeline out to the greater seas. Several large warehouse structures can be found inland, while the Port itself has little containers due to the international economic restrictions for the region."
Sawah Village

"Rising sea levels caused this once-bustling coastal village to be submerged underwater, with a crashed freight ship being a symptom rather than the cause of the evacuated population."
Cemetery (El Samman Cemetery)

"A monument to the fallen, a significant graveyard is now mostly derelict and unkempt, especially with a collapsed water tower flooding dozens of graves. The area is completely open to the elements, with a broken stone wall defining its boundaries."

"Home to the country’s valuable fisheries, this Bay maintains the history of Al Mazrah, as well as Adal. It contains a vibrant downtown section with suburbs, a modern resort, and a few small islands."
Al Bagra Fortress

"The definition of the region’s medieval history, this walled island city was a museum dedicated to displaying its cultural significance up until occupation. Note the large crab factory on the east end, a spillover from the adjacent Sariff Bay."
Airport (Al Malik Airport)

"Al Mazrah is the largest map yet to be seen in Call of Duty Warzone and Call of Duty as a franchise. This is necessary to facilitate the 150-player Battle Royales coming to the game."
For more Call of Duty news , be sure to check out our dedicated section or some of our Warzone 2.0 and Modern Warfare 2 Guides & Tutorials below:
Warzone 2.0 Guides - Map Al Mazrah Guide | Map Size | All Killstreaks Explained | Unlock All Operators | New Reporting System | Prestige Ranks, Cap, Rewards | New Battle Pass System | All New Operators List | Victus XMR Sniper Rifle Unlocking Guide | Backpack & Looting Explained
Modern Warfare 2 Guides - Jack Links Skin | Unlock All Operators | Check Server Status | Get Twitch Drops | Post-Credit Scene Explained | Unlock Gold Camo | Get Burger Town Operator | MGB Nuke | Unlock Every Weapon | All Killstreaks | Safe Code Locations | Check KD Ratio | XP Farm Trick | Chopper Gun Glitch | Weapon Tuning | Change Name Color | Hardcore Tier 1 Mode | Turn Off Crossplay | Steam Deck |
Featured image courtesy of Activision.
For more on Call of Duty: Warzone 2 , check out be sure to check out our dedicated section and learn more with some of our Warzone 2 Guides & Tutorials below:
Warzone 2 Battle Royale Guides - Map Al Mazrah Guide | Map Size | All Killstreaks Explained | Unlock All Operators | New Reporting System | Prestige Ranks, Cap, Rewards | New Battle Pass System | All New Operators List | Victus XMR Sniper Rifle Unlocking Guide | Backpack & Looting Explained | Skill-Based Matchmaking | PC Specs | Check Server Status | Unlock Zeus & Mortal's Bane | Locked On The Menu Issue | CDL Packs | Blackout Roze Operator Skin | BAS-P SMG Unlocking Guide | Weapon Balance Changes | Hidden Money Chests | Unlock Gaz and Klaus | AQ Soldier Kills |
Warzone 2 Tier Lists - Best Weapons Tier List | Best Assault Rifles (AR) Tier List
Warzone 2 DMZ Mode Guides - Factions & Missions | Contracts & World Activities | DMZ Faction Rewards | Interrogation Guide | Factions Rewards | Unlock UAV Towers | Find Stronghold Keycards | LAG & Stuttering Fix |
Warzone 2 Class Setups - Best Meta Loadouts | Best Long Range Loadouts | PDSW 528 Loadout | M4 Loadout | FSS Hurricane Loadout | TAQ-56 Loadout | MCPR-300 Loadout | Kastov 762 Loadout | RPK Loadout | Lachmann Loadout | EBR-14 Loadout | RAAL MG Loadout | SP-R 208 Loadout |

Written by Ruel Butler
Ruel is a freelance writer who has content published on multiple esteemed sites, including Den of Geek , QooApp , FandomSpot , ZenPlus , and more. He is a full-time gacha fanatic who is currently addicted to Honkai Star Rail . While waiting for his Trailblaze Power to recover, he'll spend the time reaching Infinite rank in Marvel Snap or battling the latest Tera Raid Den in Pokémon Scarlet and Violet . A lover of all things Nintendo and anime, Ruel is ready to cover the latest releases and anything new that catches his eye! You can also reach him at ruelbutler.com .
Follow me on:
- GreatNewsGamer
- Jan 11, 2023
DMZ AL MAZRAH INTERACTIVE MAP - ALL LOCATIONS (SPAWN, POI, MISSION AND MORE)
Looking for a one-stop map for DMZ Al Mazrah? Look no further. This interactive map lets you select mission, spawn, dead drop locations and more.

This interactive map covers everything you'll need in DMZ Al Mazrah. Use the drop down menus to select what you are looking for. It'll guide you to your next Mission location or tell you where the enemy teams spawn.
Credit for the map goes to Map Genie . This site allows users to edit and update video game maps from Call of Duty to World of Warcraft.
Credit: Map Genie
Related Posts
Modern Warfare Zombies Kar98K Camo Challenges Season 4 (MWZ)
How to Watch the Call of Duty: Black Ops 6 'The Truth Lies' Live Action Trailer
First Look at Black Ops 6 Gameplay Showcases Upcoming Zombies Mode
Comentarios
- Call of Duty
- League of Legends
- Genshin Impact
- Mobile Legends
- Honkai Star Rail
- Counter-Strike 2
- Street Fighter
- Partner with us
Warzone 2.0 map guide: All locations and POIs in Al Mazrah
Feel the desert heat!

Coinciding with the highly-awaited release of Modern Warfare 2 , Call of Duty ‘s free-to-play battle royale game Warzone gets a solid makeover with a brand new map, Al Mazrah .
Departing from the tropical breeze of Caldera, Warzone 2.0 now embraces the desert heat of Al Mazrah, located in the fictional republic of Adal. With new towns, landmarks, and stone ruins in place, players will have brand new locations to learn.
Some of these locations are also maps in Modern Warfare 2, so those who already dabbled in multiplayer should find them quite familiar.
Here’s a quick guide on all the locations you need to know in new Warzone 2 map, Al Mazrah.
A guide to the new Warzone 2 map and its POIs

Sector 1: Al Mazrah Northwest

- Zone 1A: Oasis
- Zone 1B: Taraq Village
- Zone 1C: Western Foothills
- Zone 1D: Rohan Oil Refinery
- Zone 1E: Al Safwa Quarry
In the northwest region of Al Mazrah, players will find a sprawling landscape of oases, roadside ruins, and three major locations: Taraq Village, Rohan Oil Refinery, and Al-Safwa Quarry.
Taraq Village looks to be the safest place to drop, loot, and hole out for a quick ambush. The POI has plenty of structures that provide you with cover, vantage points, and hiding spots.
If you’re looking for quick loot and fast fights, Rohan Oil is the place to be. The oil complex is primarily an open area with tents and worker housing on the sides. Opponents can climb up the numerous silos and tanks so always keep an eye out for trigger-happy snipers.
Similar to Rohan Oil, the Al Safwa Quarry is a vast industrial complex nestled deep in the western foothills of Al Mazrah. If you’re looking to get a nice vantage point for enemies in the open, it’d be best to land in the Upper Mountain Compound. However, your best bet for loot would be right in the middle of the complex where the cranes and factories are.
Sector 2: Al Mazrah Northeast

- Zone 2A: North Industrial
- Zone 2B: Western Outskirts
- Zone 2C: Al Mazrah City
- Zone 2D: Eastern Outskirts
- Zone 2E: Southern Outskirts
- Zone 2F: Zarqwa Hydroelectric
- Zone 2G: Mawizeh Marshlands
- Zone 2H: East Suburbs
Sector 2 features the map’s dense metropolitan district, Al Mazrah City. You can expect a plethora of buildings that you can explore, including a police station, highrise buildings, and even an embassy, potentially making it the map’s biggest hot drop.
If the bustle of city life isn’t for you, you can head over down to the East Suburbs, where you might have a quainter looting spree. The location is home to a market, a strip mall, and a freeway that cuts through the whole town.
Zarqwa Hydroelectric is another important location that you need to know for map rotations. The village has a handful of historical landmarks, housing complexes, and industrial buildings. Since Zarqwa’s near the middle of the map, you can expect straggling Operators and squads to eventually make their way here once the ring closes.
Sector 3: Al Mazrah West

- Zone 3A: Sattiq Cave Complex
- Zone 3B: Hafid Port
- Zone 3C: Sa’id City
The west sector’s crown jewel is a deep network of underground hideouts right under the town of Sattiq. The Sattiq Cave Complex is a great place to sit tight and catch out opponents unfamiliar with the location’s maze-like structure.
While the exterior of the Sattiq Cave Complex is mostly composed of rundown villages and outposts, players can visit the more established coastal locations of Hafid Port and Sa’id City. Some key landmarks here include the Oil Jetty in Hafid Port and the Soccer Stadium in Sa’id City.
- All new Operator skins coming to Warzone 2.0 and Modern Warfare 2 in Season 1
- The best items to unlock first in Warzone 2.0 and Modern Warfare 2 Season 1 battle pass
Sector 4: Al Mazrah Zaya Observatory and Mountains

- Zone 4A: Northwest Mountain
- Zone 4B: Zaya Observatory
- Zone 4C: Al Sharim Pass
- Zone 4D: Ahkdar Village
Sector 4 is a difficult location to drop at since it’s sandwiched between four other sectors. As soon as the circle closes, you should expect many players to pass through this sector.
Despite being a mid-game hot spot, players can find solid positions at either the Zaya Observatory or Ahkdar Village.
As the highest point of Al Mazrah, the Observatory gives a great vantage point over the entire map. Once you’ve cleared this place out of initial drop-ins, your opponents will have quite the journey to reach the location’s main hub. We’re talking zig-zag roads, bridges, and craggy terrain.
When in Ahkdar Village, you’re bound to be captivated by the sights. The world heritage site consists of a central courtyard, a grand bazaar, and modern apartments. With the POI having tight alleyways and labyrinthic buildings, squads are in for close-range firefights here.
Sector 5: Al Mazrah Southwest

- Zone 5A: El Samman Cemetery
- Zone 5B: Sawah Village
With only two major landmarks, Sector 5 is the perfect location for those who want to avoid fights and play the long game.
The walled El Samman Cemetery can be treated as the initial drop for the southwest region. From this derelict place, you have access to other residential structures in every direction for extra looting.
Just south of the Cemetery, you’ll find the sunken Sawah Village. Al Mazrah’s very own Atlantis, Sawah is home to a few unique landmarks, such as the Covered Market and the beached Oil Tanker.
Sector 6: Al Mazrah South

- Zone 6A: Sarrif Bay
- Zone 6B: Al Malik Airport
- Zone 6C: Al Bagra Fortress
Similar to sectors 3 and 5, the southern region is home to three coastal locations: Sarrif Bay, Al Bagra Fortress, and Al Malik Airport.
While it does have the usual inland district of residential buildings and gas stations, Sarrif Bay has its own Lighthouse Peninsula, Eastern Fishing Bay, and Resort. With swimming now being a mechanic in Warzone 2, you and your squad can take a dip and observe your enemies from the coast.
Al Bagra Fortress is a walled island city situated just southeast of Sarrif Bay. A single roadway by the Bridge and Cistern Entrance leads to it, but it looks like you can also swim your way onto the island’s shores.
Al Malik Airport sees more modern architecture, with multi-story parking lots, warehouses, an airport terminal, and a control tower. When you’re looting, it’d be best to stay away from the long dilapidated runway, the most open area in the entire POI.
Learn more about Warzone 2 with this guide on the new circle mechanic .
Follow ONE Esports on Facebook and Twitter for more CoD news, guides, and stories.
READ MORE: What is DMZ? Warzone 2.0’s new mode detailed
Sign up for a free ONE Esports account and start engaging with other fans!
You'll also receive a monthly newsletter and other goodies!
- Skip to content
- Skip to main navigation
- Skip to 1st column
- Skip to 2nd column

DMZ Missions List and Rewards in Warzone 2 (Season 5)
On this page, you can find the full list of the DMZ missions and rewards featured in Call of Duty Warzone 2 , updated with the Season 4 reset and Faction Mission Refresh .
DMZ is a brand new open-world extraction mode in Warzone 2 where Operator squads have free rein to complete faction-based missions, take on additional side objectives, engage with enemies controlled by other players or AI, and search for valuable items, all while fighting to survive toward exfiltration.
To access the missions you need to go to the dedicated "Faction Missions" menu in DMZ.
You can obtain missions in DMZ from 7 different Factions :
- White Lotus
- Redacted (Season 3)
- Phalanx (Season 4)
- Shadow Company (Season 5)
White Lotus is your starting faction. Each faction gives you missions from different tiers. Once you complete these missions you will unlock other missions from higher tiers or even missions from other factions.
The Crown Faction was added with the Season 2 of the game and it is exclusive to the Modern Warfare II owners. Only the users who own Modern Warfare 2 have access to their mission orders.
Completing a DMZ mission will give you rewards like Bonus XP or exclusive Weapon Blueprints . Missions from higher Tiers offer significant challenges coupled with significant unique rewards.
Here's below the list of all the DMZ missions that you can play in the new extraction mode of Warzone 2, including Tier 1, Tier 2, Tier 3, Tier 4, and Tier 5 DMZ missions .

Full List of DMZ Missions in Warzone:
Here's the full list of DMZ Missions featured in Call of Duty Warzone 2 from the different factions in the game. The list is being updated with the Season 04 reset and Faction mission refresh and Season 5 .
DMZ Shadow Company Missions (Season 5):
Thinning the herd.
- Kill 5 Konni soldiers in Al Mazrah
- Kill 6 Konni soldiers in Vondel
- Kill 6 Konni soldiers in Ashika Island
Deal With The Devil
- Equip a disguise
- Buy an item at the Scavenger's buy station while wearing the disguise
Abandoned Vehicle
- Acquire the key to the MRAP by finding it or purchasing it at a buy station
- Unlock and secure the MRAP
- Kill 10 enemies in radiation with headshots from over 35 meters
Battle Plans
- Dead drop 3 Konni battle notes
- Dead drop 3 cargo ship instructions
Wings Clipped
- Kill 3 reinforcement helicopters on Ahika Island
Unregistered Cargo
- Clear all hostiles on the ship to the southeast of Al Bagra Fortress
- Investigate the contents of the shipping containers
Cutting It Close
- Exfil a hostage at the final exfil
In Good Health and Spirits
- Revive a downed enemy with a revive pistol
Reconnaissance by Fire
- Kill 7 enemies with the MCPR-300 with iron sights
- Kill 7 enemies with the MCPR-300 with a hybrid sight equipped in the same deployment
- Kill 7 enemies with the MCPR-300 with a thermal sight equipped in the same deployment
- Take the laptop from the Hydroelectric dead drop
- Acquire a Dirt Bike
- Deliver the same laptop to the Zaya Observatory, Akhdar, and Al Sharim Pass dead drops within 3 minutes of the first delivery
Missile Transports
- Locate the remaining missiles using the transportation plans from the Konni ship in one deployment
- Take the 2 IR beacons from the Zaya Observatory dead drop and plant 1 near the first missile
- Plant 1 IR beacon at the second missile
The Old Place
- Kill 8 Konni soldiers in Building 21
- Extract the extraction protocol from Building 21
Konni Secrets
- Find the intel off of Konni's Comb Maker
- Send a false signal for Konni reinforcements at the target location
- Take and extract the combat intel off of the Konni reinforcements
- Acquire a code from a Konni radio from a stronghold while disguised
- Use the code to open the locked closet in the destroyed Zaya Observatory and extract the laptop inside
Learn to Share
- Give your insured weapon to an enemy operator
- Have an enemy operator extract your insured weapon before you exfiltrate
Flight Risk
- Acquire special heavy chopper fuel
- Refuel the heavy chopper
- Exfiltrate the heavy chopper
Unrestricted Access
- Clear 4 restricted zones in the Koschei Complex
- Extract intel found on soldiers in the restricted zones
- Download data from the crashed plane’s black box
- Kill 10 enemies in the Sattiq Caves Complex in the same deployment
- Extract with the black box data in the same deployment
- Extract 8 leftover gas canisters from the exposed Observatory lab
- Find the Konni safe house plans from the Commander Helo
- Throw a decoy grenade into the safe house to flush out the guards
- Extract the intel off of the Konni guards inside
- Kill 15 enemies who are unaware of you from a range of over 40 meters
- Kill 15 enemies who are unaware of you from a range of under 10 meters
Seasoned Commander
- Kill 4 commander without dying
The Ultimate Vehicle Is Team
- Kill 3 operators or commanders from the MRAP
- Destroy 4 reinforcement helicopters from the MRAP
- Destroy the Helo Commander from the MRAP
Collaborative Carnage
- Have an enemy operator kill 5 enemies from a vehicle you are driving
- Collect 2 bounties
- Take the decoy grenade from the Sarrif lighthouse
- Deliver it to the Observatory dead drop
Alliance Exposure
- Find and read the email off the laptop in the 3rd-floor office in Building 21
- Mark a member of the transportation group in their base of operations
- Mark a shipment near their base of operations
Professional Courtesy
- Rescue the hostage from the Building 21 armory
Alpha Decay
- Drill open the secured safe in the Vondel radiation
- Find and extract the gas canister inside
Pay It Forward
- Barter for the defective dog bank from the Scavenger
- Deliver the defective dog bank to the Shopkeeper's dead drop in Koschei Complex
- Extract the classified Konni intel
- Help squadmates complete 5 missions without squad wiping
Insurance Premiums
- Destroy all acquatic vehicles in a Vondel deployment
- Destroy the Bullfrog commander in the same deployment
- Kill the Rhino
- Take and extract the documents from the Rhino
- Extract the deal documents from the cruise terminal office in Vondel
Cartel No More
- Clear the Terminal in Vondel
- Open the 3 safes and search for any gas in the same deployment
- Detonate charges on the 2 cargo shipments outside the Terminal in the same deployment

DMZ Phalanx Missions (Season 4):
Welcome to vondel.
- Active a UAV Tower in Vondel
- Pick up an enemy radio in Vondel
- Kill 3 radio marked enemies in Vondel
Ready To Rock
- Acquire a large plate carrier
- Acquire a large backpack
- Acquire a self revive kit
Cargo Keeper
- Complete a Cargo Delivery contract
- Fully repair and refuel the transport vehicle
- Visit the Cruise Terminal in Vondel
- Visit the Castle in the same deployment
Day at the Zoo
- Travel to the Zoo in Vondel
- Loot 10 containers at the Zoo
- Kill 15 enemies at the Zoo
Well Supplied Soldier
- Acquire a Secure Supplies Contract
- Complete a Secure Supplies Contract in 2:30 minutes
Disarming Presence
- Drop 3 ISO Hemlock weapons in a dead drop
- Kill 10 Enemies with an ISO Hemlock
- Exfil with an ISO Hemlock weapon in the same deployment
Going Green
- Complete 2 secure nuclear material contracts
- Extract 4 nuclear fuel rods
No One Left Behind
- Rescue 2 Hostages in the same deployment
On The Spot
- Mark 10 enemies while in the Castle using a spotter scope
Street Smarts
- Kill 25 enemies while standing
- Kill 25 enemies while crouching
- Kill 25 enemies while prone
Security Checkpoint
- Place a tactical camera at the Central Station in Vondel
- Mark 10 enemies with the tactical camera at the Central Station
Gone Phishing
- Hack 3 contracts in one match using the signals Intelligence Contract
Long Distance
- Take the tracker from the dead drop in Vondel’s Zoo
- Use 3 UAV towers in Al Mazrah while carrying the tracker in the same deployment
- Deliver the loaded tracker back to the dead drop at the Zoo
Passive Income
- Receive 10 signals of insurance payments
- Open 3 safes in the same deployment
Strike Team
- Destroy the Bullfrog Commander from a vehicle
- Extract the Bullfrog Commander's weapon case in the same deployment
- Visit 8 POI using a Tactical Amphibious vehicle in the same deployment
The Transporter
- Pickup the Charge in the closed tunnel near Zaya Observatory
- Transport and drop the Charge near the supply site at the U.S. Embassy in Al Mazrah City
- Find a rebreather
- Find the cartel warehouse key from the eastern-most sunken ship in Al Mazrah
- Find and extract the cartel laptop from the warehouse
World Trip Souvenirs
- Extract 2 Dog Tags from Al Mazrah
- Extract 2 Dog Tags from Ashika Island
- Extract 2 Dog Tags from Vondel
Go For A Drive
- Acquire an encrypted hard drive
- Drive a chop top in Vondel for 2 consecutive minutes while carrying the encrypted hard drive
- Deliver the hard drive to the dead drop at the Zoo
- Destroy 3 tactical amphibious Vehicles in under 5 Seconds
- Complete 3 hunt contracts in one deployment
- Exfil successfully
Stress Test
- Extract in a Helo carrying 7 or more Operators
- Kill 20 Enemies with your fists in one deployment
Turn the Tide
- Complete 2 secure intel contracts
- Complete a destroy supplies contract in the same deployment
- Drill 3 safes in the same deployment
Contract Killer
- Complete 4 types of contracts in one deployment
- Take final exfil in the same deployment
- Clear the fire station fortress in Vondel while carrying a weapon case.
- Activate a UAV tower while carrying a weapon case.
- Extract with a weapon case in the same deployment
Last Line of Defense
- Kill 150 enemies in Vondel in the same deployment
Final Countdown
- Extract with the final exfil with 3 weapons dropped by enemy operators in the same deployment
Contractual Obligations
- Complete 8 unique contracts in a single deployment
Spice of Life
- Kill 10 enemies with a single ammo xlip
- Kill enemies using 20 different weapons in the same deployment
Rifle Some Feathers
- Buy a SP-X 80 from a Buy Station
- Kill 15 Operators or Commanders with a SP-X 80
Firearm Regulation
- Deliver 25 weapons to Vondel dead drops in a single deployment
Cut the Head
- Trade for the Encryption Key at a Buy Station
- Activate the 4 laptops in the market in under 2 minutes with the Encryption Key
- Extract with the Encryption Key
DMZ Black Mous Missions (Season 4):
Make contact.
- Use your Tac-Map and ping a contract phone
- Find a contract phone and download the intel to start the contract
Hostiles Located
- Ping 5 Enemies
- Kill 5 Enemies
Exfiltration
- Call in an exfil chopper at an exfil site marked with green smoke
- Exfil using the helicopter
Information Seeker
- Ping a UAV Tower
- Activate 1 UAV Tower
Convenience
- Ping a vehicle on the Tac-Map
- Fully refuel and repair a vehicle at a gas station
Committed Shopper
- Sell a valuable item at a Buy Station
Laswell's Letter
- Read Laswell's Letter in the notes menu and complete the requested task
Hostage Rescue
- Complete a Rescue Hostage contract
- Exfil with the hostage evac helo
Team Player
- Hold X to request to assimilate with a nearby squad
- Successfully assimilate with another squad
- Capture 2 SAM Sites in one deployment
- Open a supply drop
Down and Out
- Complete a Raid Weapon Stash contract without being downed
Badge of Honor
- Acquire a Basilisk , commonly found in police stations
- Kill 9 enemies with headshots using a Basilisk
Close Quarters
- Acquire a stronghold keycard
- Clear a stronghold of enemies
- Pick up the letter of introduction and tracker from the Vondel Zoo dead drop
- Deliver the letter of introduction to the Phalanx dead drop at the university
- Deliver the tracking device to the same Phalanx dead drop
Operators In Need
- Help a squadmate complete 3 missions
- Enter the Koschei Complex
- Investigate the chemical plant
- Extract from the Koschei Complex
Unarmed and Dangerous
- Infil solo without any weapons
- Exfil in the same deployment without picking up any weapons
Double Crossed
- Kill the Bomb Maker with a crossbow
Substantial Findings
- Take the 2 Tracking Devices from the Town Center or Al Sharim Pass dead drops
- Plant a Tracker on top of the submarine in Hafid Port
- Plant a Tracker on top of the submarine in the Ashika Island Waterways
Researcher's Dilemma
- Find the researcher's notes in the Vodel Zoo veterinary office
- Place the researcher's notes on the 2nd floor of the church near the castle in the same deployment
- Take the false notes from the church and place them in the veterinary office in the same deployment
Spetnaz Exposed
- Find the Spetnaz Documents in the Koschei Complex Alpha Cluster
- Extract the documents
- Deliver Spetnaz Documents to the Phalanz dead drop near the Vondel University
Profit and Pain
- Infil without any teammates without any weapons
- Extract 3 weapons with at least 3 attachments each in the same deployment
Eye In The Sky
- Open 5 airplane supply drops
Eyes and Ears
- Take the discrete radio transmitter from the Beach Club Dead Drop
- Plant the Radio Transmitter under the Central Security desk at the top of the Tsuki Castle
- Extract in the same deployment
Labs Investigation
- Infill into Building 21
- Investigate the Generator Room on F1
Failed Bombing
- Loot and extract the defused charge from the Ahkdar Statue
- Bring the charge to the Ashika Waterways dead drop with electrical components and a battery to rearm the charge
- Dead drop the rearmed charge to the Al Sharim Pass dead drop
Disguised Assassin
- Enter the Tsuki Castle perimeter
- Kill the bomb maker from within 5m without being downed since entering the perimeter
- Take the Hard Drive found at Phalanx's Vondel University dead drop
- Take the Decrypted B21 Hard Drive from the Al Mazrah Observatory dead drop
- Upload Both Hard Drives at the same time in Al Mazrah
The Client is King
- Complete 8 contracts in 8 unique POIs in one deployment
Untouchable
- Extract a Weapons Case without having taken health damage in that deployment
Breaking the Bunker
- Take the weapon from the Phalanx dead drop
- Kill the Sniper with the weapon
- Kill the Rhino with the weapon
Delivery Problem
- Take 7 Tracking devices from the Building 21 dead drop
- Plant a Tracking device under each of the 7 cargo trucks in the parking garage
Flight Plans
- Take the 3 Hacked Thumb Drives from the dumpster dead drop near the Al Bagra Fortress
- Air Traffic Control Tower
- North Observatory Telescope
- Al-Mazrah City TV Station
Lone Hunter
- Infil without any teammates and without any weapons
- Kill 1 Operator in the same deployment
- Exfil in the same deployment without having picked up any weapons
Crack the Code
- Drill the safe in the factory wing using the diamond-tipped drill found in the keypad-locked room in the alpha cluster
- Extract the note found inside
DMZ White Lotus Missions (Season 4):
Ashika recon.
- Kill 5 Shadow Company soldiers
- Extract 1 Shadow Company STB 556
Fuel Shortage
- Siphon the gas from 1 vehicle on Ahika Island
- Use 1 gas can in a vehicle to refuel
Shadow Company Intel
- Take the Shadow Company laptop from the 2nd floor desk in the Ashika Science Center
- Extract the laptop
Air Support
- Acquire a killstreak from a buy station, supply drop, or elsewhere
Upgraded Arsenal
- Attach a suppressor to a weapon at a workbench, found near buy stations
- Kill 6 enemies with a suppressed weapon
Commanding Intel
- Complete a Secure Intel contract to reveal the location of an enemy Commander
- Ping a Commander
- Take the IR beacon left on the rocks off the northern coast of Ashika Island
- Plant the IR beacon on the roof of Shika Castle
Operation Black Gold
- Kill 3 Enemies in Hafid Port
- Kill 3 Enemies in Rohan Oil in the same deployment
- Kill 3 Enemies in the Sattiq Cave Complex in the same deployment
Unknown Shipping
- Extract the 2 contraband packages from the sunken ships in Al Mazrah
- Extract the 2 contraband packages from the sunken ships in Ashika Island
Key Elimination
- Complete an Eliminate HVT contract
- Take a key found on an HVT or elsewhere
- Use a key to unlock a locked space or locked cache
Demolitions
- Complete a Destroy Supplies contract to locate nearby safes
- Find and open a safe
Night Operation
- Take the 2 IR beacons from the Al Sharim Pass dead drop
- Plant 1 at the north tower in the A.M. City construction zone
- Plant 1 at the south tower in the A.M. City construction zone
Medical Mule
- Deliver 3 revive pistols or self-revive to the dumpster dead drop in Zarqwa
- Deliver 5 AFAKs or large medical bags to the same dead drop
- Take the discrete radio transmitter from the Ashika town center dead drop
- Plant the radio at the top of the Shadow Company ship
- Upload the radio's frequency to an Upload Station after it's planted
Pacific Foothold
- Deliver 1 bottle of Gun Oil to the dumpster dead drop in the Residential District of Ashika Island
- Deliver 2 VCRs or Game Consoles to the same dead drop
- Deliver 3 pieces of Legion Deal Intel to the same dead drop
Fast and Strong
- Clear 5 locked Strongholds each in under 20 seconds
- Loot the GPS Tracker from the dumpster dead drop in Zaya Observatory
- Travel to every POI in Al Mazrah while carrying the GPS Tracker in one deployment
- Extract the GPS Tracker
Vondel Investigation
- Infil into Vondel with the Shadow Company laptop
- Find and take the Russian Hard Drive from the graveyard in Vondel
- Use the laptop to upload the Russian Hard Drive to Shadow Company at an upload station
Fuel Sabotage
- Siphon 3 Vehicles of Gas in Vondel
- Dead drop 3 full Gas Cans in Vondel
Intel Exchange
- Find and extract the Al Mazrah shipping Intel from Room 403 of the Ashika Island Hotel
- Take the Building 21 USB Stick from the dead drop in the waterways
- Place the Building 21 USB in the Hotel Room
Quid Pro Quo
- Call in our LTV vehicle drio behind the castle in Vondel
- Drive the vehicle to the flea market in the same deployment
- Drive the vehicle to the fire station in the same deployment
Break Check
- Locate the car crash site near the Observatory
- Find and extract the Hard Drive near the crash site
- Drop the Hard Drive in the Waterways dead drop on Ashika Island
Air Supremacy
- Control 3 SAM sites simultaneously
- Enter the riverside caves in Sattiq Caves by boat
- Loot and extract the smuggling records in the riverside caves in Sattiq Caves
- Place sensitive documents at the original location of the smuggling records in the same deployment
- Complete 4 contracts in under 6:00 minutes
Shopkeeper's Request
- Dead drop 3 Koschei Complex keys in Al Mazrah
- Dead drop 1 cat statue in Al Mazrah
- Fully gear up your 1st active duty operator
- Fully gear up your 2nd active duty operator
- Fully gear up your 3rd active duty operator
Chemist's Sources
- Find and take the Chemist's intel off of him
- Follow the Chemist's intel to find a sample of the Russian gas in Vondel
- Complete 8 contracts in under 15 minutes
Unknown Threat
- Kill 30 of the unknown forces in Ashika Island or Vondel with a suppressed pistol with headshots
Exfil Party
- Infil without teammates
- Extract with at least 6 total Operators at once in the same deployment
The Route Forward
- Loot 7 Tracking Devices from the Al-Sharim Pass dumpster dead drop
- Plant 7 Tracking Devices on the AQ trucks in Sattiq Caves in one deployment
- Travel to the server rack in the bunker in Sattiq Caves and download the data
Clean House
- Unlock and clear the Vondel Aquarium
- Unlock and clear the Vondel City Hall in the same deployment
- Unlock and clear the Cruise Terminal in the same deployment
Firing Power
- Kill the Juggernaut with the RGL-80
- Kill Velikan with the RGL-80
- Kill the Bullfrog with the RGL-80
Russian Gas
- Infil Into the Koschei Complex with the Vondel gas sample
- Find the Koschei Complex gas sample in the south of the DRD
- Validate the chemical similarity between the Vondel gas sample and Kochei Complex gas sample at the machine in the External Ops sector
DMZ Crown Missions (Season 4):
Al mazrah's threat.
- Kill 7 AQ soldiers within 10 seconds of each kill
Vondel Recon
- Have 2 UAV towers active at the same time in Vondel
Vehicular Homicide
- Destroy 1 armored AQ patrol truck in Al Safwa Quarry
- Destroy 2 cargo trucks in Zaya Observatory
- Destroy 1 boat in Mawizeh Marsh
Koschei Clearing
- Kill 5 enemies in the Koschei Complex
Chemist's Whereabouts
- Tag 3 enemies in the Al Mazrah radiation with a recon drone
Tactique-Verte Testing
- Kill 6 enemies from a range of over 25 meters with the Tactique-Verte platform of weapons
- Kill 3 armored enemies with the Tactique-Verte platform of weapons
Humanitarian Operation
- Dead drop 2 weapons to any Vondel dead drop
- Dead drop 4 lethals to any Vondel dead drop
- Dead drop 1 killstreak to any Vondel dead drop
Sample Platter
- Kill an enemy with 6 different Weapon Classes in 1 deployment
Scavenger In Vondel
- Infil with a custom weapon
- Drop the weapon near an enemy Operator's corpse
Low-Light Combat Training
- Kill 5 Enemies without using NVGs in the Chemical Plant
- Kill 5 Enemies with fire in the Chemical Plant
The Oasis Route
- Plant a Tactical Camera in the airlock at the Oasis bunker entrance
Vehicular Philanthropy
- Repair and refuel 3 vehicles at the Vondel police station
- Repair and refuel 1 boat in Vondel
Golden Ticket
- Extract a Building 21 access keycard
X Marks The Spot
- Unlock the Keypad-Locked room in the Koschei Complex alpha cluster with an R4D detector
- Extract the Koschei Complex map
Bryson Long Rifle Weapons Testing
- Kill 10 enemies from a range of over 50 Meters with the Bryson Long Rifle Weapons Platform
- Kill 10 enemies with a suppressed Bryson Long Rifle Platform Weapon
False Alarm
- Signal all 3 exfils in Al Mazrah in 1 deployment
- Extract on the final exfil in the same deployment
- Kill 7 enemies from a Helicopter in 1 deployment
- Kill 1 Operator or Commander from a helicopter
Chemical Sourcing
- Dead drop a bottle of sulphuric acid
- Dead drop a bottle of hydrogen peroxide
- Dead drop a bottle of radiation blockers
- Extract the fake Al-Qatala Documents from the Zaya Observatory dead drop.
- Stash the fake Al-Qatala Documents on the central security desk in the top room of the Ashika Island Castle
- Extract from Ashika Island
Bottom of the Barrel
- Trade the Shopkeeper a bottle of liquor in exchange for the keycode
- Enter the code into the locked room keypad in the alpha cluster entrance
- Extract the research documents from the room
Triple Clear
- Clear a stronghold in Rohan Oil
- Clear a stronghold in Al Mazrah City
- Clear a stronghold in Taraq Village
The Deadliest Sin
- Sell 25 unique valuables in 1 deployment
Explosive Ordnance Disposal
- Defuse an enemy team's charge at a supply site
Koschei Surveillance
- Plant a Tactical Camera in the Airlock at the Al Mazrah City bunker entrance
- Plant a Tactical Camera in the Airlock at the Taraq bunker entrance
- Plant a Tactical Camera in the Airlock at the Rohan Oil bunker entrance
Explosives Sources
- Kill the Pyro
- Extract the Pyro's intel
- Dead drop the Pyro's intel in Vondel
- Reset the security system at the upload station in the External Ops Section
- Open the locked cache in the restricted section in the Alpha Cluster
- Extract the Building 21 evidence from the cache
Hunting Party
- Kill both the Sniper and the Rhino within 60 Seconds of each other
Exit Through The Sector Alpha
- Locate the 2 Stairwell exits in the DRD
- Scan each exit with a Geiger counter
- Kill the Sniper with a Sniper Rifle
- Kil the Rhino with a Pistol
- Kill the Juggernaut with an LMG
Charged Interaction
- Find and take the explosive charge from the Zaya Observatory tunnel entrance
- Deliver the charge to a dead drop to neutralize the timer
- Take the charge and deliver it to the Shopkeeper in Koschei Complex
Exfil Tracking
- Take and extract the 4 Tracking Devices from the Zarqwa Hydroelectric dead drop
- Plant a Tracker on 3 enemy exfil choppers
- Plant a Tracker on the final exfil chopper
Outsourcing
- Extract the Building 21 Intel from the Black Locked Room
- Extract the Building 21 Intel from the Red Locked Room in the same deployment
- Extract the Building 21 Intel from the Blue Locked Room in the same deployment
- Infill solo without any weapons
- Kill 3 operators in the same deployment
- Extract $100.000 in the same deployment
Case By Case
- Extract the Weapon Case from Bio Bunker without dying
- Extract the Weapon Case from Ashika Island without dying
- Extract the Weapon Case from Vondel without dying
Emergency Exit
- Secure both Starwell exits in the Koschei Complex
DMZ Legion Missions (Season 4):

DMZ Redacted Missions (Season 3):
- Store an Electric Drill, a Gas Can, and a Golden Skull in your backpack at the same time
- Trade for a Secure Backpack at a buy station
Cartel Investigation
- Locate the cartel in Al Mazrah
- Kill 5 cartel soldiers
- Find and extract 2 large Contraband Packages
Calling Card
- Find and extract 3 Scavenger calling cards
- Kill the Scavenger
Unstoppable Force
- Destroy 3 vehicles by having the train collide with them
Zero Tolerance
- Infiltrate Hafid Port
- Get a shot of a cartel soldier in a tactical camera
- Find and extract the cartel recon report from the Sattiq Caves dead drop
Smoking Gun
- Clear the air traffic control tower at A.M International
- Clear the Al Mazrah City post office
- Clear the U.S. embassy
- Purchase a personal exfil at a buy station in the same deployment
- Exfil with your personal exfil with another player in the same deployment
Left High and Dry
- Trade for a skeleton key in either Al Mazrah, Ashika Island, or Building 21
- Use a skeleton key to unlock the sniper team's hideout in Ahkdar Village
- Extract the dossier found inside
Friendly Fire
- Kill the Pyro commander
- Kill 3 Pyro guards with fire
Rain and Hellfire
- Kill 5 cartel or AQ soldiers with launchers from the heavy chopper
- Kill 1 operator or juggernaut from the heavy chopper
- Destroy 2 vehicles from the heavy chopper
One Shot, One Kill
- Drill the safe on the train
- Take and extract the train manifest from the safe
- Use the train manifest to trade for the MCPR-300 at a buy station in Ashika Island
- Kill the Scavenger with a weapon dropped by an enemy operator
- Find and read the sniper team's note
- Take the 3 trackers from the Al Bagra Fortress dead drop
- Plant the 3 trackers, one at each bunker entrance
Archaeologist
- Discover what AQ is looking for in the oasis
Leaked Documents
- Find and extract the schematics from the Rohan Oil bunker entrance
- Dead drop it in Building 21
Tunnel Rats
- Kill 10 AQ soldiers in the Koschei Complex
- Kill 10 cartel soldiers in the Koschei Complex
Brothers In Arms
- Enter the factory wing of the bunker
- Kill The Sniper in the same deployment
- Kill The Rhinoceros in the same deployment
Abandoned Operator
- Locate the shopkeeper and read his list of items
- Trade the shopkeeper 2 items
- Purchase 1 item from the shopkeeper's secure buy station
Case The Place
- Extract 2 weapon cases in one deployment
- Deliver a cat statue to the shopkeeper
- Deliver a dog bank to the shopkeeper
- Take and extract the shopkeeper's intel
- Kill 10 enemies in the sandstorm in Al Mazrah City
- Kill 2 operators or commanders in the sandstorm in Al Mazrah City
Irradiated Waters
- Enter the Koschei Complex with a geiger counter
- Find the 4 nuclear fuel rods in the flooded barracks
- Extract the 4 fuel rods in one deployment
- Take the 4 flare sticks from the Ashika town center dead drop
- Light 4 flare sticks near the entrances into the chemical plant
Call of Duty: Warzone 2.0 was released on November 16, 2022, along with Season One of Modern Warfare 2 , for Xbox Series X|S, PlayStation 5, Xbox One, PlayStation 4, and Windows PC.
Stay tuned to this page as it will be constantly updated as soon as new information on the Call of Duty Warzone 2 DMZ missions releases.
- 33 Comments
Log in with
Or post as a guest.
- 1 Up 0 Down
- 2 Up 0 Down
- 5 Up 1 Down
- 0 Up 0 Down
- 3 Up 0 Down
- 4 Up 0 Down
- 8 Up 0 Down
Warzone 2 Map POIs: Al Mazrah Points Of Interest

Written by
Published
16th Nov 2022 10:12
Al Mazrah is set to be the playground for Warzone 2 for the foreseeable future, with the middle-eastern-inspired landscape boasting a number of important POIs which serve as landing destinations, lootable sacks, and end-game cover as 150 players at a time dive in to become the last man or woman standing. The new map will take a lot of getting used to, although many multiplayer maps and remastered places of the past will feature as Warzone 2 POIs. So, here's everything you need to know about the Al Mazrah Points of Interest.
Warzone 2 Al Mazrah POIs
On the official Al Mazrah Map, there are a total of 18 Warzone 2 POIs, spread out across the island. Some will prove more familiar than others, while almost all of the Modern Warfare 2 maps can be found at one POI or another.
The full list of Warzone 2 POIs is:
- Taraq Village
- Al Mazrah City
- Hydroelectric
- Al Sharim Pass
- Observatory
- Ahkdar Village
- Sawah Village
Al Mazrah POIs: North West
Oasis, taraq village, rohan oil, and quarry .
Yes, Quarry. The old-school MW2 map will feature as one of the Warzone 2 POIs. The design we saw over a decade ago will have been spruced up and embedded into a wider quarry, but those iconic white marble blocks will be there for all to see.
Taraq village is familiar with multiplayer lovers, given its presence as a 6v6 and ground war map. Oasis might not be the most populated area in the map, but will serve an end-game purpose similar to how Dam did in Verdansk. As players rotate inwards from the edge of the map, Rohan Oil will be increasingly popular, and players will have to be on high alert as they look to move through here and pick up any spare loot.
Al Mazrah POIs: North East
Al mazrah city and marshlands.
Al Mazrah City is like Downtown on steroids. The capital city will play host to the likes of Highrise, Embassy, and many more 6v6 locations squashed together to act as the main hub for high-tier loot and constant gun-fights.
Once you've managed to get what you need from Al Mazrah City, Marshlands will be your next place to visit, although its open plains may result in you needing a vehicle.
Al Mazrah POIs: Centre
Hydroelectric, caves, observatory, and al sharim pass.
The centre of Al Mazrah will be a mountainous climb, with both Observatory and Al Sharim Pass being the most vertical Warzone 2 POIs. They will serve as purposeful places to hold, but if you're just passing by, be careful of a well-placed sniper shot.
Hydroelectric and Caves will be great for scuba divers, given that underwater passages are common.
Al Mazrah POIs: South East
Ahkdar village, airport, fortress, and sarrif bay.
Acting as a replacement for Prison, Fortress will be the most southern Point of Interest in Al Mazrah, with this Warzone 2 POI being a castle-like building that won't be easily impregnated. Al Bagra multiplayer fans will enjoy holding this area down.
Airport brings back a familiar feeling too, with many replicated buildings (and Terminal) located here, while Ahkdar Village and Sariff Bay already serve as popular ground war maps.
Al Mazrah POIs: South West
Port, sa'id city, cemetery, and sawah village.
Finally, the South-West of Al Mazrah will feature Port (where Shipment can be found ), although it will be very different from its namesake in Verdansk. Cemetery is much like Marshands, as an area you don't want to linger in too.
Sawah Village might be quite a popular looting point, given its secluded surroundings, while Sa'id City appears to be a huge power position in Al Mazrah, and holding it will allow you to pick up a lot of kills.
In each Warzone 2 POI you might also find Strongholds , although they will change with every game.
Established in 2019, we don’t just cover games - we live them. Our expert team is full of dedicated gamers, qualified journalists, and industry insiders who collectively boast decades of experience covering gaming and esports. This deep-rooted expertise allows us to provide authoritative and nuanced perspectives first-hand from a team who are playing, and researching every game covered on our website.
Our foundation is built on a profound commitment to editorial independence, ensuring our content remains free from external influence and advertising pressures and is held to the highest level of editorial conduct, integrity, and quality.
Every article on GGRecon comes from rigorous research, informed analysis, and a passion for gaming that resonates with our readers. We uphold these standards through a transparent editorial policy, accessible here , which governs our processes and maintains our accountability.
Warzon 2 DMZ: Updated Map with all 28 Spawn Points on Al Mazrah

Spawns in Warzone 2's DMZ mode are not marked on the map, so one Reddit user took the trouble to add all spawn locations he knows of to a map. Guided.news further expanded the map with the help of the Reddit community, and here it comes!
What's it about? No DMZ player knows where he will start at the beginning of his next turn. In fact, there are over three dozen different spawn points on the Al Mazrah map . The problem with this, however, is not that you don't know where you are. The problem is the location of opponents who may spawn just a few meters away from you. So that you always know where opponents are at the start of a round of DMZ, we have the map with all spawn points for you here.
All spawn points on the DMZ map Al Mazrah (+ map for colorblind readers)

What does the map show exactly? The map shows you four different spawn points on Al Mazrah. The blue triangle was created by us, all other points were researched by the editor FluffyPlays (via reddit.com ). So insgesmat there are 28 different places where you can spawn in DMZ:
- Red circle: these spawns are the most dangerous starting points on the map, as you can be quickly spotted by enemies.
- Yellow Square: These spawn points on the map of Al Mazrah show the spawns that offer at least some cover.
- Green Diamond: Here you will find the best spawn points in DMZ. They provide you with enough cover and distance from enemies.
- Blue Triangle: These points were added by us: We categorize the southern triangle as a yellow point, and the spawn point in the Marshlands is red. However, this is not due to the players, but to the countless bots at this spawn location in DMZ.
If this is your spawn location in DMZ, run away!
There are some spawns where you should immediately kick in the turbo mode and run away. Especially the spawn points around the port should be left immediately. These are located on the west side of the Al Mazrah map. Start your DMZ round, take a look at the map, and if you start on the western coasts, you now know what to do to avoid being taken right out of the game.

These four spawn points are the worst in DMZ, move away from there immediately.
Players are already making it a personal mission to hunt down players in DMZ. They may have already completed all the missions and are now looking for a new challenge, according to a person I (the author) know who enjoys PvP more than the actual missions of DMZ. This person looks at which spawn points they are at and then bases their hunt on other players' starting points -- the hunt begins with the start of rounds. The video from Twitter user BKToor shows how quickly a round of DMZ can end with a bad spawn point:

By loading the tweet, you agree to Twitter's privacy policy. Learn more
Always unblock Twitter Tweets
Some players report in the comments that they get shot at over and over again right at the spawn point and are calling for changes. What are your experiences with the spawn system in DMZ. Vote in the poll or write us a comment.
Related Posts

DMZ: Secret Documents in Season 2 - How to find them

CoD MW2 & Warzone Season 6: All Content, Halloween Event & Release

Warzone 2 DMZ: Find "Stage Bag Key" & "Mayor's Briefcase Key"

Warzone 2 Season 5: New Map "Fort Resurgence" Launches Today

DMZ: How to find a GPU - All Locations + map

Modern Warfare 2: Meaning behind the Flame Symbol on Weapons

DMZ: All Dead Drops Locations on Vondel Map

DMZ: New Map "Koschei Complex" Set in Complete Darkness

Warzone 2: Guide for Best Tactics & Strategy for Plunder Mode

Warzone 2: All about Plunder Mode - Release, New Content, Changes from Warzone 1

Modern Warfare 2: Mid-Season 3 (Reloaded) Release & all the new Content

DMZ Scavenger Boss Guide: How to Find and Beat
Support our work:

All Al Mazrah POI in Warzone 2
AL Mazrah POI – Warzone 2.0 is finally out as a part of Modern Warfare 2, with it, also comes a new battle pass season and a new map.
Following up on the new map, Al-Mazrah, is a map that’s designed for battle royale and some similar game modes.
This is, by far, one of the best maps in Call of Duty, and as an attempt to understand the map completely, we’ll be covering certain Points of Interests in Al-Mazrah.
Here’s everything you need to know about Al-Mazrah’s points of interest:

Here’s a full list of the Points of Interests in Al-Mazrah:
- Ahkdar Village
- Al Sharim Pass
- Observatory
- Sawah Village
- Al Mazrah City
- Hydroelectric
- Taraq Village
A critical analysis of Al-Mazrah
The map features some dense urban areas with a bunch of waterway locations. The densest urban area on the map is the Al-Mazrah city, and then there’s the caves region. Both of these areas feature close-range combat, the caves are located in the mid-region of the map and the Al-Mazrah city is located in the northeast.
If you aren’t really into close-range battles, the map also features a wide-open area in the southwest near the cemetery.
There are also some long-range sightlines paired up with a hilly region near the observatory. These locations are perfect for snipers, so if you find yourself around here, make sure you move cover-to-cover to avoid being taken down by one.
When you open up the map, you’ll notice, if you count, of course, that there are 18 different places on the map. These are the points of interest in Al-Mazrah.
Taking a look at these POIs can be crucial as these will tell you the different types of combat that’ll be taking place all over the map.
Whether it’s engaging in close range at the Al-Mazrah city or the sneak-away near the cemetery, not having an idea of what to carry around in these locations could prove to be quite problematic.
Another thing you need to know is that as the observatory is located in the center of the map, it is likely to be a hot-drop. If you’re looking for early engagements, we’d suggest you drop here and start grinding through. The players also enjoy dropping at Al-Mazrah city, Akhdar village and the airport area, so if you’re looking for a slower-paced game, we suggest you avoid these locations.
Concluding every single location on the map, there is, in Al-Mazrah, that’s everything you need to know regarding the different POIs.
If you think this guide has helped, then let us know in the comment section below. And for more COD Warzone 2 guides , keep an eye on Frondtech.
That’s all, folks!
Last Updated on November 18, 2022

Abhinav, 19, Writer/Editor at Frondtech and out-and-out a gamer until time lasts. From spending a whole day performing LAN parties playing cs 1.6 since he was 12, to playing rust and all kinds of other games, all day long. He does it all. At times, you can find him fixing his mining rigs and staying up to date with the latest crypto news.
You might also like
Leave a comment cancel reply.
Your email address will not be published. Required fields are marked *
Notify me of follow-up comments by email.
DMZ Season 4 Phalanx’s Test Drive Mission Guide

The launch of Warzone 2 and MW2 Season 4 has brought many significant changes to DMZ mode and its been updated and revamped. The DMZ missions always get resets or changed every season, and Season 4 is no different. One of the missions for the new Phalanx Faction is Test Drive which requires players to find the Tactical Amphibious vehicle and then use the vehicle to go to multiple POI on the map. This guide will show you how to complete the Test Drive mission in DMZ Season 4.
Read More: DMZ Assault on Vondel – Detonator at Stadium, University, and Graveyard Locations , DMZ Assault on Vondel – Castle Detonator Location , How to Complete Bruiser Mission in Warzone 2 DMZ , How to Complete Lone Hunter Mission in Warzone 2 DMZ
Phalanx’s Test Drive Mission Guide

Test Drive is a Phalanx faction’s Tier 3 mission which requires players to complete this only objective:
- Visit 8 POI using a Tactical Amphibious vehicle in the same deployment
To complete this mission, players need to follow these steps:
- Players must select and deploy onto the new Vondel Map
- The tactical Amphibious vehicle is exclusive to this map

- Players then need to go to the docks which are all across the map to find the vehicle
- Finding the vehicle can be somewhat difficult if players are late or not close to the spawn location.
- After finding the vehicle the mission starts
- Players then need to go through the waterways all across the map
- Players in total need to visit 8 POI but it is required to reach them while in the vehicle.
- But its not required for players to only use the waterways, as this is an Amphibious vehicle player can take the vehicle to the roads and visit 8 different POI
- Players can check their progress in the mission tab to see how many POI they have visited yet.
- After reaching the 8 POI, players will complete the mission.
The reward for completing this mission is Victus XMR (Contraband) and 10,000 XP. That’s all you need to know about how to complete the Test Drive mission in DMZ Season 4. If you find this guide helpful, you can check our website for more such guides and news about Warzone 2.0 and various other games.
Leave a Reply Cancel reply
Your email address will not be published. Required fields are marked *
Save my name, email, and website in this browser for the next time I comment.

Wuthering Waves: Where to get the Lootmapper

The Quest of Wits All Quiz Answers Wuthering Waves

How to get Waveworn Residue 210 in Wuthering Waves

All Port City of Guixu Blobfly Locations Wuthering Waves

Gorges of Spirits Encryption Block Puzzle Solution Wuthering Waves
Sign in to your account
Username or Email Address
Remember Me

All DMZ Season 4 Faction Missions & Rewards
- DMZ Modern Warfare 2

- Updated at 12:53 am, June 28, 2023
- 12 MINUTE READ
As expected, Season 4 updated all DMZ missions and unlocks for it’s various factions

How to Complete Faction Missions in DMZ (UPDATED)
Season 4 of Warzone added a fresh coat of paint to the DMZ menus, now providing a Forward Operating Base (FOB) where players can select various passive missions to enhance their inventory and further the post launch story. Upon clicking on the mission objectives, players can select missions from the current factions: White Lotus, Black Mous, Crown (requires MWII ownership) & Phalanx. Please note that in order to access the new faction, Phalanx, players must complete the “Ice Breaker” mission from the Black Mous faction. Below are all current Season 4 faction missions and rewards:
Preview of All Faction Mission Rewards (Season 4)
Black Mous Tier 1
Make contact .
- Use Your Tac-Map and Ping a Contract Phone
- Find a Contract Phone and Download the Intel to Start the Contract
RAPP H (Contraband) + 5000 XP
Hostiles Located
- Ping 5 Enemies
- Kill 5 Enemies
Stronghold Keycard + 5000 XP
Exfiltration
- Call in an Exfil Chopper at an Exfil Site Marked With Green Smoke
- Exfil Using the Helicopter
Double XP Token + 5000 XP
Information Seeker
- Ping a UAV Tower
- Activate 1 UAV Tower
SP-X 80 (Contraband) + 5000 XP
Convenience
- Ping a Vehicle on the Tac-Map
- Fully Refuel and Repair a Vehicle at a Gas Station
Bryson 890 (Contraband) + 5000 XP
Committed Shopper
- Sell a Valuable Item at a Buy Station
Skeleton Key (Worn) + 5000 XP
Laswell’s Letter
- Read Laswell’s Letter in the Notes Menu and Complete the Requested Task
High Alert (Loading Screen) + 10,000 XP
Black Mous Tier 2
Hostage rescue .
- Complete a Rescue Hostage Contract
- Exfil With the Hostage Evac Helo
X12 (Contraband) + 7500 XP
Team Player
- Request to Assimilate With a Nearby Squad
- Successfully Assimilate With Another Squad
Double Weapon XP Token (1 Hour) + 7500 XP
Anti-Air
- Capture 2 SAM Sites in One Deployment
- Open a Supply Drop
Veterinarian Key + 7500 XP
Down And Out
- Complete a Raid Weapon Stash Contract Without Being Downed
M4 (Contraband) + 7500 XP
Badge of Honor
- Acquire a Basilisk, Commonly Found in Police Stations
- Kill 9 Enemies With Headshots Using a Basilisk
Fennec 45 (Contraband) + 7500 XP
Close-Quarters
- Acquire a Stronghold Keycard
- Clear a Stronghold of Enemies
KV Broadside (Contraband) + 7500 XP
Icebreaker
- Pickup the Letter of Introduction and Tracker From the Vondel Zoo Dead Drop
- Deliver the Letter of Introduction to the Phalanx Dead Drop at the University
- Deliver the Tracking Device to the Same Phalanx Dead Drop
Sending Signals (Animated Emblem) + 10,000 XP
Black Mous Tier 3
Operators in need .
- Help a Squadmate Complete 3 Missions
HTTP Tactical (Animated Calling Card) + 10,000 XP
Bedrock
- Enter the Koschei Complex
- Investigate the Chemical Plant
- Extract From the Koschei Complex
Double Weapon XP Token (1 Hour) + 10,000 XP
Unarmed and Dangerous
- Infil Solo Without Any Weapons
- Exfil in the Same Deployment Without Picking Up Any Weapons
Riot Shield (Contraband) + 10,000 XP
Double Crossed
- Kill the Bomb Maker With a Crossbow
Tempus Torrent (Contraband) + 10,000 XP
Substantial Findings
- Take the 2 Tracking Devices From the Town Center or Al Sharim Pass Dead Drops
- Plant a Tracker on Top of the Submarine in Hafid Port
- Plant a Tracker on Top of the Submarine in the Ashika Island Waterways
Double Weapon XP Token + 10,000 XP
Researcher’s Dilemma
- Find the Researcher’s Notes in the Vondel Zoo Veterinary Office
- Place the Researcher’s Notes on the 2nd Floor of the Church Near the Castle in the Same Deployment
- Take the False Notes From the Church and Place Them in the Veterinary’s Office in the Same Deployment.
Aquarium Key + 10,000 XP
Spetnaz Exposed
- Find the Spetnaz Documents in the Koschei Complex Alpha Cluster
- Extract the Documents
- Deliver Spetnaz Documents to the Phalanx Dead Drop Near the Vondel University
Curtain Call (BAS-P Weapon Blueprint) + 20,000 XP
Black Mous Tier 4
Profit and pain.
- Infil Without Any Teammates Without Any Weapons
- Extract 3 Weapons With at Least 3 Attachments Each in the Same Deployment
Green Access Card + 15,000 XP
Eye in the Sky
- Open 5 Airplane Supply Drops
FTAC Siege (Contraband) + 15,000 XP
Eyes and Ears
- Take the Discrete Radio Transmitter From the Beach Club Dead Drop
- Plant the Radio Transmitter Under the Central Security Desk at the Top of the Tsuki Castle
- Extract in the Same Deployment
Cruise Terminal Key + 15,000 XP
Labs Investigation
- Infil Into Building 21
- Investigate the Generator Room on F1
556 Icarus (Contraband) + 15,000 XP
Failed Bombing
- Loot and Extract the Defused Charge From the Ahkdar Statue
- Bring the Charge to the Ashika Waterways Dead Drop With Electrical Components and a Battery to Rearm the Charge
- Dead Drop the Rearmed Charge to the Al Sharim Pass Dead Drop
Double XP Token + 15,000 XP
Disguised Assassin
- Enter the Tsuki Castle Perimeter
- Kill the Bomb Maker From Within 5m Without Being Downed Since Entering the Perimeter
GS Magna (Contraband) + 15,000 XP
Title Deed
- Take the Hard Drive Found at Phalanx’s Vondel University Dead Drop
- Take the Decrypted B21 Hard Drive From the Al Mazrah Observatory Dead Drop
- Upload Both Hard Drives at the Same Time in Al Mazrah
Neon Revolution (Calling Card) + 30,000 XP
Black Mous Tier 5
The client is king.
- Complete 8 Contracts in 8 Unique POIs in One Deployment
RGL-80 (Contraband) + 20,000 XP
Untouchable
- Extract a Weapons Case Without Having Taken Health Damage in That Deployment
Skeleton Key – Pristine + 20,000 XP
Breaking The Bunker
- Take the Weapon From the Phalanx Dead Drop
- Kill the Sniper With the Weapon
- Kill the Rhino With the Weapon
Dual Kodachis (Contraband) + 20,000 XP
Delivery Problem
- Take 7 Tracking Devices From the Building 21 Dead Drop
- Plant a Tracking Device Under Each of the 7 Cargo Trucks in the Parking Garage
Double Weapon XP Token (1 Hour) + 20,000 XP
Flight Plans
- Take the 3 Hacked Thumb Drives From the Dumpster Dead Drop Near the Al Bagra Fortress
- In One Deployment, Plant Hacked Thumb Drives in Computers at the Air Traffic Control Tower, the North Observatory Telescope, and the Al Mazrah City TV Station
Cronen Squall (Contraband) + 20,000 XP
Lone Hunter
- Infil Without Any Teammates and Without Any Weapons
- Kill 1 Operator in the Same Deployment
- Exfil in the Same Deployment Without Having Picked Up Any Weapons
Bas-P (Contraband) + 20,000 XP
Crack The Code
- Drill the Safe in the Factory Wing Using the Diamond
- Tipped Drill Found in the Keypad-Locked Room in the Alpha Cluster
- Extract the Note Found Inside
Weather Proof (Operator Skin for Kleo) + 40,000 XP
White Lotus Tier 1
Ashika recon.
- Kill 5 Shadow Company Soldiers
- Extract 1 Shadow Company STB 556
Victus XMR (Contraband) + 5000 XP
Fuel Shortage
- Siphon the Gas From 1 Vehicle on Ashika Island
- Use 1 Gas Can in a Vehicle to Refuel
Shadow Company Intel
- Take the Shadow Company Laptop From the 2nd Floor Desk in the Ashika Science Center
- Extract the Laptop
ISO Hemlock (Contraband) + 5000 XP
Air Support
- Acquire a Killstreak From a Buy Station, Supply Drop, or Elsewhere
LA-8 330 (Contraband) + 5000 XP
Upgraded Arsenal
- Attach a Suppressor to a Weapon at a Workbench, Found Near Buy Stations
- Kill 6 Enemies With a Suppressed Weapon
X13 Auto (Contraband) + 5000 XP
Commanding Intel
- Complete a Secure Intel Contract
- Ping a Commander
JOKR (Contraband) + 5000 XP
- Take the IR Beacon Left on the Rocks Off the Northern Coast of Ashika Island
- Plant the IR Beacon on the Roof of Ashika Castle
Eliminating Targets (Loading Screen) + 10,000 XP
White Lotus Tier 2
Operation black gold.
- Kill 3 Enemies in Hafid Port
- Kill 3 Enemies in Rohan Oil in the Same Deployment
- Kill 3 Enemies in Sattiq Cave Complex in the Same Deployment
Lockwood 300 (Contraband) + 7500 XP
Unknown Shipping
- Extract the 3 Contraband Packages From the Sunken Ships in Al Mazrah
- Extract the 2 Contraband Packages From the Sunken Ships in Ashika Island
Crossbow (Contraband) + 7500 XP
Key Elimination
- Complete an Eliminate HVT Contract
- Take a Key Found on an HVT or Elsewhere
- Use a Key to Unlock a Locked Space or Locked Cache
Lost Room 403 Key + 7500 XP
Demolitions
- Complete a Destroy Supplies Contract to Locate Nearby Safes
- Find and Open a Safe
Night Operation
- Take the 2 IR Beacons From the Al Sharim Pass Dead Drop
- Plant 1 at the North Tower in the A.M. City Construction Zone
- Plant 1 at the South Tower in the A.M. City Construction Zone
RAAL MG (Contraband) + 7500 XP
Medical Mule
- Deliver 3 Revive Pistols or Self Revive to the Dumpster Dead Drop in Zarqwa Hydroelectric
- Deliver 5 AFAKs or Large Medical Bags to the Same Dead Drop
P890 (Contraband) + 7500 XP
- Take the Discrete Radio Transmitter From the Ashika Town Center Dead Drop
- Plant the Radio at the Top of the Shadow Company Ship
- Upload the Radio’s Frequency to an Upload Station After It’s Planted
Aim Down Sights (Animated Emblem) + 15,000 XP
White Lotus Tier 3
Pacific foothold.
- Deliver 1 Bottle of Gun Oil the Dead Drop in the Ashika Residential District
- Deliver 2 VCRs or Game Consoles to the Same Dead Drop
- Deliver 3 Pieces of Legion Deal Intel to the Same Dead Drop
TAQ-V (Contraband) + 10,000 XP
Fast And Strong
- Clear 5 Locked Stronghold Each in Under 20 Seconds
Fennec 45 (Contraband) + 10,000 XP
- Loot the GPS Tracker From the Dumpster Dead Drop in Zaya Observatory
- Travel to Every POI in Al Mazrah While Carrying the GPS Tracker in One Deployment
- Extract the GPS Tracker
Double XP Token + 10,000 XP
Vondel Investigation
- Infil Into Vondel With the Shadow Company Laptop
- Find and Take the Russian Hard Drive From the Graveyard in Vondel
- Use the Laptop to Upload the Russian Hard Drive to Shadow Company at an Upload Station
Teamwork (Calling Card) + 10,000 XP
Fuel Sabotage
- Siphon 3 Vehicles of Gas in Vondel
- Dead Drop 3 Full Gas Cans in Vondel
Expedite 12 (Contraband) + 10,000 XP
Intel Exchange
- Find and Extract the Al Mazrah Shipping Intel From Room 403 of the Ashika Island Hotel
- Take the Building 21 USB Stick From the Dead Drop in the Waterways
- Place the Building 21 USB in the Hotel Room
Quid Pro Quo
- Call in Our LTV Vehicle Drio Behind the Castle in Vondel
- Drive the Vehicle to the Flea Market in the Same Deployment
- Drive the Vehicle to the Fire Station in the Same Deployment
Lunar Patrol (Weapon Blueprint) + 20,000 XP
White Lotus Tier 4
Break check.
- Locate the Car Crash Site Near the Observatory
- Find and Extract the Hard Drive Near the Crash Site
- Drop the Hard Drive in the Waterways Dead Drop on Ashika Island
City Hall Key + 15,000 XP
Air Supremacy
- Control 3 SAM Sites Simultaneously
JOKR (Contraband) + 15,000 XP
- Dock a Boat at the Riverside Caves in Sattiq Caves
- Find and Extract the Smuggling Records in the Riverside Caves in Sattiq Caves
- Place Sensitive Documents at the Original Location of the Smuggling Records in the Same Deployment
- Complete 4 Contracts in Under 6 Minutes
TAQ-M (Contraband) + 15,000 XP
Shopkeeper’s Request
- Dead Drop 3 Koschei Complex Keys in Al Mazrah
- Dead Drop 1 Cat Statue in Al Mazrah
- Fully Gear Up Active Duty Operator 1
- Fully Gear Up Active Duty Operator 2
- Fully Gear Up Active Duty Operator 3
Skeleton Key – Used + 15,000 XP
Chemist’s Sources
- Find and Take the Chemist’s Intel Off of Him
- Follow the Chemist’s Intel to Find a Sample of the Russian Gas in Vondel
Trail of Bullets (Calling Card) + 30,000 XP
White Lotus Tier 5
- Complete 8 Contracts in Under 15 Minutes
VEL 46 (Contraband) + 20,000 XP
Unknown Threat
- Kill 30 of the Unknown Forces in Ashika Island or Vondel with a Suppressed Pistol with Headshots
SP-X 80 (Contraband) + 20,000 XP
Exfil Party
- Infil Without Teammates
- Extract with at Least 6 Total Operators at Once in the Same Deployment
The Route Forward
- Loot 7 Tracking Devices From the Al-Sharim Pass Dumpster Dead Drop
- Plant 7 Tracking Devices on the AQ Trucks in Sattiq Caves in One Deployment
- Travel to the Server Rack in the Bunker in Sattiq Caves and Download the Data
Skeleton Key – Used + 20,000 XP
Clean House
- Unlock and Clear the Vondel Aquarium
- Unlock and Clear the Vondel City Hall in the Same Deployment
- Unlock and Clear the Cruise Terminal in the Same Deployment
TAQ-V (Contraband) + 20,000 XP
Firing Power
- Kill the Juggernaut with the RGL-80
- Kill Velikan with the RGL-80
- Kill the Bullfrog with the RGL-80
Victus XMR (Contraband) + 20,000 XP
Russian Gas
- Infil Into the Koschei Complex with the Vondel Gas Sample
- Find the Koschei Complex Gas Sample in the South of the DRD
- Validate the Chemical Similarity Between the Vondel Gas Sample and Kochei Complex Gas Sample at the Machine in the External Ops Sector
Snowplow (Operator Skin) + 40,000 XP
Crown Tier 1
Al mazrah’s threat.
- Kill 7 AQ Soldiers Within 10 Seconds of Each Kill
FTAC Siege (Contraband) + 5000 XP
Vondel Recon
- Have 2 UAV Towers Active at the Same Time in Vondel
Vehicular Homicide
- Destroy 1 Armored AQ Patrol Truck in Al Safwa Quarry
- Destroy 2 Cargo Trucks in Zaya Observatory
- Destroy 1 Boat in Mawizeh Marsh
Koschei Clearing
- Kill 5 Enemies in the Koschei Complex
L2 Restricted Zone Key + 5000 XP
Chemist’s Whereabouts
- Tag 3 Enemies in the Al Mazrah Radiation With a Recon Drone
M13B (Contraband) + 5000 XP
Tactique – Verte Testing
- Kill 6 Enemies From a Range of Over 25 Meters With the Tactique-Verte Platform of Weapons
- Kill 3 Armored Enemies With the Tactique-Verte Platform of Weapons
Humanitarian Operation
- Dead Drop 2 Weapons to Any Vondel Dead Drop
- Dead Drop 4 Lethals to Any Vondel Dead Drop
- Dead Drop 1 Killstreak to Any Vondel Dead Drop
No Time For Last Words (Loading Screen) + 10,000 XP
Crown Tier 2
Sample platter.
- Kill an Enemy With 6 Different Weapon Classes in One Deployment
1 Tier Skip + 7500 XP
Scavenger In Vondel
- Infil With a Custom Weapon
- Drop the Weapon Near an Enemy Operator’s Corpse
Low-Light Combat Training
- Kill 5 Enemies Without Using NVGs in the Chemical Plant
- Kill 5 Enemies With Fire in the Chemical Plant
PDSW 528 (Contraband) + 7500 XP
The Oasis Route
- Plant a Tactical Camera in the Airlock at the Oasis Bunker Entrance
MCPR-300 (Contraband) + 7500 XP
Vehicular Philanthropy
- Repair and Refuel 3 Vehicles at the Vondel Police Station
- Repair and Refuel 1 Boat in Vondel
Lachmann-762 (Contraband) + 7500 XP
Golden Ticket
- Extract a Building 21 Access Keycard
Blue Access Card + 7500 XP
X Marks The Spot
- Unlock the Keypad-Locked Room in the Koschei Complex Alpha Cluster With an R4D Detector
- Extract the Koschei Complex Map
Barbed Silhouette (Emblem) + 15,000 XP
Crown Tier 3
Bryson long rifle weapons testing.
- Kill 10 Enemies From a Range of Over 50 Meters With the Bryson Long Rifle Weapons Platform
- Kill 10 Enemies With a Suppressed Bryson Long Rifle Platform Weapon
GS Magna (Contraband) + 10,000 XP
False Alarm
- Signal All 3 Exfils in Al Mazrah in One Deployment
- Extract on the Final Exfil in the Same Deployment
- Kill 7 Enemies From a Helicopter in One Deployment
- Kill 1 Operator or Commander From a Helicopter
Red Access Card + 10,000 XP
Chemical Sourcing
- Dead Drop a Bottle of Sulphuric Acid
- Dead Drop a Bottle of Hydrogen Peroxide
- Dead Drop a Bottle of Radiation Blockers
- Extract the Fake Al-Qatala Documents From the Zaya Observatory Dead Drop
- Stash the Fake Al-Qatala Documents on the Central Security Desk in the Top Room of the Ashika Island Castle
- Extract From Ashika Island
Lockwood 300 (Contraband) + 10,000 XP
Bottom of the Barrel
- Trade the Shopkeeper a Bottle of Liquor in Exchange for the Keycode
- Enter the Code Into the Locked Room Keypad in the Alpha Cluster Entrance
- Extract the Research Documents From the Room
Crown Sigil (Emblem) + 10,000 XP
Triple Clear
- Clear a Stronghold in Rohan Oil
- Clear a Stronghold in Al Mazrah City
- Clear a Stronghold in Taraq Village
Louder Than Words (Weapon Blueprint) + 20,000 XP
Crown Tier 4
The deadliest sin.
- Sell 25 Unique Valuables in One Deployment
1 Tier Skip + 15,000 XP
Explosive Ordnance Disposal
- Defuse an Enemy Team’s Charge at a Supply Site
Koschei Surveillance
- Plant a Tactical Camera in the Airlock at the Al Mazrah City Bunker Entrance
- Plant a Tactical Camera in the Airlock at the Taraq Bunker Entrance
- Plant a Tactical Camera in the Airlock at the Rohan Oil Bunker Entrance
Kastov 762 (Contraband) + 15,000 XP
Explosives Sources
- Kill the Pyro
- Extract the Pyro’s Intel
- Dead Drop the Pyro’s Intel in Vondel
AQ-V (Contraband) + 15,000 XP
- Reset the Security System at the Upload Station in the External Ops Section
- Open the Locked Cache in the Restricted Section in the Alpha Cluster
- Extract the Building 21 Evidence From the Cache
Black Access Card + 15,000 XP
Hunting Party
- Kill Both the Sniper and the Rhino Within 60 Seconds of Each Other
Tempus Torrent (Contraband) + 15,000 XP
Exit Through the Sector Alpha
- Locate the Two Stairwell Exits in the DRD
- Scan Each Exit With a Geiger Counter
Waiting For Action (Calling Card) + 30,000 XP
Crown Tier 5
- Kill the Sniper with a Sniper Rifle
- With the Rhino with a Pistol
- Kill the Juggernaut with an LMG
Charged Interaction
- Find and Take the Explosive Charge From the Zaya Observatory Tunnel Entrance
- Deliver the Charge to a Dead Drop to Neutralize the Timer
- Take the Charge and Deliver it to the Shopkeeper in Koschei Complex
Riot Shield (Contraband) + 20,000 XP
Exfil Tracking
- Take and Extract the 4 Tracking Devices From the Zarqwa Hydroelectric Dead Drop
- Plant a Tracker on 3 Enemy Exfil Choppers
- Plant a Tracker on the Final Exfil Chopper
Outsourcing
- Extract the Building 21 Intel From the Black Locked Room
- Extract the Building 21 Intel From the Red Locked Room in the Same Deployment
- Extract the Building 21 Intel From the Blue Locked Room in the Same Deployment
M4 (Contraband) + 20,000 XP
- Kill 3 Operators in the Same Deployment
- Extract $100,000 in the Same Deployment
FJX Imperium (Contraband) + 20,000 XP
Case By Case
- Extract the Weapon Case From Bio Bunker Without Dying
- Extract the Weapon Case From Ashika Island Without Dying
- Extract the Weapon Case From Vondel Without Dying
Emergency Exit
- Clear Both Bunker Exit in one single deployment in Koschei Complex
Nova Ops Operator Skin + 40,000 XP
Phalanx Tier 1
Welcome to vondel.
- Active a UAV Tower in Vondel
- Pick up an enemy radio in Vondel
- Kill 3 radio marked enemies in Vondel
Bike Parking Key +5000 XP
Ready To Rock
- Acquire a large plate carrier
- Acquire a large backpack
- Acquire a self revive kit
Chimera (Contraband) +5000 XP
Cargo Keeper
- Complete a Cargo Delivery contract
- Fully repair and refuel the transport vehicle
Fennec 45 (Contraband) +5000 XP
- Visit the Cruise Terminal in Vondel
- Visit the Castle in the same deployment
Veterinarian Key +5000 XP
Day at the Zoo
- Travel to the Zoo in Vondel
- Loot 10 containers at the Zoo
- Kill 15 enemies at the Zoo
X12 (Contraband) +5000 XP
Well Supplied Soldier
- Acquire a Secure Supplies Contract
- Complete a Secure Supplies Contract in 2:30 minutes
MX9 (Contraband) +5000 XP
Disarming Presence
- Drop 3 ISO Hemlock weapons in a dead drop
- Kill 10 Enemies with an ISO Hemlock
- Exfil with an ISO Hemlock weapon in the same deployment
Honor And Glory Blueprint for MX9 +5000 XP
Phalanx Tier 2
Going green.
- Complete 2 secure nuclear material contracts
- Extract 4 nuclear fuel rods
M4 (Contraband) +7.500 XP
No One Left Behind
- Rescue 2 Hostages in the same deployment
Cruise Terminal Key +7.500 XP
On The Spot
- Mark 10 enemies while in the Castle using a spotter scope
Double Weapon XP Token +7.500 XP
Street Smarts
- Kill 25 enemies while standing
- Kill 25 enemies while crouching
- Kill 25 enemies while prone
Double XP Token +7.500 XP
Security Checkpoint
- Place a tactical camera at the Central Station in Vondel
- Mark 10 enemies with the tactical camera at the Central Station
Houseboat Key +7.500 XP
Gone Phishing
- Hack 3 contracts in one match using the signals Intelligence Contract
SP-R 208 (Contraband) +7.500 XP
Long Distance
- Take the tracker from the dead drop in Vondel’s Zoo
- Use 3 UAV towers in Al Mazrah while carrying the tracker in the same deployment
- Deliver the loaded tracker back to the dead drop at the Zoo
Spartan Glory (CHARM) +15.000 XP
Phalanx Tier 3
Passive income.
- Receive 10 signals of insurance payments
- Open 3 safes in the same deployment
RAAL MG (Contraband) +10.000 XP
Strike Team
- Destroy the Bullfrog Commander from a vehicle
- Extract the Bullfrog Commander’s weapon case in the same deployment
Fire Dept Key +10.000 XP
- Visit 8 POI using a Tactical Amphibious vehicle in the same deployment
Victus XMR (Contraband) +10.000 XP
The Transporter
- Pickup the Charge in the closed tunnel near Zaya Observatory
- Transport and drop the Charge near the supply site at the U.S. Embassy in Al Mazrah City
Double XP Token +10.000 XP
- Find a rebreather
- Find the cartel warehouse key from the eastern-most sunken ship in Al Mazrah
- Find and extract the cartel laptop from the warehouse
Buoyant House Key +10.000 XP
World Trip Souvenirs
- Extract 2 Dog Tags from Al Mazrah
- Extract 2 Dog Tags from Ashika Island
- Extract 2 Dog Tags from Vondel
Lockwood MK2 (Contraband) +10.000 XP
Go For A Drive
- Acquire an encrypted hard drive
- Drive a chop top in Vondel for 2 consecutive minutes while carrying the encrypted hard drive
- Deliver the hard drive to the dead drop at the Zoo
Revolution’s Wave (Vehicle Skin) +20.000 XP
Phalanx Tier 4
- Destroy 3 tactical amphibious Vehicles in under 5 Seconds
556 Icarus (Contraband) +15.000 XP
- Complete 3 hunt contracts in one deployment
- Exfil successfully
Mayor’s Briefcase Key +15.000 XP
Stress Test
- Extract in a Helo carrying 7 or more Operators
Double Weapon XP Token +15.000 XP
- Kill 20 Enemies with your fists in one deployment
Bryson 890 (Contraband) +15.000 XP
Turn the Tide
- Complete 2 secure intel contracts
- Complete a destroy supplies contract in the same deployment
- Drill 3 safes in the same deployment
Barista’s Bag Key +15.000 XP
Contract Killer
- Complete 4 types of contracts in one deployment
- Take final exfil in the same deployment
FJX Imperium (Contraband) +15.000 XP
- Clear the fire station fortress in Vondel while carrying a weapon case
- Activate a UAV tower while carrying a weapon case
- Extract with a weapon case in the same deployment
Shield Wall Blueprint (Sakin MG38) +30.000 XP
Phalanx Tier 5
Last line of defense.
- Kill 150 enemies in Vondel in the same deployment
Double XP Token +20.000 XP
Final Countdown
- Extract with the final exfil with 3 weapons dropped by enemy operators in the same deployment
Stage Bag Key +20.000 XP
Contractual Obligations
- Complete 8 unique contracts in a single deployment
Double XP Token +20.000 XP
Spice of Life
- Kill 10 enemies with a single ammo clip
- Kill enemies using 20 different weapons in the same deployment
Levels of Hell (Calling Card) +20.000 XP
Rifle Some Feathers
- Buy a SP-X 80 from a Buy Station
- Kill 15 Operators or Commanders with a SP-X 80
Windmill Bag Key +20.000 XP
Firearm Regulation
- Deliver 25 weapons to Vondel dead drops in a single deployment
PDSW 528 (Contraband) +20.000 XP
Cut the Head
- Trade for the Encryption Key at a Buy Station
- Activate the 4 laptops in the market in under 2 minutes with the Encryption Key
- Extract with the Encryption Key
Praetorian (Operator Skins) +40.000 XP

Stay tuned for expected updates to the DMZ factions with Season 4 reloaded and Season 5.
Related Articles

BEST DG-58 LSW LOADOUT WARZONE SEASON 3 RELOADED | LMG CLOSE RANGE META CLASS

First Black Ops 6 Zombies Gameplay & Set Crew Revealed Early

First OFFICIAL Black Ops 6 Teaser Trailer & “The Truth Lies” Website | Call of Duty 2024

MW3 GUNDAM EVENT RELEASE DATE, OPERATORS AND REWARDS

Best DG56 LSW Loadout in Warzone Season 3 Reloaded | LMG Long Range Meta Class

How to Unlock Obsidian Camo in Modern Warfare 3 Season 4 | Warzone Weapon Prestige Camo
Advertisements.
Dropping the Bomb | Daily Call of Duty® News, Rumors, Concepts, and Opinion Pieces
DETONATED is not endorsed by, affiliated with, maintained or sponsored by Activision Blizzard King , Microsoft , Xbox , Sony , or PlayStation . All content, games titles, trade names and/or trade dress, trademarks, artwork, and associated imagery are trademarks and/or copyright material of their respective owners.
© DETONATED 2024 - All Rights Reserved.
IMAGES
VIDEO
COMMENTS
With this stored, you can now visit all 17 POIs for the next task. How to Travel to Every POI in Al Mazrah While Carrying the GPS Tracker in One Deployment in DMZ. While traveling to all 17 POIs in Al Mazrah may seem too challenging, it's doable if you follow these specific instructions. For starters, you need to get an armored vehicle. This ...
Loot the GPS tracker. Travel to every POI in Al Mazrah. 1. Loot the GPS tracker. Screenshots: GuidingLight. How to loot the GPS tracker (expand the screenshots above): Go to the northeast of Zaya Observatory (F5). Loot the GPS tracker in the white dumpster. 2.
Travel to Every POI While Carrying the GPS Tracke in one deploymentr & Loot the gps from the dumpster - Dmz GuidePathfinder faction mission guide how and whe...
Currently, there is only one shared map between Warzone 2 and DMZ, although you will obviously move through the area differently depending on which game mode you choose. Here's a full list of the MW2 DMZ POIs that you can visit on Al Mazrah: Taraq Village. Rohan Oil. Al-Mazrah City.
This guide is for the Pathfinder mission in Modern Warfare 2 DMZ! How to find the GPS tracker in the dumpster dead drop near Sa'id City! #dmz #mw2 #warzone2 ...
In this video i am going to show you an easy way to travel to every poi in al mazrah to complete path finder mission in white lotus in dmz.Do check out othe...
Call of Duty DMZ. DMZ. Loot the GPS tracker from the dumpster dead drop in Zaya Observatory. Travel every POI in Al Mazrah while carrying the GPS tracker in a one deployment. Extract the GPS ...
The new Call of Duty Warzone 2.0 map has now been revealed as Al Mazrah. Players will drop into this location and scour the new areas to find Points of Interest (POIs). Al Mazrah is a large urban area with many houses and winding rivers that allow underwater combat. Players will need to survey every inch of the map to find the POIs, and our ...
DMZ Missions Guide in Warzone. Pathfinder is a new Season 4 DMZ Mission for the faction White Lotus featured in the DMZ mode of Call of Duty: Warzone 2. In this guide, you can find all the mission's objectives and the rewards you'll obtain by completing it.
updated Oct 24, 2022. Al Mazrah is one of the new maps in Call of Duty Warzone 2.0. The map has a mix of metropolitan and rural architecture set within the Republic of Adal. Players will be able ...
This interactive map covers everything you'll need in DMZ Al Mazrah. Use the drop down menus to select what you are looking for. It'll guide you to your next Mission location or tell you where the enemy teams spawn. Credit for the map goes to Map Genie. This site allows users to edit and update video game maps from Call of Duty to World of ...
DMZ has a huge amount of rewards available for Warzone 2.0 players to unlock by completing Faction Missions. Here's everything you can get your hands on after the latest wipe! If you're dropping into DMZ, you'll want to be making the most of your time in Al Mazrah. After all, in this extraction shooter game mode, there's some great loot ...
Credit: Activision Blizzard. Zone 1A: Oasis. Zone 1B: Taraq Village. Zone 1C: Western Foothills. Zone 1D: Rohan Oil Refinery. Zone 1E: Al Safwa Quarry. In the northwest region of Al Mazrah, players will find a sprawling landscape of oases, roadside ruins, and three major locations: Taraq Village, Rohan Oil Refinery, and Al-Safwa Quarry.
These are the three objectives in the Pathfinder mission: Continue reading after this ad. Head to the Zaya Observatory and loot the GPS tracker in the dumpster dead drop. While carrying the GPS tracker, travel to every POI in Al Mazrah. Extract the GPS tracker. Okay, so part one is traveling to the Zaya Observatory.
Interactive Map. Sign up to completely disable ads on the site and support the development. The most detailed DMZ interactive map of Al Mazrah. Best quality, in-game icons, map colors customization. All POIs, Keys, Hidden Caches, Missions etc.
DMZ Missions List and Rewards in Warzone 2 (Season 5) On this page, you can find the full list of the DMZ missions and rewards featured in Call of Duty Warzone 2, updated with the Season 4 reset and Faction Mission Refresh.. DMZ is a brand new open-world extraction mode in Warzone 2 where Operator squads have free rein to complete faction-based missions, take on additional side objectives ...
The most detailed interactive maps of Urzikstan, Al Mazrah, Koschei Complex, Vondel, Ashika Island and Building 21. Best quality, in-game icons, map customization. All POIs, Keys, Hidden Caches, Missions etc.
Hey y'all. Just wondering if anyone has any tips for the "Visit all 17 POI's in Al Mazrah with the stashed GPS" quest, as I kinda left it until last for this tier of missions. Is a light helo the best vehicle, or am I dreaming? Is there a 'best' order of POI's to visit? Does anyone have a list of all 17 POI's, maybe with circles on a map?
Warzone 2 Al Mazrah POIs. Click to enlarge. On the official Al Mazrah Map, there are a total of 18 Warzone 2 POIs, spread out across the island. Some will prove more familiar than others, while almost all of the Modern Warfare 2 maps can be found at one POI or another. The full list of Warzone 2 POIs is: Oasis. Taraq Village.
So insgesmat there are 28 different places where you can spawn in DMZ: Red circle: these spawns are the most dangerous starting points on the map, as you can be quickly spotted by enemies. Yellow Square: These spawn points on the map of Al Mazrah show the spawns that offer at least some cover. Green Diamond: Here you will find the best spawn ...
AL Mazrah POI - Warzone 2.0 is finally out as a part of Modern Warfare 2, with it, also comes a new battle pass season and a new map.. Following up on the new map, Al-Mazrah, is a map that's designed for battle royale and some similar game modes. This is, by far, one of the best maps in Call of Duty, and as an attempt to understand the map completely, we'll be covering certain Points of ...
The DMZ missions always get resets or changed every season, and Season 4 is no different. One of the missions for the new Phalanx Faction is Test Drive which requires players to find the Tactical Amphibious vehicle and then use the vehicle to go to multiple POI on the map. This guide will show you how to complete the Test Drive mission in DMZ ...
Season 4 of Warzone added a fresh coat of paint to the DMZ menus, now providing a Forward Operating Base (FOB) where players can select various passive missions to enhance their inventory and further the post launch story. Upon clicking on the mission objectives, players can select missions from the current factions: White Lotus, Black Mous ...