
- Forum Listing
- Marketplace
- Advanced Search
- Ford Trucks | Utes | Vans |SUVs | Crossovers
- Ford Excursion Forum

Factory code for 2000 Excursion's keypad
- Add to quote
My wife and I recently bought a 2000 Excursion. We can't find the factory code to reprogram the keypad on the driver's door. I looked under the dash where I found the code for our Expidition, but was not able to find it. Can anyone suggest a remedy?
You can try to contact ford CS and see if they can help you with this. I have found the code occasionally on a sheet of paper in the owners manual. Just my 2 cents.
janlsn98 said: My wife and I recently bought a 2000 Excursion. We can't find the factory code to reprogram the keypad on the driver's door. I looked under the dash where I found the code for our Expidition, but was not able to find it. Can anyone suggest a remedy? Click to expand...
The code is usually located on a white electrical box located near your jack. My code for a Mountaineer is located inside the panel located on the drivers side in the back of the cargo area. The number is not easy to read, it requires a flashlight and looking at it at a angle. Good luck.
janlsn98 said: My wife and I recently bought a 2000 Excursion. We can't find the factory code to reprogram the keypad on the driver's door. I looked under the dash where I found the code for our Expidition, but was not able to find it. C an anyone suggest a remedy? Click to expand...
- ?
- 116.1K members
Top Contributors this Month


- Tech Articles
- Ford Articles
- Discussion Forum
- Blue Oval Trucks Store
Ford Excursion Keyless Entry Code
When I bought my 2003 Ford Excursion, it didn’t come with the Keyless Entry ‘wallet card’ that contains the door code.
If you don’t have this card, the code can be located by reading the sticker on the GEM (Generic Electronics Module) located in the dash.
On my Excursion, I found that you can see the top of the GEM by removing the ashtray and looking in to the dash with a flashlight.
When you look at the module, you should see a white sticker with black print. You can see it in the photo below. The print is upside down.
Here’s a look at sticker flipped 180 degrees. The actual door code starts with the ‘2’. The remaining numbers aren’t visible. I had too much trouble positioning the camera to get a shot at the whole number.
Here is what the sticker will look like. The ‘09388’ is the 5-digit keyless entry door code.
Setting Your Own Code:
Once you find the factory code, you can set your own personal 5-digit code.
Step 1: Enter the factory 5-digit code (you’ll hear a click in the door. I lock the door before entering the code so I can see it unlock when the code is entered)
Step 2: Immediately (within 5-seconds) push the ‘1-2’ button after entering the code.
Step 3: Immediately (within 5-seconds) enter your new 5-digit code.
Step 4: Now lock the door and make sure the new 5-digit code works.
Note: You can’t erase the original factory code. It will always work irregardless of what you set for a personal code.
Another Method To Find The Code:
I found a YouTube video that demonstrates how to find the code using an inspection mirror. The method didn’t work for me, but it may for you.
Here’s the video:
- Ford Manuals
- 2000 Excursion
- Owner's manual
Ford 2000 Excursion Owner's Manual
- page of 233 Go / 233
Table of Contents
- Troubleshooting
- Breaking-In Your Vehicle
- Special Notices
- Snowplowing
- Vehicle Symbol Glossary
- Warning Lights and Chimes
- Service Engine Soon
- Light Turns on Solid
- Light Is Blinking
- Air Bag Readiness
- Transmission Control Indicator Light (TCIL)
- Safety Belt
- Brake System Warning
- Anti-Lock Brake System (ABS)
- Turn Signal
- Charging System
- Speed Control
- Oil Pressure/Engine Coolant
- Four Wheel Drive Low
- Safety Belt Warning Chime
- Supplemental Restraint System (SRS) Warning Chime
- Key-In-Ignition Warning Chime
- Headlamps on Warning Chime
- Speedometer
- Engine Coolant Temperature Gauge
- Trip Odometer
- Engine Oil Pressure Gauge
- Battery Voltage Gauge
- Headlamp Control
- Daytime Running Lamps (DRL)
- Panel Dimmer Control
- 4WD Control
- Reverse Sensing System
- Auxiliary Power Point
- Mode Selector Control
- Temperature Control Knob
- Fan Speed Control
- Climate Control System
- Operating Tips
- Auxiliary A/C-Heater Controls
- Rear Window Defroster
- Using Your Audio System
- Premium AM/FM Stereo/Cassette/Single CD
- Volume/Power Control
- Tune Adjust
- AM/FM Select in Tape Mode
- AM/FM Select in Radio Mode
- AM/FM Select
- Tune Adjust in Radio Mode
- Tune Adjust for CD Changer
- Seek Function
- Seek Function in Radio Mode
- Seek Function in Tape Mode
- Seek Function for CD or CD Changer
- Scan Function
- Radio Station Memory Preset
- Autoset Memory Preset
- Treble Adjust
- Bass Adjust
- Starting Autoset Memory Preset
- Speaker Balance Adjust
- Speaker Fade Adjust
- Tape/CD Select
- Fast Forward
- Tape Direction Select
- Eject Function
- Dolby Noise Reduction
- Compression Adjust
- Shuffle Feature
- Setting the Clock
- Rear Seat Controls
- Adjusting the Volume
- Using Headphones/Personal Audio System
- Media Select
- Memory Preset Control
- Troubleshooting the CD Changer
- Cleaning Compact Discs
- CD and CD Changer Care
- Cleaning Cassette Player
- Cassette and Cassette Player Care
- Audio System Warranties and Service
- Radio Reception Factors
- Radio Frequency Information
- Positions of the Ignition
- Turn Signal Control
- To Turn Speed Control On/Off
- To Set a Speed
- To Set a Higher Set Speed
- To Set a Lower Set Speed
- To Disengage Speed Control
- To Return to a Previously Set Speed
- Windshield Wiper/Washer Controls
- Hazard Flasher
- Tilt Steering Wheel
- Rear Window Wiper/Washer Controls
- Speed Dependent Wipers
- Flash to Pass
- Overdrive Control
- Activating/Deactivating Overdrive
- Power Windows
- One Touch down
- Window Lock
- Accessory Delay
- Childproof Door Locks
- Power Door Locks
- Power Side View Mirrors
- Overhead Console
- Fold-Away Mirrors
- Heated Outside Mirrors
- Forward Storage bin
- Installing a Garage Door Opener
- Power Quarter Rear Windows
- Automatic Dimming Inside Rear View Mirror
- English/Metric Display
- Illuminated Visor Mirror
- Trip Computer
- Mode Control
- Outside Air Temperature
- Compass Zone Adjustment
- Interior Lamps
- Compass Calibration Adjustment
- Dome/Map Lamps
- Rear Courtesy/Reading Lamps
- Rear Dome Lamp
- Center Console
- Remote Entry System
- Unlocking/Locking the Doors
- Replacing the Battery
- Sounding a Panic Alarm
- Illuminated Entry
- Replacing Lost Transmitters
- Programming Remote Transmitters
- Keyless Entry System
- Programming Your Own Personal Entry Code
- Securilock Passive Anti-Theft System
- Unlocking/Locking the Doors with the Keyless Entry System
- Theft Indicator
- Programming Spare Securilock Keys
- Procedure to Program Spare Securilock Keys to Your Vehicle
- Full Bench Seat
- 60/40 Split Bench Seat
- Captain’s Chair
- Adjusting the Front Power Seat
- Using the Manual Lumbar Support
- Heated Seats
- Head Restraints
- Rear Folding Bench Seat
- Folding down Rear Seats into Load Floor
- Returning the Seat to Upright
- Third Row Seat
- Accessing the Third Row Seat
- Reclining the Seatback
- Folding down the Third Row Seat
- Removing/Installing the Third Row Seat
- Safety Restraints Precautions
- Combination Lap and Shoulder Belts
- Vehicle Sensitive Mode
- Automatic Locking Mode
- When to Use the Automatic Locking Mode
- How to Use the Automatic Locking Mode
- Energy Management Feature
- How to Disengage the Automatic Locking Mode
- Safety Belt Replacement Label
- Front and Second Row Safety Belt Height Adjustment
- Adjusting the Lap Belt
- Safety Belt Extension Assembly
- Safety Belt Warning Light and Indicator Chime
- Conditions of Operation
- Belt Minder
- One Time Disable
- Deactivating/Activating the Belt Minder Feature
- Safety Belt Maintenance
- Important Supplemental Restraint System (SRS) Precautions
- Air Bag Supplemental Restraint System (SRS)
- Children and Air Bags
- How Does the Air Bag Supplemental Restraint System Work?
- Disposal of Air Bags and Air Bag Equipped Vehicles
- Safety Restraints for Children
- Determining if the System Is Operational
- Important Child Restraint Precautions
- Children and Safety Belts
- Safety Seats for Children
- Child and Infant or Child Safety Seats
- Installing Child Safety Seats in Combination Lap and Shoulder Belt Seating Positions
- Attaching Child Safety Seats with Tether Straps
- Preparing to Start Your Vehicle
- Important Safety Precautions
- Starting the Engine
- Using the Engine Block Heater
- Guarding against Exhaust Fumes
- Important Ventilating Information
- ABS Warning Lamp
- Parking Brake
- Steering Your Vehicle
- Brake-Shift Interlock
- Preparing to Drive Your Vehicle
- Automatic Transmission Operation
- Driving with a 4–Speed Automatic Transmission
- Understanding Gearshift Positions
- Power Take off (PTO)
- Four-Wheel Drive (4WD) Operation
- Forced Downshifts
- Shift Strategy (4R100 Automatic Transmission)
- Electronic Shift on the Fly (ESOF) 4X4 System
- 4WD System Indicator Lights
- Shifting from 2WD (2WD High) to 4X4 HIGH (4WD High)
- Positions of the Electronic Shift System
- Using the Electronic Shift 4WD System
- Shifting from 4X4 HIGH (4WD High) to 2WD (2WD High)
- Shifting from 4X4 HIGH (4WD High) to 4X4 LOW (4WD Low)
- Shifting from 4X4 LOW (4WD Low) to 4X4 HIGH (4WD High) or 2WD (2WD High)
- Driving Off-Road with 4WD
- If Your Vehicle Gets Stuck
- Mud and Water
- Driving on Hilly or Sloping Terrain
- Vehicle Loading
- Calculating the Load Your Vehicle Can Carry/Tow
- Special Loading Instructions for Owners of Pickup Trucks and Utility-Type Vehicles
- Driving through Water
- Trailer Towing Table
- 4X2 W/Automatic Transmission
- 4X4 W/Automatic Transmission
- 4X2 with Automatic Transmission
- Preparing to Tow
- Load Equalizing Hitch
- 4X4 with Automatic Transmission
- Driving While You Tow
- Using a Step Bumper
- Trailer Brakes/Lamps
- Safety Chains
- Trailer Towing Tips
- Launching or Retrieving a Boat
- Servicing after Towing
- Luggage Rack
- Recreational Towing (All Wheels on the Ground)
- 2WD Vehicles (with Automatic Transmissions)
- To Adjust the Cross-Bar Position
- To Remove the Cross-Bar Assembly from the Roof Rack Side Rails
- To Adjust the Tie-Downs
- Using Roadside Assistance
- Getting Roadside Assistance
- Resetting the Fuel Pump Shut-Off Switch
- Roadside Coverage Beyond Basic Warranty
- Standard Fuse Amperage Rating and Color
- Passenger Compartment Fuse Panel
- Fuse Panel Description
- Power Distribution Box Description
- Changing the Tires
- Spare Tire Information
- Tire Change Procedure
- Location of the Spare Tire and Tools
- Jump Starting Your Vehicle
- Connecting the Jumper Cables
- Preparing Your Vehicle
- Jump Starting
- Removing the Jumper Cables
- Wrecker Towing
- Service Recommendations
- Precautions When Servicing Your Vehicle
- Working with the Engine Off/On
- Opening the Hood
- Checking the Engine Oil
- Identifying Components in the Engine Compartment
- 5.4L V8/6.8L V10 Gasoline Engines
- Adding Engine Oil
- Engine Oil and Filter Recommendations
- Checking and Adding Brake Fluid—Gasoline Engine
- Checking and Adding Brake Fluid—Diesel Engine
- Checking and Adding Washer Fluid
- Checking and Adding Washer Fluid for the Liftgate
- Checking Engine Coolant
- Adding Engine Coolant
- Recycled Engine Coolant
- Severe Climates
- Coolant Refill Capacity
- What You Should Know about Fail-Safe Cooling
- How Fail-Safe Cooling Works
- When Fail-Safe Mode Is Activated
- Checking and Adding Power Steering Fluid
- Checking Automatic Transmission Fluid
- Low Fluid Level
- Correct Fluid Level
- High Fluid Level
- Adjusting Automatic Transmission Fluid Levels
- Checking and Adding Transfer Case Fluid
- Air Filter Maintenance
- Changing the Air Filter Element
- Traction-Lok Axle
- Windshield Wiper Blades
- Checking the Wiper Blades
- Rear Window Wiper Blades
- Information about Uniform Tire Quality Grading
- Changing the Wiper Blades
- Traction AA a B C
- Temperature a B C
- Tire Rotation
- Checking the Tire Pressure
- Servicing Your Tires
- Replacing the Tires
- Snow Tires and Chains
- What You Should Know about Automotive Fuels
- Choosing the Right Fuel
- Octane Recommendations
- Fuel Quality
- Cleaner Air
- Running out of Fuel
- Fuel Filler Cap
- Filling the Tank
- Fuel Filter
- Measuring Techniques
- Essential of Good Fuel Economy
- Calculating Fuel Economy
- Driving Style — Good Driving and Fuel Economy Habits
- Emission Control System
- EPA Window Sticker
- Readiness for Inspection/Maintenance (I/M) Testing
- Replacing Exterior Bulbs
- Replacing Headlamp Bulbs
- Replacing Front Parking/Turn Signal Bulbs
- Replacing Tail Lamp/Turn/Backup Lamp Bulbs
- Replacing High-Mount Brakelamp Bulbs
- Interior Bulbs
- Replacing License Plate Lamp Bulbs
- Using the Right Bulbs
- Aiming the Headlamps
- Cleaning and Caring for Your Vehicle
- Washing Your Vehicle
- Waxing Your Vehicle
- Repairing Paint Chips
- Cleaning the Wheels
- Cleaning the Engine
- Cleaning Non-Painted Plastic Exterior Parts
- Cleaning the Instrument Cluster Lens
- Cleaning the Exterior Lamps
- Cleaning the Instrument Panel
- Cleaning the Wiper Blades, Windshield and Rear Window
- Cleaning the Interior Fabric
- Cleaning and Maintaining the Safety Belts
- Cleaning Leather Seats
- Motorcraft Part Numbers
- Refill Capacities
Advertisement
Quick Links
- 1 Fuse Panel Description
- 2 Maintenance and Care
- 3 Capacities and Specifications
- Download this manual
Related Manuals for Ford 2000 Excursion

Summary of Contents for Ford 2000 Excursion
- Page 1 All rights reserved. Reproduction by any means, electronic or mechanical including photocopying, recording or by any information storage and retrieval system or translation in whole or part is not permitted without written authorization from Ford Motor Company. Ford may change the contents without notice and without incurring obligation.
Page 2: Introduction
- Page 3 INFORMATION ABOUT THIS GUIDE The information found in this guide was in effect at the time of printing. Ford may change the contents without notice and without incurring obligation. SPECIAL NOTICES Notice to owners of diesel-powered vehicles Read the 7.3 Liter Power Stroke Direct Injection Turbo Diesel Owner’s...
- Page 4 Introduction These are some of the symbols you may see on your vehicle. Vehicle Symbol Glossary Safety Alert Fasten Safety Belt Air Bag-Side Child Seat Installation Warning Brake System Brake Fluid - Non-Petroleum Based Master Lighting Switch Fog Lamps-Front Fuel Pump Reset Windshield Defrost/Demist Power Windows...
- Page 5 Vehicle Symbol Glossary Child Safety Door Lock/Unlock Panic Alarm Engine Coolant Do Not Open When Hot Avoid Smoking, Flames, or Sparks Explosive Gas Power Steering Fluid Emission System Passenger Compartment Air Filter Introduction Interior Luggage Compartment Release Symbol Engine Oil Engine Coolant Temperature Battery...
Page 6: Instrumentation
- Page 7 Instrumentation Electronic Rear window sound system Gearshift lever defroster control (pg. 27) (pg. 115) (pg. 26) HIGH 4WD selector* (pg. 19) Climate Auxiliary control system power point Power adjustable Reverse (pg. 22) (pg. 21) foot pedals* sensing system* (pg. 54) (pg.
- Page 8 Instrumentation WARNING LIGHTS AND CHIMES FUEL FILL FUEL Low fuel Illuminates as an early reminder of a low fuel condition indicated on the fuel gauge (refer to Fuel Gauge in this chapter for more information). When refueling, after the light comes on, the amount of fuel that is added will be less than the advertised capacity since there is fuel still in the tank.
- Page 9 What you should do if the Service Engine Soon light illuminates Light turns on solid: This means that the OBD II system has detected a malfunction. Temporary malfunctions may cause your Service Engine Soon light to illuminate. Examples are: 1. The vehicle has run out of fuel. (The engine may misfire or run poorly.) 2.
- Page 10 Instrumentation government emission standards. The OBD II system also assists the service technician in properly servicing your vehicle. The Service Engine Soon indicator light illuminates when the ignition is first turned to the ON position to check the bulb. If it comes on after the engine is started, one of the engine’s emission control systems may be malfunctioning.
- Page 11 Instrumentation Air bag readiness Momentarily illuminates when the ignition is turned ON. If the light fails to illuminate, continues to flash or remains on, have the system serviced immediately. Transmission control indicator light (TCIL) (if equipped) Illuminates when the Transmission Control Switch (TCS), refer to OVERDRIVE Overdrive control in the Controls...
- Page 12 Instrumentation Anti-lock brake system (ABS) Momentarily illuminates when the ignition is turned to the ON position. If the light remains on, continues to flash or fails to illuminate, have the system serviced immediately. With the ABS light on, the anti-lock brake system is disabled and normal braking is still effective unless the brake warning light also remains illuminated with the parking brake released.
- Page 13 Instrumentation Four wheel drive low Momentarily illuminates when the ignition is turned to the START RANGE position. Illuminates when four-wheel drive low is engaged. If the light continues to flash have the system serviced. Door ajar Illuminates when the ignition is in the ON or START position and any DOOR door is open.
- Page 14 Instrumentation or remains on, have the system serviced. Refer to SecuriLock anti-theft system in the Controls and features chapter. Safety belt warning chime Sounds to remind you to fasten your safety belts. For information on the safety belt warning chime, refer to the Seating and safety restraints chapter.
- Page 15 Instrumentation Fuel gauge Displays approximately how much fuel is in the fuel tank (when the key is in the ON position). The fuel gauge may vary slightly when the vehicle is in motion. The ignition should be in the OFF position while the vehicle is being refueled.
- Page 16 Instrumentation Never remove the coolant reservoir cap while the engine is running or hot. This gauge indicates the temperature of the engine coolant, not the coolant level. If the coolant is not at its proper level the gauge indication will not be accurate. Odometer Registers the total kilometers (miles) of the vehicle.
- Page 17 Instrumentation Tachometer Indicates the engine speed in revolutions per minute. Driving with your tachometer pointer continuously at the top of the scale may damage the engine. Battery voltage gauge This shows the battery voltage when the ignition is in the ON position. If the pointer moves and stays outside the normal operating range (as indicated), have the vehicle’s...
Page 18: Controls And Features
- Page 19 4WD CONTROL (IF EQUIPPED) This control operates the 4WD. Refer to the Driving chapter for more information. Reverse sensing system (if equipped) The reverse sensing system (RSS) sounds a tone to warn the driver of obstacles near the rear bumper when the reverse gear is selected. To help avoid personal injury, please read and understand the limitations on the reverse sensing system described below.
- Page 20 Controls and features The reverse sensing system detects obstacles within approximately 1.8 meters (5.9 ft.) of the rear bumper with a decreased coverage area at the outer corners of the bumper, (refer to the figures for approximate zone coverage areas). As you move closer to the obstacle, the rate of the tone increases.
- Page 21 AUXILIARY POWER POINT The power point is an additional power source for electrical accessories. Do not plug optional electrical accessories into the cigarette lighter. Use the powerpoint. The maximum current draw of any single power point is 20 Amps. Exceeding this limit may result in a blown fuse. There are up to four auxiliary power points in the following locations: •...
- Page 22 Controls and features • Located on the right trim panel in the rear cargo area. CLIMATE CONTROL SYSTEM Manual heating and air conditioning system Fan speed control Controls the volume of air circulated in the vehicle. Temperature control knob Controls the temperature of the airflow inside the vehicle.
- Page 23 Since the air conditioner removes considerable moisture from the air during operation, it is normal if clear water drips on the ground under the air conditioner drain while the system is working and even after you have stopped the vehicle. •...
- Page 24 Controls and features Operating tips • In humid weather, select on your windshield. After a few minutes, select any desired position. • To prevent humidity buildup inside the vehicle, don’t drive with the climate control system in the OFF or MAX A/C position. •...
- Page 25 Controls and features Your auxiliary A/C controls are located in the overhead console. In order for the auxiliary A/C-heater controls to function, the driver’s REAR auxiliary A/C-heater control must be set to REAR. COOL WARM PANEL FLOOR The instrument panel A/C - heater controls must be on in order for the auxiliary A/C-heater to operate.
- Page 26 Controls and features Turn the fan speed control knob to the desired speed. Turn the temperature control to the desired temperature. If the front seat control panel is set to MAX A/C, only cool air will be provided because no heating is available in this mode.
- Page 27 Activating the rear window defroster will also activate the heated mirrors (if equipped). For more information refer to Heated Outside Mirrors in this section. USING YOUR AUDIO SYSTEM Premium AM/FM Stereo/Cassette/Single CD VOL PUSH ON FM 1 DOLBY B NR SEEK TUNE SCAN...
- Page 28 Controls and features Turn control to raise or lower VOL - PUSH ON volume. If the volume is set above a certain level and the ignition is turned off, the volume will come back on at a “nominal” listening level when the ignition switch is turned back on.
- Page 29 Tune adjust in radio mode • Press to move to the next frequency down the band (whether or not a listenable station is located there). Hold the control to move through the frequencies quickly. • Press to move to the next frequency up the band (whether or not a listenable station is located there).
- Page 30 Controls and features Seek function in radio mode • Press to find the next listenable station down the frequency band. • Press to find the next listenable station up the frequency band. Seek function in tape mode • Press to listen to the previous selection on the tape. •...
- Page 31 Controls and features Scan function in tape mode Press the SCAN control to hear a short sampling of all selections on the tape. (The tape scans in a forward direction. At the end of the tape’s first side, direction automatically reverses to the opposite side of the tape.) To stop on a particular selection, press the control again.
- Page 32 Controls and features Starting autoset memory preset 1. Select a frequency using the AM/FM select controls. 2. Press the AUTO control. 3. When the first six strong stations are filled, the station stored in memory preset control 1 will start playing.
- Page 33 Press the TREB control then press: • to decrease the treble output • to increase the treble output. Speaker balance adjust Speaker sound distribution can be adjusted between the right and left speakers. Press the BAL control then press: • to shift sound to the left and •...
- Page 34 Controls and features Tape/CD select • To begin tape play (with a tape loaded into the audio system) while in the radio or CD mode, press the TAPE control. Press the button during rewind or fast forward to stop the rewind or fast forward function.
- Page 35 Controls and features Eject function Press the EJ control to stop and eject a tape. Press the EJ control to stop and eject a CD. Dolby noise reduction Dolby noise reduction operates in tape mode. Dolby noise reduction reduces the amount of hiss and static during tape playback.
- Page 36 Controls and features Setting the clock To set the hour, press and hold the CLK control and press SEEK: • to decrease hours and • to increase hours. To set the minute, press and hold the CLK control and press TUNE: •...
- Page 37 Controls and features The CLK button will allow you to switch between media display mode AUTO (radio station, stereo information, etc.) and clock display mode (time). When in clock mode, the media information will display for 10 seconds, when the radio is turned on, and then revert to clock information.
- Page 38 Controls and features If there is a discrepancy between the rear seat and the front audio controls, (i.e, both trying to listen to the same playing media), the front audio system will receive the desired selection. Adjusting the volume Press the + control to increase volume.
- Page 39 Memory preset control Push the MEM control successively to allow rear seat passengers to scroll through the six memory presets in AM, FM1, or FM2. Push the MEM control in CD changer mode (if equipped) to advance to the next disc. Seek function •...
- Page 40 Controls and features 2. Press to eject the magazine. 3. Turn the magazine (A) over. 4. Using the disc holder release knob (C), pull the disc holder (B) out of the magazine. If you pull too hard on the disc holder, the disc holder may come completely out of the magazine.
- Page 41 5. Line up the CD with the groove of the disc holder. Ensure that the label on the CD faces downwards. 6. Press in on the disc holder until it locks securely into the magazine. If the disc holders are not fully locked into the magazine, the unit will not operate.
- Page 42 Controls and features If your changer does not work, it may be that: • A disc is already loaded where you want to insert a disc. • The disc is inserted with the label surface downward. • The disc is dusty or defective. •...
- Page 43 Radio frequency information The Federal Communications Commission (FCC) and the Canadian Radio and Telecommunications Commission(CRTC) establish the frequencies AM and FM stations may use for their broadcasts. Allowable frequencies are: AM 530, 540–1600, 1610 kHz FM 87.7, 87.9–107.7, 107.9 MHz Not all frequencies are used in a given area.
- Page 44 Controls and features POSITIONS OF THE IGNITION 1. ACCESSORY, allows the electrical accessories such as the radio to operate while the engine is not running. 2. LOCK, locks the steering wheel, automatic transmission gearshift lever and allows key removal. 3. OFF, shuts off the engine and all accessories without locking the steering wheel.
- Page 45 SPEED CONTROL To turn speed control on • Press ON. Vehicle speed cannot be controlled until the vehicle is traveling at or above 48 km/h (30 mph). Do not use the speed control in heavy traffic or on roads that are winding, slippery, or unpaved.
- Page 46 Controls and features To set a speed • Press SET/SET ACC/SET ACCEL. For speed control to operate, the speed control must be ON and the vehicle speed must be greater than 48 km/h (30 mph). If you drive up or down a steep hill, your vehicle speed may vary momentarily slower or faster than the set speed.
- Page 47 You can accelerate with the accelerator pedal at any time during speed control usage. Releasing the accelerator pedal will return your vehicle to the previously programmed set speed. To set a lower set speed • Press and hold CST/COAST. Release the control when the desired speed is reached or •...
- Page 48 Controls and features Pressing OFF will erase the previously programmed set speed. To return to a previously set speed • Press RES/RSM/RESUME. For RES/RSM/RESUME to operate, the vehicle speed must be faster than 48 km/h (30 mph).
- Page 49 Controls and features TILT STEERING WHEEL Pull the tilt steering control toward you to move the steering wheel up or down. Hold the control while adjusting the wheel to the desired position, then release the control to lock the steering wheel in position. Never adjust the steering wheel when the vehicle is moving.
- Page 50 Controls and features Push (tap) the end of the stalk briefly for a single swipe (no wash). Push and hold for three swipes with wash. Push and hold for a longer wash (up to ten seconds). Rear window wiper/washer controls For rear wiper operation, rotate the rear window wiper and washer control to the desired position.
- Page 51 Controls and features FLASH TO PASS Pull toward you to activate and release to deactivate. OVERDRIVE CONTROL (IF EQUIPPED) Activating overdrive (Overdrive) is the normal drive position for the best fuel economy. The overdrive function allows automatic upshifts and downshifts through all available gears.
- Page 52 Controls and features POWER WINDOWS Press and hold the rocker switches to open and close windows. • Press the top portion of the rocker switch to close. • Press the bottom portion of the rocker switch to open. One touch down •...
- Page 53 Controls and features Window lock The window lock feature allows only the driver to operate the power windows. To lock out all the window controls except for the driver’s press the left side of the control. Press the right side to restore the window controls. Accessory delay (if equipped) With accessory delay, the window switches may be used for up to ten minutes after the ignition switch is turned to the OFF position or until...
- Page 54 Controls and features POWER SIDE VIEW MIRRORS (IF EQUIPPED) The ignition can be in any position to adjust the power side view mirrors. To adjust your mirrors: 1. Select L to adjust the left mirror or R to adjust the right mirror. 2.
- Page 55 Controls and features Fold-away mirrors Pull the side mirrors in carefully when driving through a narrow space, like an automatic car wash. Heated outside mirrors (if equipped) Both mirrors are heated automatically to remove ice, mist and fog when the rear window defrost is activated.
- Page 56 Controls and features Forward storage bin (if equipped) Press the release control to open the storage compartment. The door will open slightly and can be moved to full open. The storage compartment may be used to secure sunglasses or a similar object.
- Page 57 Power quarter rear windows (if equipped) Press the portion of the VENT control to open the power rear quarter windows. Press the portion of the VENT control to close the power rear quarter windows. Automatic dimming inside rear view mirror (if equipped) Your vehicle is equipped with inside rear view mirror with an auto-dimming function.
- Page 58 Controls and features Illuminated visor mirror To turn on the visor mirror lamps, lift the mirror cover. TRIP COMPUTER (IF EQUIPPED) The trip computer tells you about the condition of your vehicle through a constant monitor of vehicle systems. You may select display features on the trip computer for a display of status.
- Page 59 Mode control Each press of the MODE control will display a different feature as follows: Average fuel economy. The display will indicate the vehicle’s average fuel economy in liters/100 km (or miles/gallon) since the average fuel economy was last reset. If you calculate your average fuel economy by dividing liters of fuel used by 100 kilometers traveled...
- Page 60 Controls and features • if the vehicle is started while parked on an incline. • if less than 30 liters (8 gallons) of fuel is added to the fuel tank. The fuel range function will flash for five seconds at the following distances based on fuel remaining and fuel economy calculations: •...
- Page 61 Compass zone adjustment 1. Determine which magnetic zone you are in for your geographic location by referring to the zone map. 2. Locate the trip computer on the overhead console. 3. Turn ignition to the ON position. 4. Press and hold both trip computer controls.
- Page 62 Controls and features Compass calibration adjustment Perform this adjustment in an open area free from steel structures and high voltage lines. For optimum calibration, turn off all electrical accessories (heater/air conditioning, wipers, etc.) and make sure all vehicle doors are shut. 1.
- Page 63 Rear courtesy/reading lamps • Second row courtesy/reading lamp • Third row courtesy/reading lamp The courtesy lamps light when: • any door is opened. • the instrument panel dimmer switch is held up until the courtesy lamps come on. • any of the remote entry controls are pressed and the ignition is OFF. With the ignition key in the ACC or ON position, the reading lamps can be turned on by pressing the rocker control.
- Page 64 Controls and features CENTER CONSOLE Your vehicle may be equipped with a variety of console features. These include: • Utility compartment • Coin holder slots • Pen holder • Compact disc changer (if equipped) Use only soft cups in the cupholder.
- Page 65 Controls and features If there is any potential remote keyless entry problem with your vehicle, ensure ALL key fobs (remote entry transmitters) are brought to the dealership, to aid in troubleshooting. Unlocking the doors Press this control to unlock the driver door.
- Page 66 Controls and features Sounding a panic alarm Press this control to activate the alarm. To deactivate the alarm, press the control again or turn the ignition to ACC or ON. This device complies with part 15 of the FCC rules and with RS-210 of Industry Canada.
- Page 67 Controls and features To replace the battery: 1. Twist a thin coin between the two halves of the transmitter near the key ring. DO NOT TAKE THE FRONT PART OF THE TRANSMITTER APART. 2. Place the positive (+) side of new battery in the same orientation.
- Page 68 Controls and features Replacing lost transmitters If a remote transmitter has been lost and you would like to remove it from the vehicle’s memory, or you would like to purchase additional remote transmitters and have them programmed to your vehicle: •...
- Page 69 Keyless entry system With the keyless entry keypad, you can: • lock or unlock the vehicle doors without using the key. Your vehicle has a factory set 5 digit code that operates the keyless entry system. You can also program your own 5 digit personal entry code. The factory-set code is located: •...
- Page 70 Controls and features Unlocking the doors with the keyless entry system To unlock the driver’s door, enter either the factory-set code or personal code (each digit pressed within five seconds of the prior digit). The interior lamps will illuminate. To unlock all doors, enter the factory-set code or personal code (driver door unlocks) and press the 3/4 control within five seconds.
- Page 71 If a problem occurs, turn the ignition OFF and restart the engine with all other objects on the key ring held away from the ignition key. Check to make sure the encoded ignition key is an approved Ford encoded ignition key.
- Page 72 Controls and features Procedure to program spare SecuriLock keys to your vehicle New SecuriLock keys must have the correct mechanical key cut for your vehicle. Conventional (non-SecuriLock ) keys cannot be programmed to your vehicle. You will need to have two previously programmed SecuriLock keys and the new unprogrammed SecuriLock key readily accessible for the...
- Page 73 CARGO NET (IF EQUIPPED) The cargo net secures lightweight objects in the cargo area. Attach the net to the anchors provided. This net is not designed to restrain objects during a collision. TRIDOOR The TriDoor area is intended for cargo storage only, not for passengers. You can open and close the TriDoors from outside the vehicle only.
Page 74: Seating And Safety Restraints
- Page 75 Seating and safety restraints Captain’s chair (if equipped) • Lift the track release bar to move the seat forward or rearward. Make sure that the seat is relatched into place. • Pull the seatback handle up to recline the seat. Adjusting the front power seat (if equipped) Never adjust the driver’s seat or seatback when the vehicle is moving.
- Page 76 Seating and safety restraints Press front to raise or lower the front portion of the seat cushion. Press rear to raise or lower the rear portion of the seat cushion. Press the control to move the seat forward, backward, up or down. Using the manual lumbar support Turn the lumbar support control toward the front of vehicle to move...
- Page 77 Seating and safety restraints Heated seats (if equipped) To operate the heated seats: • Push control to activate. • Push again to deactivate. The indicator light will illuminate when activated. REAR SEATS Head restraints (if equipped) Your vehicle’s seats may be equipped with head restraints which adjust up and down.
- Page 78 Seating and safety restraints The head restraints can be moved up and down. Rear folding bench seat (if equipped) Folding down rear seats into load floor Ensure that no objects such as books, purses or briefcases are on the floor in front of the second row seats before folding them down and insure the seat is fully latched rearward.
- Page 79 Seating and safety restraints 2. Lift seat cushion up and rotate forward. 3. The headrest must be removed in order to fold the seatback down. Remove 2nd row seat headrest by pushing in both tabs while pulling up on headrest simultaneously. 4.
- Page 80 Seating and safety restraints 5. Lift the lower seat control and flip the seatback down. 6. Lift up flap on seatback to release closeout panel. 7. Rotate panel to closeout the space between the seatback and the floor. Returning the seat to upright Insure the seat is pulled back to the locked position, whether the seat is occupied or empty.
- Page 81 Seating and safety restraints 2. Lift the lower seat control. 3. Pull up on the seatback while lifting the handle to lift the seatback into the upright position. 4. Remove headrest from storage position and return to 2nd row seatback. Push down headrest completely to secure. Reclining the seatback Lift the control to adjust the seatback.
- Page 82 Seating and safety restraints To reduce the risk of personal injury, the second row seat should not be left in the forward, E-Z entry position while the vehicle is in motion. Please ensure that the seat is in the upright, fully latched rearward position before putting the vehicle in motion.
- Page 83 Seating and safety restraints REMOVING THE THIRD ROW SEAT From the rear of the vehicle, with the liftgate window and cargo doors open: 1. Pull the seat release lever located on the lower right side of the seatback while pushing the seatback down onto the seat cushion.
- Page 84 Seating and safety restraints 2. Push up on the seat to verify that it is latched into the floor. 3. Verify that the safety belts can move freely on either side of the seat. SAFETY RESTRAINTS Safety restraints precautions Always drive and ride with your seatback upright and the lap belt snug and low across the hips.
- Page 85 Seating and safety restraints Always transport children 12 years old and under in the back seat and always properly use appropriate child restraints. Combination lap and shoulder belts 1. Insert the belt tongue into the proper buckle (the buckle closest to the direction the tongue is coming from) until you hear a snap and feel it latch.
- Page 86 Seating and safety restraints Automatic locking mode In this mode, the shoulder belt is automatically pre-locked. The belt will still retract to remove any slack in the shoulder belt. The automatic locking mode is not available on the driver safety belt. When to use the automatic locking mode •...
- Page 87 This indicates the safety belt is now in the automatic locking mode. How to disengage the automatic locking mode Ford recommends that all safety belt assemblies and attaching hardware should be inspected by a qualified technician after any collision. Safety belt assemblies not in use during a collision should also be inspected and replaced if either damage or improper operation is noted.
- Page 88 Seating and safety restraints Safety belt replacement label The short plastic boot on the front safety belt at the passenger outboard anchor location covers a “Replace Belt” label on the safety belt. In the event of a collision, the colored label (REPLACE BELT) may become visible.
- Page 89 Seating and safety restraints Failure to follow these instructions will affect the performance of the safety belts and increase the risk of personal injury. Front and second row safety belt height adjustment Your vehicle has safety belt height adjustments for the driver, front passenger and second row passengers.
- Page 90 Seating and safety restraints Insert the tongue into the correct buckle (the buckle closest to the direction the tongue is coming from). To lengthen the belt, turn the tongue at a right angle to the belt and pull across your lap until it reaches the buckle.
- Page 91 Seating and safety restraints Safety belt warning light and indicator chime The seat belt warning light illuminates in the instrument cluster and a chime sounds to remind the occupants to fasten their safety belts. Conditions of operation If... The driver’s safety belt is not buckled before the ignition switch is turned to the ON position...
- Page 92 I’m not going far 3 of 4 fatal crashes occur within 25 miles of home. Belts are Ford designs its safety belts to enhance comfort. If uncomfortable you are uncomfortable - try different positions for the safety belt upper anchorage and seatback which should be as upright as possible;...
- Page 93 Seating and safety restraints Do not sit on top a buckled safety belt to avoid the Belt Minder chime. Sitting on the safety belt will increase the risk of injury in an accident. To disable (one-time) or deactivate the Belt Minder feature please follow the directions stated below.
- Page 94 (if equipped), shoulder belt guide on seatback (if equipped), child safety seat tether bracket assemblies (if equipped), and attaching hardware, should be inspected after a collision. Ford recommends that all safety belt assemblies used in vehicles involved in a collision be replaced.
- Page 95 This information will assist Ford in the servicing of your vehicle and may help Ford better understand real world collisions and further improve the safety of future vehicles.
- Page 96 Do not attempt to service, repair, or modify the Air Bag Supplemental Restraint System or its fuses. See your Ford or Lincoln-Mercury dealer.
- Page 97 Seating and safety restraints Children and air bags For additional important safety information, read all information on safety restraints in this guide. Children must always be properly restrained. Accident statistics suggest that children are safer when properly restrained in the rear seating positions than in the front seating position.
- Page 98 Seating and safety restraints The air bags inflate and deflate rapidly upon activation. After air bag deployment, it is normal to notice a smoke-like, powdery residue or smell the burnt propellant. This may consist of cornstarch, talcum powder (to lubricate the bag) or sodium compounds (e.g., baking soda) that result from the combustion process that inflates the...
- Page 99 Seating and safety restraints • and the electrical wiring which connects the components. The diagnostic module monitors its own internal circuits and the supplemental air bag electrical system warning (including the impact sensors), the system wiring, the air bag system readiness light, the air bag back up power and the air bag ignitors.
- Page 100 To improve the fit of lap and shoulder belts on children who have outgrown child safety seats, Ford recommends use of a belt-positioning booster seat that is labelled as conforming to all Federal motor vehicle safety standards. Belt-positioning booster seats raise the child and provide a shorter, firmer seating cushion that encourages safer seating posture and better fit of lap and shoulder belts on the child.
- Page 101 Seating and safety restraints A belt-positioning booster should be used if the shoulder belt rests in front of the child’s face or neck, or if the lap belt does not fit snugly on both thighs, or if the thighs are too short to let the child sit all the way back on the seat cushion when the lower legs hang over the edge of the seat cushion.
- Page 102 (passenger side front and outboard rear seating positions) (if equipped). Ford recommends the use of a child safety seat having a top tether strap. Install the child safety seat in a seating position which is capable of providing a tether anchorage. For more information on top tether straps, refer to Attaching safety seats with tether straps.
- Page 103 Seating and safety restraints Children 12 and under should be properly restrained in the rear seat whenever possible. 2. Pull down on the shoulder belt and then grasp the shoulder belt and lap belt together. 3. While holding the shoulder and lap belt portions together, route the tongue through the child seat according to the child seat...
- Page 104 Seating and safety restraints 5. To put the retractor in the automatic locking mode, grasp the shoulder portion of the belt and pull downward until all of the belt is extracted and a click is heard. 6. Allow the belt to retract. The belt will click as it retracts to indicate it is in the automatic locking mode.
- Page 105 Seating and safety restraints Attaching child safety seats with tether straps Most new forward-facing child safety seats include a tether strap which goes over the back of the seat and hooks to an anchoring point. Tether straps are available as an accessory for many older safety seats. Contact the manufacturer of your child seat for information about ordering a tether strap.
- Page 106 Seating and safety restraints 3. Locate the correct anchor for the selected seating position. • The anchors are located under the seat frame. 4. Clip the tether strap to the anchor as shown. If the tether strap is clipped incorrectly, the child safety seat may not be retained properly in the event of a collision.
- Page 107 Seating and safety restraints 5. Refer to the Installing child safety seats in combination lap and shoulder belt seating positions section of this chapter for further instructions to secure the child safety seat. 6. Tighten the child safety seat tether strap according to the manufacturer’s instructions.
- Page 108 Starting PREPARING TO START YOUR VEHICLE Engine starting is controlled by the powertrain control system. This system meets all Canadian Interference-Causing Equipment standard requirements regulating the impulse electrical field strength of radio noise. When starting a fuel-injected engine, avoid pressing the accelerator before or during starting.
- Page 109 2. Make sure the headlamps and vehicle accessories are off. 3. Make sure the parking brake is set. 4. Make sure the gearshift is in P (Park). 3. Turn the key to 4 (ON) without turning the key to 5 (START). If there is difficulty in turning the key, firmly rotate the steering wheel left and right until the key turns...
- Page 110 Starting STARTING THE ENGINE 1. Turn the key to 5 (START) without pressing the accelerator pedal and release as soon as the engine starts. The key will return to 4 (ON). 2. If the temperature is above –12°C (10°F) and the engine does not start within five seconds on the first try, turn the key to OFF, wait 10 seconds and try again.
- Page 111 Guarding against exhaust fumes Although odorless and colorless, carbon monoxide is present in exhaust fumes. Take precautions to avoid its dangerous effects. If you ever smell exhaust fumes of any kind inside your vehicle, have your dealer inspect and fix your vehicle immediately. Do not drive if you smell exhaust fumes.
Page 112: Driving
- Page 113 ABS warning lamp warning lamp in the instrument cluster momentarily illuminates when the ignition is turned to the ON position. If the light does not illuminate momentarily at start up, remains on or continues to flash, the ABS needs to be serviced. With the ABS light on, the anti-lock brake system is disabled and normal braking is still effective unless the...
- Page 114 Driving The BRAKE warning lamp in the instrument cluster illuminates and remains illuminated (when the ignition is turned ON) until the parking brake is released. Always set the parking brake fully and make sure that the gearshift is securely latched in P (Park) (automatic transmission) or in 1 (First) (manual transmission).
- Page 115 PREPARING TO DRIVE YOUR VEHICLE Utility vehicles have a significantly higher rollover rate than other types of vehicles. In a rollover crash, an unbelted person is significantly more likely to die than a person wearing a seat belt. Your vehicle has special design and equipment features to make it capable of performing in a wide variety of circumstances.
- Page 116 Driving If you cannot move the gearshift lever out of P (Park) with ignition in the ON position and the brake pedal depressed: 1. Apply the parking brake, turn ignition to the LOCK position, then remove the key. 2. Reinsert the key and turn the ignition to the OFF position. 3.
- Page 117 Hold the brake pedal down while you move the gearshift lever from P (Park) to another position. If you do not hold the brake pedal down, your vehicle may move unexpectedly and injure someone. P (Park) Always come to a complete stop before shifting into P (Park).
- Page 118 Driving The transmission control indicator light (TCIL) (the word OFF) on the OVERDRIVE end of the gearshift lever will illuminate. Drive – Not shown on the display. Activate by pressing the transmission control switch (TCS) on the end of the gearshift lever with the gearshift in the position.
- Page 119 Your vehicle is not designed to be equipped with a Power Take Off (PTO). For PTO usage, a special transmission case, internal components and calibration are required. Ford Motor Company does not recommend the installation of a PTO system. Damage resulting from the use of a PTO system may not be covered by your warranty.
- Page 120 4WD system indicator lights The 4WD system indicator lights illuminate only under the following conditions. If these lights illuminate when driving in 2WD, contact your Ford dealer as soon as possible.
- Page 121 • 4x4 -momentarily illuminates when the vehicle is started. Illuminates when 4x4 High or 4x4 LOW is engaged. • LOW RANGE –momentarily illuminates when the vehicle is started. Illuminates when 4x4 Low is engaged. Using the electronic shift 4WD system Positions of the electronic shift system To prevent damage, the electronic shift 4WD system is designed to allow up to 45 seconds before the shift command is performed.
- Page 122 Driving Shifting from 4x4 HIGH (4WD high) to 2WD (2WD high) Rotate the 4WD control to 2WD at any forward speed. Disengagement of the transfer case and front hubs may be delayed due to torque bind which is caused by driving on dry hard surfaces or performing tight turns while using the 4WD system.
- Page 123 Driving 4. Move the 4WD control to the 4x4 HIGH (4WD high) or 2WD (2WD HIGH high) position. 5. Hold the shift command until the LOW RANGE indicator light shuts off. 6. If the LOW RANGE indicator light does not shut off after 15 seconds, start the vehicle moving, then repeat steps 1 through 5 before reporting any shift concerns to your dealer.
- Page 124 Driving Do not spin the wheels at over 56 km/h (35 mph). The tires may fail and injure a passenger or bystander. Sand When driving over sand, try to keep all four wheels on the most solid area of the trail. Do not reduce the tire pressures but shift to a lower gear and drive steadily through the terrain.
- Page 125 When descending a steep hill, avoid sudden braking. Shift to a lower gear when added engine braking is desired. When speed control is on and you are driving uphill, your vehicle speed may drop considerably, especially if you are carrying a heavy load. If vehicle speed drops more than 16 km/h (10 mph), the speed control will cancel automatically.
- Page 126 Driving • GVWR (Gross Vehicle Weight Rating): Maximum total weight of the base vehicle, passengers, optional equipment and cargo. The GVWR is specific to each vehicle and is listed on the Safety Certification Label on the driver’s door pillar. • GAWR (Gross Axle Weight Rating): Carrying capacity for each axle system.
- Page 127 to the front of your vehicle, (potentially including weight added to the cab), the weight added should not exceed the front axle reserve capacity (FARC). Additional frontal weight may be added to the front axle reserve capacity provided you limit your payload in other ways (i.e. restrict the number of passengers or amount of cargo carried).
- Page 128 Driving 3. Subtract your loaded vehicle weight from the maximum GCWR on the following charts. This is the maximum trailer weight your vehicle can tow and must fall below the maximum shown under maximum trailer weight on the chart. DRIVING THROUGH WATER Do not drive quickly through standing water, especially if the depth is unknown.
- Page 129 4x2 w/automatic transmission Engine Rear axle Maximum GCWR-kg ratio 5.4L 3.73 5 896 (13 000) 6.8L 3.73 7 711 (17 000) 6.8L 4.30 8 164 (18 000) 4x4 w/automatic transmission Engine Rear axle Maximum GCWR-kg ratio 5.4L 4.10 6 577 (14 500) 6.8L 3.73 7 711 (17 000)
- Page 130 Driving 4x4 with automatic transmission Engine Rear axle Maximum GCWR-kg ratio 5.4L 4.10 6 577 (14 500) 6.8L 3.73 7 711 (17 000) 6.8L 4.30 8 164 (18 000) 7.3L 3.73 8 164 (18 000) (Diesel) The frame mounted hitch receiver is non-removable. Towing a Class IV trailer (extra heavy duty) 2 268–4 536 kg (5 001–10 000 lbs.) trailer weight requires a weight-distributing or fifth-wheel hitch.
- Page 131 Safety chains Always connect the trailer’s safety chains to the frame or hook retainers of the vehicle. To connect the trailer’s safety chains, cross the chains under the trailer tongue and allow slack for turning corners. If you use a rental trailer, follow the instructions that the rental agency gives to you.
- Page 132 Driving • Consult your local motor vehicle speed regulations for towing a trailer. • Use a lower gear when towing up or down steep hills. This will eliminate excessive downshifting and upshifting for optimum fuel economy and transmission cooling. • Anticipate stops and brake gradually. Exceeding the GCWR rating may cause internal transmission damage and void your warranty coverage.
- Page 133 Ford recommends the driveshaft be removed/installed only by a qualified technician. See your local dealer for driveshaft removal/installation. Improper removal/installation of the driveshaft can cause transmission fluid loss, damage to the driveshaft and internal transmission components.
- Page 134 Driving To adjust the cross-bar position: 1. Release the latch at both ends of the cross-bar (both cross-bars are adjustable). 2. Slide cross-bar to the desired location. 3. Tighten the latch at both ends of the cross-bar. To remove the cross-bar assembly from the roof rack side rails: 1.
- Page 135 Driving To adjust the tie-downs: Use the adjustable tie downs to secure loads to the luggage carrier. 1. Loosen the slider knobs at each end of the cross rail. 2. Slide the crossbar to the desired placement. Ensure that both sides of the crossrails are even.
Page 136: Roadside Emergencies
- Page 137 Roadside coverage beyond basic warranty In the United States, you may purchase additional roadside assistance coverage beyond this period through the Ford Auto Club by contacting your Ford or Lincoln Mercury dealer. Similarly in Canada, you may purchase additional coverage beyond the basic coverage period by consulting the Ford Roadside Assistance Club brochure or by calling 1–877–294–CLUB (1–877–894–2582).
- Page 138 Roadside emergencies The fuel pump shut-off switch is located in the passenger’s foot well, by the kick panel. Use the following procedure to reset the fuel pump shut-off switch. 1. Turn the ignition to the OFF position. 2. Check the fuel system for leaks. 3.
- Page 139 Always replace a fuse with one that has the specified amperage rating. Using a fuse with a higher amperage rating can cause severe wire damage and could start a fire. Standard fuse amperage rating and color Fuse Mini Standard Rating Fuses Fuses Grey...
- Page 140 Roadside emergencies To remove the fuse panel cover, turn the panel fasteners counterclockwise. To remove a fuse use the fuse puller tool provided on the fuse panel cover.
Page 141: Fuse Panel Description
- Page 142 Roadside emergencies Fuse/Relay Fuse Amp Location Rating Heated Mirrors, Rear Defroster ON indicator Rear Integrated Control Panel (RICP), CD Changer Instrument Cluster, GEM Module, Overdrive Cancel Switch, PATS/PATS Transiever, Idle Validation Switch (Diesel only) Starter Motor Relay, GEM, Radio (w/ Secondary) Radio Start Feed Air Bag Module, Blower Motor Relay Coil...
Page 143: Power Distribution Box Description
- Page 144 Roadside emergencies The high-current fuses are coded as follows. Fuse/Relay Fuse Amp Location Rating 20A* 10A* 15A* 20A* 20A* 10A* 20A* 15A* 20A* 30A* 20A* 15A* 10A* 15A* — — — — 20A* (Gasoline only) — (Diesel only) 7.5A* 10A* 7.5A* 10A* 20A* (Gasoline...
- Page 145 Fuse/Relay Fuse Amp Location Rating 50A** 30A** 40A** 30A** 50A** — (Gasoline only) 30A** (Diesel only) 30A** 30A** 40A** 30A** — 20A** 30A** (Gasoline only) 20A** (Diesel only) — 30A** 50A** — 40A** — — — — — — — Roadside emergencies Power Distribution Box Description Ignition Switch (B1 &...
- Page 146 Roadside emergencies Fuse/Relay Fuse Amp Location Rating — — — — — — — — — — 30A CB 60A** *Mini fuses **Maxi fuses CHANGING THE TIRES If you get a flat tire while driving, do not apply the brake heavily. Instead, gradually decrease your speed.
- Page 147 Location of the spare tire and tools The spare tire and tools for your vehicle are stowed in the following locations: Tool Spare tire Jack Jack handle and lug wrench Tire change procedure To prevent the vehicle from moving when you change a tire, be sure the parking brake is set, then block (in both directions) the wheel that is diagonally opposite (other side and end of the vehicle) to the tire being changed.
- Page 148 Roadside emergencies 2. Turn engine OFF and block the diagonally opposite wheel (block not provided). 3. Remove the jack, jack handle, lug wrench and spare tire from the stowage locations. 4. Use the tip of the lug wrench to remove any wheel trim. 5.
- Page 149 Roadside emergencies • Front passenger side (4x4) • Front driver side (4x4) Make sure the jack fits into the notched area on the differential housing. • Rear 2000 U137 (hdw) Owners Guide (owners) USA English (fus)
- Page 150 (rotation, flat tire, wheel removal, etc.). Bolt size M14 x 1.5 200-225 * Torque specifications are for nut and bolt threads free of dirt and rust. Use only Ford recommended replacement fasteners. 2000 U137 (hdw) Owners Guide (owners) USA English (fus) Wheel lug nut torque*...
- Page 151 On all two-piece flat wheel nuts, apply one drop of motor oil between the flat washer and the nut. Do not apply motor oil to the wheel nut threads or the wheel stud threads. When a wheel is installed, always remove any corrosion, dirt or foreign materials present on the mounting surfaces of the wheel or the surface of the...
- Page 152 Roadside emergencies Preparing your vehicle When the battery is disconnected or a new battery is installed, the transmission must relearn its adaptive strategy. As a result of this, the transmission may shift firmly. This operation is considered normal and will not effect function or durability of the transmission. Over time, the adaptive learning process will fully update transmission operation to its optimum shift feel.
- Page 153 Roadside emergencies 2. Connect the other end of the positive (+) cable to the positive (+) terminal of the assisting battery. 3. Connect the negative (-) cable to the negative (-) terminal of the assisting battery. 4. Make the final connection of the negative (-) cable to an exposed metal part of the stalled vehicle’s engine, away from the battery and the carburetor/fuel injection system.
- Page 154 Roadside emergencies Do not connect the end of the second cable to the negative (-) terminal of the battery to be jumped. A spark may cause an explosion of the gases that surround the battery. 5. Ensure that the cables are clear of fan blades, belts, moving parts of both engines, or any fuel delivery system parts.
- Page 155 Roadside emergencies 2. Remove the jumper cable on the negative (-) connection of the booster vehicle’s battery. 3. Remove the jumper cable from the positive (+) terminal of the booster vehicle’s battery. 4. Remove the jumper cable from the positive (+) terminal of the disabled vehicle’s battery.
- Page 156 Roadside emergencies After the disabled vehicle has been started and the jumper cables removed, allow it to idle for several minutes so the engine computer can relearn its idle conditions. When the battery is disconnected or a new battery is installed, the transmission must relearn its adaptive strategy.
- Page 157 If the vehicle is towed by other means or incorrectly, vehicle damage may occur. Ford Motor Company provides a towing manual for all authorized tow truck operators. Have your tow truck operator refer to this manual for proper hook-up and towing procedures for your vehicle.
Page 158: Maintenance And Care
- Page 159 Do not start your engine with the air cleaner removed and do not remove it while the engine is running. OPENING THE HOOD 1. Inside the vehicle, pull the hood release handle located under the bottom left corner of the instrument panel.
- Page 160 Maintenance and care IDENTIFYING COMPONENTS IN THE ENGINE COMPARTMENT 5.4L V8/6.8L V10 GASOLINE ENGINES Refer to the 7.3 Liter Power Stroke Direct Injection Turbo Diesel Owner’s Guide Supplement for diesel engine component locations. 1. Battery 2. Engine oil filler cap 3.
- Page 161 1. Make sure the vehicle is on level ground. 2. Turn the engine off and wait a few minutes for the oil to drain into the oil pan. 3. Set the parking brake and ensure the gearshift is securely latched in P (Park).
- Page 162 Change your engine oil and filter according to the appropriate schedule listed in the scheduled maintenance guide. Ford production and aftermarket (Motorcraft) oil filters are designed for added engine protection and long life. If a replacement oil filter is used...
- Page 163 Ford material and design specifications, start-up engine noises or knock may be experienced. It is recommended you use the appropriate Motorcraft oil filter (or another brand meeting Ford specifications) for your engine application. BRAKE FLUID Checking and adding brake fluid—gasoline engine Brake fluid should be checked and refilled as needed.
- Page 164 MAX. Do not fill above this line. 4. Use only a DOT 3 brake fluid certified to meet Ford specifications. Refer to Lubricant specifications in the Capacities and specifications chapter. Brake fluid is toxic. If brake fluid contacts the eyes, flush eyes with running water for 15 minutes.
- Page 165 In very cold weather, do not fill the reservoir all the way. Only use a washer fluid that meets Ford specifications. Refer to Lubricant specifications in the Capacities and specifications chapter. State or local regulations on volatile organic compounds may restrict the use of methanol, a common windshield washer antifreeze additive.
- Page 166 Maintenance and care A 50/50 mixture of distilled water and Ford Premium Engine Coolant provides: • maximum cooling system efficiency. • freeze protection down to -36° C (-34° F). • boiling protection up to 129° C (265° F). • protection against rust and other forms of corrosion.
- Page 167 Use only Ford Premium Engine Coolant E2FZ-19549-AA (in Canada, Motorcraft CXC-10) or a premium engine coolant that meets Ford specification ESE-M97B44-A. • DO NOT USE Ford Extended Life Engine Coolant F6AZ-19544-AA (orange in color). • DO NOT USE a DEX-COOL engine coolant or an equivalent engine coolant that meets Ford specification WSS-M97B44-D.
- Page 168 4. When you are sure that all the pressure has been released, use the cloth to turn it counterclockwise and remove the cap. Recycled engine coolant Ford Motor Company recommends the use of a recycled engine coolant produced by Ford-approved processes. Not all coolant recycling processes produce coolant which meets Ford specification ESE-M97B44-A.
- Page 169 Coolant refill capacity To find out how much fluid your vehicle’s cooling system can hold, refer to Refill capacities in the Capacities and specifications chapter. Fill your engine coolant reservoir as outlined in Adding engine coolant in this chapter. Severe climates If you drive in extremely cold climates (less than –36°...
- Page 170 Maintenance and care What you should know about fail-safe cooling (if equipped) If the engine coolant supply is depleted, this feature allows the vehicle to be driven temporarily before incremental component damage is incurred. The “fail-safe” distance depends on ambient temperatures, vehicle load and terrain.
- Page 171 Never remove the coolant reservoir cap while the engine is running or hot. 5. Re-start the engine and take your vehicle to a service facility. Driving the vehicle without repairing the engine problem increases the chance of engine damage. Take your vehicle to a service facility as soon as possible.
- Page 172 Maintenance and care 3. While the engine idles, turn the steering wheel left and right several times. 4. Turn the engine off. 5. Recheck the fluid level on the dipstick. Do not add fluid if the level is between the arrows in the FULL COLD range. 6.
- Page 173 Low fluid level Do not drive the vehicle if the fluid level is at the bottom of the dipstick and the ambient temperature is above 10°C (50°F). Correct fluid level The transmission fluid should be checked at normal operating temperature 66°C-77°C (150°F-170°F) on a level surface. The normal operating temperature can be reached after approximately 30 km (20 miles) of driving.
- Page 174 Maintenance and care Adjusting automatic transmission fluid levels Before adding any fluid, make sure the correct type is used. The type of fluid used is normally indicated on the dipstick and also in the Lubricant specifications section in the Capacities and specifications chapter.
- Page 175 3. Add only enough fluid through the filler opening so that the fluid level is at the bottom of the opening. Use only fluid that meets Ford specifications. Refer to the Capacities and specifications chapter. BATTERY Your vehicle is equipped with a...
- Page 176 Maintenance and care For longer, trouble-free operation, keep the top of the battery clean and dry. Also, make certain the battery cables are always tightly fastened to the battery terminals. If you see any corrosion on the battery or terminals, remove the cables from the terminals and clean with a wire brush.
- Page 177 1. With the vehicle at a complete stop, set the parking brake. 2. Put the gearshift in P (Park), turn off all accessories and start the engine. 3. Run the engine until it reaches normal operating temperature. 4. Allow the engine to idle for at least one minute. 5.
- Page 178 Maintenance and care Changing the air filter element 1. Loosen the clamp that secures the air filter element in place. 2. Carefully separate the two halves of the air filter housing. 3. Remove the air filter element from the open end of the air filter housing.
- Page 179 TRACTION-LOK AXLE (IF EQUIPPED) This axle provides added traction on slippery surfaces, particularly when one wheel is on a poor traction surface. Under normal conditions, the Traction-Lok axle functions like a standard rear axle. Extended use of other than the manufacturer’s specified size tires on a Traction-Lok rear axle could result in a permanent reduction in effectiveness.
- Page 180 Maintenance and care Changing the wiper blades To replace the wiper blades: 1. Pull the wiper arm away from the windshield and lock into the service position. 2. Turn the blade at an angle from the wiper arm. Push the lock pin manually to release the blade and pull the wiper blade down toward the windshield to remove it from the...
- Page 181 U.S. Department of Transportation-Tire quality grades: The U.S. Department of Transportation requires Ford to give you the following information about tire grades exactly as the government has written it. Treadwear The treadwear grade is a comparative rating based on the wear rate of the tire when tested under controlled conditions on a specified government test course.
- Page 182 Maintenance and care The temperature grade for this tire is established for a tire that is properly inflated and not overloaded. Excessive speed, underinflation, or excessive loading, either separately or in combination, can cause heat buildup and possible tire failure. SERVICING YOUR TIRES Checking the tire pressure •...
- Page 183 If you do not follow these precautions, your vehicle may not drive properly and safely. Make sure that all replacement tires are of the same size, type, load-carrying capacity and tread design (e.g., “All Terrain”, etc.), as originally offered by Ford. Maintenance and care...
- Page 184 Maintenance and care Do not replace your tires with “high performance” tires or larger size tires. Failure to follow these precautions may adversely affect the handling of the vehicle and make it easier for the driver to lose control and roll over. Tires that are larger or smaller than your vehicle’s original tires may also affect the accuracy of your speedometer.
- Page 185 WHAT YOU SHOULD KNOW ABOUT AUTOMOTIVE FUELS Important safety precautions Do not overfill the fuel tank. The pressure in an overfilled tank may cause leakage and lead to fuel spray and fire. The fuel system may be under pressure. If the fuel filler cap is venting vapor or if you hear a hissing sound, wait until it stops before completely removing the fuel filler cap.
- Page 186 Maintenance and care • Avoid inhaling fuel vapors. Inhaling too much fuel vapor of any kind can lead to eye and respiratory tract irritation. In severe cases, excessive or prolonged breathing of fuel vapor can cause serious illness and permanent injury. •...
- Page 187 Maintenance and care Choosing the right fuel Use only UNLEADED FUEL. The use of leaded fuel is prohibited by law and could damage your vehicle. Do not use fuel containing methanol. It can damage critical fuel system components. Your vehicle was not designed to use fuel or fuel additives with metallic compounds, including manganese-based compounds containing MMT.
- Page 188 Charter. In Canada, look for fuels that display the Automaker’s Choice Logo. Cleaner air Ford approves the use of reformulated “cleaner-burning” gasolines to improve air quality. These gasolines may contain oxygenates up to 10% ethanol or 15% MTBE. Running out of fuel Avoid running out of fuel because this situation may have an adverse affect on powertrain components.
- Page 189 Ford or Motorcraft fuel filler cap is not used. The fuel system may be under pressure. If the fuel filler cap is venting vapor or if you hear a hissing sound, wait until it stops before completely removing the fuel filler cap.
- Page 190 Maintenance and care empty. Empty reserve is the small amount of usable fuel remaining in the fuel tank after the fuel gauge indicates empty. The amount of empty reserve varies and should not be relied upon to increase driving range. When refueling your vehicle after the fuel gauge indicates empty, you might not be able to refuel the full amount of the advertised capacity of the fuel tank due to the empty reserve still present in the tank.
- Page 191 economy under current driving conditions. Additionally, keeping records during summer and winter will show how temperature impacts fuel economy. In general, lower temperatures give lower fuel economy. Driving style — good driving and fuel economy habits Give consideration to the lists that follow and you may be able to change a number of variables and improve your fuel economy.
- Page 192 Maintenance and care • Perform all regularly scheduled maintenance items. Follow the recommended maintenance schedule and owner maintenance checks found in your vehicle scheduled maintenance guide. Conditions • Heavily loading a vehicle or towing a trailer may reduce fuel economy at any speed.
- Page 193 If other than Ford, Motorcraft or Ford-authorized parts are used for maintenance replacements or for service of components affecting emission control, such non-Ford parts should be equivalent to genuine Ford Motor Company parts in performance and durability.
- Page 194 Maintenance and care Readiness for Inspection/Maintenance (I/M) testing In some localities, it may be a legal requirement to pass an I/M test of the on-board diagnostics system. If your “Check Engine/Service Engine Soon” light is on, refer to the description in the Warning Lights and Chimes section of the Instrumentation chapter.
- Page 195 Replacing headlamp bulbs 1. Make sure that the headlamp control is in the OFF position. 2. Open the hood. 3. Disconnect the electrical connector from the bulb by pulling rearward. 4. Remove bulb retainer ring by turning it counterclockwise about turn, then slide the ring off the plastic base.
- Page 196 Maintenance and care 3. Remove the two screws and carefully disengage parking lamp/turn signal assembly from the vehicle. 4. Rotate bulb socket counterclockwise about ⁄ turn and remove from lamp assembly. 5. Carefully pull bulb straight out of the socket and push in the new bulb.
- Page 197 Maintenance and care Replacing tail lamp/turn/backup lamp bulbs The tail lamp/turn/backup lamp bulbs are located in the same portion of the tail lamp assembly, one just below the other. Follow the same steps to replace either bulb: 1. Remove the four screws and the lamp assembly from vehicle.
- Page 198 Maintenance and care To install the brakelamp assembly: 1. Install the bulb socket into the lamp assembly and rotate 45 degrees. 2. Install the lamp assembly on the vehicle and secure with two screws. Replacing license plate lamp bulbs The license plate bulbs are located behind the rear bumper.
- Page 199 If your vehicle has been in an accident the alignment of your headlamps should be checked by a qualified service technician. CLEANING AND CARING FOR YOUR VEHICLE Refer to the Customer Assistance chapter for a list of Ford-approved cleaners, polishes and waxes. Maintenance and care...
- Page 200 Maintenance and care Washing your vehicle Wash your vehicle regularly with cold or lukewarm water. Never use strong detergents or soap. If your vehicle is particularly dirty, use a quality car wash detergent. Always use a clean sponge, washing glove or similar device and plenty of water for best results.
- Page 201 Ultra Touch Prep and Finishing Kit (#F7AZ-19K507–BA), Lacquer Touch-up Paint (#ALBZ-19500–XXXXA), or Exterior Acrylic Spray Lacquer (#ALAZ-19500–XXXXA) from the Ford Car Care Chemicals line. Please note that the part numbers (shown as XXXX above) will vary with your vehicle’s specific coloring. Observe the application instructions on the products.
- Page 202 Cleaning the exterior lamps Wash with the same detergent as the exterior of your vehicle. If necessary, use a tar remover such as Ford Extra Strength Tar and Road Oil Remover (B7A-19520–AA). To avoid scratching the lamps, do not use a dry paper towel, chemical solvents or abrasive cleaners.
- Page 203 For tougher soiling concerns, Ford recommends using the Deluxe Leather Care Kit F8AZ-19G253–AA, which is available from your Ford Dealer. This mild cleaner and special pad, cleans the leather and maintains its natural beauty. Follow the instructions on the cleaner label.
Page 204: Capacities And Specifications
- Page 205 The axle lubricant should be changed any time the rear axle has been submerged in water. Add 236 ml (8 oz.) of Additive Friction Modifier C8AZ-19B546-A or equivalent meeting Ford Specification EST-M2C118-A for complete refill of Traction-Lok axles. Application Capacity 5.7L...
- Page 206 Service refill capacities are determined by filling the rear axle to the bottom of the filler hole with the specified lubricant. Use Ford Premium Engine Coolant (green in color). DO NOT USE Ford Extended Life Engine Coolant (orange in color). Refer to Adding engine coolant, in the Maintenance and Care chapter.
- Page 207 Capacities and specifications LUBRICANT SPECIFICATIONS Ford part Item name or equivalent Front axle Motorcraft SAE 75W-90 Premium 4x4 Front Axle Lubricant Rear axle Motorcraft SAE 75W-140 High Performance Synthetic Rear Axle Lubricant Brake fluid High Performance DOT 3 Motor Vehicle Brake...
- Page 208 Add 236 ml (8 oz.) of Additive Friction Modifier C8AZ-19B546-A or equivalent meeting Ford specification EST-M2C118-A for complete refill of Traction-Lok axles. Ford design rear axles contain a synthetic lubricant that does not require changing unless the axle has been submerged in water.
- Page 209 Capacities and specifications Some transmission fluids may be labeled as dual usage, such as MERCON and MERCON V. These dual usage fluids are not to be used in an automatic transmission that requires use of the MERCON type fluid. However, these dual usage fluids may be used in transmissions that require the MERCON V type fluid.
- Page 210 Capacities and specifications...
Page 211: Certification Label
Page 212: customer assistance.
- Page 213 Away from home If you own a Ford or Mercury vehicle and are away from home when your vehicle needs service, or if you need more help than the dealership could provide, after following the steps described above, contact the Ford Customer Assistance Center to find an authorized dealership to help you.
- Page 214 P.O. Box 2000 Oakville, Ontario L6J 5E4 1-800-565-3673 (FORD) In order to help you service your Ford or Lincoln Mercury vehicle, please have the following information available when contacting a Customer Assistance Center: • Your telephone number (home and business) •...
- Page 215 THE DISPUTE SETTLEMENT BOARD (U.S. only) The Dispute Settlement Board is: • an independent, third-party arbitration program for warranty disputes • available free to owners and lessees of qualifying Ford Motor Company vehicles The Dispute Settlement Board may not be available in all states. Ford...
- Page 216 • the file number assigned to your application • the toll-free phone number of the DSB’s independent administrator Your dealership and a Ford Motor Company representative will then be asked to submit statements. To properly review your case, the Board needs the following information: •...
- Page 217 • a brief summary of the action taken by the dealer(s) and Ford Motor Company • the names (if known) of all the people you contacted at the dealership(s) • a description of the action you expect to resolve your concern You will receive a letter of explanation if your application does not qualify for Board review.
- Page 218 UTILIZING THE MEDIATION/ARBITRATION PROGRAM (CANADA ONLY) In those cases where you continue to feel that the efforts by Ford and the dealer to resolve a factory-related vehicle service concern have been unsatisfactory, Ford of Canada participates in an impartial third party mediation/arbitration program administered by the Canadian Motor Vehicle Arbitration Plan (CAMVAP).
- Page 219 If your vehicle must be serviced while you are traveling or living in Central or South America, the Caribbean, or the Middle East, contact the nearest Ford dealership. If the dealership cannot help you, write or call: FORD MOTOR COMPANY...
- Page 220 Customer assistance Ford Deluxe Leather and Vinyl Cleaner (not available in Canada) Motorcraft Vinyl Cleaner (Canada only) Ford Extra Strength Tar and Road Oil Remover* (not available in Canada) Ford Extra Strength Upholstery Cleaner (Canada only) Ford Extra Strength Upholstery Cleaner (not available in Canada)
- Page 221 Customer assistance Comfort and convenience Cargo organizers Cargo shades Cargo trays Dash trim Engine block heaters Battery warmer/blanket Cellular phone holder Electrochromatic compass mirror Electrochromatic compass mirror with temperature display Heat storage system Tire step Travel equipment Daytime running lights (DRL) Factory luggage rack adaptors Fog lights Framed luggage covers...
- Page 222 Customer assistance Protection and appearance equipment Air bag anti-theft locks Carpeted cargo mat Door edge guards Diamond plate splash guards Car/truck covers Cargo liners, interior Carpet floor mats Cleaners, waxes and polishes Flat splash guards Front end covers (full) Hood deflectors Locking gas cap Lubricants and oils Molded splash guards...
- Page 223 • Ford cannot assume responsibility for any adverse effects or damage that may result from the use of such equipment. ORDERING ADDITIONAL OWNER’S LITERATURE...
Page 224: Reporting Safety Defects
Page 225: index.
- Page 226 Cruise control (see Speed control) ...45 Customer Assistance ...136 Ford accessories for your vehicle ...219 Ford Extended Service Plan ...212 Getting assistance outside the U.S. and Canada ...218 Getting roadside assistance ...136 Getting the service you need ..212 Ordering additional owner’s literature ...223...
- Page 227 Engine block heater ...110 Engine oil ...160 checking and adding ...160 dipstick ...160 filter, specifications ...162, 204 recommendations ...162 refill capacities ...204 specifications ...207, 209 Exhaust fumes ...111 Fail safe cooling ...170 Fluid capacities ...204 Four-Wheel Drive vehicles ..13, 119 control trac ...19 description ...121 driving off road ...123...
- Page 228 Index bulb specifications ...198 daytime running lights ...18 flash to pass ...51 high beam ...12, 50 replacing bulbs ...195 turning on and off ...18 warning chime ...14 Heating ...22 heating and air conditioning system ...22 Hood ...159 Ignition ...44, 209 Infant seats (see Safety seats) ..101 Inspection/maintenance (I/M) testing ...194...
- Page 229 Locks childproof ...53 doors ...53 Lubricant specifications ...207, 209 Lumbar support, seats ...76–77 Manual transmission fluid capacities ...204 lubricant specifications ...209 Message center ...58 english/metric button ...58 menu button ...59 Mirrors ...58 automatic dimming rearview mirror ...57 fold away ...55 heated ...55 side view mirrors (power) ...54 Motorcraft parts ...189, 204...
- Page 230 Index Seats ...74 child safety seats ...101 cleaning ...203 SecuriLock passive anti-theft system ...70–72 Servicing your vehicle ...158 Snowplowing ...3 Spark plugs, specifications ...204, 209 Special notice ...3 diesel-powered vehicles ...3 utility-type vehicles ...3 Specification chart, lubricants ...207, 209 Speed control ...45 Speedometer ...15 Starting your vehicle ...108, 110 jump starting ...151...
Page 231: Filling Station Information
- Page 232 Filling station information fluid that indicates dual usage (MERCON and MERCON V) in an automatic transmission application requiring MERCON may cause transmission damage. Use of any fluid other than the recommended fluid may cause transmission damage. Indicates only approximate dry-fill capacity. Some applications may vary based on cooler size and if equipped with in-tank cooler.
This manual is also suitable for:
Rename the bookmark, delete bookmark, delete from my manuals, upload manual.

- Forum Listing
- Marketplace
- Advanced Search
- Ford Diesels
- Power Stroke Excursions
Keypad Code for a 2000 Excursion, NOT Behind the Radio
- Add to quote
I have looked behind the radio for the code location. I took the dash out and looked at pictures of the location from a F 250 Forum It is not located behind the radio. The only thing that is back there is a vent tube. I have looked at several posts and everyone with a 2000 or 2001 EX has had problems finding the code. Anyand all help is appreciated.
I've searched all over-I'm comfortable stating that it's not on the 00.
I spent several nights looking about my excursion for this code and could not find it on my 2000. I even called the ford help line and they said it was not printed anywhere inside the vehicle. I went to the dealer (not the place I bought it) and they got the code in about 3 minutes. When I called to ask about the code they had said it would be $65 but the guy who did the work just said "thanks for coming by" and sent me on my way.
there is a thread on FTE (ford-trucks.com) right now. the 2000 has to be done by the shop, however you can get a list of possible numbers emailed to you and try them 1 x 1. several people have hit it in 2-3 pages... PS there are 8 pages of maybe 300 numbers. I have the list now and will begin trying.
My code was bought from Ford while having a key programmed. The code is easy to remember, very simple.

I think anyone with a NGS can get the code.
[ QUOTE ] there is a thread on FTE (ford-trucks.com) right now. the 2000 has to be done by the shop, however you can get a list of possible numbers emailed to you and try them 1 x 1. several people have hit it in 2-3 pages... PS there are 8 pages of maybe 300 numbers. I have the list now and will begin trying. [/ QUOTE ] Do you have a link to this post? Do you kno wif they have a list for the 01? Brent
I was told that for the early years it was under the kick panel on either the drivers or pass. side. Don't remember which side they said.
http://www.ford-trucks.com/forums/514216-keyless-keypad-code.html Supposedly there is no place on the 2000 where the code is printed.. and the list is for any pad.. it is just a list of all the possible key sequences. about 3100.
Did you look in the binder that the owners manual comes in. My 2000 had a small card (size of a credit card) with the code printed on it inside the binder.
here's another location to try. From another forum: entry code discussion Check out the last entry on pg 1

My 11 y/o opened both my 'oo and the '05 by randomly pushing the buttons. He's a whiz on Playstation. Maybe it's in the wrist action. LOL. Kinda disturbing
- ?
- 211.5K members
Top Contributors this Month

Customer Viewpoint Ratings and Reviews
Who leaves ratings and reviews?
Ratings and reviews are provided by customers who have either purchased a vehicle or visited a dealership for service.
How are ratings and reviews collected?
Customers are invited to participate in a survey administered by MaritzCX, an independent, third-party supplier.
Can dealerships edit or remove reviews?
No. Ford personnel and/or dealership personnel cannot modify or remove reviews.
Are reviews modified or monitored before being published?
MaritzCX moderates public reviews to ensure they contain content that meet Review guidelines, such as:
‣No Profanity or inappropriate defamatory remarks
‣No Personal Identifying information (e.g., customer phone number or email)
‣No Competitor references (e.g., another brand or dealership)
‣Dangerous behavior (e.g. threatening to harm employees or others)
‣Lack of adequate text (e.g., symbols, emoji’s and random letters)
Reviews on the product and not the customer’s Sales or Service experience
- Electric Vehicles
- Pay my bill
- Update my SYNC
- Replace a Part
How do I get a replacement key for my Ford?
If your coded keys are lost or stolen, and you do not have an extra one, new coded keys may be obtained from your Ford Dealer .
For security reasons, you must visit the dealer in person and provide proof of identification and vehicle ownership.
- Personal Identification: Valid Driver's License, state-issued picture I.D., or passport.
- Current Vehicle Registration
- Current Certificate of Automobile Insurance
- Vehicle Title
- Bill of Sale
This may require having your vehicle towed to your dealer.
- Key codes for vehicles older than 10 model years are not available.
- If your dealer is unable to duplicate your key, they may be able to recommend a reputable locksmith in your area to perform this service.
- The cost of a new key varies. For additional information, contact your dealer.
Additional Information
How do I get a spare key? How do I find my Keyless Entry Code? What do I do if I locked my keys in my vehicle?

Home » Troubleshooting » Ford Excursion key fob not working – causes and how to fix it
Ford Excursion key fob not working – causes and how to fix it
The remote keyless system in Ford Excursion allows the driver to conveniently lock and unlock the vehicle with the press of a button. When the key fob stops working, it quickly becomes an inconvenience to manually lock and unlock the vehicle. In some cases it can even leave you stranded if the vehicle can’t detect the key and won’t let you start the engine.

The most common cause of key fob not working in Ford Excursion is dead battery. But the remote key can also stop working due to worn buttons, poor battery contact, water damage, defective key fob, receiver module issues, signal interference, dead 12 volt battery, and unpaired key requiring reprogramming.
1. Dead battery in key fob
Dead battery is the leading cause of key fob not working in Excursion. Usually there are signs of weakening battery before it gives up. If the remote was working previously, but the range of the remote was gradually decreasing until it ceased to function, this indicates that the battery was wearing out.
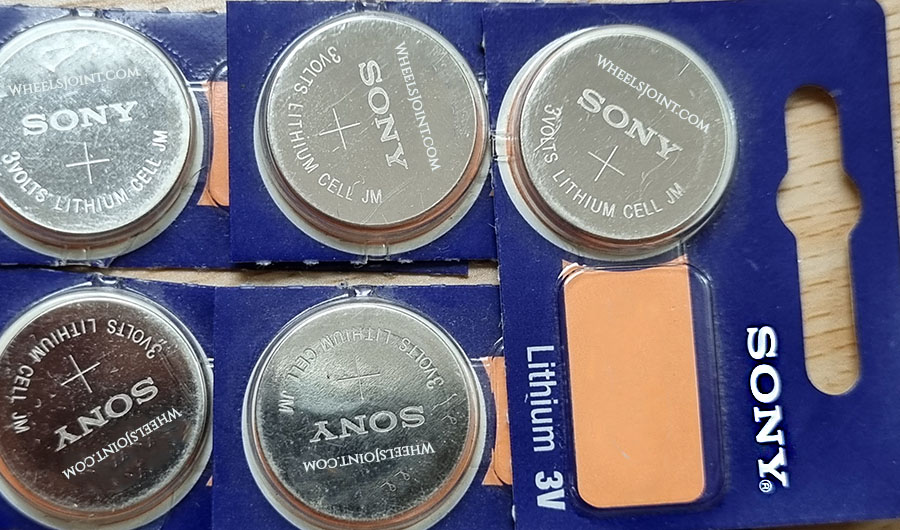
Replace the battery
If the button cell battery in the key fob of Excursion is replaced incorrectly or a battery is unsuitable, it can damage the vehicle key. Only replace drained batteries with new batteries in the same voltage, size, and specification. Make sure the battery is facing in the right direction when inserting it.
Recommended video
Key fob not working after replacing the battery
When purchasing a new battery for the key fob of your Excursion, keep in mind that the battery may be sitting on the shelf for a long time. Therefore after replacement it may not work, or may not last that long. Try purchasing the battery from a store where stock moves fast. If you still can’t get the key fob to work after verifying that the battery is healthy, your key fob issues may not be due to bad battery.
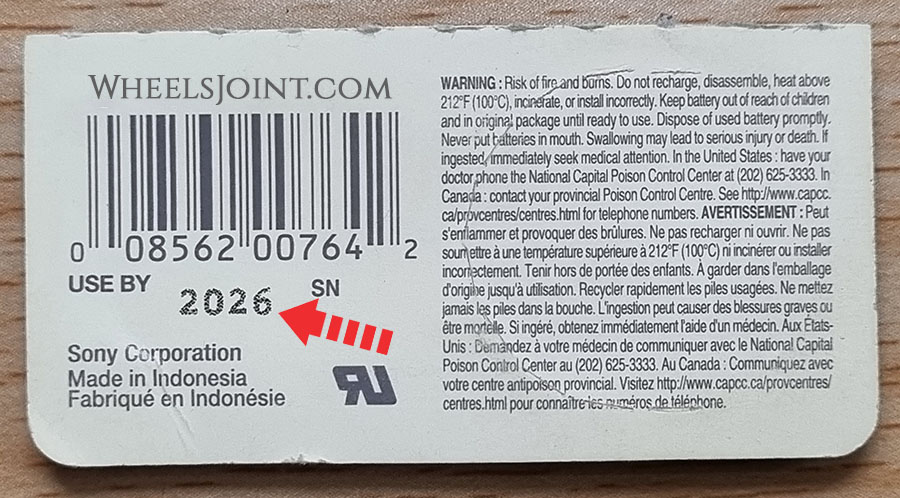
Starting the engine with dead key fob battery
If your Excursion has push button start/stop feature, your vehicle may not start due to weak key fob battery and a ‘key not detected’ alert message may be displayed in the instrument cluster. Don’t worry, you can still start your vehicle, the immobilizer is controlled by a passive transponder. Passive means, among other things, that the transponder in the key does not need its own power source.
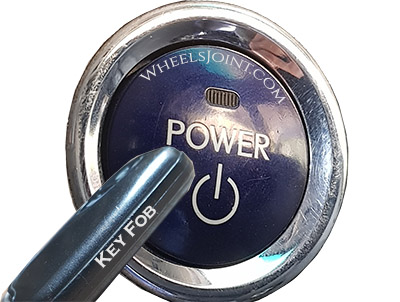
Touch the start/stop button with your key fob and then start the engine. If it doesn’t work, then look in the owners manual for exact location of key fob placement, as it may vary depending on model.
Use spare key: You can try starting your Excursion with its second key. It will also rule out any other problem with the first key, for example, water damage.
How long does the key fob battery last?
Depending on how often you use the key fob or remote control of your Excursion, the battery should last between two and four years. This is assuming the new battery you installed is healthy and its use by date is many years away.
2. Poor battery connection
The battery inside the key fob of Excursion has metal retaining clips that hold the battery in position and completes the circuit. If the clips don’t have any tension, it can cause contact issues and the remote may not receive any power. Make sure the battery is firmly placed and does not move around when you shake the remote. Also make sure all the battery contacts are corrosion and dust free.
3. Water damage
If your Ford Excursion key fob has taken a bath in the soapy water of the washing machine after you forgot to take it out of your pants pocket, water damage is very likely.
Water resistant, not waterproof
Your Excursion key has rubber seals which prevents the water from getting to the electronic chip inside. A splash of water or brief exposure to light rain should be fine, but exposure to excessive amount of water like submerging the key in the pool can cause the water to penetrate the seals and damage the chip. Submerging the key in ocean water at the beach can be much more damaging to key fob electronics due to highly conductive nature of salt water.
But my key fob survived water exposure?
If your Excursion key fob survived a wash cycle, or a deep bath in the ocean or pool water, it doesn’t make the key fob waterproof, it means you got lucky. Exposure to excessive water increases the risk of water damage, so you shouldn’t make this a habit.
What to do in case of water damage?
If your Excursion key fob stopping working after exposure to clean tap water or rain, immediately remove the battery and clean the electronic component with paper towel and let it dry fully before putting back the battery. In case of exposure to salt water, or soapy or dirty water, it is recommended to clean the chip with isopropyl alcohol or electronic cleaner. If the key fob still doesn’t work after cleaning and drying, the chip is probably fried and you will have to buy a new key.
4. Dead 12 volt battery
The remote keyless system and the central locking system in Excursion require the 12 volt battery to be in healthy state to function properly. If the 12 volt battery is dead or if the electric current has been interrupted due to corrosion on the battery terminals or the ground connection, all on-board electronics will stop working.
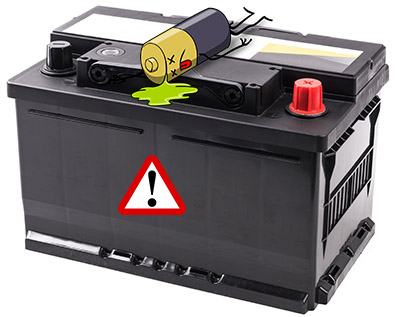
In this case, you will have to manually unlock the door of your Excursion with physical key. Also, the electrical accessories (e.g. headlights, fan, and infotainment system) will not function or may function poorly, and the engine will not start. Check the 12v battery and its connections.
5. Signal interference
Excursion remote control signal can be disrupted by objects, poor weather conditions or transmitters on the same frequency band close to the vehicle. The remote key may work when you’re near the vehicle, but may not work from a distance. In case of severe interference, the remote may not work at all.

Interference signals can be caused not only by neighboring radio masts and towers, but also by unprofessionally installed satellite systems. A large part of the radio interference is caused by defects and aging effects in electrical devices and radio systems, which lead to unwanted emissions, radiation and repercussions on power and communication networks. Your Excursion key fob should start working again when you leave the area of interference.
6. Reprogramming required
In rare cases, the remote key of Excursion may stop working due to pairing issues. The key can be reprogrammed with an OBDII scanner. You may also be able to program a key by following a few steps, an original key is typically required for successful pairing. The instructions should be mentioned in the owners manual. If you fail to do it yourself, you may have to visit an authorized dealer for reprogramming of the key.
7. Defective key fob
If your Excursion key fob stopped working after you dropped it on the floor, you may have damaged the internal chip. Or, if your key fob just stopped working one day out of the blue, in rare cases this could indicate a faulty key fob – assuming you have tried everything to fix the issue e.g. battery replacement, reprogramming and the spare key fob works.
8. Faulty receiver module
Ford Excursion has a remote keyless system receiver that receives radio frequency signals from the key fob. If none of your key fobs work, and and you can’t reprogram the keys, it is possible the receiver module has developed a fault.
You may have to perform further diagnostics to identify the faulty. The keyless entry antenna could be damaged, or the module is just not communicating with other modules on the vehicle. In these cases an OBDII scan tool can be used to verify if the commands are being transmitted and acted on by the security module.
9. Electronic immobilizer fault
The immobilizer is an anti-theft security system that prevents the engine from being started and the vehicle from being moved with an unauthorized vehicle key. A fault in the immobilizer system can prevent your Excursion from being started. You may also see a warning light with key symbol or key not detected message in the instrument cluster.
For vehicles with an ignition lock
There is a chip in the vehicle key. The chip automatically deactivates the immobilizer if a valid vehicle key is inserted into the ignition lock. The electronic immobilizer is activated automatically when the vehicle key is removed from the ignition lock.
For vehicles with a starter button
There is a chip in the vehicle key. It is used to automatically deactivate the electronic immobilizer when there is a valid remote control vehicle key in the vehicle interior. The electronic immobilizer is automatically activated as soon as there is no valid vehicle key in the vehicle.
The engine can only be started with a genuine vehicle key that is coded correctly. You can obtain coded vehicle keys from an authorized Ford dealer.
Reset the system
If the key fob is not working due to a glitch in the keyless entry system, it may be possible to restore the functionality by resetting the keyless entry system in your Excursion.
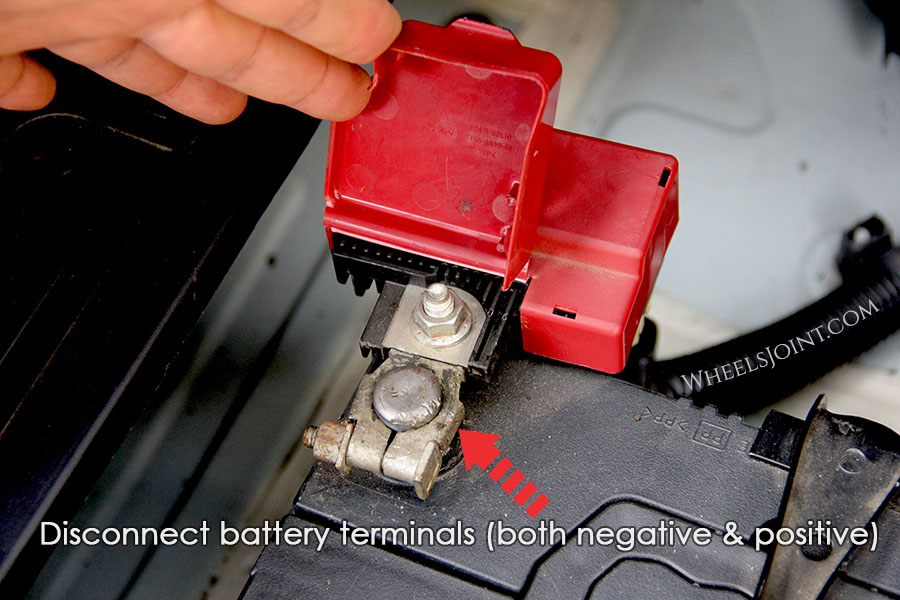
There isn’t any button or option to reset the keyless entry system in Excursion, but you can reboot all the on-board computers by disconnecting the 12 volt battery for a few minutes. Remove the cable from the negative terminal of the battery first, then from the positive terminal. With the battery disconnected, press the horn button a few times and turn on the headlights to drain out all the residual electricity from the system. After about 15 minutes, reconnect the battery in reverse order: positive cable first, then negative cable.
Use OBD2 scanner for diagnosis
Since Ford Excursion is equipped with on-board diagnostics (OBD), a fault diagnosis can provide initial indications of where the malfunction is located. This method will be especially useful when diagnosing a faulty remote keyless system receiver module.
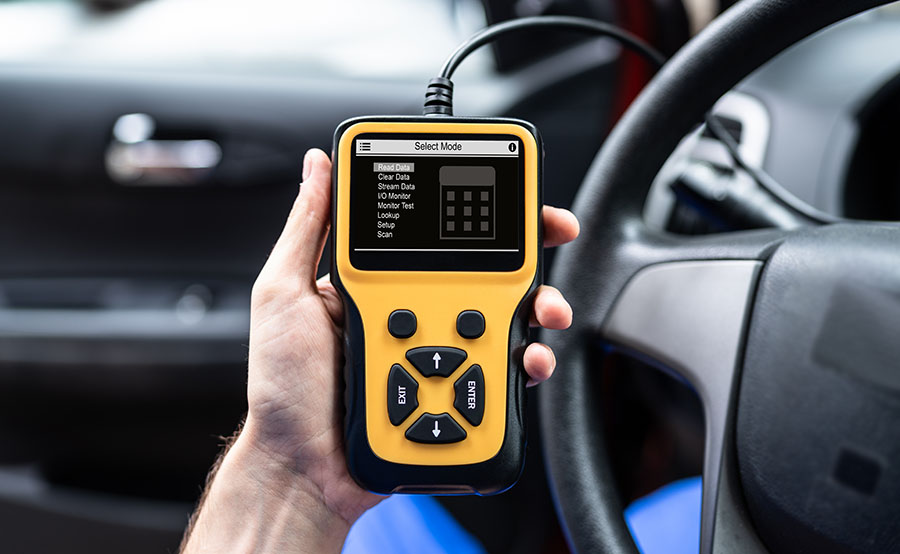
To begin troubleshooting, you must first connect the diagnostic tool to your Excursion. The OBDII connector is usually located under the dashboard. With the tool connected, turn on the ignition. Most diagnostic devices then ask for some information about the vehicle. It is important that you enter this 100% correctly, otherwise the result of the search may be inaccurate. In addition to the vehicle make, model, and engine type, you usually also have to type in the Vehicle Identification Number (VIN). Since some OBD codes are manufacturer-specific, the scanner will be able to give you more accurate information if you enter more details about your Excursion.
Conclusion:
There are many reasons why your Ford Excursion key fob is not working. When looking for the reason, you should start with the most obvious cause that is easy to diagnose: dead battery, which you can replace in a few minutes.

- Lincoln MKS AC not cooling – causes and diagnosis
- Toyota FJ Cruiser steering wheel controls not working – causes and how to fix it
- Lincoln MKZ bad wheel bearings symptoms, causes and diagnosis
- Vauxhall Astra low AC refrigerant symptoms, how to recharge
- Subaru Forester bad mass air flow sensor (MAF) symptoms and causes
- Pontiac Sunfire airbag light is on – causes and how to reset
- Ford E-350 bad wheel bearings symptoms, causes and diagnosis
- Audi S5 pulls to the right when driving
- Chevy HHR battery light is on – causes and how to reset
- Cadillac DTS key fob not working – causes and how to fix it
- Chrysler Concorde AC smells bad – causes and diagnosis
- Honda Crosstour bad wheel bearings symptoms, causes and diagnosis
- Ferrari 296 GTB key fob won’t lock or unlock the doors
- Is Renault Kadjar key fob waterproof?
- Buick Encore dead battery symptoms, causes, and how to jump start
- Nissan Sentra bad spark plugs symptoms, causes, and diagnosis
- Maserati Levante auto windows not working, how to reset
- Jeep Compass dashboard lights flicker and won’t start – causes and how to fix it
- Does the Jeep Liberty have Android Auto?
- Citroen C3 clogged catalytic converter symptoms, causes, and diagnosis
- Abington Journal on Facebook
- Abington Journal on Twitter
- Sign Up For Notices
- Submit News Tip
- Online Community
- Online Forms
- Submit Scores
- Submit Sports News
- Pro Football
- College Football
- College Basketball
- Auto Racing
- Submit Letter To The Editor
- Submit Anniversary
- Submit Birth
- Submit Birthday
- Submit Engagement
- Submit Wedding
- TV Listings
- Search Notices
- Place Notices

- Classifieds
- Manage My Account
Need to Sell? Click here to place a classified ad.
Get local news in your inbox. Click to sign up.
Click here to submit a news tip or submit an event., get free penguins tickets with an online subscription..
- Add Your Event
- Entertainment
- Privacy Policy
- Terms Of Service
Steamtown National Historic Site offers Mother’s Day Excursion to Moscow

SCRANTON — Pamper Mom with a relaxing excursion aboard vintage railroad passenger equipment to scenic Moscow in the Pocono foothills. The trip departs from Steamtown National Historic Site (NHS) at 1:30 pm Sunday, May 12 and returns at 3:30 pm.
This special Mother’s Day excursion kicks off the 2019 Steamtown NHS railroad passenger train excursion season. Welcome spring by enjoying the budding greenery along the tracks, then explore the historic Lackawanna Railroad passenger depot and freight station, operated by the Lackawanna & Wyoming Valley Railroad Historical Society.
Ticket prices are as follows: Adults (ages 16-61), $24; seniors (ages 62+), $22; children (ages 6-15), $17; and children to age 5, free (ticket obtained at fee booth). For more information or to make reservations, call 570-340-5204.
Located in downtown Scranton, Steamtown NHS is open daily from 9 a.m. to 5 p.m. daily. From I-81 follow exit 185 (Central Scranton Expressway); then follow the brown and white signs to the park entrance at Lackawanna Avenue and Cliff Street (GPS: N 41.41, W 75.67). General park information is available by phoning 570-340-5204 during regular business hours, or by visiting the park website anytime.
RELATED ARTICLES MORE FROM AUTHOR

Gerrity’s employee at Clarks Summit store tests positive; company says no risk for customers

Flynn: $25,000 awarded to Valhalla Veterans Services and $50,000 to the Treatment Court Advocacy Center for suicide prevention

University of Scranton students volunteer as judges for science competition
Ch. 9 The Development of Russia
Ivan i and the rise of moscow, learning objective.
- Outline the key points that helped Moscow become so powerful and how Ivan I accomplished these major victories
- Moscow was considered a small trading outpost under the principality of Vladimir-Suzdal into the 13th century.
- Power struggles and constant raids under the Mongol Empire’s Golden Horde caused once powerful cities, such as Kiev, to struggle financially and culturally.
- Ivan I utilized the relative calm and safety of the northern city of Moscow to entice a larger population and wealth to move there.
- Alliances between Golden Horde leaders and Ivan I saved Moscow from many of the raids and destruction of other centers, like Tver.
A rival city to Moscow that eventually lost favor under the Golden Horde.
Grand Prince of Vladimir
The title given to the ruler of this northern province, where Moscow was situated.
The Rise of Moscow
Moscow was only a small trading outpost in the principality of Vladimir-Suzdal in Kievan Rus’ before the invasion of Mongol forces during the 13th century. However, due to the unstable environment of the Golden Horde, and the deft leadership of Ivan I at a critical time during the 13th century, Moscow became a safe haven of prosperity during his reign. It also became the new seat of power of the Russian Orthodox Church.
Ivan I (also known as Ivan Kalita) was born around 1288 to the Prince of Moscow, Daniil Aleksandrovich. He was born during a time of devastation and upheaval in Rus’. Kiev had been overtaken by the invading Mongol forces in 1240, and most of the Rus’ principalities had been absorbed into the Golden Horde of the Mongol Empire by the time Ivan was born. He ascended to the seat of Prince of Moscow after the death of his father, and then the death of his older brother Yury.

Ivan I. He was born around 1288 and died in either 1340 or 1341, still holding the title of Grand Prince of Vladimir.
Ivan I stepped into a role that had already been expanded by his predecessors. Both his older brother and his father had captured nearby lands, including Kolomna and Mozhaisk. Yury had also made a successful alliance with the Mongol leader Uzbeg Khan and married his sister, securing more power and advantages within the hierarchy of the Golden Horde.
Ivan I continued the family tradition and petitioned the leaders of the Golden Horde to gain the seat of Grand Prince of Vladimir. His other three rivals, all princes of Tver, had previously been granted the title in prior years. However they were all subsequently deprived of the title and all three aspiring princes also eventually ended up murdered. Ivan I, on the other hand, garnered the title from Khan Muhammad Ozbeg in 1328. This new title, which he kept until his death around 1340, meant he could collect taxes from the Russian lands as a ruling prince and position his tiny city as a major player in the Vladimir region.
Moscow’s Rise
During this time of upheaval, the tiny outpost of Moscow had multiple advantages that repositioned this town and set it up for future prosperity under Ivan I. Three major contributing factors helped Ivan I relocate power to this area:
- It was situated in between other major principalities on the east and west so it was often protected from the more devastating invasions.
- This relative safety, compared to Tver and Ryazan, for example, started to bring in tax-paying citizens who wanted a safe place to build a home and earn a livelihood.
- Finally, Moscow was set up perfectly along the trade route from Novgorod to the Volga River, giving it an economic advantage from the start.
Ivan I also spurred on the growth of Moscow by actively recruiting people to move to the region. In addition, he bought the freedom of people who had been captured by the extensive Mongol raids. These recruits further bolstered the population of Moscow. Finally, he focused his attention on establishing peace and routing out thieves and raiding parties in the region, making for a safe and calm metaphorical island in a storm of unsettled political and military upsets.

Kievan Rus’ 1220-1240. This map illustrates the power dynamics at play during the 13th century shortly before Ivan I was born. Sarai, the capital of the Golden Horde, sat to the southeast, while Moscow (not visible on this map) was tucked up in the northern forests of Vladimir-Suzdal.
Ivan I knew that the peace of his region depended upon keeping up an alliance with the Golden Horde, which he did faithfully. Moscow’s increased wealth during this era also allowed him to loan money to neighboring principalities. These regions then became indebted to Moscow, bolstering its political and financial position.
In addition, a few neighboring cities and villages were subsumed into Moscow during the 1320s and 1330s, including Uglich, Belozero, and Galich. These shifts slowly transformed the tiny trading outpost into a bustling city center in the northern forests of what was once Kievan Rus’.
Russian Orthodox Church and The Center of Moscow
Ivan I committed some of Moscow’s new wealth to building a splendid city center and creating an iconic religious setting. He built stone churches in the center of Moscow with his newly gained wealth. Ivan I also tempted one of the most important religious leaders in Rus’, the Orthodox Metropolitan Peter, to the city of Moscow. Before the rule of the Golden Horde the original Russian Orthodox Church was based in Kiev. After years of devastation, Metropolitan Peter transferred the seat of power to Moscow where a new Renaissance of culture was blossoming. This perfectly timed transformation of Moscow coincided with the decades of devastation in Kiev, effectively transferring power to the north once again.

Peter of Moscow and scenes from his life as depicted in a 15th-century icon. This religious leader helped bring cultural power to Moscow by moving the seat of the Russian Orthodox Church there during Ivan I’s reign.
One of the most lasting accomplishments of Ivan I was to petition the Khan based in Sarai to designate his son, who would become Simeon the Proud, as the heir to the title of Grand Prince of Vladimir. This agreement a line of succession that meant the ruling head of Moscow would almost always hold power over the principality of Vladimir, ensuring Moscow held a powerful position for decades to come.
- Boundless World History. Authored by : Boundless. Located at : https://www.boundless.com/world-history/textbooks/boundless-world-history-textbook/ . License : CC BY-SA: Attribution-ShareAlike

Elektrostal
City in moscow oblast, russia / from wikipedia, the free encyclopedia, dear wikiwand ai, let's keep it short by simply answering these key questions:.
Can you list the top facts and stats about Elektrostal?
Summarize this article for a 10 year old
IMAGES
VIDEO
COMMENTS
I show you how to find the Key pad code for your Ford Excursion but this will work on just about any ford with a keyless entry. Ford installing these was one...
This can be tested using a PID monitor on the NGS scanner at the FORD dealer. PID KEYPAD will tell the NGS what key was pushed as your run through the keys. Replacement of the keypad would be necessary to fix it. On 2001 Excursion the Keyless Entry is controller by the Gem Module and keycodes are retrieved from the Gem.
My wife and I recently bought a 2000 Excursion. We can't find the factory code to reprogram the keypad on the driver's door. I looked under the dash where I found the code for our Expidition, but was not able to find it. Can anyone suggest a remedy? The code on my 2000 "X" was 13933, I don't know if that's a standard factory set or not.
This video shows how to find the factory keyless entry code on a Ford Excursion. It also shows how to create your own personal keyless entry code and other f...
If you don't have the radio pullers, you can use a couple of small screwdrivers. There are 2 sets of holes on each side of the radio. Push the tool into the holes and slightly bend the tool out away from the radio. Without the pullers, it will be a bit of a problem, but it can be done. Good luck.
Step 2: Immediately (within 5-seconds) push the '1-2' button after entering the code. Step 3: Immediately (within 5-seconds) enter your new 5-digit code. Step 4: Now lock the door and make sure the new 5-digit code works. Note: You can't erase the original factory code. It will always work irregardless of what you set for a personal code.
Excursion Keyless Entry Code Location. Originally Posted by dougger222. I was told it takes Ford close to an hour to run through all the codes to get to the door code, this was told by two Ford dealerships. I lost my second key for the 00 X and was able to buy two PATS keys off Ebay for $20 had them cut for a $1 each but was told I would have ...
View and Download Ford 2000 Excursion owner's manual online. Ford Motor Company 2000 Ford Excursion Owner's Guide. 2000 Excursion automobile pdf manual download. Also for: 2002 excursion, Excursion 1999.
Verify the following prior to following these instructions: Your vehicle is equipped with keyless entry, and. You have a key fob remote that is compatible with your vehicle. Obtain all remote transmitters for this vehicle. This procedure will erase all previously programmed remotes. You must program all existing and new remotes that you wish to ...
Today I will show you how to program a replacement key fob for a 2000 Ford Excursion. This simple procedure will work on most older Ford cars, trucks, and va...
2005 EXCURSION!! XLT V10 Silver Purchased 10/8/05 19920 Miles. Heated tow mirrors, Hood/window deflector,Ford rubber mats, Firestone bags/air source kit, Helwig swaybar, Prodigy, underhood liner and light, V's and Modded B's, Bilsteins, Procomp stabilizer, Curt front reciever, 6 disk Visteon stereo, 6 disk changer in console, X-3 AIC, door lights,OEM Fog mod, volt/tran temp gauges,skid plate.
To find the keyless entry code: Insert a programmed smart key into the ignition and switch the ignition on for a few seconds. Switch the ignition off and remove the key. Insert the second programmed smart key into the ignition and switch the ignition on. The factory-set code will display for a few seconds in the instrument cluster located above ...
If your coded keys are lost or stolen, and you do not have an extra one, new coded keys may be obtained from your Ford Dealer . For security reasons, you must visit the dealer in person and provide proof of identification and vehicle ownership. Personal Identification: Valid Driver's License, state-issued picture I.D., or passport.
Replace the battery. If the button cell battery in the key fob of Excursion is replaced incorrectly or a battery is unsuitable, it can damage the vehicle key. Only replace drained batteries with new batteries in the same voltage, size, and specification. Make sure the battery is facing in the right direction when inserting it.
2000 Ford Expedition door key code location..... easy!Check out My Amazon Auto Accessories Store! Lets make that Weekend job less Painful! ...
SCRANTON — Pamper Mom with a relaxing excursion aboard vintage railroad passenger equipment to scenic Moscow in the Pocono foothills. The trip departs from… The trip departs from Steamtown National Historic Site (NHS) at…
Hi 04.12.1914 (ns) BtsMt Paul Hitzelsberger was killed in a crash at Seeflugstaion Putzig , Baltic Sea. I am searching added information ( number of seaplane , name and fate another crew member ) about this event. Cheers vikinn.
Ivan I (also known as Ivan Kalita) was born around 1288 to the Prince of Moscow, Daniil Aleksandrovich. He was born during a time of devastation and upheaval in Rus'. Kiev had been overtaken by the invading Mongol forces in 1240, and most of the Rus' principalities had been absorbed into the Golden Horde of the Mongol Empire by the time ...
Lost Door Entry Key Code. I show you how to find it. 2000 Ford Expedition.Check out My Amazon Auto Accessories Store! Lets make that Weekend job less Painful...
Elektrostal , lit: Electric and Сталь , lit: Steel) is a city in Moscow Oblast, Russia, located 58 kilometers east of Moscow. Population: 155,196 ; 146,294 ...