
- Remember me Not recommended on shared computers
Forgot your password?
- Engine & Transmission

Timing Belt on 3.5L Engine
- Timing belt
- motor mount

By ddbutton1 February 15, 2012 in Engine & Transmission
- Reply to this topic
- Start new topic
Recommended Posts
I do almost all of my own mechanical work, but I am concerned about changing the timing belt on the Journey 3.5L engine because the engine is transverse. The timing belt cover is up against the right strut tower and the engine mount is in the center of of the "loop". So far I can't find any repair/installation directions for the Journey. (Mopar has a service manual, but it only works on Windows 7 and earlier with Internet Explorer - I am 100% Apple)
If anybody reads this and has instructions, service manual or experience changing the timing belt on the 3.5L engine in the Journey - I'm up for making a deal.
Link to comment
Share on other sites.
Are you sure its a belt and not a "chain" on a 3.5?
caperinmuskoka
I know my new 2012 with the Penstar has a Chain...
I will check ...........Yes it does have a belt larryl.......................Caper...
The 3.5L in the 2009 Journey is the same engine as in the Charger and Challenger. I have seen some minimal instructions for replacing the belt, but only for "forward facing" engines. The basic replacement and timing arrangement is the same on the Journey, but since it is transverse mounted the disassembly from the beginning has additional obstacles. For one, there is only 1/2 inch clearance from the main pulley to the strut tower of the body; and secondly, the engine mount is in the way to get the belt out and back in. The engine was probably assembled with the mount, but when it is in the vehicle the mount traps the belt. It's like they took a lesson from the Asian manufacturers. (Goes together OK, but don't worry about maintenance.)

i scanned a few print outs from all data. pm me your email ill send them to you. it's not complete, but hope it helps. ill try to print out the remaining stuffs if i have time at work tomorrow.
- 8 months later...
You have to take off the engine mount to get to the timing belt. Does anyone have the detail for how to put the timing belt properly on i have a feeling my mechanic screwed up and wont admit it
Just had mine done yesterday along with the water pump and tensioner- the water pump had began to "seep" so it was a good thing I had the procedure done
Also had new plugs Mopar NGK installed and it seems to run very well took my mechanic six hours
I used the Gates brand for the timing belt, tensioner and water pump and a goodyear Gator serpentine belt
160600 klm's
- 2 weeks later...
Hey larryl, did he have to drop the motor or was he able to do it with the engine in?
He did not remove the engine but it took six hours and a lot of cussing
I replaced the timing belt on my wife's 2001 300M a few years back. Fortunately, the motor was mounted front to back. After taking off the bulk of the front fascia and the radiator, etc, it wasn't too bad, just time consuming. I can't imagine doing it on a transverse mounted engine. Good luck. If anyone does this on tehir own, please update us!
- 2 months later...
I currently have 78000 miles on my 2010 Journey. How much does a timing belt cost to replace? I'm still trying to figure out if I'm getting the timing belt changed or trading it in.
- 2 years later...

Replace timing belt, tensioner, and water pump:
Estimate for upstate NY in April 2015 is between $650 and $900
Join the conversation
You can post now and register later. If you have an account, sign in now to post with your account. Note: Your post will require moderator approval before it will be visible.

× Pasted as rich text. Paste as plain text instead
Only 75 emoji are allowed.
× Your link has been automatically embedded. Display as a link instead
× Your previous content has been restored. Clear editor
× You cannot paste images directly. Upload or insert images from URL.
- Insert image from URL
- Submit Reply
- Existing user? Sign In
More Forum Apps
- Online Users
- Leaderboard
|| Forum Activity ||
- All Activity
- Create New...

- Forum Listing
- Marketplace
- Advanced Search
- Welcome To Allpar - The Mopar Community
- Allpar.com Articles
Replacing 3.5 V6 Timing Belts
- Add to quote
- Timing belt
- Water pump and gasket
- Revised Belt tensioner pulley
- RTV silicone
- Drain the cooling system (turn the radiator drain 1 full turn only
- Remove the upper radiator hose
- Remove the top radiator support
- Remove the two 10mm head bolts from either side of the radiator and gently pull the top of the radiator forward to gain a little more room
- Remove the four 10mm head bolts holding the cooling fan module to the radiator . Remove the four clip nuts and the cooling fan electrical connector and lift the fan module out of the vehicle
- Loosen and remove the drive belts and remove the three 13mm head bolts holding the alternator belt tensioner pulley to the timing cover
- Remove the three piece timing belt cover (the lowest piece can be accessed through the crankshaft pulley by turning the pulley and removing the bolts)
- turn the crankshaft pulley and line up the timing marks on top dead center
- Remove the timing belt tensioner two 13mm bolts and remove the tensioner (If the tensioner pulley wheel is made of plastic you will want to purchase a revised steel tensioner pulley) . Put the tensioner in a suitable vise to compress it and install a small allen wrench from the front to hold it in place (close the vise slowly to compress the tensioner)
- (If need be) Remove the plastic tensioner pulley (the 15mm head attaching bolt can be removed without removing the crankshaft pulley)
- The timing belt can easily be slipped under/around the crankshaft pulley by slightly bending it to the outside of the timing belt housing on the drivers side and working it with your hand through the crankshaft pulley . No excessive force is needed to do this and be sure to clean the area well prior to installing the new belt
- With the belt removed , remove and replace the water pump . Coat the gasket with a little RTV silicone and clean the gasket mating surface well
- Install the new timing belt in the opposite direction as removed . Make sure that all the timing marks are lined up .
- Reinstall the timing belt tensioner
- Do not attempt to loosen the camshaft sprocket 18mm head center bolts or you will need to perform a timing set procedure
- Remove the coolant temperature sensor when refilling the coolant to purge the trapped air from the system and be sure to use a 50/50 mix of antifreeze and water
- If the vehicle is already equipped with a revised steel timing belt tensioner pulley there is no need to remove it to replace the belt
- The idler pulley for the serptine belt on the driver's side of the engine has three bolts - each different length. Be sure to put them back in the right place.
- I had to replace the water pump due to leaks. I had let it go for a few months, but was really suprised at the damage it had done to the timing belt, really had some gunk to clean out. Be sure to ask for the water pump gasket, it does not come with the water pump (what do you expect for $100?).
- The timing belt tensioner really does need a vise to get the pin to seat; that thing is really strong!
- I was able to change the timing belt without removing the crankshaft damper, but if I did it again, I think I would spend the $20 and rent the correct tool to pull it off.
- Hate to admit this, but I got one of the cams off by a tooth or so, and it would not start, which is amazing to me. Had to tear it down and retime. Lesson learned - get both cams at TDC with the crankshaft before you put it back together! I found it difficult to get both cams lined up, and then when the tensioner was released, it also shifted some, so be prepared to spend time getting everything lined up (and possibly reinstalling the tensioner!).
- Tear down time was about 3 hours, 1.5 hours to put back together.
- Go ahead and replace the AC belt and serpetine belt while you are at it.
Hello new here so timing belt broke and now I need to retime the complete engine intake/exhaust valves anyone have a right up also I accidently tried to loosen the camshaft center bolt trying to alighn timing belt marks
- ?
- 763.6K posts
- 48.9K members
Top Contributors this Month

- Forum Listing
- Marketplace
- Advanced Search
- Dodge Intrepid First Generation Forums (1993-1997)
- General Discussion (First Generation)
Did your belt do more than skip, and did it bend valves?
Just skipped a tooth or two, no damage., skipped a tooth or two, bent valves., cam or crank sprockets came free of belt, no damage., cam or crank sprockets came free, bent valves..
- Total voters 2
- Poll closed Feb 10, 2005 .
How many BROKEN 3.5 timing belts bend valves?
- Add to quote
I'm trying to get a feel for just how "interference" this engine is. The book says it is, but I've put a few timing belts on LH-cars that had died at low engine speed. Usual cause was a broken tensioner pulley bolt, and a vehicle owner who was deaf or "had to get somewhere." So: My question is: If the crank and one or both cams rotate independently, more than just a skipped tooth on the belt, what has everyone seen happen? I've never had one come in whose belt died while above 1500 or so RPM; does anyone have bent valve stories to tell, or is the book just alarmist? TIA.
I would say about 1/20. It takes more then just one tooth off.
The T-Belt's tensioner broke in my 1G. When the engine first died on me i didn't really know what was wrong yet, so i tried to start it back up again. Amazingly enough it fired up, but was running really rough. I think the belt may have slipped on one or both of the cams. I got it up to 40 mph before it died a second and final time, and i tried cranking it untill the battery was nearly dead. no damage whatsoever...
I replaced my water pump & timing belt a year or so ago @ 125k. This past fall the car broke down on me while driving at speed - the motor was probably 2000-2500 rpm. No warning - "cruise" light came on for a second & then she died. After coasting to a stop, I tried refiring but all she did was spin over. Upon disassembly, found the tensioner had crapped out to the point the bearing was shot & tensioner fell off. The cams & crank were WAY out of sync - way more than a tooth or two off. I think I got really lucky because the timing belt jambed at the crank pulley to the point where the belt tore & the plastic crank pulley cracked. Although motor never appeared to interfere, you can bet my fingers were crossed after I relaced the belt, tensioner, & crank pulley. Bottom line, all was OK & I thank my lucky stars. What I learned - ALWAYS CHECK/REPLACE TENSIONER ALONG WITH THE BELT!
- ?
- 42K members
Top Contributors this Month

- Forum Listing
- Marketplace
- Advanced Search
- General, Performance, and Technical
- General Challenger Discussion
- How-To, DIY and Tips & Tricks
3.5L Timing Belt & Water Pump Replacement
- Add to quote
I finally did the Timing Belt & Water Pump maintenance on my Challenger's 3.5L this last weekend, and while there's plenty of info out there on how to do it, I figured I'd create a thread on this nonetheless. At the very least, I can include the useful links I found when doing research on this and add in some extra notes/details I found out the hard way which weren't in other write-ups. So without further Mountain Dew, let's dive into this puppy! First thing's first, you're going to want to get all your parts and tools together before you start. This is a 100K mile maintenance, so there can be quite a few things to change if you haven't already done any of them. Main parts list : - the Timing Belt - the timing belt's hydraulic tensioner* - the timing belt's tensioner pulley** - Water Pump (and gasket) Optional parts list : - serpentine drive belt - drive belt idler pulley - drive belt tensioner pulley ( I have already replaced all these, so I just removed these parts and remounted them during this particular maintenance ) Optional fluids/adhesives/other list : - Engine coolant ( Zerex G-05 ) and distilled water*** - RTV sealant (gasket sealer)**** - a roll of paper towels ( the good kind, not the el-cheapos! ) - some sheets of cardboard (a large box broken down should do it) Tool list : - 1/4" drive and 3/8" drive ratchets and matching sockets in metric sizes 10mm, 13mm, 15mm, 16mm, & 18mm - Torx bits in sizes T30 and T40 - wrenches in same metric sizes as above (ratcheting wrenches are a plus here). - torque wrenches in all 3 drive sizes (1/4", 3/8", & 1/2") and smaller extensions for each - harmonic dampener puller and installer tool sets for Chrysler 3.5L engines*****. That's pretty much everything you'll need to do this deal. Next, I will list out some of the threads and YouTube vids I used to gather my intel before starting. --------------------------------------------------------------------------------------------------- * - these rarely fail from what I understand, so replacement is optional; I opted NOT to replace mine this go-round. ** - these are usually the first part of the timing belt system to fail, so replace the pulley at the very least or the whole pulley and arm component if desired (what I did). *** - just draining the radiator will yield 2 gallons of coolant/water mix, so if not reusing it, you'll need a gallon of 100% coolant and a gallon of distilled water (or 2 gallons 50/50 pre-mixed coolant ). **** - this is optional for the water pump gasket seal. The manual says to use it, but I found no other references to it, so it's up to you whether or not you want to use some. ***** - you can rent these from Autozone, OEM #27139 (puller) and OEM #27306 (installer) ( write-up continued in next post... )
Useful Info from Others Threads & Vids I will use this post for listing out some of the threads and YouTube videos I found useful while researching what all is involved to do this maintenance... First up is a thread from this very forum ( NOTE : its got a YouTube video link in it that leads to a series of 5 videos on this topic which are very useful! ): http://www.challengertalk.com/forums/f38/changed-timing-belt-p0016-code-502601/ Here is another YouTube video which is helpful to watch and take notes on: And one more: --------------------------------------------------------------------------------------------------- I had some more links, but after reading through them, they didn't really provide anything above and beyond what the ones above do, so I'm leaving them out for now... --------------------------------------------------------------------------------------------------- ( write-up continued in next post... )
Attachments

I plan on doing this myself this weekend. Was that an M12 x 3” bolt or M13 x3”? You gave two different sizes for the bolt used to reinstall the balancer Sent from my iPhone using Tapatalk
Good catch, I see that discrepancy now. Not positive which is the correct size just from memory, I will need to check my notes and/or measure that bolt when I get home this evening so I can provide the right info. Also, it looks like a whole bunch of the pics I had attached to the posts are now gone or the links are messed up. That’s disconcerting; not sure what’s up there, but I will try to fix those this evening as well. Nuke
Sweet. I plan on hopping on my own timing belt and water pump change this weekend. Challenger has 140k o it and I bought it just over 100k so I have no idea if it was ever done, and considering I’m starting to get a chirping noise from inside the timing belt cover (already replaced the tensioner assembled and idler pulley) I figure go ahead and do it. One video I found on YouTube had the same sound coming from it on his sxt (mines an se) and turned out it was the water pump seal(gasket) was going bad and causing the whistle inside. Sent from my iPhone using Tapatalk
It’s entirely possible that timing belt has never been changed, in which case you’ll want to do it as soon as possible to make sure it doesn’t go and lunch the motor. Actually, from what I’ve read, the belt itself isn’t the part that gives up most often in there. It’s the timing belt tensioner pulley which will usually go first and hose everything up. Either way, once you’re in there, might as well do it all, so that’s why the belt, pulley, water pump etc. are all on the list to change at once. Not sure on that whistling noise, but I would err on the side of caution and assume it’s the water pump. Best to change it out now before it gives up and overheats everything, right?
Exactly. And considering it’s 180 for everything that’s less than a new engine I’d rather just do it and be done with it. If the chirping doesn’t stop then it’s something else but at least I’ll have ruled that out and won’t have to worry bout the pump or the timing belt for another 100k Sent from my iPhone using Tapatalk
I am pretty sure this bolt is a M12 x 1.75 and it’s approximately 4.25” long or about 10.5 centimeters. If you want one, PM me an address to which I can ship one, and it’s yours...for free. I’ve got four of them, I won’t miss it, I promise. if it goes away on a trip to your garage and stays there, the other 3 will suffice I’m sure.

3.5L Timing Belt & Water Pump Replacement Since I’m doin my timing belt tomorrow, would be a bit of a problem getting it to florida in that short a time lol. I’ll see if I can find one at a parts or hardware store tomorrow before I begin tearing it apart Sent from my iPhone using Tapatalk
Ashiva said: Since I’m doin my timing belt tomorrow, would be a bit of a problem getting it to florida in that short a time lol. I’ll see if I can find one at a parts or hardware store tomorrow before I begin tearing it apart Click to expand...
Ashiva said: Good thing I did the timing belt and water pump replacement. The timing belt tensioner pulley had failed. It already was dumping the ball bearings in the bottom of the crankcase. So I changed it just in time. Click to expand...
Good thing I did the timing belt and water pump replacement. The timing belt tensioner pulley had failed. It already was dumping the ball bearings in the bottom of the crankcase. So I changed it just in time. Sent from my iPhone using Tapatalk
3.5L Timing Belt & Water Pump Replacement I drained the entire cooling system and left the pep**** open to continue to release it all. I lined up the camshafts to TDC and didn’t worry about the actual crankshaft since it was so close to being tdc anyway (my father was an ASE certified mechanic for 30 years and said it’s more important to have the cams TDC) I cleaned and vacuumed out the entire timing belt area since there were ball bearings at the bottom and dust galore. I recommend a soft bristle paint brush to brush the dust up and a shop vacuum to suck it dry. I rented the Chrysler oem pulley that you couldn’t get to work right and had no trouble with it. I did have to take off two of the legs and manually put them on the balancer but otherwise it worked just fine with the longest shaft. Putting it back on was easy with a couple half in washers and that m12 x 1.75 bolt I picked up that was around 100 mm. Also ended up using a socket that fit round it to help with pushing it back on till I could get the threads on the original bolt. I also only tightened down the balancer to line up with the ac compressor pulley. I basically changed my coolant and had got prestone antifreeze. It’s green, but it’s HOAT and designed for Chrysler engines so if anything happens I still have the bottle of it sludges the engine. After it’s said and done, my slight knock has gone away, and she seems to have more power sitting still (I thought it was a rough idle at first but it’s more like she gained torque, it’s like she wants to move). If you’ve ever sat in a vehicle with a souped up engine you know the feeling I mean. That low I wanna go rumble in the seats when sittin still. Sent from my iPhone using Tapatalk
Oh and be prepared for bruises and blood. And being sore. And if you don’t have a torque wrench (mine is only inches and starts at 120) you can still get it done ok. Just don’t wrench down hard on the bolts and tight till snug but not till they stop (if you understand what I mean). The worst part for me on the whole thing was having to go rent the right puller (the one I originally rented was too long) Oh and I think you can do everything just fine without removing the bolts on the power steering. They don’t seem to be attached in any way that hinders the removal of the timing cover. Sent from my iPhone using Tapatalk
- ?
- 95.2K members
Top Contributors this Month


CarParts.com will be back soon!
We apologize for the inconvenience. The CP Team is working on some upgrades to improve our service. Thank you for using CarParts.com!
You can call us at
1-866-529-0412
Reference ID: 18.7fc733e.1714779977.38aedb

- Forum Listing
- Marketplace
- Advanced Search
- Powerplants (HEMI and V6 Engines)
- 1st Gen V6 Forum (2.7L & 3.5L)
- 3.5L V6 Forum
HELP!! - 3.5L V6 Timing Belt Change FAIL
- Add to quote
Hello all, I apologize for the really really long post in advance. If you read the whole thing, may the Lord bless you. 2007 Dodge Charger SXT 3.5L NAG1 Be sure to read my Chrysler Timing Belt 101 tips at the end of my post. Condensed Version::::::: Changed timing belt because it was due Now engine runs like crap - vibrates and seems like an off balance washing machine. Also you can hear what sounds like a valve tapping coming from the exhaust. Suspect something with the rocker arms or valves. I loosened the rocker arms when doing it the first time because the manual said to do so. I tried to get the timing right several more times after the first time and believe I have it now. But there is a different problem now. I need to know where to go next. I don't know how to check anything on the rocker arms or how to check for damaged valves. Stealer ship quoted 1200 to change rocker arms. Crankshaft - TDC: http://postimg.org/image/71g7r0i73/ Camshaft Passenger - TDC: http://postimg.org/image/s9u7hbyg9/ Camshaft Driver - TDC: http://postimg.org/image/8kgiimfxl/ *Video: *Note on the video you really can't see how much the engine is shaking due to the image stabilization of the camera. It was shaking hard enough that I saw vibration in my door as I sat in the driver seat with the door open. It was bouncing it. Full Version::::: I am in dire need of help. I swapped out my timing belt this past weekend (along with tensioner, tensioner pulley, water pump, valve cover gasket, upper intake gasket, spark plug gaskets) and I royally screwed something up. I am going to post pictures/video of what is up. At this point I am completely frustrated though, I have spent 3 entire days screwing with this thing thinking it was going to be no big deal. After all, I was following the factory service manual... what could go wrong? (Besides that whole part where they tell you to loosen the rocker arms.) What has happened is my car now runs like complete crap. At first I thought, oh no big deal I just got the timing off by a tooth somewhere. Now I don't think that is the case, I have set and reset the timing belt about 10 times and each time it has came out looking really really close. In its current state, the passenger side is advanced by about 1/2 of a tooth, the drivers side is pretty well dead on with the mark and this is as close as I can get it (See pictures - taken straight on as not to skew the angle). It still runs horrifically. Now let me back the truck up a bit, when I did this the first round I was following the LX Service manual to a "T", I loosened the rocker arm assemblies as to get the pressure off of the cams (I only did this because I bought new valve cover gaskets/plug gaskets because I read it may fix oil consumption issues - otherwise I would not have done this). I think this is where I went wrong. The cams did move while I was loosening this, and after I got the rocker arms loosened enough that the cams would no longer "snap into place" due to the valve springs I put them back to TDC. After I got the belt on I bolted it up (tightened the rocker arms in the pattern shown in the manual to the torque that it said.) I fired her up and it ran, seemingly, normal for about 4 seconds. Then the problems began. It started shaking as if it wanted to die, but the spark was solid... it didn't show signs of dieing, just like it was "off balance" or something. I went to the tail pipe while it was running and to my horror I could what sounded like a valve getting smacked... a loud tick/ping noise in harmonic succession. (See the video on Youtube for an example). I was frightened... on top of that the MIL was on (I expected this since it wasn't 100% back together) and the little lightning bolt was flashing (expected too since the alternator was not hooked up.) So I went back at it, I adjusted the cams in every which way I could think of, advanced by 1 tooth on each side, dead on, slightly off, and lastly I tried it 1 tooth retarded. Mind you when I was doing it this time the rocker arms were tightened and I used the simple "bull clip/paper wedge" method. Worked like a charm. Then I gave up, I put it back to what I think to be TDC at all 3 points (again see pics) and it still runs like a wet machine gun fart. I had my brother in law come over, who used to be a mechanic, and he said that he thinks the timing is dead on as well. He suggested that something happened when I was adjusting the rocker arm assemblies and confirmed the noise from the tail pipe sounds like a valve getting tapped to him as well. I then called Dodge... they quoted me $1200 based upon my description and I said thanks but no thanks. They said they would likely just replace the rocker arm assemblies. Again this is just based on my fragmented description but something sounded strange about that to me. Just replacing the whole assembly? Why? He said there is a tube in the middle of the rocker arms that delivers oil, I researched this a little and he is of course correct. But he also said that when the rocker arms get rotated this can block that little passage. While this may be true it doesn't seem to fit my problem. I pulled the codes that it was throwing a last ditch effort, there is only 1 code registered - P0123. I haven't had time to research this as it is late and again I am stupid frustrated. I am sure this is my fault and I shouldn't have tried to do it by the book in hindsight. Also I checked the number of teeth on the belt I got, it is correct and matches what was on the OEM (can't recall how many at the moment, 203 or something like that.) What do y'all think? I am preparing to rip the valve covers off and see if I can find anything in there but my knowledge of rocker arms, valves, and all of that jazz is very limited because I've never had to go that deep into my engine. I feel that I am about to attend the school of hard knocks. No pun intended. See video/pics. I will post more info if you need it. Also, fnkychkn - I followed your instructions to set the crankshaft half a tooth BTDC and put it on this way. Worked pretty well as far as I can tell but my results are not as intended. Crankshaft - TDC: http://postimg.org/image/71g7r0i73/ Camshaft Passenger - TDC: http://postimg.org/image/s9u7hbyg9/ Camshaft Driver - TDC: http://postimg.org/image/8kgiimfxl/ *Video: *Note on the video you really can't see how much the engine is shaking due to the image stabilization of the camera. It was shaking hard enough that I saw vibration in my door as I sat in the driver seat with the door open. It was bouncing it. Chrysler Timing Belt 101 Hard Learned Lessons::::: ====================================== As an aside, for those of you having problems with getting your dampener pulley/harmonic balancer back onto your crankshaft here is a few tips I learnt. 1) The bolt you need is an M12-1.75 pitch FULL THREAD - it needs to be longer than 3.5 inches (yes I know that's not metric but I can't remember the measurement in mm) 2) If you can somehow find this bolt (I couldn't) then just use thick fender washers and a matching nut to press it back on, be sure to lube the threads 3) If, like me, your local Home Depot, Lowes, True Value Nuts & Bolts, and everyone else doesn't carry this size of bolt then try this... 3a) Get the pulley on the shaft as well as you can to start 3b) VERY GENTLY tap it into place a little ways with a heavy hammer, I meant VERY gently... it will seem like its not moving but it is (at least mine did). I know people say to not do this... it is up to you and I was desperate 3c) Get it on to the point that you can use the factory bolt. Again... lube it up! 3d) It pushes right on, I had 0 issues. The crankshaft didn't even budge while I was doing this 3e) It might be worth mentioning that I placed the crankshaft pulley in my oven at about 225 for like 45 minutes, and I hung a bag of ice over top of the crankshaft itself while the pulley baked. I don't think this made a huge difference other than it was hard to handle. As for tightening the bolt up... 1) Use the Chrysler pulley puller that you have undoubtedly rented from O'Reilly, Advance, or AutoZone 2) Curse that you even thought renting the "Harmonic Balancer Installation Kit" would do you any good and prepare to take it back angrily 3) Get creative with an 18mm shallow socket, a socket extension, and the pulley puller in place. 4) What I mean by this is put the pulley puller on the pulley, but not before inserting an 18mm shallow socket with an extension bar through the puller's "hole", and then find something that you can wedge into the pulley puller to hold it in place while you crank on the damper bolt. 5) This is also VERY effective at getting the damper bolt OFF. As for the suggestion to loosen the rocker arms... DO NOT!!!!!!!!!!!!!!!!!!!!!!! A better suggestion would be to remove your radiator fan and air box. The service manual lacks these steps. As for a good method to avoid fatigue while doing this job... *Put a towel down across the front of your chargers engine bay, maybe 2 towels, to avoid extreme pain on the underside of your forearms the next day *Drive your car up on ramps, this made it tremendously easier, and I didn't have to stoop over as low (had to get up on my tip toes sometimes though) *If you do your work outside like me, put up some sort of sun shade before you begin your work. *Bring a tool chest along for the ride instead of throwing your tools on the ground/someplace inside the engine bay *Schedule an extra day off work like I did in case the proverbial crap hits the fan, you won't be any good at work if your mind is tied up thinking about your poor car sitting at home
Thanks. Added a Condensed version to the OP.
What parts, other than the belt, did you replace?
Tensioner, Tensioner Pulley, Water Pump, Valve Cover Gaskets, Plug Gaskets (the ones in the valve covers), Upper Intake Gasket
You'll probably have to verify that the timing marks are still as they should be. So other than loosening the valve-train, your steps pretty much or exactly mirrored the steps posted in the KB article here?
Yes. How would I go about verifying the timing beyond what I already have done? The pictures I posted are of where the timing marks are after the engine has been running. They are as close to TDC as possible. Also I've tried just about every conceivable variation.
As much as I hate to say it, you'll need to pull off the front covers again exposing all the marks....or is it all still apart? BTW - your crank pic is not displaying....
Hmmm...ok, do you have access to a compression tester? Maybe start with verifying compression in each cyl to verify if valves are sealing properly?
I think I can rent one from the local box store. I've never used one though so this should be interesting. As I stated earlier when you start getting into the valve train/lower parts of the engine I am pretty clueless... I've never had to tear down an engine this far. I am just a DIY'er that doesn't have enough sense to ask on the forums ahead of time... Maybe this is an obvious question based upon what you wrote above, but what knowledge specifically would doing a compression test gain for me? (I am guessing it would tell me if there was valve damage right?? or perhaps it would further verify that my timing is either on or off???)
rhyvun said: What would doing a compression test tell us specifically? (I am guessing it would tell us if there was valve damage right??) Click to expand...
Awesome, I am going to look into doing this. You know I just now realized I forgot to mention there is an OBD code stored, it is P0123 - TPS: Bad Idle, High Idle. This only started after the timing belt swap, was not an issue prior. From what I read this could cause rough idle and engine revving? I am not getting any revving but the idle is very obviously rough. It's not erratic though so I am thinking this is just a secondary issue. I could be totally off base though. I am open to more suggestions, I am trying to fix this ASAP as I am down 1 car now and this presents large problems.
If you took off the upper intake then you had to do something with the EGR tube o-ring. I would be looking there to make sure you have no leaks on the back side of the intake. Look there and look for Vac leaks everywhere. Good luck and keep us posted please?
I did have to mess with the EGR, a dreaded task. Alas I replaced the EGR O-Ring when I put the UIM back on, and I also did a quick propane test, specifically around the EGR, to see if there were any leaks. I couldn't find any. That is not to say that there isn't one... usually though when I've had leaks the problem isn't so well-timed. It is more erratic, but that is just my experience. I will more thoroughly check for leaks tonight, though I'm not sure I would be able to tell with all of the other crap going on with the engine. Last time I used propane to find a leak in the EGR it actually killed the car. FWIW
I think your P0123 code is the problem. I got this code when I replaced my plugs. Make sure The Throttle Position Sensor/Switch is connected back up correctly..or not damaged.... I would start there.....
pioneer1 said: I think your P0123 code is the problem. I got this code when I replaced my plugs. Make sure The Throttle Position Sensor/Switch is connected back up correctly..or not damaged.... I would start there..... Click to expand...
As a second thought... it seems like it is going into limp mode. For those of you that watched my short video... does this seem like it could be a limp mode problem?? IF that is the case I guess I need to start looking for electrical problems right? When I turn the key to "run" the lightning bolt, the CEL, and my ESP light come on. SO I am 100% sure it is going into limp and maybe this is what is causing my issue.
When I did mine, I was finally able to start mine up for 10 secs or so to verify that all was ok before I buttoned it all back up. It ran smooth so not sure if that's your problem.
If I am not mistaken, the 3.5 is an interference motor. Are you absolutely sure you got all the timing marks lined up correctly before you cranked it over the very first time? If you are able to, pull all your plugs and put a wrench on the crank bolt and try spinning over by hand. If nothing impedes the rotation, then you'd have nothing hitting anything internally. When I changed mine (my last car) it was a difficult thing to keep the cams from spinning as I did not loosen the rocker shafts, but slow and steady won the day for me and I had no issues at start up. Could you account for all the fasteners when everything went back together? Could something have dropped down inside the engine while the intake manifold was off? Did the intake manifold gasket go on ok and was fully seated?
The 3.5 is an interference engine. I cannot gaurantee that it wasn't 1 or 2 teeth off the first time I cranked it, but I am 95% confident it wasn't more than 1. I've checked the timing marks over and over and they are as close as they are going to get. All fasteners are accounted for. But I am going to triple check tonight... thank you guys for all of the ideas, keep them rolling. I can't check it ATM as I am not at home. Nothing dropped inside the manifold, I taped it off real good immediately after exposure. The gaskets I am sure they are good, but I feel like I am going to be pulling them off again anyhow if I can't find some sort of electrical issue. Starting with the TPS/plugs. I would imagine if its a plug though it would be throwing a code for that too. Maybe I'm wrong though.
In reading the manual it appears as though one possible problem could be that one or more hydraulic valve lash adjusters could have "deflated". Seems to me that if there was metallic contact happening in the engine, the noise would not just be from the tailpipe but also from the engine bay. From the manual: (sorry...formatting not copied over) but look at page 6152 under: 9 - 2176 ENGINE - 3.5L - SERVICE INFORMATION - LX Refer to Lash Adjuster (Tappet) Noise Chart for Possible Causes and Correction of a lash adjuster (tappet) type noise. POSSIBLE NOISE SOURCES - POSSIBLE NOISE MISDIAGNOSIS SOURCES Spongy/soft/aerated lash adjusters. - Exhaust leak . Missing lash adjuster swivel contact pads. - Exhaust rocker arm-to-cylinder head cover contact . Intake rocker-to-camshaft bearing journal contact. - Piston pin bore fit . Rocker arm bind-up. - Timing drive hydraulic tensioner tick . Intake rocker arm-to-spark plug tube contact. - Accessory drive belt deterioration . Excessive cam end play. - P iston-to-bore clearance knock. Broken valve spring. - Crankshaft bearing noise. Broken/loose camshaft sprocket bolt. - Crankshaft bearing noise. Incomplete cam lobe machining. - Crankshaft bearing noise. Cracked lash adjuster cartridge body. - Crankshaft bearing noise. Hope some of this helps.
OK weird stab at it but happened to me. In order to Di what you did you're moved plenum. The way its running sounds like when I did plugs on mine one time. And the egr sealing ring got sucked in causing major vacuum leak. Started fine ran good the boom like crap
I went through this personal hell a couple of months ago (amen on the towels/blankets). You can see my issues in the "How to install 3.5v Timing Belt" thread (thanks again fnkychkn!). I was getting crankshaft position sensor error when my belt wasn't line up correctly, so since you are not getting that error, your timing belt position is most likely good. In my case, I got the CPS error after a couple of minutes of running (seemingly smooth at that) so I'd imagine that the sensor is pretty sensitive. Your description of the engine noise/vibrations sounds like when I did the plugs the first time and didn't get the EGR tube sealed up with the intake manifold. I am planning on having the car for the long haul (just shy of 200k miles now), so I ended up buying the miller puller and balancer installers. Despite the limited use, it did make life a lot easier. Also a huge fan of the socket wrench with the spinning handle. Couple of other tips (for those wanting to do the belt themselves): - After removing and installing the crankshaft covers 3 or more times, don't get lazy and break out the pneumatic socket wrench (not impact). You will strip at least one of the bolt holes. - After removing and installing the hydraulic belt tensioner a dozen times, don't get lazy and break out the pneumatic socket wrench. You'll strip at least one of those holes too. - Did I mention don't use a pneumatic socket wrench (what the hell was I thinking)? - A 6in C clamp is your best friend when resetting the hydraulic tensioner. If you have a spare one around, drill an indentation so the tip doesn't slip out when resetting it. - Have at least 6in of padding between your chest and the hood latch.
A 6 inch C Clamp... FFFFFFFFFFFFFFFFFFF, I HAVE ONE and I didn't use it. jf9i82f92jf;anf98n239fh32~~~!!!!!! That is so irritating, it would have saved me a LOT of hassle. Live and learn right? I will double check the EGR again for sure, it is easy to check. I would feel like a putz if that's all it was. I am still really curious about this P0123 code I am getting though... very eager to get home and check into this. Hope it is just a fluke, though I know these things rarely are.
Was in plenum caught fast enough
Hehe, I already cracked it open actually. It was stuck hard but at no point did I feel like it was going to strip out. I used a little 8mm (I think) closed box wrench and it popped right open with a bit of torque. Also, I made this video of my cams running in slow motion thinking it may help to diagnose something (it has worked in the past with my power steering pulley). Didn't really do much for me though aside from put me at ease that the cam shafts seem to "wobble" when being watched. Seems pretty smooth in the slow motion. Interesting watch. Recorded at 1/8th speed.
Glad it was a "simple" fix and by simple I mean not costly!
- ?
- 123.3K members
Top Contributors this Month

Serpentine Belt Check on a 2010 Dodge Journey RT 3.5L V6
Dodge journey model years - 2009, 2010, 2011, 2012, 2013, 2014, 2015, 2016, 2017, 2018, 2019.
1. Getting Started - Prepare for the repair
2. Open the Hood - How to pop the hood and prop it open
3. Check Serpentine Belts - Determine the proper amount of 'give'
4. More Info. - Additional thoughts on checking the serpentine belts

Hans Angermeier is an ASE certified Maintenance and Light Repair Technician and has produced over 100,000 videos showing drivers how to fix things on their cars. He has broad expertise on basic repair procedures covering the majority of cars on the road. Over the past 10 years, Hans has been focused on building CarCareKiosk, which is visited by millions of drivers each month.
- Lake Chevy helped make these videos
- Download Dodge owners manuals

The video above shows how to check the serpentine belt on your 2010 Dodge Journey - if it gives more than a half inch when pressed, is cracked, frayed or appears shiny, you should change it (or have it changed) immediately. Worn serpentine belt noise in a Journey can indicate impending problems if ignored, while typically being fairly cheap and easy to replace. Depending on your engine, the serpentine belt replacement cost is between $100 and $200. Most vehicles do not need a special serpentine belt tool, but rather a 1/2" breaker bar and a socket on the serpentine belt tensioner to relieve the tension from the belt. Check out our parts page for coupons on new belts for your Journey!
The serpentine belt in your Journey connects your engine to many of the components you use every day such as your air conditioner, battery (via the alternator), power steering and cooling system - a quick look at the serpentine belt diagram outline all of the components feeding from it. Serpentine belt vs timing belt? The timing belt connects the crankshaft to the camshaft, thus making sure the pistons and valves are operating in the correct sequence. The timing belt will often drive the water pump too. Since the timing belt is deeper in the engine, it is often much more expensive to replace than the serpentine belt. Not all vehicles have a timing belt (they typically have a timing chain instead), whereas all modern vehicles have a serpentine belt. As such, you may experience a dead battery, difficulty steering, overheating, etc. that might be due to a worn belt, not a faulty component! If your Journey is one of those Dodges that shrieks horrendously when it runs, you likely have a worn belt, bad tensioner or both.
- Advance Auto coupon for 20% off entire order: KIOSK20

Flushing the coolant in your car is not that hard and will extend the life of your engine tremendously - learn how here!
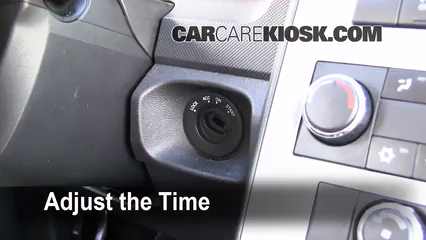
Is the clock in your car ahead or behind? Learn how to set it here!

You love your kids right? See how to properly secure their car seat.

Learn how to diagnose and fix minor oil leaks in your car

- Forum Listing
- Marketplace
- Advanced Search
- Dodge Charger Discussion
- Charger Problems/Assistance
Broken timing belt and bent valves
- Add to quote
Timing belt went on my ‘09 charger SXT with a 3.5. Mechanic replaced belt, and found zero compression on cylinder #3. He told me compression on the other cylinders checked out fine. He told me likely bent valve, but possible cracked piston due to it being an interference engine. Car has 220,000 miles (bought it brand new), so not worth paying mechanic to dig into further, only to find a hole in the piston. I’m somewhat mechanically inclined, but never worked on an engine, so decided to take a stab at it, and and if I get it going great. If not, I’m only out my time and can chalk it up to a learning experience. It ran rough, but was able to drive it on a trailer and hauled it home to my shop. I removed the passenger side head, and took it to my mechanic. He found bent intake valves, so is going to replace all the intake valves on that head. Pistons all look fine, but can see marks where all 4 valves (intake and exhaust) kissed each piston. I asked mechanic if I should pull the drivers side head since I’m this far in, but he said he wouldn’t since he compression tested those cylinders and they were fine. I would prefer to not remove that head, since it would add a fair amount of labor on my part removing the head (and especially the old head gasket). At the same time, I don’t want to get it all back together, only to have problems with the drivers side head. I‘m looking for other opinions. What should I do?
Seems like a bit of a delimna. The bare minimum is just make the known repairs to the damaged head. With an engine at tha mileage I wouldn't go looking for problems.
Is it a nice car? If so, it's worth the effort to pull the DS head and inspect everything. Good time to replace all the valve seals, too.
No, not really a nice car. Northern car, so it has some rust. Otherwise good shape mechanically, but high miles. Mostly sentimental value and my desire to see it hit 300k were the reasons to try to keep it going a little longer.
Do a leak down test. You could likely just get a used engine to swap in. Also, I thought these had a timing chain? Sent from my SM-G988U using Tapatalk
Personally, that high mileage, youd be better off doing what you KNOW is wrong, dont chase ghosts, and get out of it what you can. Otherwise more worth the trouble of tracking down a decent used motor to swap. Thats just to stay cheaper than buying a new, even just new to you, car.
The easy button would be a set of reman heads. Someone can pop the plugs out and look for any evidence of obvious damage to the pistons with a bore scope. Best,
- ?
- 105.6K members
Top Contributors this Month
2009 - 2020 Dodge Journey 3.5L Engine Torque Specs

- Torque Spec
2009 Dodge Journey 3.5L Complete Torque Specs List
Click the area you are looking for!
Dodge Journey 3.5L SOHC Repair Information
Dodge journey 3.5l sohc engine repair information.
Here you can find information regarding the assembly of the Dodge 3.5L SOHC engine. In this guide we will start from the inside of the engine including the crankshaft, connecting rods, and piston ring installation and then move outwards all the way to the pulley belt system. Along the way correct procedures and torque specs will be given to aid in the assembly of the engine. Feel free to start from the beggining and work your way outwards or skip ahead to your current position in the engine for what you may need.
Crankshaft Main Caps Installation
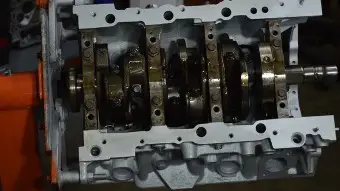
Dodge Journey 3.5L Main Cap Inner Bolts Torque Specs : 15 ft-lbs + 90°
Dodge journey 3.5l main cap outer bolts torque specs : 20 ft-lbs + 90°, dodge journey 3.5l main cap side bolts torque specs : 20 ft-lbs, piston and connecting rod installation.
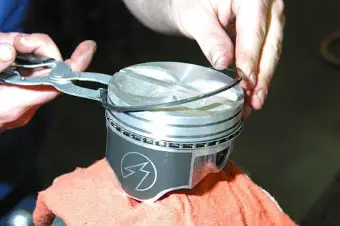
Dodge Journey 3.5L SOHC Connecting Rod Torque Specs : 40 ft-lbs + 90°
Oil pump installation.
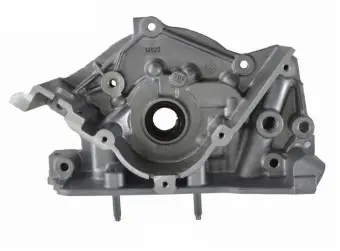
Dodge Journey 3.5L Oil Pump Mounting Bolt Torque Specs : 20 ft-lbs
Dodge journey 3.5l oil pump cover bolts torque specs : 8 ft-lbs, dodge journey 3.5l oil pump pickup tube torque specs : 20 ft-lbs, cylinder head installation.
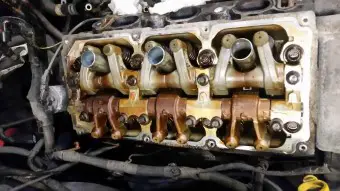
Dodge Journey 3.5L Cylinder Head Main Bolt Torque Specs : 35 ft-lbs + 55 ft-lbs + 90°
Dodge journey 3.5l cylinder head small bolts torque specs : 20 ft-lbs, timing belt and camshaft installation.
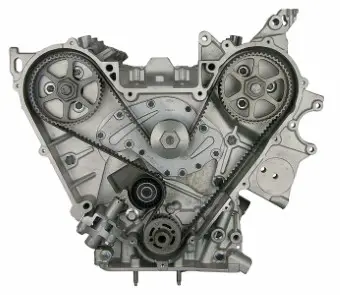
Dodge Journey 3.5L Camshaft Sprocket Bolts Torque Spec: 85 ft-lbs + 90°
Dodge journey 3.5l camshaft thrust plate bolts torque spec : 20 ft-lbs, dodge journey 3.5l camshaft rocker shaft torque spec : 22 ft-lbs, dodge journey 3.5l timing belt tensioner bolts torque spec : 20 ft-lbs, dodge journey 3.5l water pump to block torque spec : 8 ft-lbs, dodge journey 3.5l crankshaft position sensor torque spec: 8 ft-lbs, timing cover installation.
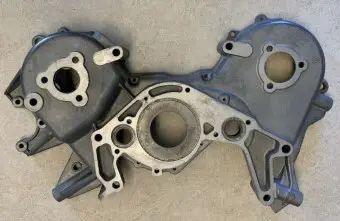
Dodge Journey 3.5L Timing Cover Bolts Torque Specs (M6): 8 ft-lbs
Dodge journey 3.5l timing cover bolts torque specs (m10): 40 ft-lbs, oil pan installation.
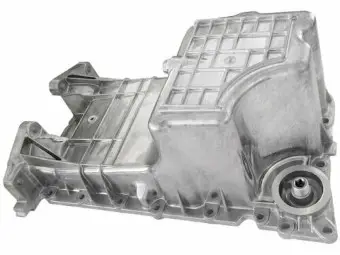
Dodge Journey 3.5L Oil Pan Torque Specs (M6): 8 ft-lbs
Dodge journey 3.5l oil pan torque specs (m8): 18 ft-lbs, dodge journey 3.5l oil drain plug torque specs : 20 ft-lbs, valve covers installation.
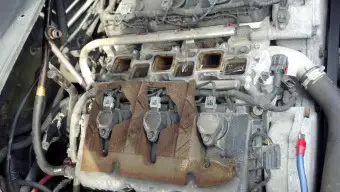
Dodge Journey 3.5L Valve Cover Torque Specs : 8 ft-lbs
Intake manifold and fuel rail installation.
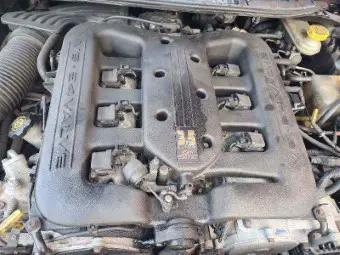
Dodge Journey 3.5L Intake Manifold Torque Specs (M6): 8 ft-lbs
Dodge journey 3.5l intake manifold torque specs (m8): 20 ft-lbs, dodge journey 3.5l ignition coil assembly torque spec : 8 ft-lbs, dodge journey 3.5l spark plug torque specs : 13 ft-lbs, dodge journey 3.5l throttle body torque specs : 8 ft-lbs, exhaust manifold installation.
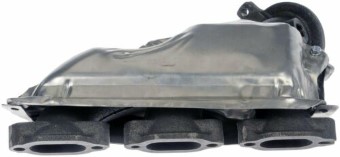
Dodge Journey 3.5L Exhaust Manifold Torque Spec : 18 ft-lbs
Dodge journey 3.5l exhaust pipe torque specs : 30 ft-lbs, water pump and thermostat installation.
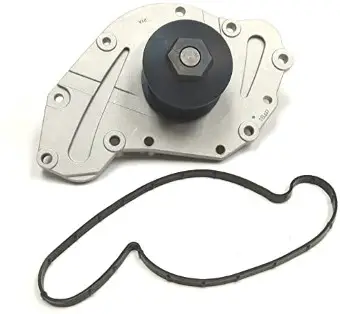
Dodge Journey 3.5L Water Pump to Case Torque Specs : 8 ft-lbs
Front dress and pulley belt installation.
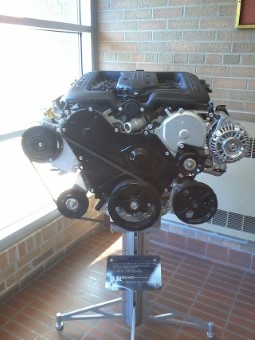
Dodge Journey 3.5L Crankshaft Pulley Torque Specs : 70 ft-lbs
Dodge journey 3.5l idler pulley bolt torque spec : 16 ft-lbs, dodge journey 3.5l drive belt tensioner torque specs : 33 ft-lbs, dodge journey 3.5l motor mount to engine torque specs : 45 ft-lbs, dodge journey 3.5l motor mount to frame torque specs : 45 ft-lbs, dodge journey 3.5l alternator to block torque specs : 30 ft-lbs, dodge journey 3.5l power steering pulley torque specs : 18 ft-lbs, dodge journey 3.5l a/c compressor to block torque specs : 15 ft-lbs, other makes, top 10 dodges ever.

IMAGES
VIDEO
COMMENTS
Buy Now!New Timing Belt and Component Kit from 1AAuto.com http://1aau.to/ic/1ATBK00120This video shows you how to replace the Timing Belt Kit on your 2009-20...
Timing belt replacement Dodge Journey SXT 2009 2010 3.5L V6 PART 2 water pump too.Check out your timing belt kit choices on Amazon. http://amzn.to/1HlP7xB ...
The average price of a 2009 Dodge Journey timing belt replacement can vary depending on location. Get a free detailed estimate for a timing belt replacement in your area from KBB.com Car Values
Timing belt replacement Dodge Journey SXT 2009 2010 3.5L V6 water pump install remove PART 1.Check out your timing belt kit choices on Amazon. http://amzn.t...
Journey's Year: 2009. Posted December 28, 2023. My 2009 dodge Journey's engine cut off while driving. Mechanic said it was a timing belt failure and says I need a new engine. The timing belt is not broken, I've opened it up and looked at it. Is it possible for the belt to skip a tooth and be out of time and if so since it is an interference ...
Loosen the 15, or 16mm bolt that holds the tensioner arm in place. It only needs to come out enough to allow the alignment tab to be pulled out, and the tensioner arm pivoted up and down. Remove the serpentine belt idler pulley. Remove the 5 10mm bolts and 1 13mm bolt from the cast aluminum timing inspection cover.
On average, the cost for a Dodge Journey Timing Belt Replacement is $996 with $366 for parts and $630 for labor. Prices may vary depending on your location. Car Service Estimate Shop/Dealer Price; 2009 Dodge Journey V6-3.5L: Service type Timing Belt Replacement: Estimate $1429.66: Shop/Dealer Price $1628.90 - $2190.17: 2010 Dodge Journey V6-3.5L:
Author. Posted February 16, 2012. The 3.5L in the 2009 Journey is the same engine as in the Charger and Challenger. I have seen some minimal instructions for replacing the belt, but only for "forward facing" engines. The basic replacement and timing arrangement is the same on the Journey, but since it is transverse mounted the disassembly from ...
The average cost for a Dodge Journey Timing Belt Replacement is between $779 and $862. Labor costs are estimated between $317 and $400 while parts are typically priced around $463. This range does not include taxes and fees, and does not factor in your unique location. Related repairs may also be needed. For a more accurate estimate based on ...
Instructions. Remove the four 10mm head bolts holding the cooling fan module to the radiator . Remove the four clip nuts and the cooling fan electrical connector and lift the fan module out of the vehicle. Remove the timing belt tensioner two 13mm bolts and remove the tensioner (If the tensioner pulley wheel is made of plastic you will want to ...
4 posts · Joined 2005. #4 · Jan 27, 2005. I replaced my water pump & timing belt a year or so ago @ 125k. This past fall the car broke down on me while driving at speed - the motor was probably 2000-2500 rpm. No warning - "cruise" light came on for a second & then she died. After coasting to a stop, I tried refiring but all she did was spin over.
Check if this fits your 2009 Dodge Journey. Notes: -Complete timing belt with water pump kit -Kit includes timing belt, tensioners and water pump with mounting gasket (s) -Designed for timing belt driven water pumps Without tensioner bracket. PRICE: 209.99. $20999. Free In-Store or Curbside Pick Up. SELECT STORE. Home Delivery. Standard Delivery.
This is a 100K mile maintenance, so there can be quite a few things to change if you haven't already done any of them. Main parts list: - the Timing Belt. - the timing belt's hydraulic tensioner*. - the timing belt's tensioner pulley**. - Water Pump (and gasket) Optional parts list: - serpentine drive belt. - drive belt idler pulley.
How to Replace Dodge and Chrysler 3.5L Water Pump and Timing Belt Step by Step In this video I will show you how I replaced my timing belt and water pump on ...
JOURNEY: 3.5L V6: Engine: Timing Belt & Component Kit: Include vehicles sold in: ... Related Parts. DODGE > 2009 > JOURNEY > 3.5L V6 > Engine > Timing Belt & Component Kit. Price: Alternate: No parts for vehicles in selected markets. Standard Replacement . CONTINENTAL TB295K2 Kit Info. Choose [Wholesaler Closeout - Private Label Pkg. - 30 Day ...
Front Inner Cover To Cylinder Head. Camshaft Thrust Plate. Timing Belt Cover Inner to Cylinder Head. M8x1.25x25.00. [naa,nae,nas]. Outer to Inner. Inner Cover To Right Cylinder Head. Bracket To Canister. MSRP $5.25. $4.34.
Replacement. Timing Belt Kit - 3.5 Liter Engine, Includes Camshaft Belt Tensioner... Part Number: REPC319805. Guaranteed to Fit. $59.49. 0. Add to Cart. Vehicle Fitment. 2009 Dodge Journey SXT 6 Cyl 3.5L.
The 2009 Dodge Journey with the 3.5L SOHC V6 has a timing belt and the 2.4 L 4Cylinder engine uses a timing chain. The belts need to be replaced every so often and the chains shouldn't have to be changed as long as regular oil changes are done on the vehicle. The reason why the belt needs changed is because it is outside of the engine and is exposed and the chain is on the inside and isn't ...
2007 Dodge Charger SXT 3.5L NAG1 Be sure to read my Chrysler Timing Belt 101 tips at the end of my post. Condensed Version::::: Changed timing belt because it was due Now engine runs like crap - vibrates and seems like an off balance washing machine. Also you can hear what sounds like a valve tapping coming from the exhaust.
About Press Copyright Contact us Creators Advertise Developers Terms Privacy Policy & Safety How YouTube works Test new features NFL Sunday Ticket Press Copyright ...
1. Getting Started - Prepare for the repair. 2. Open the Hood - How to pop the hood and prop it open. 3. Check Serpentine Belts - Determine the proper amount of 'give'. 4. More Info. - Additional thoughts on checking the serpentine belts.
Timing belt went on my '09 charger SXT with a 3.5. Mechanic replaced belt, and found zero compression on cylinder #3. He told me compression on the other cylinders checked out fine. He told me likely bent valve, but possible cracked piston due to it being an interference engine. Car has 220,000 miles (bought it brand new), so not worth paying ...
The 3.5L SOHC engine uses two different sizes of cylinder head bolts with a total of 11 bolts being installed into the cylinder head. The 8 main bolts located on the sides of the cylinder heads should be torqued down to 35 ft-lbs and then 55 ft-lbs followed by an additional 90 degree turn.