Existing customer? Sign in

6 Best Angular Product Tour Libraries For User Onboarding
If you want to build onboarding tours for Angular applications, here are six open-source libraries you should check out. And if you want to try a no-code solution to save time and resources, we’ve got you covered, too.
If you’re using Angular to develop your web applications, you’re already familiar with its robust features and ease of use. Developed and maintained by Google, Angular is known for its ability to create Single Page Applications (SPAs), which helps you offer a seamless user experience and faster loading times.
Additionally, Angular has a large and active community of developers, which means that there is a wealth of resources and support available to you. This community-driven support also ensures that Angular is continuously updated with new features and security patches, making it a reliable and secure framework for building web apps.
And if you’re looking to build product tours on Angular, you’re in luck. It offers a wide range of tools and features that make it easier to build user onboarding tours. For example, you can use Angular's built-in support for animations and dynamic components to create engaging and interactive tours that guide users through your key features.
The best place to start with building your own Angular product tours is to find an open-source library that gives you all the tools you need to get started.
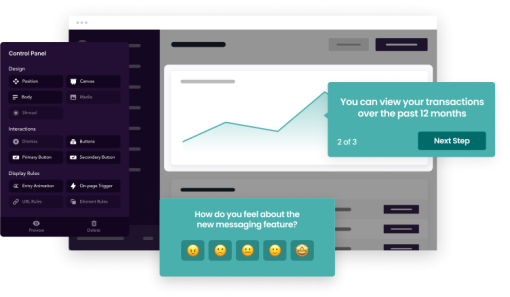
Can't code? No time? Try our no-code tool instead.
Quickly create sophisticated onboarding flows, all without any code involved.
6 Best Angular onboarding tour libraries #
An open-source library simplifies building from scratch and saves you precious time. So if you want to build onboarding tours for Angular applications, here are six open-source libraries you should check out for building your Angular product tour.
We’ve picked them out based on their ease of use as well as their reliability and how they are being looked after by the team that made them. For instance, we’ve omitted libraries that are not being maintained anymore.
1. Angular Intro.js #
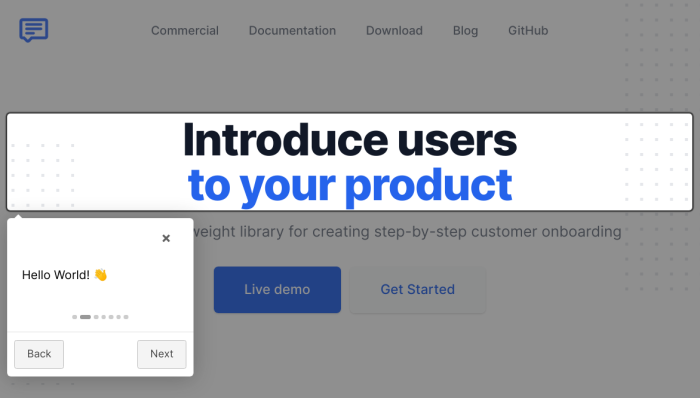
Good old Intro.js. We’ve talked about it in our previous articles on JavaScript tours , React tours , and Vue.js tours . Of course, Intro.js also works with Angular.
Intro.js is a well-known library for creating step-by-step introductions and guided tours on web applications. There are other features such as various customization options, controlling the order of the steps, as well as tooltips and highlighting elements.
It is used by major companies like Amazon and SAP, so it is quite reliable and trusted. Unlike various other open-source libraries, Intro.js has a commercial license that starts at a one-time purchase of $9.99.
If you decide to get Intro.js, make sure to get the Angular wrapper , which allows Intro.js to work inside an Angular app.
2. Angular Shepherd #
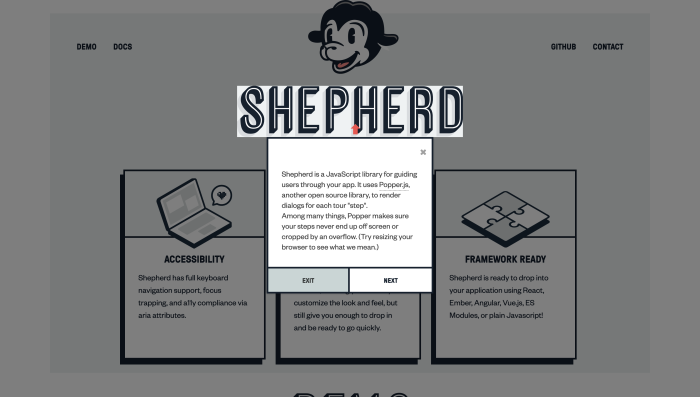
Shepherd is another onboarding library that pretty much works for all JavaScript-based frameworks. Angular as well.
Like Intro.js, Shepherd allows you to define a sequence of steps that guide users through your application's interface, highlighting key elements and providing descriptive tooltips. The library provides a flexible API for customizing the behavior, appearance, and position of each step, as well as the ability to add event handlers for user interactions.
Shepherd provides a wrapper for Angular so you can get started with it on your Angular product right away.
To use Angular Shepherd, you need to install and import the angular-shepherd package in your Angular application. You can then define the steps of the tour using the ShepherdService, and customize each step's content, position, and styling using HTML and CSS.
3. Angular UI Tour #
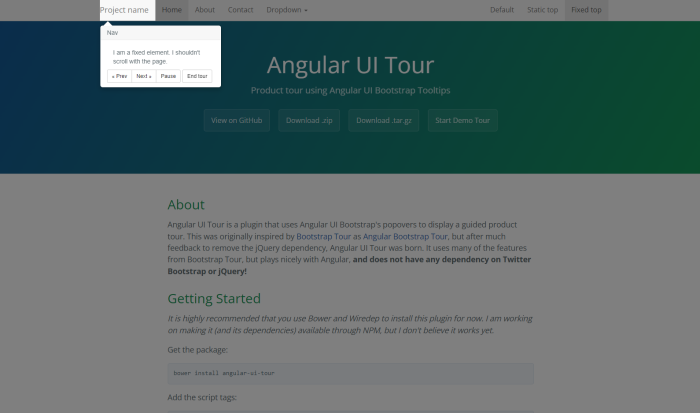
Angular UI Tour is a plugin that uses popovers from Angular UI Bootstrap to display a guided tour. It was originally created as Angular Bootstrap Tour , inspired by Bootstrap Tour , but then they tweaked it so that it doesn’t have any dependency on Twitter Bootstrap or JQuery.
Angular UI Tour gives you the ability to create tours with multiple steps that can be customized with HTML and CSS. Each step can include a title, a description, and a template with custom content. You can also highlight elements on the page and add tooltips or popovers to provide additional information.
Angular UI Tour also supports multiple positioning options, such as left, right, top, and bottom, and allows you to control the size and position of the highlighted elements. Additionally, you can add event handlers to respond to user interactions, such as clicking or hovering on an element.
To use Angular UI Tour, you need to install and import the angular-ui-tour package and add the ui-tour directive to your Angular app. You can then define the steps of the tour using a configuration object and start the tour by calling the start() method.
4. Ngx UI Tour #
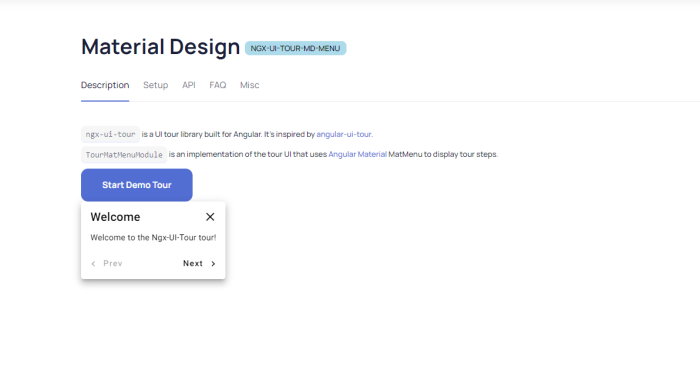
Inspired by Angular UI Tour, Ngx UI Tour is a product tour library that uses Angular Material MatMenu to display tours. So before you use this, you’ll have to make sure Angular Material is installed properly. Originally, this was Ngx Tour , but that library is not being maintained and it has been replaced by Ngx UI Tour.
It allows you to create customizable steps that guide users through your application's interface and provides various features such as tooltips, popovers, and highlight elements.
With Ngx Tour, you can define each step of the tour using an HTML template, add event handlers to respond to user interactions, and customize the content, placement, and styling of tooltips and popovers. Ngx Tour also supports multiple positioning options, such as top, bottom, left, and right, and provides flexibility to adjust the step's size and position.
It’s also super well-maintained. Since 2021, it has had releases with new features and fixes like clockwork, right up to 2023. Considering that Angular UI Tour’s last release was in 2017, this might be a better option.
To use Ngx Tour, you need to install and import the ngx-tour-core package and the specific ngx-tour-ngx-bootstrap or ngx-tour-md-menu package for the styling library of your choice. You can then add tour steps to your Angular app using the TourService and TourStep classes, and customize their appearance and behavior using CSS.
5. Angular Popper #
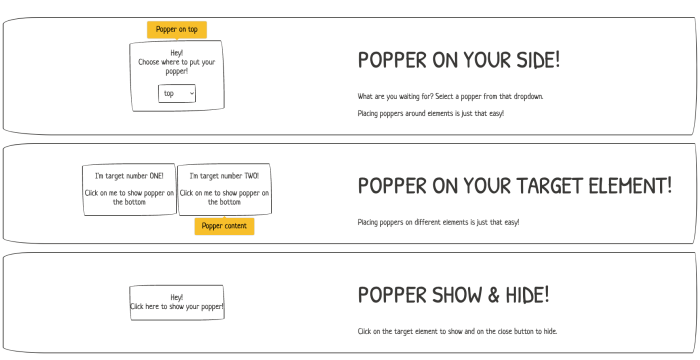
Angular Popper is a library that simplifies creating onboarding tours in Angular applications. It is built on top of Popper.js , which is a lightweight tooltip and popover library itself.
As such, its focus is on creating tooltips. You can position them, arrange them in order, point them to certain elements. If all you need are great tooltips to give in-app guidance, Angular Popper may be the best fit for you.
To use it, you need to install and import the NgxPopperModule and use the ngx-popper directive with a configuration object to create tooltips. You can define the content of each step using Angular components, choose from various placement options, and customize the styling of the popovers using CSS.
6. Angular Joyride #
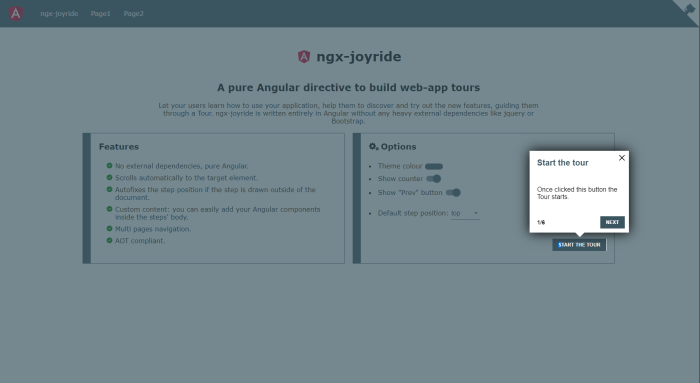
Angular Joyride is a product tour library built entirely in Angular with no external dependencies. As with other Angular-based libraries, you can take advantage of the various UI components offered by Angular when creating your tours.
Aside from the usual ability to create tour steps and style them, you can use custom HTML content, pass parameters to your templates, set up multi pages navigation, and do everything you need to easily guide users through your site.
It’s also fairly well maintained. New releases are not as frequent as NgX UI Tour, but the last release was in January 2022. Still fairly recent when compared to some other libraries on this list.
To use Angular Joyride, install and import the ngx-joyride package and add the joyride directive to your Angular app. You can then define the steps of the tour using a configuration object and start the tour by calling the startTour() method.
Don’t have the time or resources to build? Use a no-code onboarding software instead #
Open-source libraries are great when you are looking to make user onboarding a DIY project for your in-house team.
But if you think about the opportunity cost, knowing that building takes time and resources away from other mission-critical tasks you should be doing, consider using a product adoption platform as a no-code solution for onboarding.
In this case, Chameleon could be the right fit for your needs. You can use it to create customizable, on-brand Tours, Tooltips, Microsurveys, and Launchers. Try it for free and get into the sandbox environment to play with it, or book a personalized demo with our product experts.
👉 Check out this interactive demo on building an onboarding Launcher in Chameleon.
Build onboarding for your Angular app fast & easy
Save dev time and quickly deploy product tours for your Angular app with our no-code suite of tools
You might also be interested in...
User Onboarding Metrics, KPIs, and Benchmarks: A Comprehensive Guide
User onboarding still isn't good enough, but here's how it's changing, mobile user onboarding: the ultimate guide for 2023, boost product adoption and reduce churn.
Get started free in our sandbox or book a personalized call with our product experts
Guide your users through a tour of your app.
Accessibility.
Shepherd has full keyboard navigation support, focus trapping, and a11y compliance via aria attributes.
Highly Customizable
Shepherd's styles are kept minimal, allowing you to easily customize the look and feel, but still give you enough to drop in and be ready to go quickly.
Framework Ready
Shepherd is ready to drop into your application using React, Ember, Angular, Vue.js, ES Modules, or plain Javascript!
01. How to Include
02. example, brands that use shepherd.
Angular ng-template, ng-container and ngTemplateOutlet - The Complete Guide To Angular Templates
Angular University
High-Quality Angular Courses
More posts by Angular University.
In this post, we are going to dive into some of the more advanced features of Angular Core!
You have probably already come across with the ng-template Angular core directive, such as for example while using ngIf /else, or ngSwitch .
The ng-template directive and the related ngTemplateOutlet directive are very powerful Angular features that support a wide variety of advanced use cases.
These directives are frequently used with ng-container, and because these directives are designed to be used together, it will help if we learn them all in one go, as we will have more context around each directive.
Let's then see some of the more advanced use cases that these directives enable. Note: All the code for this post can be found in this Github repository .
Table Of Contents
In this post, we will be going over the following topics:
Introduction to the ng-template directive
- Template Input Variables
- The ng-template directive use with ngIf
- ngIf de-suggared syntax and ng-template
- ng-template template references and the TemplateRef injectable
Configurable Components with Template Partial @Inputs
- The ng-container directive, when to use it?
- Dynamic Template with the ngTemplateOutlet custom directive
- Template outlet @Input Properties
- Final Combined Example
Summary and Conclusions
Like the name indicates, the ng-template directive represents an Angular template: this means that the content of this tag will contain part of a template, that can be then be composed together with other templates in order to form the final component template.
Angular is already using ng-template under the hood in many of the structural directives that we use all the time: ngIf , ngFor and ngSwitch .
Let's get started learning ng-template with an example. Here we are defining two tab buttons of a tab component (more on this later):
The first thing that you will notice about ng-template
If you try the example above, you might be surprised to find out that this example does not render anything to the screen!
This is normal and it's the expected behavior. This is because with the ng-template tag we are simply defining a template, but we are not using it yet.
Let's then find an example where we can render an output, using some of the most commonly used Angular directives.
The ng-template directive and ngIf
You probably came across ng-template for the first time while implementing an if/else scenario such as for example this one:
This is a very common use of the ngIf/else functionality: we display an alternative loading template while waiting for the data to arrive from the backend.
As we can see, the else clause is pointing to a template, which has the name loading . The name was assigned to it via a template reference, using the #loading syntax.
But besides that else template, the use of ngIf also creates a second implicit ng-template! Let's have a look at what is happening under the hood:
This is what happens internally as Angular desugars the more concise *ngIf structural directive syntax. Let's break down what happened during the desugaring:
- the element onto which the structural directive ngIf was applied has been moved into an ng-template
- The expression of *ngIf has been split up and applied to two separate directives, using the [ngIf] and [ngIfElse] template input variable syntax
And this is just one example, of a particular case with ngIf. But with ngFor and ngSwitch a similar process also occurs.
These directives are all very commonly used, so this means these templates are present everywhere in Angular, either implicitly or explicitly.
But based on this example, one question might come to mind:
How does this work if there are multiple structural directives applied to the same element?
Multiple Structural Directives
Let's see what happens if for example we try to use ngIf and ngFor in the same element:
This would not work! Instead, we would get the following error message:
This means that its not possible to apply two structural directives to the same element. In order to do so, we would have to do something similar to this:
In this example, we have moved the ngIf directive to an outer wrapping div, but in order for this to work we have to create that extra div element.
This solution would already work, but is there a way to apply a structural directive to a section of the page without having to create an extra element?
Yes and that is exactly what the ng-container structural directive allows us to do!
The ng-container directive
In order to avoid having to create that extra div, we can instead use ng-container directive:
As we can see, the ng-container directive provides us with an element that we can attach a structural directive to a section of the page, without having to create an extra element just for that.
There is another major use case for the ng-container directive: it can also provide a placeholder for injecting a template dynamically into the page.

Dynamic Template Creation with the ngTemplateOutlet directive
Being able to create template references and point them to other directives such as ngIf is just the beginning.
We can also take the template itself and instantiate it anywhere on the page, using the ngTemplateOutlet directive:
We can see here how ng-container helps with this use case: we are using it to instantiate on the page the loading template that we defined above.
We are refering to the loading template via its template reference #loading , and we are using the ngTemplateOutlet structural directive to instantiate the template.
We could add as many ngTemplateOutlet tags to the page as we would like, and instantiate a number of different templates. The value passed to this directive can be any expression that evaluates into a template reference, more on this later.
Now that we know how to instantiate templates, let's talk about what is accessible or not by the template.
Template Context
One key question about templates is, what is visible inside them?
Does the template have its own separate variable scope, what variables can the template see?
Inside the ng-template tag body, we have access to the same context variables that are visible in the outer template, such as for example the variable lessons .
And this is because all ng-template instances have access also to the same context on which they are embedded.
But each template can also define its own set of input variables! Actually, each template has associated a context object containing all the template-specific input variables.
Let's have a look at an example:
Here is the breakdown of this example:
- this template, unlike the previous templates also has one input variable (it could also have several)
- the input variable is called lessonsCounter , and it's defined via a ng-template property using the prefix let-
- The variable lessonsCounter is visible inside the ng-template body, but not outside
- the content of this variable is determined by the expression that its assigned to the property let-lessonsCounter
- That expression is evaluated against a context object, passed to ngTemplateOutlet together with the template to instantiate
- This context object must then have a property named estimate , for any value to be displayed inside the template
- the context object is passed to ngTemplateOutlet via the context property, that can receive any expression that evaluates to an object
Given the example above, this is what would get rendered to the screen:
This gives us a good overview of how to define and instantiate our own templates.
Another thing that we can also do is interact with a template programmatically at the level of the component itself: let's see how we can do that.
Template References
The same way that we can refer to the loading template using a template reference, we can also have a template injected directly into our component using the ViewChild decorator:
As we can see, the template can be injected just like any other DOM element or component, by providing the template reference name defaultTabButtons to the ViewChild decorator.
This means that templates are accessible also at the level of the component class, and we can do things such as for example pass them to child components!
An example of why we would want to do that is to create a more customizable component, where can pass to it not only a configuration parameter or configuration object: we can also pass a template as an input parameter .
Let's take for example a tab container, where we would like to give the user of the component the possibility of configuring the look and feel of the tab buttons.
Here is how that would look like, we would start by defining the custom template for the buttons in the parent component:
And then on the tab container component, we could define an input property which is also a template named headerTemplate :
A couple of things are going on here, in this final combined example. Let's break this down:
- there is a default template defined for the tab buttons, called defaultTabButtons
- This template will be used only if the input property headerTemplate remains undefined
- If the property is defined, then the custom input template passed via headerTemplate will be used to display the buttons instead
- the headers template is instantiated inside a ng-container placeholder, using the ngTemplateOutlet property
- the decision of which template to use (default or custom) is taken using a ternary expression, but if that logic was complex we could also delegate this to a controller method
The end result of this design is that the tab container will display a default look and feel for the tab buttons if no custom template is provided, but it will use the custom template if its available.
The core directives ng-container, ng-template and ngTemplateOutlet all combine together to allow us to create highly dynamical and customizable components.
We can even change completely the look and feel of a component based on input templates , and we can define a template and instantiate on multiple places of the application.
And this is just one possible way that these features can be combined!
I hope that this post helped to get familiar with some of the more advanced features of Angular core, if you have some questions please let me know in the comments below and I will get back to you.
And if you would like to know about more advanced Angular Core features, we recommend checking the Angular Core Deep Dive course, where Angular Templates are covered in much more detail.
To get notified when more posts like this come out, I invite you to subscribe to our newsletter:
If you are just getting started learning Angular, have a look at the Angular for Beginners Course :
Other posts on Angular
Have also a look also at other popular posts that you might find interesting:
- Getting Started With Angular - Development Environment Best Practices With Yarn, the Angular CLI, Setup an IDE
- Why a Single Page Application, What are the Benefits ? What is a SPA ?
- Angular Smart Components vs Presentation Components: What's the Difference, When to Use Each and Why?
- Angular Router - How To Build a Navigation Menu with Bootstrap 4 and Nested Routes
- Angular Router - Extended Guided Tour, Avoid Common Pitfalls
- Angular Components - The Fundamentals
- How to build Angular apps using Observable Data Services - Pitfalls to avoid
- Introduction to Angular Forms - Template Driven vs Model Driven
- Angular ngFor - Learn all Features including trackBy, why is it not only for Arrays ?
- Angular Universal In Practice - How to build SEO Friendly Single Page Apps with Angular
- How does Angular Change Detection Really Work ?
Angular UI Tour
Product tour using angular ui bootstrap tooltips.
Find Ngx Guided Tour Examples and Templates
Use this online ngx-guided-tour playground to view and fork ngx-guided-tour example apps and templates on codesandbox. click any example below to run it instantly or find templates that can be used as a pre-built solution.


- Easy to use
- Responsive to window resizes
- Supports multiple tours
- Smoothly scrolls to each step
- Control the placement for each tour tip
- Internet Explorer 10+
angular-ui-tour
- 7 Dependencies
- 1 Dependents
- 22 Versions

Angular UI Tour is a plugin that uses Angular UI Bootstrap's popovers to display a guided product tour. This was originally inspired by Bootstrap Tour as Angular Bootstrap Tour , but after much feedback to remove the jQuery dependency, Angular UI Tour was born. It uses many of the features from Bootstrap Tour, but plays nicely with Angular, and does not have any dependency on Twitter Bootstrap or jQuery!
Check out the live demo here . (The demo is not up-to-date documentation)
Breaking changes in 0.8.0:
- Dependencies have changed. If you are not using NPM or Bower, please take note of the changes.
- Backdrop class changed from .tour-backdrop to .ui-tour-backdrop
- Tour#status changed to Tour#Status
- The following tour step options have been removed: popupDelay , popupCloseDelay , animation
Deprecated in 0.8.2 (will be removed in 1.0.0):
- tourStep.trustedContent is deprecated. If you created your own popup template, please use bind-html-compile="tourStep.content" instead.
Getting Started
It is highly recommended that you use a package manager like NPM or Bower to install Angular UI Tour in order to ensure that its dependencies are installed correctly.
Get the package:
Add the script tags:
Then add the module to your app:
Add some styles for the backdrop (feel free to style it however you want):
Note: if you give the backdrop a background color, also give it a fill color because it uses SVG for rounded corners
If your app is a SPA, tours will not end by default when the user clicks the forward or back buttons of the browser because tours are allowed to span multiple views. To fix this behavior (and still allow tours to span multiple views) enable the navigation interceptors:
That will listen for navigation events from ngRoute and UIRouter, and if the event was not caused by Angular UI Tour, it will end any active tours.
Tour Configuration
Tours can be configured either programatically in a config block, or declaratively as part of the uiTour directive declaration.
To configure in a config block, use TourConfigProvider.set(optionName, optionValue);
To configure on a tour declaration, use ui-tour-<option-name>="optionValue"
Important: If a lifecycle hook event is overridden in a config block, the function must return a promise. If it is overridden in the directive declaration, it will be wrapped in a promise automatically. If the function returns a promise, it will wait until it is resolved before moving on.
Tour steps are extensions of Angular UI's Tooltips and therefore all options are available. Although there are 3 types of Tooltips, there is only one type of Tour Step. In addition, almost all of the Tour options can be overridden by individual tour steps, as well as additional options that can be changed.
As a convenience for developers, tour steps can be given IDs by supplying a value to the tour-step attribute: tour-step="myStep" . Please note that the element ID will not be used as the step ID. See the multi-page tour example below for example.
To configure on a tour step declaration, use tour-step-<option-name>="optionValue"
Additional Options
Best practice: always set the order so that the steps display in the expected order. Steps with the same order will display consecutively, but the order among them is unpredictable. At first, use increments of 10 so that if you need to add steps in the middle later you won't have to reorder everything.... Remember when code needed line numbers??? :)
uiTour is the container for the tour steps; all tour steps must be declared as descendants of uiTour. The declaration can be as simple as adding ui-tour to an element, or can include one or more options (shown above).
tourSteps declare which elements should have a popup during the tour. They can be declared on any element, but some consideration should be taken when deciding which element on which to declare them.
The tour itself has a small API that can be used to control the flow of the tour. The tour object is available on the scope of the uiTour directive, and can be required as TourController in directives on or in the uiTour's subtree.
createStep() Example
Tour service.
The uiTourService can be used for retrieving a reference to a tour object. There are three methods to retrieve the reference (note that they are all synchronous):
Tour Notifications
The tour itself is an event emitter that emits the following notifications. The difference between listening for notifications and setting lifecycle hook handlers as shown above is that these notifications are outside of the lifecycle of the tour. That means that the notification events are emitted, and then the tour moves on without waiting for any handlers to finish. By setting a lifecyle hook handler, the tour will wait for a handler to complete before moving on. If you simply need to know when something happened, use an event notification listener, but if you need to execute code before the tour moves continues, set an lifecycle hook handler.
Listen for the following events using this pattern:
Multi-page Tours
As of 0.7.0, the strong integration with ngRoute and UIRouter is deprecated, and the navigation API has been significantly simplified. If you want to create a tour that spans multiple pages (in reality these are multiple views as there is no built-in way to resume a tour after a page reload) there is a very simple API. In fact, this API can be used to asynchronously load more tour steps on demand, even if no navigation occurs.
Using a step's onNext or onPrev lifecycle hook, you can implement your navigation logic, and just return tour.waitFor('stepOnAnotherPage')' .
If you are using UIRouter, you would just replace $location.path() with $state.go() (or whatever works best).
Effectively, this pauses the tour and waits for a step with the provided step ID to be registered, and then resumes the tour starting at that step. It does not care where the step comes from or how it is loaded, as long as it is loaded after tour.waitFor() is called.
It is important to either return tour.waitFor() or return $q.reject() , otherwise, if there is another step on the current page, it will show instead of the intended one.
Multiple Tours
If you need to have separate tours on your site there are a couple ways to achieve it. One way is to use separate ui-tour directives, and any tour steps defined within each subtree will belong to the respective tour. This is a fairly idealistic approach because it assumes that you can cleanly separate your tours. If you need to create multiple tours on the same subtree you have two options: use tour-step-enabled and set flags to enable/disable steps when the appropriate tour is running, or create one or more detached tours and assign steps to them. A detached tour is not associated with a DOM subtree, and steps must be explicitly assigned to it for them to display. Here is an example of how to set up a detached tour and assign steps:
Setting a tour name for detached tours is required, but by adding a name to regular tours you can specify belongsTo for those as well. Any step that has a belongsTo attribute will ignore its ancestral tour, and a step can only belong to one tour.
Build It Yourself
Thanks and enjoy!
(The MIT License)
Copyright (c) 2014
Permission is hereby granted, free of charge, to any person obtaining a copy of this software and associated documentation files (the 'Software'), to deal in the Software without restriction, including without limitation the rights to use, copy, modify, merge, publish, distribute, sublicense, and/or sell copies of the Software, and to permit persons to whom the Software is furnished to do so, subject to the following conditions:
The above copyright notice and this permission notice shall be included in all copies or substantial portions of the Software.
THE SOFTWARE IS PROVIDED 'AS IS', WITHOUT WARRANTY OF ANY KIND, EXPRESS OR IMPLIED, INCLUDING BUT NOT LIMITED TO THE WARRANTIES OF MERCHANTABILITY, FITNESS FOR A PARTICULAR PURPOSE AND NONINFRINGEMENT. IN NO EVENT SHALL THE AUTHORS OR COPYRIGHT HOLDERS BE LIABLE FOR ANY CLAIM, DAMAGES OR OTHER LIABILITY, WHETHER IN AN ACTION OF CONTRACT, TORT OR OTHERWISE, ARISING FROM, OUT OF OR IN CONNECTION WITH THE SOFTWARE OR THE USE OR OTHER DEALINGS IN THE SOFTWARE.
Package Sidebar
npm i angular-ui-tour
Git github.com/benmarch/angular-ui-tour
github.com/benmarch/angular-ui-tour
Downloads Weekly Downloads
Unpacked size, total files, last publish.
6 years ago
Collaborators
This website requires JavaScript.
Navigation Menu
Search code, repositories, users, issues, pull requests..., provide feedback.
We read every piece of feedback, and take your input very seriously.
Saved searches
Use saved searches to filter your results more quickly.
To see all available qualifiers, see our documentation .
- Notifications
✈️ UI tour for Angular apps
hakimio/ngx-ui-tour
Folders and files, repository files navigation.

UI tour library for Angular
Angular Material, Ionic, Taiga UI, Ng Bootstrap and Ngx Bootstrap UIs are supported.
ngx-ui-tour is a fork of Isaac Mann's ngx-tour . The project had to be forked since the original is no longer maintained.
Table of contents
Demo and documentation, compatibility, installation and usage, tourservice, step configuration, event observables, custom template, styling active tour anchor.
Demo and documentation can be found at hakimio.github.io/ngx-ui-tour
Material Design and Ngx Bootstrap tour UIs
Ng bootstrap tour ui, ionic tour ui, taiga ui tour ui.
- Material Design UI
- NG Bootstrap UI
- Ngx Bootstrap UI
- Taiga UI Dropdown UI
- Taiga UI Hint UI
- JavaScript Console UI
Documentation page
Releases 46
Used by 116.
Contributors 20
- TypeScript 66.2%
- JavaScript 0.1%

IMAGES
VIDEO
COMMENTS
ng2. Guided tour for your Angular applications.. Latest version: 2.0.1, last published: 2 years ago. Start using ngx-guided-tour in your project by running `npm i ngx-guided-tour`. There are no other projects in the npm registry using ngx-guided-tour.
Angular UI Tour is a plugin that uses popovers from Angular UI Bootstrap to display a guided tour. It was originally created as Angular Bootstrap Tour, inspired by Bootstrap Tour, but then they tweaked it so that it doesn't have any dependency on Twitter Bootstrap or JQuery.. Angular UI Tour gives you the ability to create tours with multiple steps that can be customized with HTML and CSS.
Steps for creating an ngx-guided-tour : Create an Angular project and install the npm module for guided tour component: npm install ngx-guided-tour --save. Import modules to app.module.ts as given ...
Ngx-Tour is a lightweight and easy-to-use library for creating guided tours in Angular applications. It supports multiple tour steps, custom templates, keyboard navigation, and more. Ngx-Tour is compatible with Bootstrap, Material, and custom UI libraries.
7. It's very hard to find something good looking related to guided tour, onboarding, etc. for Angular. Most of the libraries are ugly, abandoned, or built only for desktop-driven tours. For mobile, there isn't any library to support it properly. Most users search for 'material design tour onboarding', as we can see it in Android libraries, but ...
Guided tour component using SASS and typescript. Allows you to use selectors to step your user through workflows and introduce them to your application. Customiziable theme and many features.
What is an Angular Onboarding Tour? An Angular Onboarding Tour is a series of overlay dialogs that walk users through your Angular app's UI elements.These tours are used to quickly onboard new users to web apps, and most companies with great user experiences incorporate some sort of product tour into their first-time user experiences.. Creating an onboarding walkthrough from scratch in a web ...
ngx-guided-tour Demo. Guided tour is a great way to introduce your users to new features or remind them how to use exisiting features. Hover your mouse over the orb above to start the tour. Orbs are optional, If not set or set to false the tour will just start. Restart Tour. Click restart to start the tour again. There are multiple features to ...
The filter the overlay uses on the background. --ngx-tour-guide__overlay-background-color. rgba (255, 255, 255, 0.15) The color of the overlay. These classes can be used to directly style the corresponding element. selector. description. .tour-guide-container. targets the container of the skip button (if used) as well as every stop message.
Accepts bottom, bottomLeft, bottomRight, center, left, right, top, topLeft, and topRight. Can be taken from the guided-tour.constants.ts file. This also supports a array of OrientationConfiguration. When an array of OrientationConfiguration is passed to it, it will use the smallest maximumSize the screen can fit into.
Shepherd is a JavaScript library that helps you create interactive tours for your app. You can use it to highlight features, provide tips, and guide users through complex workflows. Learn how to use Shepherd with the documentation, demo, and examples.
Angular ng-template, ng-container and ngTemplateOutlet - The Complete Guide To Angular Templates. In this post, we are going to dive into some of the more advanced features of Angular Core! You have probably already come across with the ng-template Angular core directive, such as for example while using ngIf /else, or ngSwitch. The ng-template ...
An Angular Tour (Joyride) library built entirely in Angular, without using any heavy external dependencies like Bootstrap or JQuery. From now on you can easily guide your users through your site showing them all the sections and features.. Latest version: 2.5.0, last published: 2 years ago. Start using ngx-joyride in your project by running `npm i ngx-joyride`.
Angular UI Tour is a plugin that uses Angular UI Bootstrap's popovers to display a guided product tour. This was originally inspired by Bootstrap Tour as Angular Bootstrap Tour , but after much feedback to remove the jQuery dependency, Angular UI Tour was born. It uses many of the features from Bootstrap Tour, but plays nicely with Angular, and ...
Find Ngx Guided Tour Examples and Templates. Use this online ngx-guided-tour playground to view and fork ngx-guided-tour example apps and templates on CodeSandbox. Click any example below to run it instantly or find templates that can be used as a pre-built solution! ngx-guided-tour-experiment. demo.
Create interactive guided product tours in minutes with the most non-technical friendly, lightweight and extendable library. - Labs64/GuideChimp. ... Support of Single Page Applications build with Angular, Vue.js, React, etc. Extendable using out-of-the-box and third-party plugins;
UI tour library for Angular 12+. Latest version: 12.0.1, last published: 3 months ago. Start using ngx-ui-tour-core in your project by running `npm i ngx-ui-tour-core`. There are 7 other projects in the npm registry using ngx-ui-tour-core.
You can also add callbacks to the <tour>: <tour step="currentStep" post-tour="tourComplete()" post-step="stepComplete()"> It is very easy to add a cookie module that remembers what step a user was on. With the angular-cookie module, this is all you need to integrate cookies:
angular-ui-tour. About. Angular UI Tour is a plugin that uses Angular UI Bootstrap's popovers to display a guided product tour. This was originally inspired by Bootstrap Tour as Angular Bootstrap Tour, but after much feedback to remove the jQuery dependency, Angular UI Tour was born.It uses many of the features from Bootstrap Tour, but plays nicely with Angular, and does not have any ...
Usage. In its easiest form, you can use Telemachy just by implementing the HasGuidedTour interface: By implementing the optional tourAutoStart() method (and having it return true ), Telemachy will automatically start this component's tour whenever it becomes active through the angular router. You can also explicitly say it should be started by ...
Tour of Heroeslink. Tour of Heroes helps you gain confidence that Angular can do whatever you need it to do by showing you how to: Use Angular directives to show and hide elements and display lists of hero data. Create Angular components to display hero details and show an array of heroes. Use one-way data binding for read-only data.
An Angular Tour (Joyride) library built entirely in Angular, without using any heavy external dependencies like Bootstrap or JQuery. ... web application product intro tour guide for the first time visitors. onboarding; user; tour; user-tour; tour-guide; guide; lumyu. published 4.1.0 • 5 years ago. react-beacon. Onboarding beacons for React ...
MIT license. UI tour library for Angular. Angular Material, Ionic, Taiga UI, Ng Bootstrap and Ngx Bootstrap UIs are supported. ngx-ui-tour is a fork of Isaac Mann's ngx-tour. The project had to be forked since the original is no longer maintained.