
PHOTOSHOP FEATURES

How to use shapes in Photoshop to upgrade your images.
Vector shapes are a versatile tool with many applications in Adobe Photoshop. Explore how you can find and use custom shapes for your next project.
Shapes can help round out your work.
Whether you’re editing a photo or working on a graphic design project, you can use shapes to make everything from a festive border to a button on a website. And because Photoshop shapes are resolution-independent, you can rest assured they’ll look good at any size.
How do I find shapes in Photoshop?
From the toolbar, click and hold the Shape tool icon to see the different shapes you can draw . Your options include the rectangle tool as well as the ellipse, polygon, and line tools — but if you want to create your own shapes, the Custom Shape tool is for you. You can use it to draw your own new shapes and save them for later with the Define Custom Shape option.

All shapes, all sizes.
Photoshop formats shapes as vector graphics, so you can change their size and scale without sacrificing resolution.

Shapes to fit anywhere.
Whether you want a rounded rectangle or the silhouette of a specific animal, there’s a shape tool to suit your needs.

Sculpt your own shapes.
Access Shape Properties from the Properties panel to modify a wide variety of your shape’s characteristics, from adjusting gradient to changing its outline and thickness.

Layer shapes for easy edits.
If you’re combining multiple shapes to create a logo or other design, use the Layers panel so you can modify each shape’s layer independent of the others.
Where can I get free shapes for Photoshop?
If you don’t want to draw your own Photoshop custom shapes, many artists and creators have made their own preset shapes which you can download for free from their websites. So long as they’re in the CSH file format, you can easily bring them into your Photoshop project.
How do I download and install shapes in Photoshop?
Follow these steps to add new free Photoshop shapes to your toolbar.
1. Download it:
Download a selection of different drawing shapes from online.
2. Open it:
Launch Photoshop and select Edit › Preset Manager.
3. Import it:
Select Custom Shapes from the drop-down menu.
Select Load. When the file dialog box appears, navigate to the CSH files you downloaded, select them, and click OK.
Do more with Adobe Photoshop.
Perfect every pixel with more Photoshop tutorials.
From layer styles to vector masks, discover strategies to help elevate your next project.

Learn about layers.
From the background to the foreground, learn how to make use of layers in every part of your project.
Explore how to enhance your work with layers

Add flair with filters.
Filters are a quick and easy way to add unique atmospheric effects to your image.
See how filters can improve your project
Find the Creative Cloud plan that's right for you.
Adobe photoshop single app.
Get Photoshop on desktop and iPad as part of Creative Cloud. Learn more
Creative Cloud All Apps
Get 20+ Creative Cloud apps, including Photoshop on desktop and iPad. See what's included | Learn more
Students and teachers
Save over 60% on Creative Cloud All Apps. See terms | Learn more
Purchase by phone: 800-585-0774
Terms and conditions
stickypromobar
Adobe Photoshop
Create gorgeous images, rich graphics, and incredible art. Plans starting at .
Plans starting at .
Language Navigation
What's included
- Draw and edit shapes
- Photoshop User Guide
- Dream it. Make it.
- What's new in Photoshop
- Edit your first photo
- Create documents
- Photoshop | Common Questions
- Photoshop system requirements
- Get to know Photoshop
- Work with Illustrator artwork in Photoshop
- Work with Photoshop files in InDesign
- Substance 3D Materials for Photoshop
- Use the Capture in-app extension in Photoshop
- Photoshop on the iPad | Common questions
- Get to know the workspace
- System requirements | Photoshop on the iPad
- Create, open, and export documents
- Work with layers
- Draw and paint with brushes
- Make selections and add masks
- Retouch your composites
- Work with adjustment layers
- Adjust the tonality of your composite with Curves
- Apply transform operations
- Crop and rotate your composites
- Rotate, pan, zoom, and reset the canvas
- Work with Type layers
- Work with Photoshop and Lightroom
- Get missing fonts in Photoshop on the iPad
- Japanese Text in Photoshop on the iPad
- Manage app settings
- Touch shortcuts and gestures
- Keyboard shortcuts
- Edit your image size
- Livestream as you create in Photoshop on the iPad
- Correct imperfections with the Healing Brush
- Create brushes in Capture and use them in Photoshop on the iPad
- Work with Camera Raw files
- Create and work with Smart Objects
- Adjust exposure in your images with Dodge and Burn
- Auto adjustment commands in Photoshop on the iPad
- Smudge areas in your images with Photoshop on the iPad
- Saturate or desaturate your images using Sponge tool
- Content aware fill for iPad
- Common questions
- System requirements
- Supported file types
- Introduction to the workspace
- Open and work with cloud documents
- Generative AI features
- Basic concepts of editing
- Quick Actions
- Retouch images and remove imperfections
- Make quick selections
- Image improvements with Adjustment Layers
- Move, transform, and crop images
- Draw and paint
- Work with anyone on the web
- Generate Image
- Generate Background
- Reference Image
- Get started with Creative Cloud Beta apps
- Photoshop (beta) on the desktop
- Generate image with descriptive text prompts
- Generate background with descriptive text prompts
- Common questions on generative AI in Photoshop
- Generative Fill in Photoshop on the desktop
- Generative Expand in Photoshop on the desktop
- Generative Fill in Photoshop on the iPad
- Generative Expand in Photoshop on the iPad
- Generative AI features in Photoshop on the web
- Content credentials in Photoshop
- Identity and provenance for NFTs
- Connect accounts for creative attribution
- Photoshop cloud documents | Common questions
- Photoshop cloud documents | Workflow questions
- Manage and work with cloud documents in Photoshop
- Upgrade cloud storage for Photoshop
- Unable to create or save a cloud document
- Solve Photoshop cloud document errors
- Collect cloud document sync logs
- Invite others to edit your cloud documents
- Share files and comment in-app
- Workspace basics
- Preferences
- Learn faster with the Photoshop Discover Panel
- Place files
- Default keyboard shortcuts
- Customize keyboard shortcuts
- Tool galleries
- Performance preferences
- Grid and guides
- Touch gestures
- Use the Touch Bar with Photoshop
- Touch capabilities and customizable workspaces
- Technology previews
- Metadata and notes
- Place Photoshop images in other applications
- Show or hide non-printing Extras
- Specify columns for an image
- Undo and history
- Panels and menus
- Position elements with snapping
- Position with the Ruler tool
- Photoshop for design
- Device Preview
- Copy CSS from layers
- Slice web pages
- HTML options for slices
- Modify slice layout
- Work with web graphics
- Create web photo galleries
- How to resize images
- Work with raster and vector images
- Image size and resolution
- Acquire images from cameras and scanners
- Create, open, and import images
- View images
- Invalid JPEG Marker error | Opening images
- Viewing multiple images
- Customize color pickers and swatches
- High dynamic range images
- Match colors in your image
- Convert between color modes
- Color modes
- Erase parts of an image
- Blending modes
- Choose colors
- Customize indexed color tables
- Image information
- Distort filters are unavailable
- About color
- Color and monochrome adjustments using channels
- Choose colors in the Color and Swatches panels
- Color mode or Image mode
- Add a conditional mode change to an action
- Add swatches from HTML CSS and SVG
- Bit depth and preferences
- Layer basics
- Nondestructive editing
- Create and manage layers and groups
- Select, group, and link layers
- Place images into frames
- Layer opacity and blending
- Mask layers
- Apply Smart Filters
- Layer comps
- Move, stack, and lock layers
- Mask layers with vector masks
- Manage layers and groups
- Layer effects and styles
- Edit layer masks
- Extract assets
- Reveal layers with clipping masks
- Generate image assets from layers
- Work with Smart Objects
- Combine multiple images into a group portrait
- Combine images with Auto-Blend Layers
- Align and distribute layers
- Load selections from a layer or layer mask's boundaries
- Knockout to reveal content from other layers
- Get started with selections
- Make selections in your composite
- Select and Mask workspace
- Select with the marquee tools
- Select with the lasso tools
- Adjust pixel selections
- Move, copy, and delete selected pixels
- Create a temporary quick mask
- Select a color range in an image
- Convert between paths and selection borders
- Channel basics
- Save selections and alpha channel masks
- Select the image areas in focus
- Duplicate, split, and merge channels
- Channel calculations
- Replace object colors
- Perspective warp
- Reduce camera shake blurring
- Healing brush examples
- Export color lookup tables
- Adjust image sharpness and blur
- Understand color adjustments
- Apply a Brightness/Contrast adjustment
- Adjust shadow and highlight detail
- Levels adjustment
- Adjust hue and saturation
- Adjust vibrance
- Adjust color saturation in image areas
- Make quick tonal adjustments
- Apply special color effects to images
- Enhance your image with color balance adjustments
- View histograms and pixel values
- Crop and straighten photos
- Convert a color image to black and white
- Adjustment and fill layers
- Curves adjustment
- Target images for press
- Adjust color and tone with Levels and Curves eyedroppers
- Adjust HDR exposure and toning
- Dodge or burn image areas
- Make selective color adjustments
- Camera Raw system requirements
- What's new in Camera Raw
- Introduction to Camera Raw
- Create panoramas
- Supported lenses
- Vignette, grain, and dehaze effects in Camera Raw
- Automatic perspective correction in Camera Raw
- Radial Filter in Camera Raw
- Manage Camera Raw settings
- Open, process, and save images in Camera Raw
- Repair images with the Enhanced Spot Removal tool in Camera Raw
- Rotate, crop, and adjust images
- Adjust color rendering in Camera Raw
- Process versions in Camera Raw
- Make local adjustments in Camera Raw
- Remove objects from your photos with Content-Aware Fill
- Content-Aware Patch and Move
- Retouch and repair photos
- Correct image distortion and noise
- Basic troubleshooting steps to fix most issues
- Replace sky in your images
- Transform objects
- Adjust crop, rotation, and canvas size
- How to crop and straighten photos
- Create and edit panoramic images
- Warp images, shapes, and paths
- Vanishing Point
- Content-aware scaling
- Transform images, shapes, and paths
- Paint symmetrical patterns
- Draw rectangles and modify stroke options
- About drawing
- Painting tools
- Create and modify brushes
- Add color to paths
- Paint with the Mixer Brush
- Brush presets
- Gradient interpolation
- Fill and stroke selections, layers, and paths
- Draw with the Pen tools
- Create patterns
- Generate a pattern using the Pattern Maker
- Manage paths
- Manage pattern libraries and presets
- Draw or paint with a graphics tablet
- Create textured brushes
- Add dynamic elements to brushes
- Paint stylized strokes with the Art History Brush
- Paint with a pattern
- Sync presets on multiple devices
- Migrate presets, actions, and settings
- Add and edit the text
- Unified Text Engine
- Work with OpenType SVG fonts
- Format characters
- Format paragraphs
- How to create type effects
- Line and character spacing
- Arabic and Hebrew type
- Troubleshoot fonts
- Create type
- Use the Blur Gallery
- Filter basics
- Filter effects reference
- Add Lighting Effects
- Use the Adaptive Wide Angle filter
- Use the Oil Paint filter
- Use the Liquify filter
- Apply specific filters
- Smudge image areas
- Save your files in Photoshop
- Export your files in Photoshop
- Supported file formats
- Save files in graphics formats
- Move designs between Photoshop and Illustrator
- Save and export video and animations
- Save PDF files
- Digimarc copyright protection
- Understanding color management
- Keeping colors consistent
- Color settings
- Work with color profiles
- Color-managing documents for online viewing
- Color-managing documents when printing
- Color-managing imported images
- Proofing colors
- Video editing in Photoshop
- Edit video and animation layers
- Video and animation overview
- Preview video and animations
- Paint frames in video layers
- Import video files and image sequences
- Create frame animations
- Creative Cloud 3D Animation (Preview)
- Create timeline animations
- Create images for video
- Print 3D objects
- Print from Photoshop
- Print with color management
- Contact Sheets and PDF Presentations
- Print photos in a picture package layout
- Print spot colors
- Print images to a commercial printing press
- Improve color prints from Photoshop
- Troubleshoot printing problems | Photoshop
- Creating actions
- Create data-driven graphics
- Process a batch of files
- Play and manage actions
- Add conditional actions
- About actions and the Actions panel
- Record tools in actions
- Photoshop UI toolkit for plug-ins and scripts
- Fixed issues
- Known issues
- Optimize Photoshop performance
- Basic troubleshooting
- Troubleshoot crash or freeze
- Troubleshoot program errors
- Troubleshoot scratch disk full errors
- Troubleshoot GPU and graphics driver issues
- Find missing tools
- Photoshop 3D | Common questions around discontinued features
Learn how to create shapes on your canvas and use the Live Shape Properties to interact with your shapes.
Find help in the app Use the Discover Panel to find answers, access tutorials, and learn more about creating shapes.
Photoshop comes with the ability to draw and edit vector shapes easily. You can also convert your vector shape to a raster or pixel-based shape. Read the full article to learn more.
Topics in this article:
Create shapes
Draw a custom shape.
- Accessing legacy custom shapes
Fill and stroke shapes
Draw a star shape using the polygon tool, draw heart shapes in photoshop.
Follow these quick steps to create shapes in Photoshop:
Select a shape tool

Set shape tool options
In the shape tool options bar, you can set:
- Mode : Set a mode for your Shape tool — Shape, Path, and Pixels .
- Fill : Choose a color to fill your shape.
- Stroke : Choose the color, width, and type of your shape stroke.
- W&H : Manually set the width and height of your shape.
- Path operations : Use path operations to set the way your shapes interact with each other.
- Path alignment : Use path alignment to align and distribute your shape components.
- Path arrangement : Use path arrangement to set the stacking order of shapes you create.

Draw a shape
Click and drag on the canvas with your selected shape tool to draw a shape. This automatically creates a new shape layer in the Layers panel.
- Hold the Shift key while drawing to make your shapes proportional.
- With your shape layer selected, use the Move tool to move your shape around and reposition on the canvas.
- To easily scale, transform, or rotate your shape, choose Edit > Free Transform or press Control+T (Win) / Command+T (Mac).
Edit shape properties
You can easily edit your shape properties directly using on-canvas controls or accessing Shape Properties under the Properties panel. On-canvas controls make your interaction with shapes more intuitive.
You can use on-canvas transform and rounding controls to adjust the appearance of your shape. The keyboard modifiers will work the same way for on-canvas transform controls as they work in Transform tool in Photoshop . You can modify the radius of all corners of your shape at once or hold Alt (Win) or Option (Mac) as you drag to change the radius of a single corner. For triangles, all corners will be modified even if you drag one of them. Easily rotate a shape using the on-canvas rotate handle that appears as you hover over your shape on the canvas.

Once you've drawn a shape, you can click anywhere on the canvas to bring up a Create Shape pop-up dialog and modify your shape parameters.

Follow these quick steps to fill and stroke shapes:
In the Layers panel, select the shape layer you want to fill or stroke.
Do one of the following to set the shape fill or stroke type:
- Select a shape tool (press U) from the toolbar. In the tool options bar, select Fill or Stroke .
- In the Properties panel, click the fill or stroke type option.
In the pop-up menu, choose a fill or stroke option — Solid Color , Gradient , or Pattern .
Solid Color: Fills or strokes the shape layer with the current foreground color. Use the Color Picker or color presets to select a different color.
Gradient: Choose a gradient preset or click on the gradient to display the Gradient Editor dialog. Set additional gradient options:
- Angle specifies the angle at which the gradient is applied.
- Reverse flips the orientation of the gradient colors.
- Style specifies the shape of the gradient.
- Scale changes the size of the gradient.
- Align With Layer uses the bounding box of the layer to calculate the gradient fill. You can drag in the image window to move the center of the gradient.
Pattern: Choose a pattern from the pop‑up menu and set additional pattern options:
- Angle specifies the angle at which the pattern is applied. Set the angle selector at a certain degree or manually type in an angle value to rotate your pattern at the desired angle.
- Scale changes the size of the pattern. Enter a value or drag the slider.
Enhanced with the February 2021 release of Photoshop desktop (22.2)
You can draw custom shapes by using shapes from the Custom Shape pop-up panel, or save a shape or path to use as a custom shape.
To view all the custom shapes that come with Photoshop, click the gear icon on the right of the Custom Shape picker in the shape tool options bar. You will see the list of available shapes. Select any custom shape as desired.
If you don't find a desired shape, click the gear icon in the Custom Shape picker panel and select Import Shapes option to import a desired shape from your saved files. You can also create and save a custom shape in your library.

You can easily edit your Custom Shape Tool properties directly from Shape Properties under the Properties panel. You can also use on-canvas Transform controls to transform a custom shape while keeping intact its shape properties.
Click and drag anywhere in the canvas to draw your custom shape.

You also have the flexibility of setting Custom Shape Tool preset directly from the Shapes Windows panel. When you select a custom shape from Windows > Shape panel, this preset will get updated in the Custom Shape Tool > Custom Shape picker as well.
You can access the custom shape properties only for the shapes drawn using the Custom Shape Tool and not when a path has been converted to a shape.
Save a shape or path as a custom shape
In the Paths panel, select a path—either a vector mask for a shape layer, a work path, or a saved path.
Choose Edit > Define Custom Shape , and enter a name for the new custom shape in the Shape Name dialog box. The new shape appears in the Shape pop-up panel in the options bar.
To save the new custom shape as part of a new library, select Save Shapes from the pop-up panel menu.
For more information, see Work with the Preset Manager .
One of the basic shapes that we learn to draw as kids is a five-corner star shape.
Follow these 3 quick steps to draw a star shape with the Polygon shape tool:
From the toolbar, click and hold the shape tool group icon to bring up hidden shape tool options. Select the Polygon tool.
Drag on your canvas to draw a polygon.
Click anywhere on the canvas to bring up the Create Polygon dialog and set the following attributes:
- Width & Height : Manually set the width and height of your polygon.
- Symmetric : Select the checkbox to maintain symmetry in your polygon.
- Number of Sides : Manually enter the number of sides you'd like the polygon to have. For example, set the number of sides to 5 if you want to draw a 5-cornered star shape.
- Corner Radius : Manually set a radius to get rounded corners for your polygon.
- Star Ratio : Adjust the Star Ratio percentage to get the perfect star shape.
- Smooth Star Indents : Select the checkbox to round up the star indents.
- From Center : Select the checkbox to align the star-shape from the centre.

Accessing Legacy Custom Shapes
If you have used Legacy Custom Shapes from older versions of Photoshop and would like to add them to your current version, follow the steps below.
From the main window, select Window > Shapes
Watch this short video to learn how to use the Legacy Custom Shapes to draw heart shapes in Photoshop.
More like this
- Photoshop community | Drawing shapes in Photoshop just got easier
- Photoshop community | Quick Tips: How to find and use Legacy Shapes in the current version of Photoshop
- Work with the Line tool
- Draw with the Pen tool
- Add vector shapes to your designs | Tutorial
Get help faster and easier
Quick links
Legal Notices | Online Privacy Policy
Share this page
Language Navigation
Home > Photoshop Basics > How to Draw Shapes with the Shape Tools in Photoshop

How to Draw Shapes with the Shape Tools in Photoshop

Learn the basics of drawing shapes using the shape tools in Photoshop! Covers the geometric shape tools which include the Rectangle, Ellipse, Triangle, Polygon and Line Tools. Updated for Photoshop 2022.
In this tutorial, I show you the basics of how to draw shapes using the shape tools in Photoshop. Specifically, we’ll look at how to use the geometric shape tools, which are the Rectangle Tool, the Ellipse Tool, the Triangle Tool, the Polygon Tool, and the Line Tool. Photoshop also includes a Custom Shape Tool for drawing more ellaborate pre-made shapes. But because the Custom Shape Tool behaves differently than the geometric shape tools, I’ll cover it in a separate tutorial .
Let's get started!
Download this tutorial as a print-ready PDF!
Which version of Photoshop do I need?
Adobe has made quite a few changes to the shape tools in recent versions of Photoshop. So to follow along, you’ll want to be using Photoshop 2022 or newer. You can get the latest Photoshop version here .
Setting up the document
You can follow along with me by creating a new Photoshop document . To create one from the Home Screen, click the New file button.

Or if you're on Photoshop's main interface, go up to the File menu and choose New .

Then in the New Document dialog box, choose the Default Photoshop Size preset and click Create .

The new document appears, ready for us to draw some shapes.

Where do I find Photoshop's shape tools?
The shape tools in Photoshop are all found in the toolbar , nested together in the same spot. By default, the Rectangle Tool is the tool that's visible.

Click and hold on the Rectangle Tool's icon to open a fly-out menu showing the other shape tools hiding behind it. We'll look at each tool as we go along. For now, select the Rectangle Tool.

The shape tool options in the Options Bar
The options for the active shape tool appear in the Options Bar . And most of the options are the same no matter which shape tool is selected. So let's look at these options from left to right.
Resetting the shape tool to its default settings
The tool icon on the far left of the Options Bar tells us which tool is active. But it's also how we reset the tool to its default settings. To reset it, right-click (Win) / Control-click (Mac) on the tool icon.
Then choose Reset Tool from the menu.

The Tool Mode
Next is the Tool Mode option where we choose which kind of shape we want to draw. Shapes in Photoshop can be drawn as either vectors, paths or pixels.
Vector shapes are drawn using points connected together by straight or curved lines, and they remain scalable and editable without ever losing quality. A path is also scalable and editable, but it's simply the outline of the shape without any fill or stroke. And a pixel shape is made of pixels, just like images.
In most cases, you'll want to draw vector shapes. And for that, the mode needs to be set to Shape , which it is by default.

The Fill Color
The Fill option is where we choose a color for the shape. The default shape color is black. To choose a different color, click the Fill color swatch.

Then choose the kind of fill you need using the icons along the top of the panel. From left to right, we have No Color (which leaves the inside of the shape empty), a Solid Color preset, a Gradient preset or a Pattern preset.

If you choose Solid Color, Gradient or Pattern, then twirl open one of the preset groups and choose a preset by clicking its thumbnail. Here I’ve selected the Solid Color preset option and I’ve opened the RGB group to select a preset color.

Or to choose your own custom fill color for the shape, click the icon in the upper right corner.

Then select a color from the Color Picker. I’ll choose a purple color by setting the H (Hue) value to 295 degrees, the S (Saturation) value to 70 percent and the B (Brightness) also to 70 percent. Click OK to close the Color Picker when you’re done.

The Stroke Color
The next two options in the Options Bar are for adding a stroke around the shape. By default, Photoshop adds a 1 pixel black stroke. To choose a different color, or no color, click the Stroke color swatch.

Then use the icons along the top of the panel to choose from the same options we saw with the fill color. Again from left to right, we have No Color (for when you don't want a stroke around the shape), a Solid Color preset, a Gradient preset, or a Pattern preset.

Or click the icon in the upper right corner to choose a custom stroke color from the Color Picker. But in my case, I'll stick with the default black.
The Stroke Size
Next, set the width or thickness of the stroke by entering a Size value. I'll set it to 16 pixels . As we'll see, all of these options (fill color, stroke color, stroke size and more) can also be changed from the Properties panel after we draw the shape.

The Stroke Type, Alignment and more
For even more stroke options, click the Stroke Options box.
From here, you can set the stroke Type to either a Solid , Dashed or Dotted line . Solid is the default. Or change the stroke's Alignment to either Inside , Outside or Centered on the outline of the shape. And you can change the Cap Type or Corner Type if needed.

If you click the More Options button at the bottom.

A separate dialog box opens with most of the same options, but you can also create your own custom dashed or dotted line, and save your settings as a preset. Since we're only covering the basics here (and there's lots more to cover), I'll click Cancel to close the dialog box.

The Width and Height
Next in the Options Bar are the Width ( W ) and Height ( H ) fields. But rather than allowing you to set a width and height for your shape before you draw it, these options are used to change the width and height after you’ve drawn the shape.
You can ignore the Width and Height options in the Options Bar because they can easily be changed in the Properties panel after we draw the shape.

Path Operations, Path Alignment and Path Arrangement
The next three icons after the Width and Height fields hold options that I'll cover in more detail in a separate tutorial.
But briefly, clicking the first icon, Path Operations , opens a list of ways to combine two or more shapes into a larger or more complex shape. The default setting, New Layer, draws a separate and independent shape each time.

The next icon, Path Alignment , opens all the ways to align or distribute multiple shapes. The Align To option at the bottom lets you switch between aligning shapes to a selection or to the canvas.

And the third icon, Path Arrangement , holds commands for moving the selected shape above or below the other shape(s) that it's combined with, similar to moving layers above or below each other in the Layers panel.

The Gear icon
The next set of options are found by clicking the Gear icon in the Options Bar.
First are the Path Options for changing the Thickness or Color of the path outline around the shape. But don't confuse a path outline with a stroke. Paths exist only in Photoshop and do not appear when you print your work or when you save it as a jpeg, png or other file format. These path options exist only to make the path outline easier to see while working in Photoshop. To place an actual outline or border around the shape, you need to add a stroke.
I'll increase the thickness to 2 px just to make the path easier to see as we go through this tutorial. But in most cases, the default thickness of 1 px works fine.
Below that are options for setting a custom size or aspect ratio for the shape before you draw it, along with the option to draw the shape out from its center rather than from a corner. But I would avoid these options because they are sticky , meaning that they remain selected until you come back and choose a different one, which can quickly become annoying. Instead, I'll show you a better way to access these options from your keyboard.
The Corner Radius
Next is the Corner Radius option, which is only visible when the Rectangle Tool, Triangle Tool or Polygon Tool is active in the toolbar. Corner Radius lets you set the roundness of the shape's corners before you draw the shape by entering a value, in pixels.
But again, there are easy ways to adjust the corner radius after the shape is drawn, so there's no reason to set it here unless you know the exact value you need.

Align Edges
Finally, the Align Edges option aligns the edges of your shape to Photoshop's pixel grid, which I covered in the Zooming and Scrolling Images tutorial. Aligning the edges to the pixel grid keeps the shape's edges looking sharp, so you’ll want to leave Align Edges checked.

How to draw shapes with the shape tools
So now that we've gone through the shape options in the Options Bar, let's look at how to draw different kinds of shapes using Photoshop's various shape tools. We'll start with the Rectangle Tool which draws simple four-sided shapes. I'll show you all the ways to use the Rectangle Tool, but much of what we'll cover applies to the other shape tools as well.
Select the Rectangle Tool
First, in the toolbar, make sure the Rectangle Tool is selected.

How to draw a rectangle shape
Click on the canvas to set a starting point for the shape, and then drag away from that point. As you drag, you won't see the shape's fill or stroke color. All you will see is the path outline.

How to reposition the shape as you draw
If you press and hold the spacebar on your keyboard while your mouse button is still down, you can drag the shape outline around the canvas to reposition it. Then release the spacebar to continue dragging out the shape.
Completing the shape
Release your mouse button to complete the shape. The path outline is still visible but so are the fill and the stroke.

The shape layer
In the Layers panel, the new shape appears on its own shape layer . And because the shape was drawn using the Rectangle Tool, Photoshop names the layer Rectangle 1 . Since shapes are added on their own layers, it means a shape can be scaled, edited, moved or deleted without affecting any other shapes or other elements in the document.

Turning shape layers on and off
I’ll hide the shape so we can look at more ways to use the Rectangle Tool by clicking the shape layer's visibility icon .
How to draw a perfect square
To draw a perfect square with the Rectangle Tool, click to set a starting point for the shape and then begin dragging. Press and hold the Shift key on your keyboard to lock the shape's aspect ratio to a perfect square and then continue dragging.

Release your mouse button to complete the shape, and then release the Shift key. Make sure to release your mouse button before releasing Shift, otherwise it won't work.
The Shift key can also be used to draw a perfect circle with the Ellipse Tool, an equilateral triangle with the Triangle Tool, or a symmetrical polygon shape with the Polygon Tool, all of which we'll look at in a moment.

In the Layers panel, the second shape appears on its own shape layer above the first. Hide the second shape by clicking its visibility icon so we can look at a third way to use the Rectangle Tool.

How to draw a shape at an exact size
If you know the exact size that the shape needs to be, then instead of clicking and dragging, simply click on the canvas and release your mouse button.
The Create Rectangle dialog box opens where you can enter a width and height for the shape, in pixels. Note that while the dialog box currently says "Create Rectangle" because I'm using the Rectangle Tool, this trick can be used with any shape tool to draw the shape at an exact size.

Click OK to close the dialog box, and the shape instantly appears.

How to move a shape around the canvas
To move the shape to a new location after you draw it, switch from your shape tool to the Path Selection Tool (the black arrow) in the toolbar, located directly above the shape tools.

Then simply click on the shape and drag it into place.

Tip! Access the Path Selection Tool temporarily
Instead of choosing the Path Selection Tool from the toolbar, you can access it temporarily from your keyboard by holding the Ctrl (Win) / Command (Mac) key. With the key held down, click and drag to move the shape. Then release the key to switch back to your shape tool.
Tip! Select shapes just by clicking on them
And here's a tip you can use when you've drawn multiple shapes in your document, each on its own layer, and you need to select individual shapes to move them around.
Select the Path Selection Tool from the toolbar so you can access its options in the Options Bar. Then in the Options Bar, change the Select option from Active Layers to All Layers . You can then click on any shape to select it without needing to click on the shape's layer in the Layers panel.

More tricks for drawing shapes
Earlier I mentioned that you can reposition a shape as you draw it by holding the spacebar on your keyboard, dragging the shape into place, and then releasing your spacebar to continue dragging out the shape. This works with any of Photoshop's shape tools.
To draw a shape from its center rather than from a corner, click to set the starting point and begin dragging. Then hold the Alt (Win) / Option (Mac) key on your keyboard and continue dragging. Release your mouse button to complete the shape, and then release the Alt (Win) / Option (Mac) key.
How to delete a shape
To delete a shape, click on its shape layer in the Layers panel and drag the layer down onto the Trash Bin . Or with the layer selected, press the Delete on your keyboard.

How to reselect a shape
To reselect an existing shape in your document, click on its shape layer in the Layers panel. And if the shape was turned off, click its visibility icon to turn it back on.
Editing the shape with the on-canvas controls
Back in Photoshop 2021, Adobe added on-canvas controls to shapes. These controls appear around the shape after you draw it, and make it easy to scale, resize or rotate the shape without needing to use the Free Transform command . The on-canvas controls can also be used to adjust the roundness of a shape's corners. Here’s how to use them.
How to resize the shape
To resize a shape using the on-canvas controls, click and drag any of the handles (the squares that appear around the path outline). By default, dragging a handle will resize the shape non-proportionally, meaning that each side or corner can be moved without moving any others.

To scale the shape proportionally, hold the Shift key on your keyboard as you drag a handle. Just remember to release your mouse button first before releasing the Shift key.
You can also hold Alt (Win) / Option (Mac) while dragging to resize the shape from its center, or Shift+Alt (Win) / Shift+Option (Mac) to resize it proportionally from its center.

How to undo a transformation
To undo the last transformation you made to the shape, go up to the Edit menu and choose Undo Transform Path . Or press Ctrl+Z (Win) / Command+Z (Mac) on your keyboard. Press Ctrl+Z (Win) / Command+Z (Mac) repeatedly to undo multiple steps in a row.

How to rotate a shape
To rotate a shape using the on-canvas controls, move your cursor just outside the path outline. When the cursor changes to a rotate icon (a curved double-sided arrow), click and drag to rotate the shape around its center.

How to rotate a shape from its corner
Shapes can also be rotated around a corner or other location by moving the reference point . The reference point is the target icon that appears in the center of the shape by default. If you're not seeing the reference point, I show you how to turn it on next.
How to show the reference point
If the reference point is not visible, you’ll need to turn it on in Photoshop’s preferences. On a Windows PC, go up to the Edit menu in the Menu Bar. On a Mac, go up to the Photoshop menu. From there, choose Preferences and then Tools .

Then in the Preferences dialog box, select Show Reference Point when using Transform . You'll only need to do this once. And as a bonus, the reference point will now be visible not only with shapes but anytime you use Photoshop's Free Transform command. Click OK to close the dialog box when you’re done.

Click and drag the reference point to a new location. I'll move it onto the handle in the upper left corner:

And now when you rotate the shape, it rotates around the new point. Note that the reference point icon automatically resets to the center of the shape when you release your mouse button.

How to round the shape's corners
The on-canvas controls can also be used to adjust the roundness, or radius, of the shape's corners, although this feature depends on which shape tool was used.
With the Rectangle Tool, all four corners can be rounded at once, or a single corner can be rounded independently. But shapes drawn with the Triangle Tool or Polygon Tool are limited to a single control that affects all corners at the same time. And the Ellipse Tool and Line Tool do not allow rounded corners at all.
The radius controls are the small circles just inside the corners.

Rounding all corners at once
For rectangle and square shapes that have a radius control in each corner, drag any of the controls to round all four corners at the same time and by the same amount:

Rounding a single corner independently
To adjust a single corner without affecting the others, hold Alt (Win) / Option (Mac) on your keyboard and drag the corner's radius control.
But if you know the exact radius value you need for the corner(s), then instead of dragging with the on-canvas controls, you can enter the exact value in Photoshop's Properties panel, which we'll look at next.

The Live Shape properties in the Properties panel
While the on-canvas controls are convenient, they're not the only way to adjust the appearance of your shape. In fact, any shape drawn with one of Photoshop's geometric shape tools (the Rectangle, Ellipse, Triangle, Polygon, or Line Tool) is what Adobe calls a Live Shape .
A Live Shape means that after the shape is drawn, all of its properties remain live and editable. And the properties are found in the Properties panel .
Since I currently have a rectangle shape selected, the Properties panel is showing options for a shape drawn with the Rectangle Tool. But most of the options will be the same no matter which tool was used.

The Transform properties
The Properties panel is divided into sections, and the first section at the top is Transform . The Transform options are the same for all shape tools.
The shape's Width, Height and Location
In the Transform properties, you can edit the shape's Width (W) or Height (H), and click the link icon to link or unlink the width and height values. The X and Y coordinates can be used to set a specific location for the shape on the canvas. X is the horizontal distance from the left of the canvas and Y is the vertical distance from the top.

The Rotation angle
The Angle option sets the rotation of the shape. To reset the angle, enter a value of 0 degrees. If you rotated the shape using the on-canvas controls, the current angle appears and can be adjusted from here.

Clicking the arrow next to the angle value opens a list of preset angles to choose from.

Tip! Changing values with the scrubby slider
The width and height, X and Y values, and the rotation angle can all be changed using Photoshop's scrubby slider . Click on a property's name (for example, the letter W for the width), keep your mouse button held down, and drag left or right to change the value.

Flipping the shape's orientation
Finally, you can use the Flip Horizontal or Flip Vertical icons to flip the shape's orientation.

The Appearance properties
The Appearance section in the Properties panel holds options for changing the shape's fill color, the stroke color, the thickness of the stroke, and more. It’s also where we adjust the roundness of the corners. The fill and stroke options are the same for all shapes, but the corner options will change depending on the shape tool that was used.
The Fill and Stroke color
Click the Fill or Stroke color swatches to change the colors. You’ll find the same options for choosing colors that we saw earlier in the Options Bar.

The stroke Size and other options
Below the color swatches are more options for the stroke that are copied over from the Options Bar. You can change the Size of the stroke, or click the Stroke Options box to the right of the size to change the stroke Type from a solid to a dashed or dotted line.
The three icons below the stroke size let you change, from left to right, the stroke's Alignment (Inside, Outside or Centered), the Cap Type and the Corner Type .

Earlier we learned how to adjust the roundness of the shape's corners using the on-canvas controls. But you can also adjust the corner radius here in the Properties panel. In fact, when you use the on-canvas controls, you'll see the radius values changing in the Properties panel.
By default, the four boxes (one for each corner) are linked together, so entering a new value for one corner changes all four by the same amount. To unlink the boxes (or link them together again), click the link icon .
Here I’ve changed the radius value of the upper left corner to 60 pixels . And because all four corners were linked together, they all changed to 60 pixels when I pressed Enter (Win) / Return (Mac) to accept the new value.

Below the individual boxes is a larger box that displays the current radius values for all corners at once. The first value is the top left corner, then the top right, the bottom right, and the bottom left. You can highlight any value to change it and only that one corner will be affected, even if the corners are linked together.

The Pathfinder properties
Finally, the Pathfinder section at the bottom of the Properties panel holds the same options for combining shapes that we saw earlier in the Options Bar. From left to right, we have Combine Shapes, Subtract front shape, Intersect shape areas, and Exclude overlapping areas. These options are the same for all shape tools, and again, I'll cover them in a separate tutorial.

Drawing shapes with Photoshop's other shape tools
At this point, we've covered most of the basics for drawing shapes in Photoshop. We know where to find the various shape tools in the toolbar, and we've looked at the options in the Options Bar, like choosing a fill and stroke color, which are mostly the same for each tool. We know how to draw shapes by clicking and dragging on the canvas, how to edit the shapes using the on-canvas controls, and how to edit the Live Shape properties in the Properties panel.
But since the only shape tool we've used so far is the Rectangle Tool, let's take a quick look at Photoshop's other geometric shape tools. I won't repeat everything that's the same with each tool and that we've already covered. Instead, we'll focus mostly on features that are unique to each tool.
The Ellipse Tool
While the Rectangle Tool draws rectangles and squares, the Ellipse Tool draws round or elliptical shapes, including perfect circles. Other than that, both tools behave much the same. But since elliptical shapes have no corners, you won't find any options to adjust them.
To select the Ellipse Tool, click and hold on the Rectangle Tool in the toolbar, or whichever shape tool you used last. Then choose the Ellipse Tool from the menu.

Drawing an elliptical shape
Click and drag in the document to draw an elliptical shape, or hold Shift as you drag to draw a perfect circle as I'm doing here:

Release your mouse button to draw the shape, and then drag any of the on-canvas control handles to resize it as needed. Hold Shift as you drag to lock the original aspect ratio in place, or hold Alt (Win) / Option (Mac) to resize the shape from its center.

The Live Shape properties
In the Properties panel, the Ellipse Tool shares the same editable Live Shape properties as the Rectangle Tool. The only properties missing are the corner radius options since they don't apply. But you can still change the width and height, the fill and stroke color, and more.

The Triangle Tool
The Triangle Tool was first introduced in Photoshop 2021. Before that, drawing a triangle shape involved selecting the Polygon Tool (which we'll look at next) and setting the number of sides to 3. But we now have a dedicated Triangle Tool so you don’t need to remember that a triangle is just a 3-sided polygon. And we can even round the triangle's corners using either the on-canvas controls or the Live Shape properties in the Properties panel.
To select the Triangle Tool, click and hold on whichever shape tool appears in the toolbar, which will always be the last tool that was used. Then choose the Triangle Tool from the list:

The Corner Radius option in the Options Bar
Like the Rectangle Tool, the Triangle Tool includes a Corner Radius option in the Options Bar which can be used to set the roundness of the corners before drawing the shape. But to draw a triangle with sharp corners, leave the radius at its default value of 0 px .

Drawing a triangle shape
Click and drag in the document to draw a triangle shape, or hold Shift as you drag to draw an equilateral triangle where all three sides are the same length. And as with all the shape tools, you can hold Alt (Win) / Option (Mac) to draw the shape out from its center.

Rounding the triangle corners
Release your mouse button to complete the shape, and then use the on-canvas controls to scale, resize or rotate the triangle if needed.
Triangles also include a single corner radius control at the top.

Dragging the control up or down will adjust the roundness of all three corners of the triangle at once.

The corner radius can also be adjusted in the Properties panel along with all of the other Live Shape properties that are common with all shapes:

The Polygon Tool
While the Triangle Tool draws 3-sided shapes and the Rectangle Tool draws shapes with 4 sides, the Polygon Tool in Photoshop can draw shapes with as many sides as you need. It can even draw stars, as we’ll see in a moment.
Select the Polygon Tool in the toolbar by clicking and holding on the last shape tool that was used, and then choose the Polygon Tool from the list:

The Sides and Radius options
Along with the standard shape tool options in the Options Bar, the Polygon Tool also includes a box for entering the number of sides and for setting the corner radius . If you know the number of sides you need, you can set it here before drawing the shape. Or you can leave these options at their defaults (sides = 5, radius = 0 px) and adjust them in the Properties panel after the shape is drawn.

Drawing the polygon shape
Click and drag in the document to draw the polygon shape. Hold Shift as you drag to draw a symmetrical polygon with all sides the same length.

Release your mouse button to complete the shape:

The on-canvas Radius control
Just like the Triangle Tool, shapes drawn with the Polygon Tool include a single corner radius control at the top. Drag the control up or down to round all corners of the polygon at once.

The Radius option in the Properties panel
Or you can adjust the radius from the Properties panel. I'll reset it back to 0 px.

Changing the number of sides
You can change the number of sides for the polygon in the Properties panel. I'll increase it from 5 to 6:

And since the polygon is a Live Shape, it instantly updates from 5 to 6 sides:

How to draw stars with the Polygon Tool
To turn your polygon shape into a star, lower the Star Ratio option in the Properties panel. The more you lower the value below 100%, the more the sides of the polygon will indent towards the center.
I'll set the number of sides back to 5. And I'll lower the Star Ratio down to 47% , which is the value you need to draw a perfect 5-point star .

And the polygon instantly turns into a star shape.

The Smooth Star Indents option
Click the ellipsis icon (the three dots):
To reveal the Smooth Star Indents option.

With Smooth Star Indents enabled, the star's indents become rounded instead of sharp:

The Line Tool
The last of Photoshop's geometric shape tools, and the final tool we'll look at in this tutorial, is the Line Tool . The Line Tool is used to draw straight lines, and you can add an arrowhead at either the start or end of the line.
To select the Line Tool in the toolbar, click and hold on the last shape tool that was used, and then choose the Line Tool from the list:

Choosing a line color
The Line Tool is different from the other shape tools in that the color of the line is actually controlled by the stroke color, not the fill color. That's because a line is really just a straight path with a stroke around it.
To choose a line color, click the Stroke color swatch:

Then use the icons along the top left of the panel to choose from a Solid Color preset, a Gradient preset or a Pattern preset. Or click the icon in the top right to select a custom color from the Color Picker.
I'll click the Solid Color preset option. Then I'll twirl open the Pure group of presets and choose orange as my line color by clicking its thumbnail:

Setting the line weight with the stroke size
The weight, or width, of a line is controlled by the stroke size. So still in the Options Bar, I'll set the size to 100 px just to make the line easy to see.

How to draw an arrow with the Line Tool
While you may, on occasion, have a need to draw simple straight lines, the Line Tool is more often used to draw arrows. Arrowheads can be added to the start or end of a line but must be added before the line is drawn. Even though lines are Live Shapes with editable properties in the Properties panel, arrowheads are not something that can be added or edited later.
To add an arrowhead to the line, click the Gear icon in the Options Bar.
In the Arrowhead options, add the arrowhead to either the Start or End of the line, or both. I'll choose the end. Then enter a Width and Length for the arrowhead, in pixels. I'll set the width to 120 px and the length to 150 px, again just so it's easy to see.
Unfortunately, choosing the correct arrowhead size can be tricky because there is no way to preview the result until you draw the shape, and you can't edit the size after you draw the shape. So if you get it wrong, you'll need to delete or undo the line, click the Gear icon in the Options Bar, change the width or length value, and then draw a new line to try again.
Use the Concavity option if you want to indent the base, or bottom, of the arrowhead. I'll set it to 20%.

How to draw the line
To draw your line or arrow, click on the canvas to set the starting point. Then keep your mouse button held down and drag away from that point to set the line's length and direction. Hold Shift as you drag to limit the direction to horizontal, vertical or a 45 degree angle.
As you drag, all you will see is the line's path. If you added an arrowhead, you'll also see the arrowhead's path. And notice that because I set the Concavity option to 20%, the base of the arrowhead is indented.

Release your mouse button to complete the line, at which point the stroke around the path appears, giving the line its color.
How to rotate the line
You can rotate the line around its center by clicking and dragging just outside one of the end points. Hold Shift to rotate the line in 15 degree increments:

To rotate the line from an end rather than from its center, click and drag the reference point (which, if you're not seeing it, we turned on earlier in Photoshop's Preferences) to one of the ends.

And then click and drag just outside the opposite end to rotate it.

Finally, the Line Tool shares the same Live Shape properties in the Properties panel as the other shape tools. There are no options for rounding the corners, but you can change the line's color or weight (using the Stroke options), adjust the rotation angle, flip the line vertically or horizontally, and more.

And there we have it! That's the basics of drawing shapes using the geometric shape tools in Photoshop! The one shape tool we didn't cover here is the Custom Shape Tool. But you can learn all about it in my Drawing Custom Shapes in Photoshop tutorial
Check out more of my Photoshop Basics tutorials , and don't forget that all of my tutorials are now available to download as PDFs !
- All Categories
- Custom Shapes
- Styles & Gradients
40 Free Mountains Custom Shapes

Items in set: 40
License: Free for commercial use
Get ready to take your designs to new heights with this stunning set of 40 vector mountain custom shapes! Whether you're working on a logo, poster, or flyer, these simple yet powerful shapes are the perfect way to add a touch of rugged beauty and natural inspiration to your work. With a wide variety of styles to choose from, this set is incredibly versatile, making it perfect for everything from adventure-themed branding to eco-conscious marketing campaigns. Each shape is carefully crafted to capture the majesty and grandeur of the mountains. So why wait? Download this set of free custom shapes today and start exploring the possibilities for yourself! Whether you're an experienced designer or just starting out, these mountain shapes are sure to inspire and delight, giving your work a sense of adventure and excitement that's sure to stand out from the crowd.

Download (100.6 KB)
Premium images:

- WordPress Tutorials
- Graphic Design
- Presentations
- Shopify Knowledge Base
- Theme Collections
The Ultimate Roundup of 2000+ Free Photoshop Custom Shapes
When it comes to custom shapes, I can't stop remembering my drawings from childhood. All kids in the yard had a competition in designing the best shape. We drew ships, cars, people, ornaments, and more to get the right to be called a creativity master, lol. However, today's innovations make things much easier, hence, you can easily enrich any web project with a large number of free Photoshop custom shapes.
By the way, custom shapes were introduced in the 6th Photoshop edition, they allow you do much more with vector graphics than a pen tool. Photoshop custom shapes are very useful, if you do not have an appropriate brush you can use a readymade custom shape preset . Shapes differ from brushes greatly they can be easily scaled to large sizes without loss of quality and sharpness and can be great helpers when editing PSD templates .
Also, if you are up to creating a video with similar shapes, check out this free video editor , a good option for video editing with multiple sticker options and related templates.

In this compilation we've gathered more than two thousands of custom shapes, only the most impressive ones and they can be downloaded for free. When downloading, do not forget to read terms of use according to designer guidelines. Here is a tip on how to upload custom shapes:
- Open your Adobe Photoshop,
- Select Custom Shape Tool on your toolbar (shortcut U ),
- From the Options Bar click the Preset Picker triangle icon ,
- Click the gear icon on the right of Preset Picker Panel ,
- Select Import Shapes .
Once you upload a new custom shape you can change its size, color layer style in a few mouse clicks.
In this roundup you will find the following types of free Photoshop Custom Shapes:
Lines and Flashes
Other shapes, coronavirus shapes.
60 Silhouettes

Silhouettes Megaset

55 Hearts Photoshop & Vector Shapes (CSH)

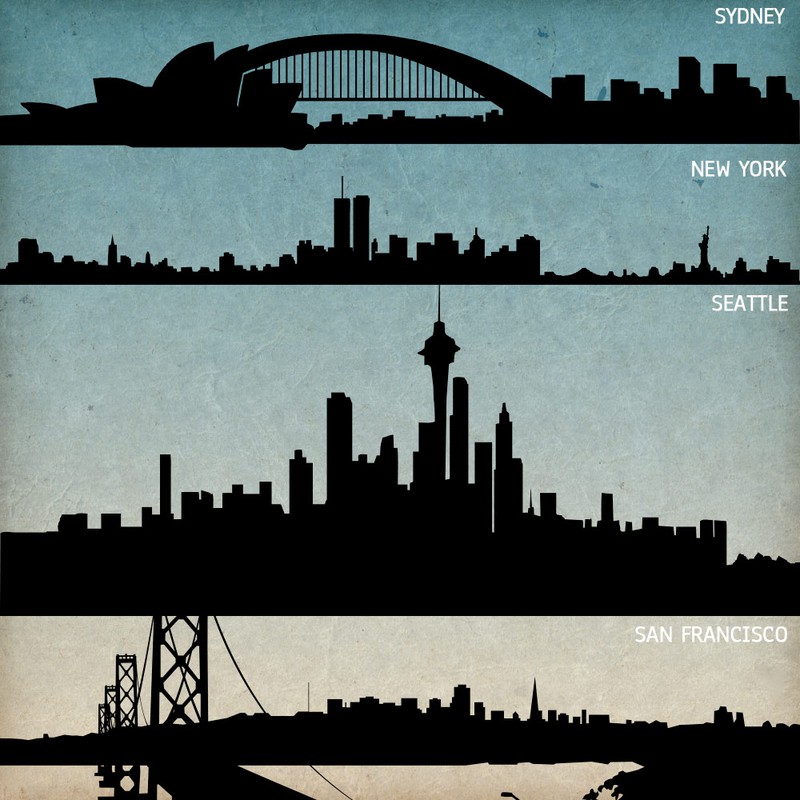
6 City Skylines
Sacred Geometry

30 Sunburst Custom Shapes

Bracket Frames

Racing Flags

Wild Animals Shapes

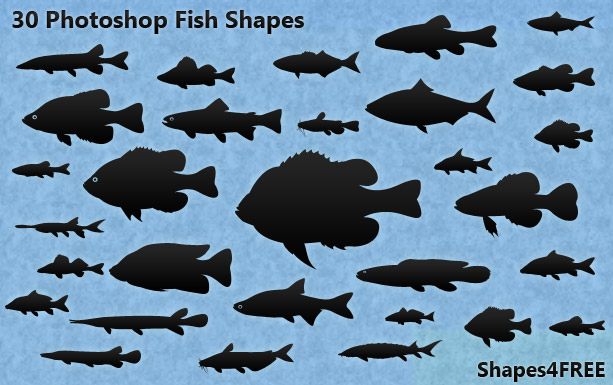
Photoshop Fish Shapes
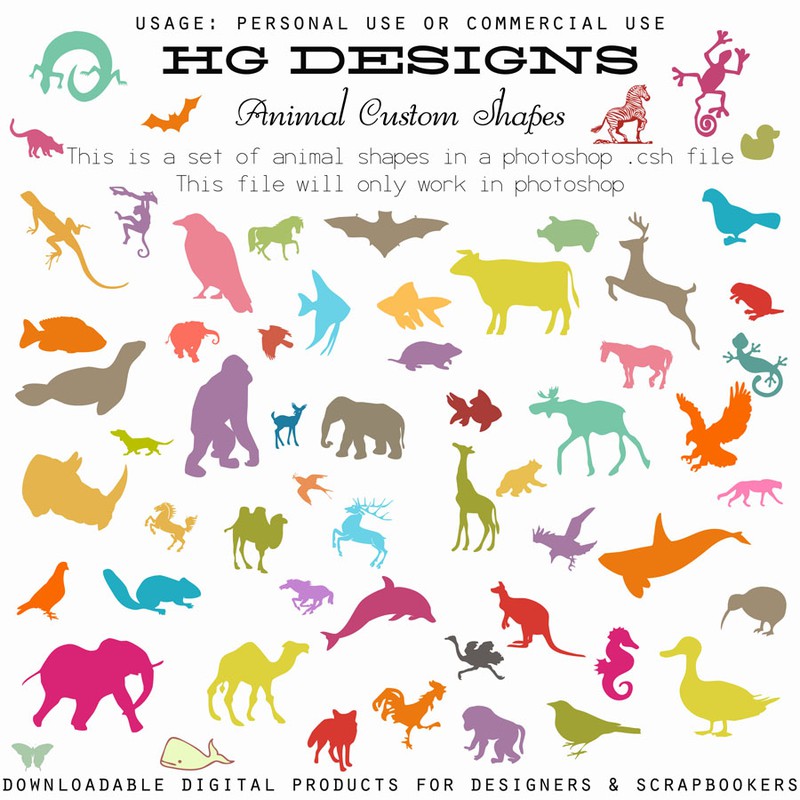
Animal Custom Shapes
Animal Shapes

Assorted Logos

Custom Arrows

Hand Drawn Arrows

Red Faction

Circle Clocks

Media Shapes

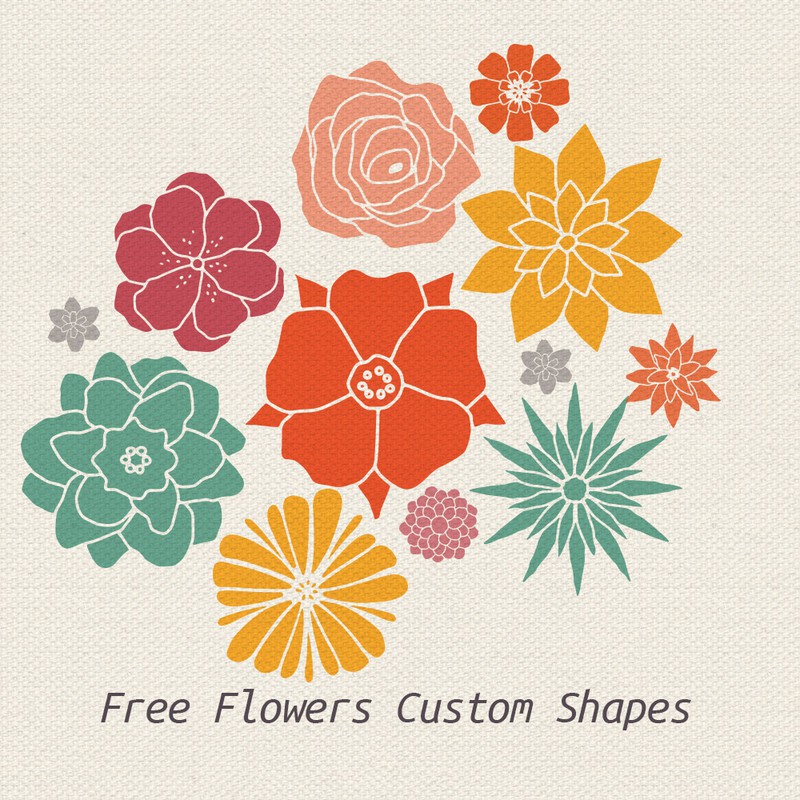
Flower Custom Shapes
Flower Shapes

Floral Banner Shapes

Various Shapes

50-s Custom Shapes

Splat Shapes

Custom Shapes Pack

Email (Envelope) Photoshop Custom Shapes

Free PSD Templates
Audrey mall - shopping center, entertainment store free psd template.

TopSound - Recording Studio Free PSD Template

Tiless - Home Decor Mockup Free PSD Template

Cybemic - eCommerce PSD Template

Telecord - Digital Marketing Multipage Creative Free PSD Template

Recordo - Free Music Studio design PSD Template

Race - Sports Event Creative Multipurpose Free PSD Template

Evolwent - Interior Design Website Mockup Free PSD Template
FoodWine - Food And Beverage Website Design Free PSD Template

How do you like these shapes? Small wonder that now we need some Photoshop skills and a number of worthseeing custom shapes to become a creativity master. Anyway, we should take all advantages of new technologies for composing mind-blowing goods on the web. Do not forget to share this post with your friends to help them replenish their collection of custom shapes and free PSD templates !
Any shape you can think of is used in some design. The more pre-made shapes a designer has – the more options he has for his project. People, cars, animals, plants, artificial objects – literally, everything that surrounds us in everyday life.
Designers are artists and they definitely can draw all the shapes they need manually but that will take time. If the project doesn’t need some original drawings it is much easier and faster to take the shape made by someone else.
Nope, designers create such sets for Adobe Illustrator and other drawing software too. However, Photoshop is the most popular of the drawing software programs, so we focus on it in this article.
130+ Carefully Selected Photoshop Text Effect Tutorials
50 Free Smoke Brushes for Photoshop
Photoshop Grid Templates: Designing Through the Line
100 Amazing Free Photoshop Actions

Writing a blog post or building a micro niche WordPress website is something Alex can do bare-handed. You're welcome to contact him via Telegram , Facebook , or LinkedIn .
Get more to your email
Subscribe to our newsletter and access exclusive content and offers available only to MonsterPost subscribers.

Related Posts
Best digital products award 2023 – honored by templatemonster, winners of monster’s award 2023 announced, bring festive mood to your website with free christmas vectors and psd files, leave a reply cancel reply.
You must be logged in to post a comment.
Recent freebies
2,800+ photoshop custom shapes.
Download photoshop custom shapes - free for personal and commercial use. These vector shapes are available in CSH file format. Enjoy!
We’re sorry, but Freepik doesn’t work properly without JavaScript enabled. FAQ Contact
- Notifications
- Go back Remove
- No notifications to show yet You’ll see useful information here soon. Stay tuned!
- Downloads 0/60 What is this?
- My collections
- My subscription
Find out what’s new on Freepik and get notified about the latest content updates and feature releases.
- Travel background
- Travel banner
- Travel illustration
- Travel post
- Travel poster

- Add to collection
- Save to Pinterest
- travelling poster
- vacation poster
- tourism flyer

- adventure poster
- adventure flyer

- holiday poster

- holiday banner
- trip banner
- tourism banner

- explore the world
- tourism traveling
- holiday travel

- travel design
- travel tourism

- airplane travel
- travel plane

- travel story
- travel sale
- travel instagram

- travel flyer
- vacation flyer

- square banner

- travel luggage

- luggage bag

- travel post
- resort banner

- travel landing page
- travel website

- tours and travels

- trip poster

- travel and tourism

- travel suitcase

- world tourism day
- world travel

- Travel cartoon

- vertical poster
- print templates
- holiday flyer

- travel social media
- tourism post

- holiday post

- vacation banner

- travel template

- travel banner

- adventure banner
Breaking News
Time travel and surveillance state paranoia collide in a witty, thought-provoking romance novel

- Show more sharing options
- Copy Link URL Copied!
Book Review
The Ministry of Time
By Kaliane Bradley Avid Reader Press: 352 pages, $28.99 If you buy books linked on our site, The Times may earn a commission from Bookshop.org , whose fees support independent bookstores.
“People aren’t history,” scoffs Adela, vice secretary of the Ministry, whose work is shrouded in secrecy and subterfuge. This retort comes late in Kaliane Bradley’s debut novel, “The Ministry of Time,” but it’s a telling line. Its dismissal of individual lives reveals the novel’s stakes. If people aren’t history, what is? This is a disturbing statement to come out of the mouth of a high-ranking British bureaucrat. For a book that could also be easily described as witty, sexy escapist fiction, “The Ministry of Time” packs a substantial punch.
Of late, many critically acclaimed books embrace mystery and absurdity in a way that both suspends and expands conventionally held notions of time. Hilary Leichter’s “Terrace Story,” National Book Critics Circle award winner Lorrie Moore’s “I Am Not Homeless If This Is Not My Home,” Ali Smith’s “Companion Piece,” National Book Award winner Justin Torres’ “Blackouts,” and Marie-Helene Bertino’s “Beautyland,” among others, forge poignant, bracing emotional connections. Their playfulness reveals possibilities and perspectives that might be lost in a novel bound by fact-checked 21st century reality. After all, in a world where nothing feels normal, fiction that embraces a disregard for physics and convention mirrors our new upside-down quotidian life.

To this end, Kaliane Bradley proves that it’s possible to address imperialism, the scourge of bureaucracy, cross-cultural conflict and the paranoia inherent in a surveillance state through her utterly entertaining novel. “The Ministry of Time” begins with a sixth-round job interview for an undisclosed position. The unnamed narrator is caught off guard when “the interviewer said my name, which made my thoughts clip. I don’t say my name, not even in my head. She’d said it correctly, which people generally don’t.” For the narrator, who “plateaued” as a “translator-consultant” in the Languages department of the Ministry of Defense, this top-secret job that pays three times her current salary is worth the mystery.
Soon the work is disclosed. The narrator, whose mother immigrated to the United Kingdom from Cambodia, will be working closely with people who might bristle at the term “refugees.” She’s now part of the Ministry of Expatriation working with one of five “expats” scavenged from the past. Confident in her storytelling, Bradley sweeps away the details of how and why time travel exists in the novel.

A disorienting, masterful, shape-shifting novel about multiracial identity
Rachel Khong’s irresistible puzzle of a second novel suggests it is a mistake to think we can force complex, nature-nurture identities in a chosen direction.
April 22, 2024
“All you need to know is that in your near future, the British government developed the means to travel through time but had not yet experimented with doing it.” With that, from the jump, readers and characters alike are asked to take a leap of faith as the narrator assumes the role of a “bridge” between an “expat” and modern life. The larger purpose of her work is elusive to her as well, but, in short, the narrator is tasked to be the roommate of an explorer named Commander Graham Gore who died on a doomed Royal Navy Arctic exhibition in 1847. He’s mannered, understandably jumpy, but also rather sexy for someone who died close to 200 years ago. Will this be an odd sort of meet-cute, or is something more chaotic afoot?
Buckle up, the ride has just begun. Juggling notions of “hereness” (the present) and “thereness” (the past), the novel’s five expats come to grips — or not — with the fact that they have been snatched from the past. The ministry selected individuals who were on the point of death so that their departures from the past would in no way rupture their historic timelines. But how would they affect the present? The bridges take notes, and medical examinations are de rigueur, but these collected data are merely passed along without much in the way of analysis.
The expats and bridges adjust to life together in a largely amusing fashion, sharing lovely homes provided by the ministry, visiting pubs, learning about the very existence of cinema. Music streaming services are a hit, but, generally speaking, the expats find it hard to accept the scale of modern life. Whether this is due to some physical mutation created by the process of time travel or if it’s merely the challenge of cultural displacement for people “loose as dust in narrative time,” true fissures begin to surface.

How many lives can one author live? In new short stories, Amor Towles invites us along for the ride
For fans who worry that a volume comprising six stories and a novella won’t serve up the deeper delights of his novels, prepare for what may be Towles’ best book yet.
March 29, 2024
In a manner that feels wholly unsurprising to the reader, suspicions arise as to the nature of the project. Why exactly is there a need for secrecy and what are the particulars about this ability to time travel that we’re asked to tacitly accept? Tensions also flare between the narrator and another bridge, Simellia, who are the two people of color in this tightly knit circle. The specter of imperialism looms and informs a certain tension between the narrator and Gore. Yet, as a green bureaucrat, happy to rise in the ranks, she confronts Simellia, saying, “You signed up for this job… [knowing], as much as I did, that what we were doing was world-changing. That’s what you wanted, remember? Do you think the world changes by being asked politely? Or do you think there has to be risk?”
But this brash confidence begins to waver. The narrator recognizes, “Every time I gave Graham a book, I was trying to shunt him along a story I’d been telling myself all my life.” Then she notes that the ministry “fed us all poison from a bottle marked ‘prestige’ and we developed a high tolerance for bitterness.” While the book does assume some obvious postures of university level post-colonial theory and language, it moves past these more cliched moments by focusing its attention on the characters. A tight narrative rich with witty banter, cutting observations and interspersed passages from Gore’s doomed expedition also keep the novel taut.
“Maybe I was tired of stories, telling them and hearing them,” muses the narrator. Curiously, while she made languages her profession (hence her tendency to consider that “the great project of Empire was to categorize: owned and owner, coloniser and colonised, evolué and barbarian, mine and yours.”), her antagonistic younger sister became a writer. Finding herself falling in love with Gore, the narrator becomes the story, upending history.
As the story’s momentum builds into that of a spy thriller, Bradley pulls off a rare feat. “The Ministry of Time” is a novel that doesn’t stoop to easy answers and doesn’t devolve into polemic. It’s a smart, gripping work that’s also a feast for the senses. An assassination, moles, questions of identity and violence wreak havoc on our happy lovers and the bubble they create in London. Yet our affection for them is as fresh and thrilling as theirs is for one another, two explorers of a kind, caught in a brilliant discovery. Bradley’s written an edgy, playful and provocative book that’s likely to be the most thought-provoking romance novel of the summer. Check your history: That’s no small feat.
Lauren LeBlanc is a board member of the National Book Critics Circle.
More to Read

Review: Long before Bond, ‘The Ministry of Ungentlemanly Warfare’ kicked off British covert ops
April 18, 2024

Review: Brilliantly acted, HBO’s ‘The Regime’ flirts with satire but lacks political bite
March 2, 2024

A poet’s novel of utopia shows less an ideal than, perhaps, a road map
Feb. 24, 2024
A cure for the common opinion
Get thought-provoking perspectives with our weekly newsletter.
You may occasionally receive promotional content from the Los Angeles Times.
More From the Los Angeles Times

10 books to add to your reading list in May
May 1, 2024

‘Disability Intimacy’ starts a long-overdue conversation
April 26, 2024

In Jane Smiley’s rock ’n’ roll novel, does good sense make good fiction?
April 19, 2024

A mysterious photographer of the Civil War, under a new microscope
- International edition
- Australia edition
- Europe edition

Utah cat found safe in California after sneaking into Amazon return box
Galena survived six days of travel with no food or water before being discovered in relatively good shape by Amazon employee
In the famous Schrödinger’s cat hypothesis, a cat in a box is both alive and dead until someone looks inside – and in the case of one mischievous cat from Utah discovered inside an Amazon return package, it was very much alive.
The cat, Galena, survived being shipped all the way from Lehi, Utah, across the US to California after sneaking into the package. Galena, six, an indoor-only cat, traveled more than 500 miles in a 3-by-3ft shipping container, according to NBC .
Galena endured six days of travel with no food or water, but was discovered in relatively good shape by an Amazon employee.
Her owner, Carrie Clark, first discovered that her beloved companion was missing on 10 April. Family and friends quickly helped her look for the cat, passing around posters.
“Galena, our super shy indoor cat escaped today,” Clark wrote about Galena’s disappearance to a Facebook group for lost pets. “She’s a part of our family and has never been gone this long before.”
A week later, Clark and her husband got an astonishing notification from Galena’s microchip: the cat had been discovered in Los Angeles.
At first she thought the notification was a mistake. But Galena the cat had actually been mailed cross-country.
Brandy Hunter, an Amazon worker at a California warehouse, said co-workers informed that they had found a cat in a returned package, Hunter said on Facebook .
Hunter, who self-described as a “crazy cat lady”, took Galena in for the night, then to a local veterinarian.
When the vet scanned Galena’s microchip the Clarks were instantly notified, and the vet also called the Clarks to confirm Galena was now in their care.
The Clarks hopped on a plane and traveled to California to be reunited. While “much skinnier”, Clark confirmed Galena was “completely unharmed”.
after newsletter promotion
“We’re in awe of all the tender mercies that have taken place. It’s a total miracle!” she posted.
She believes Galena may have gotten into the Amazon box while they were trying to seal the return delivery, she told the New York Times . Because the box already weighed more than 30lb, they did not notice the extra weight.
“She doesn’t meow a lot and she loves boxes, so for her, she was really happy in that moment, I’m sure,” Clark said. “Although I’m sure that wasn’t the case later on.”
Most viewed
Some millennial and Gen X parents are leaving it all behind to spend 6 figures on a family gap year. Here's how they budget and 'worldschool' their kids.
- Some white-collar parents are leaving their jobs to take family gap years.
- They say it's a reprieve from American life and a way to spend time with their children.
- Immersive travel is key as parents prioritize local experiences to teach their kids other ways to live.
Claire Williams and her husband Matt had what you might call a Cadillac problem .
They were trying to figure out how to best use some money they'd saved. They thought about buying another home or adding an extension to their current one, but while spending time with their kids in quarantine, they realized what they needed more than anything was time.
"We thought, how do you buy time?" Claire, 40, told Business Insider. "The answer we came up with was stepping off the hamster wheel out of the daily grind."
So, Matt left his job of 11 years at an architecture and engineering firm and they set off in June 2022 to travel the world for a year with their then 13-,10-, and 7-year-olds to bond, broaden their worldview, and show the kids "that there are many different ways to live, work, and be happy," said Claire, a stay-at-home mom.
From surfing in Sri Lanka to riding camels in the Sahara, they traveled to six continents and 26 countries. They rented out their Bay Area house, cooked a lot while on the road, and meticulously budgeted for each country, estimating that they spent just shy of $100,000 living abroad for a year, excluding flights, insurance, and back-at-home costs like a storage unit.
Family gap years like this are a chance for 30- and 40-something white-collar parents who have enough cash to leave their jobs behind to show their kids a different way of life. It's a sabbatical with a twist — the kids are in tow and they're leaving their schools behind, too. Parents said they typically mix homeschooling on the road with worldschooling , which prioritizes immersive travel as education.
For a certain set, making a non-traditional move like leaving it all behind to take your kids around the world became even more appealing when the pandemic forced us to rethink life's possibilities.
It's sticking around as the world somewhat normalizes; Reddit is littered with threads looking for family gap year advice , which posters can easily find in various blogs . Travel with immediate family is the top travel trend for 2024, per travel network Virtuoso's Luxe Report . Parents said that while traveling for a year makes finding alone time hard and planning on the go is tiring, the family time is priceless and it can be an escape from the stresses of the modern American economy.
'We wanted to enjoy our kids while we were still their favorite people'
The 2020s economic landscape sent some families packing their bags. More than 50 million Americans quit their jobs in 2022 as burnout and work stress soared. Inflation hit a 40-year high , leading to the Federal Reserve trying to fight back by raising interest rates.
At the same time, those who owned real estate and stocks saw a major spike in wealth, and those who worked from home found increased flexibility, both sparking new possibilities in lifestyle.
Jennifer Spatz, founder of Global Family Travels , said she started receiving requests two-and-a-half-years ago in a newly vaccinated world from families looking to travel and educate their children for a year. She now offers a family gap year and extended travel planning service for $80 to $100 an hour. Once itineraries are approved, she works with travel partners to collect commissions on hotels and experiences.
"It could expand into a big business," she said, adding that her family gap year clients typically have disposable income and kids around 8 to 11 years old. Parents agreed that pre-high school years are the prime time, while kids are young enough to still value family time and old enough to absorb new experiences.
"We wanted to enjoy our kids while we were still their favorite people," said Amy Chang, 44. "If we took time off when they get to high school or college, that doesn't do us any good in building relationships with them because they're going to have their own lives by then."
Related stories
Chang and her husband Allen were among the 63% of physicians burned out after working through COVID-19. She said their jobs put them in a privileged position to save money, as did having few student loans, living in a house they could afford on one salary, and driving the same car for 12 years. With a solid financial cushion to cover a year's mortgage and traveling, they left central Massachusetts with their then 9- and 7-year-olds in August 2022 for a road trip around the US to visit national parks before heading off to Asia and Europe.
They rented an RV from a local family, cooked on the go, and stayed in Airbnbs. They stayed under budget, which included their savings plus room for an emergency fund after returning home.
"Even though it was a huge expense, it was worth it…even if it means working a little longer on the tail end of our careers," she said.
World lessons, no classroom required
No family gap year is complete without immersive travel. Parents said they've read "The Iliad" while in Greece, attended worship services from different religions, and taught their kids how to navigate a foreign city — all parts of their desire to provide their kids with real-world schooling.
They typically value regenerative tourism, which involves giving back and positively impacting places as you travel. They want a local's experience rather than a cruise or all-inclusive resort, Spatz said. She often plans trips that involve work and education aligned with the United Nations Sustainable Development Goals , like gender equality or access to clean water. For example, one of her families will be wrapping up their gap year in July in a remote Nepal village, working with a woman who started a school.
"It's learning about the different cultures and history, but taking the kids out of that traditional classroom," she said.
Claire wanted to "get beyond the surface" by participating in Workaway , in which they stayed with local families in exchange for helping them around the home. In Sydney, Australia, they helped a family clean chicken coops on a 300-acre cattle farm. In Santiago, Chile, they helped care for baby quails on a poultry farm. It allowed them to save money and live with locals side-by-side, she said.
Marisa Vitale, 47, has been experiencing different ways people live around the world, often choosing non-touristy areas to understand how the neighborhood works. She and her family lived in a Spanish-intensive homestay in Guatemala, with an indigenous Hmong family in Vietnam, and in an Argentine estancia to learn how the gauchos work the land.
For her 11-year-old-twins, she said has been "a masterclass in history and anthropology," adding that her kids write reports and create art projects for each country they visit.
"Right when they're on the cusp of becoming young adults, what better way to understand who they are and how they feel in their skin than to take them through a wide variety of ways to live," she wrote over email from "deep in the desert" of Jordan, where they were staying in a Bedouin cave. "Empathy, kindness, and patience are the main things I take away from traveling. We wanted our kids to see those in so many different faces and places across the globe."
Her family plans to return to their Los Angeles home, which they rented out, this July. She halted her work as a self-employed photographer and her husband is on a yearlong sabbatical from his 15-year government job. While their monthly budget changes depending on where they're traveling, she estimates that they spend about $10,000 a month between lodging and general expenses, with a small amount of leeway for splurging on an experience.
A year later
A gap year also proves educational for parents. It helped Chang and her husband recalibrate their work lives. She's now doing shift work as an OB-GYN hospitalist — a better work-life balance than her previous work in private practice — and her husband is doing a fellowship to figure out how physicians can use AI.
"He wouldn't have been able to research or think about that at all if he hadn't had the time off," she said.
Re-entry was a little harder for Claire, despite Matt returning to his previous job. She said traveling cost them an average of $261 per day, less per day than their daily life in California. That included food and beverage, lodging, entertainment and experiences, ground transportation and fuel, and miscellaneous living expenses like medicine or SIM cards.
"When you remove your mortgage, gas, insurance — there are so many little things that are gone when you're on the road," she said.
Right now, they're living in Salt Lake City for two years as they contemplate what's next and prepare to launch a podcast about their travels. She hopes to keep the adventure going.
"Our time abroad felt not overwhelmed by consumerism," she said. "In the U.S., everything from highways to shopping to grocery stores is just really big and loud. So much of our gap year was really quiet and authentic and simple."
Watch: Marriott International's Tina Edmundson tells Insider that the travel mindset has changed since the pandemic
- Main content
IMAGES
VIDEO
COMMENTS
Today Only! Get 3 Months of Unlimited Premium Graphics for only $19. Hurry! Ends in 02:04:47. Learn More. 932 Best Travel Shapes Free Brush Downloads from the Brusheezy community. Travel Shapes Free Brushes licensed under creative commons, open source, and more!
2,800+ Photoshop Shapes - Free for Commercial Use. Download photoshop custom shapes in CSH vector file format - free for personal and commercial projects. Coronavirus (COVID-19) Icons Photoshop & Vector Shapes. 24 Ribbons Photoshop Shapes.
With the Custom Shape Tool selected, right-click (Win) / Control-click (Mac) anywhere inside your Photoshop document. You'll see the Shape selection box appear, allowing you to select any of the currently available Custom Shapes. The shape you just created will appear as the very last shape in the selection box.
And because Photoshop shapes are resolution-independent, you can rest assured they'll look good at any size. How do I find shapes in Photoshop? From the toolbar, click and hold the Shape tool icon to see the different shapes you can draw. Your options include the rectangle tool as well as the ellipse, polygon, and line tools — but if you ...
Step 2: Drag the shape into the document. Then to add the shape to your document, simply click and drag the shape's thumbnail from the Shapes panel and drop it onto the canvas. Dragging and dropping the shape from the Shapes panel into the document. Release your mouse button and Photoshop instantly draws the shape.
Follow these quick steps to create shapes in Photoshop: Select a shape tool. From the toolbar, click and hold the Shape tool () group icon to bring up the various shape tool options — Rectangle, Ellipse, Triangle, Polygon, Line, and Custom Shape. Select a tool for the shape you want to draw. Set shape tool options.
The Best Free Photoshop Custom Shapes. You'll find free Photoshop shapes that are silhouettes of people, animals, objects, decorative elements, and much more. Laurels and Calligraphy Shapes. My favorite pack of free custom shapes for Photoshop, this one includes a total of 65 different elements that will prove to be extremely useful for your ...
Find & Download the most popular Travel Shapes PSD on Freepik Free for commercial use High Quality Images Made for Creative Projects
Going to File > New in the Menu Bar. Then in the New Document dialog box, choose the Default Photoshop Size preset and click Create. Creating a new document at the default size. The new document appears, ready for us to draw some shapes. The new Photoshop document.
Learn how to draw custom shapes in Photoshop using the Custom Shape Tool and the Shapes panel. Plus how to load hundreds of missing shapes, how to combine an...
Open an overlay by selecting File> Open. Change the size of the selected overlay to match your main image by choosing Image> Image Size. Copy and paste the overlay into the image by choosing Select> All, then go to Edit> Copy. Switch to your main photo and go to Edit> Paste. Change the Layer mode to the Screen mode.
Find & Download Free Graphic Resources for Travel. 10,172,000+ Vectors, Stock Photos & PSD files. Free for commercial use High Quality Images ... Mockup Baker for Photoshop Customize PSD files based on 3D models AI Figma plugin Generate your own unique AI images directly in Figma Projects ; Flaticon Free customizable icons ...
Find & Download Free Graphic Resources for Travel Shapes. 99,000+ Vectors, Stock Photos & PSD files. Free for commercial use High Quality Images
In this Photoshop Tutorial, I am going to show you how to design a Creative Tour/Travel Poster Design.Kindly take a deep breath, grab your mouse and follow ...
Description: Get ready to take your designs to new heights with this stunning set of 40 vector mountain custom shapes! Whether you're working on a logo, poster, or flyer, these simple yet powerful shapes are the perfect way to add a touch of rugged beauty and natural inspiration to your work. With a wide variety of styles to choose from, this ...
Here is a tip on how to upload custom shapes: Open your Adobe Photoshop, Select Custom Shape Tool on your toolbar (shortcut U ), From the Options Bar click the Preset Picker triangle icon, Click the gear icon on the right of Preset Picker Panel, Select Import Shapes. Once you upload a new custom shape you can change its size, color layer style ...
2,800+ Photoshop Custom Shapes. Download photoshop custom shapes - free for personal and commercial use. These vector shapes are available in CSH file format. Enjoy! Speech Bubbles Photoshop Shapes. 40 Price Tag Photoshop Custom Shapes. 55 Shields Photoshop Custom Shapes. Map Pin Icon Photoshop & Vector Shapes. Vintage Labels Photoshop Shapes.
1. Adobe Photoshop Generative Fill: Crafting Detailed AI Composites. We've tested many AI image generators, and using Photoshop's Generative AI is one of the best ways. Powered by Adobe Firefly, Photoshop gives users a lot of control over what they create with the advanced AI features. Plus, those with standard Photoshop skills can create ...
An icon in the shape of a person's head and shoulders. It often indicates a user profile. ... ask a local for the best restaurants in Athens rather than blindly following travel guides.
The world's highest mountain continues to draw climbers willing to risk their lives as they clamber past frozen corpses on their way to the top.
Photoshop Shapes. Photoshop Shapes (also known as Photoshop Custom Shapes) are pre-made vector based elements that you can install to save yourself time.Feel free to browse and download Photoshop Shapes available or submit your own!
An airport in Japan says it has never lost a piece of luggage in 30 years of operations. Last month, Kansai International Airport, in Osaka, won the Skytrax award for the World's Best Airport for ...
Travel PSD. Images 157.50k Collections 5. ADS. ADS. ADS. Page 1 of 100. Find & Download the most popular Travel PSD on Freepik Free for commercial use High Quality Images Made for Creative Projects.
Confident in her storytelling, Bradley sweeps away the details of how and why time travel exists in the novel. Opinion A disorienting, masterful, shape-shifting novel about multiracial identity
Galena endured six days of travel with no food or water, but was discovered in relatively good shape by an Amazon employee. Her owner, Carrie Clark, first discovered that her beloved companion was ...
Travel with immediate family is the top travel trend for 2024, per travel network Virtuoso's Luxe Report. Parents said that while traveling for a year makes finding alone time hard and planning on ...