- forest river Manuals
- Travel Trailer
- Owner's manual

forest river Travel Trailer Owner's Manual
- page of 56 Go / 56
Table of Contents
- Troubleshooting
Introduction
- Welcome Letter
Customer Information
- Manufacturers' Warranties
- Dealer's Responsibilities
- Customer's Responsibilities
- Reporting Safety Defects
- Warranty/Pre-Delivery (Sample) Forms
- How to Contact Us
- Coach-Net™ Roadside Assistance
Identification and Safety
- Vehicle ID Decals and Plates
- Vehicle Serial Number Label
- Safety Regulations and Propane
- Safety Devices
- Smoke Detector
- Fire Safety
- Tire Safety
Weighing, Loading and Towing
- Cargo Carrying Capacity
- Weight Terminology
- Weighing Your Travel Trailer
- Loading Tips
- Packing for Travel
Leveling Jacks and Slide Room Operation
- Selecting a Campsite
- Campsite Parking
- Leveling Jacks Operation
- Slide Room Operation
Living Quarters
- Prolonged Occupancy
- Condensation and Humidity
- Propane Regulator
- Electrical System Control
- Power Converter/Inverter
- Fuses and Circuit Breakers
- Fresh Water
- Water Center Panel
- Traveling with Water
- Monitor Panel/Command Center
- Sanitization
- Waste Water/Holding Tanks
- Winterization and De-Winterization
- Fresh Water Holding Tanks
- Water System Maintenance and Troubleshooting
- Microwave Oven
- Refrigerator
- Air Conditioner
- Water Heater
- Audio Visual (DVD, Cablebox, Rear Vision System Etc.)
- Converter/Battery Charger
Care and Maintenance
- Windows and Doors
- Frame/Extrusions/Aluminum Surfaces
- Propane System
- Storage Tips
- Heating Pads
- Care and Maintenance Charts
- Effects of Formaldehyde
- Waterpur™ Water Treatment System
- Maintenance Schedule
Advertisement
Quick Links
- 1 Electrical System Control
- 2 Fuses and Circuit Breakers
- 3 Power Converter/Inverter
- Download this manual
Related Manuals for forest river Travel Trailer

Summary of Contents for forest river Travel Trailer
- Page 1 Travel Trailer Owner’s Manual BEGIN THE JOURNEY!
Page 2: Introduction
Page 3: warranty, page 4: table of contents, page 5: customer information, page 6: dealer's responsibilities, page 7: reporting safety defects, page 8: warranty/pre-delivery (sample) forms, page 9: how to contact us, page 10: coach-net™ roadside assistance, page 11: identification and safety, page 12: safety devices, page 13: smoke detector, page 14: fire safety, page 15: tire safety.
- Page 16 IDENTIFICATION AND SAFETY Tire Fundamentals ‘M+S’ or ‘M/S’ indicates that the tire has some mud and snow capability. Most radial tires have these markings; hence, they have some mud and snow capability. NOTE: If it becomes necessary to replace a tire and you feel it is a warranty issue, most tire manufacturers require the D.O.T.
- Page 17 IDENTIFICATION AND SAFETY W ARNING DANGER TIRE TIPS Be sure to use wheel nuts that are compatible with • Make sure all of the lug nuts are secure. Use a the coin in the wheel. Improperly torqued wheel torque wrench. Do not guess. nuts can cause the wheel to separate from the •...
Page 18: Weighing, Loading And Towing
Page 19: weighing your travel trailer, page 20: loading tips, page 21: packing for travel, page 22: leveling jacks and slide room operation, page 23: leveling jacks operation, page 24: slide room operation, page 25: living quarters, page 26: propane, page 27: propane regulator, page 28: electrical system control, page 29: batteries, page 30: power converter/inverter, page 31: volt fuses, page 32: plumbing, page 33: monitor panel/command center, page 34: sanitization, page 35: winterization and de-winterization, page 36: fresh water holding tanks, page 37: water system maintenance and troubleshooting, page 38: appliances.
- Page 39 APPLIANCES • When the burner lights, turn the knob back to the DANGER OFF position. • Depending upon your model, follow the procedure It is not safe to use cooking appliances for comfort for either ‘Match lit’ ignition or ‘Piezo’ ignition. heating.
Page 40: Microwave Oven
Page 41: refrigerator, page 42: heating/cooling, page 43: thermostat.
- Page 44 APPLIANCES Run the chlorinated water throughout the system, open- DANGER ing each faucet one at a time until you smell the chlorine. Do not operate the water system for a couple hours, Do not store or use gasoline or other combustible allowing the chlorine to take care of the problem;...
Page 45: Entertainment/Electrical
Page 46: audio visual (dvd, cablebox, rear vision system etc.), page 47: care and maintenance, page 48: frame/extrusions/aluminum surfaces, page 49: heating pads, page 50: care and maintenance charts, page 51: effects of formaldehyde.
- Page 52 2.5 gallons per minute. This capacity was The WaterPur™ cartridge only with a genuine determined under WQA Standard S-200 Test Conditions WaterPur™ cartridge available from your Forest River and may vary with local water characteristics. Inc. dealer. The cartridge consists of activated carbon particles fused Operational Note: The WaterPur™...
Page 53: Maintenance Schedule
Page 54: appendix a, page 55: index.
- Page 56 Forest River Interactive Mobile Manuals Download your Forest River mobile app or visit our dynamic online manual to enhance your ownership experience. These interactive options provide incredible ease and insight into use, maintenance and enjoyment of your Forest River product.
Rename the bookmark
Delete bookmark, delete from my manuals, upload manual.
The Savvy Campers
How to Winterize a Travel Trailer: The Complete Guide
If you happen to be the proud owner of an RV, then you must know how important it is to prepare it for winter. Winter can be unforgiving on your RV, especially since they are too large to be stored indoors reasonably.
Before you embark on winterizing your RV, your first order of business should be collecting everything you’ll need for the process. Items needed to winterize a travel trailer will include non-toxic RV antifreeze, a water heater bypass kit, silicone sealant, and other necessary items and tools. Below is a systematic, step by step guide on how to properly winterize your RV in time for the prolonged cold season.
Water System
One of the most important parts to winterizing your RV is making sure the water system does not freeze. The whole point of winterizing your RV’s water system is to ensure that no water residue is left to freeze. The process might be a long and cumbersome one, but it’s a necessary one that shouldn’t be ignored. Once you do it once and learn the tricks for your trailer, you will get the hang of it and next year will go by quickly. Follow the steps below if you’d like to start winterizing your RV’s water system but don’t know how to go about it.
- Remove any inline water filters as well as the bypass before completely draining the fresh water holding tank. Do the same for both the gray and black holding tanks.
- Assuming the hot water is off, drain your tank. If not, wait for the hot water in the water heater to cool off before draining.
- Open all hot and cold faucets before draining them using the water pump. Remember to close them all once all the water has been eradicated.
- Bypass your hot water tank by using the onboard bypass kit. If you do not have one installed, you can find one here. If you do not want to bypass your tank, it will require an additional 6 gallons of nontoxic antifreeze.
- Check to see if you have a water pump winterization kit installed from the factory. If not, you can purchase one here. This kit will pull water from a tube instead of your fresh water tank so you can pump antifreeze in. However, if you haven’t installed it in your RV, you can still achieve the bypass by disconnecting the inlet side of the RV’s water pump.
- Dip one end of the transparent pipe which is from your water pump in a gallon of non-toxic antifreeze.
- Start the pump. Doing so will result in pressure building gradually within the entire system.
- Open the faucet furtherest away from your water pump which will slowly fill the pipes with the non-toxic antifreeze.
- Close the faucet when you see the antifreeze come out. Complete this for both hot and cold water.
- Repeat the same process until all the faucets are filled with the non-toxic antifreeze.
- Do the same with the toilet, shower, as well as the outside shower (If your RV has one).
- Switch the water pump off as soon as the water system is filled with the non-toxic antifreeze.
- Release the pressure from the water system by opening the faucet.
- To winterize the city water system, make sure to complete the step above, if not, you will damage a part.
- Take the small screen off the city water connection, then using a screwdriver (or anything long and pointy), push against the valves until the antifreeze comes out of it. You may need someone to turn the pump on to flow the antifreeze.
- Replace the small screen, and your water system will be winterized.
- If you have a black tank flush, you can use an air compressor with this attachment to blow the water out of the valve.
If you aren’t familiar with the winterizing procedure, then asking your mechanic for help would be the right thing to do. The last thing you want is to mess up your RV’s water system because you skipped on a few essential steps. You can also check the RV’s manufacturers manual for instructions on how to properly winterize your RV’s water system. Once your water system has been properly winterized, it’s time to winter-proof other parts of your RV.
If you get antifreeze in your hot water tank, here is an article detailing what you need to do .
Grey and Black Tank
To winterize your grey and black tank, start by dumping them and make sure they are rinsed out. Pour some antifreeze down each drain to evacuate the water in the P traps making sure some goes down into the grey tank, as well as put a half gallon or so down the toilet and your tanks should be winterized.
Slides, Doors, Windows
Your travel trailer won’t be fully winterized without some additional maintenance. Failure to treat your slides, which include your slide seals, doors and window seals, then they might stay shut completely or leak. Use a good quality conditioner on the seals such as our favorite here to spray and wipe on all of your seals on your RV. You will want to use a lubricant on hinges, and any moving parts such as your awning or slide hardware such as the one we recommend here. Apply some grease on the locks to avoid rust shutting them permanently.
UV light can also discolor your interior so you might want to find something to cover all of your windows.
While lubricating your RV, don’t forget to check the rubber gaskets as well. Make sure they aren’t torn or worn out. In case they are, then it would be in your best interest to replace them before winter because, without suitable rubber gaskets, nothing will prevent running water from entering the RV doors and running the interior.
Clean any debris and grime from the windows so your RV will be clean come spring time. Finally, double check your work to make sure everything is well done. If you’re satisfied with what you’ve done, your next order of business will be winter-proofing the RV roof.
Taking care of the RV roof is an essential process to keeping your RV in top shape, therefore, you should go about it with as much attention. Since the RV roof covers a larger surface area than the roof of an average car, you’ll have to take your time to do a great job. You’ll start by washing the roof with a soft brush to remove any debris and dead leaves that may encourage water damage. Using a hose and some car wash or dish soap will do the trick.
Once the roof is clean and dry, you’ll inspect for any scratches and chipped areas, using a roof sealant to seal them off one by one. Check all of the old sealant on any roof penetrations such as vent fans, solar panels, or air conditioners and reseal if there are any gaps or thoughts of water penetration. If your RV has an EPDM rubber roof, then check out for bumps and other forms of irregularities.
If the damage isn’t too extensive, then you might want to reseal and leave it at that. However, if the damage is extensive, then you might want to replace the entire roof. For resealing your RV’s EPDM rubber roof, you’ll typically use a Dicor sealant. When applying the Dicor, it will self level to create a waterproof seal. Avoid using petroleum-based products to clean your EPDM rubber roof since it can cause irreparable damage.
If you choose to use the EPDM sealant, then you’ll start by mixing it in activator before you start coating. Remember to take your time while applying the coat to avoid missing any damaged spots. If your roof has a slit for example from a branch dragging across it, then you might want to use EternaBond seam tape for all your sealing needs. For safety reasons, always make sure you have the right tools and attire on before embarking on winterizing your RV roof.
To winterize travel trailer tires correctly, you need to condition the tires properly to protect them from damage because of the elements. You’ll start by filling the tires to the recommended air pressure. To prevent the tires from deflating completely, you’ll be required to always check them from time to time and filling them up. Failure to do so will only lead to extensive damage to the tires because of the weight of the RV. It would also be a good idea for you to purchase tire covers to keep off UV rays as well as snow.
The right tire covers will protect your RV tires from the extensive damaging UV rays have been known to cause. Once your tires are covered, look for pieces of treated wood and stick them under the tires between the tires and the ground. This way, your tires will be protected from damage as a result of prolonged contact between the tires and frozen ground. The treated wood should have a much larger surface area than the RV tire for it to rest comfortably on it.
Note that leaving your RV tires hanging on a narrow piece of treated wood might lead to eventual damage. The latter is so because your RV’s heavyweight has to be evenly distributed on the full tires or else the pressure will overwhelm the tires. After you’ve conditioned your RV tires for winter with a good conditioner, move on to the next step.
Stabilizing Jacks
You can’t call your RV a fully winterized camper without paying attention to the stabilizing jacks. You’ll start by doing some preliminary checks to ensure that the RV’s stabilizing jacks are in perfect condition. If not, find what the problem is and fix it. If the stabilizing jacks are broken or extensively damaged, you might want to have them replaced before storing your RV for winter. Use grease or a silicone spray to protect the jacks from water damage. If you live near a saltwater body, then spray the stabilizing jacks with silicone spray at least once a week. Doing so will offer maximum protection from rust, which is more prevalent in areas with a high amount of salt in humidity.
If your winterized travel trailer has a generator, then you’ll have to take care of it as well. You’ll begin by changing the generator oil and adding fuel stabilizer to keep the gas in a good condition. Finally, run the generator long enough until the stabilizer has run its course throughout the entire fuel system. In the spring you may want to change the spark plug and you will be good to go.
The batteries provide you power to all of your vital systems while you are off grid, so you will always want to care for them properly. If you live in a cold climate, remove the batteries from the RV and away from the extreme cold. It would help if you did this because batteries tend to freeze pretty quickly, especially during winter and should, therefore, be stored inside the house. Before storing your RV battery, check your fluid levels and add distilled water if they are low. After that, charge it until it’s full and keep them on a battery maintainer for the duration of the winter.
Store your battery on a block of wood to protect it from direct contact with the cold surface or concrete, which will lead to loss of power. Don’t forget to charge the batteries regularly since doing so is the only way to keep the freezing at bay. Lastly, keep the batteries out of the reach of children for reasons we all know.
If you live in a warm climate, you can take these precautions as well, but you could also leave your travel trailer plugged into shore power to keep them topped off.
Electrical System
If your RV is not going to be in use for the long term, then it’s only logical that you should keep the electrical system completely switched off. Unplug all of the cables from the walls of the RV for safety purposes. This would also be a good idea to do some maintenance which should include the replacement of all faulty electrical equipment and tucking away all the exposed electrical wires. Check your smoke and propane detector batteries to make sure they are working and you are done.
The propane tank facilitates all of your heating needs the RV and should, therefore, be prepared for winter as well. Since you won’t be living in the RV throughout the winter, the propane has to be stored properly to avoid wastage. Start by checking the condition of the propane tank. Look out for any dents, scrapes, weakened valve connections, and rust. Make sure you are replacing any tank with extensive damage. Turn your propane tank off and bring it into the garage.
Cleaning the interior of your winterized camper is just as important as cleaning the exterior. Therefore, taking as much time as you need comes highly recommended. Make sure that all the dust, spills and cobwebs (if any) are swept off from your RV. Remove the curtains wash them. Once they are dry, you can keep them in the house until the next time you’d like to take the RV out for a ride. Make sure the RV windows are wiped clean in the inside just like you did from the outside.
Remove all dry-cell batteries from any devices such as the clock or radio. The kitchen cabinet should also be cleaned and aired out. The latter is very important since not doing so will leave tiny drops of food which are likely to attract rodents or insects, or both. The kitchen sink, the bathroom, the toilet, as well as the bedroom, should be cleaned, dusted, and mopped as well. It always a better idea to get back to a clean RV just in time for spring than having to clean it all over again.
If you have any appliances such as a fridge, microwave, and stove in your RV, make sure you’ve cleaned them thoroughly. Use a prop to hold the doors open. Leaving the doors open will allow for air to circulate freely.
Getting rid of all the food is one significant step of you should never skip whenever you’re winterizing your RV for the incoming cold season. The freezing temperatures can cause some food will either rot or burst, attracting unwanted animals and insects. Some of these food may include water, soda cans, beer cans, soup, honey, and jam. To avoid wastage, you can collect everything and store them in your house instead of discarding them. If a soup can or soda freezes and bursts, trust me, you are in for some cleanup come spring time.
Once the food is out, clean the food cabinets as well as the fridge (as directed above) to finish off any scent that may end up attracting rodents and insects into your RV during winter. Get rid of the trash and clean the dustbin before either returning it into your winterized RV or your house for storage.
You’ll begin by washing your RV’s exterior, removing all the dust, grime, and debris that may have stuck on the chassis. Once the exterior has dried off completely, you’ll start checking for damage on the frame. If you find any patches or cracks on the paint, repair them according to your manufacturer instructions. Once all the cracks on the body have been sealed off, the next step will be waxing. The purpose of waxing is to protect the paint from discoloring or fading that’ll come as a result of regular use or prolonged storage.
The waxing process should be carried out just as you would wax a car. We use this wax as it comes highly recommended for this kind of job. Lastly, avoid waxing the awning cap pieces, the propane covers, the roof, and of course, the battery box as they will take on the white color of the wax and be hard to get off. You can use painters tape to cover any areas you don’t want to mess up.
You’ll start by removing all the beddings from your RV since leaving them in there throughout winter will only make the environment inside your RV stuffy. Once all of the blankets, bed sheets, and pillows have been washed and air out, fold them neatly and stash them in the house. Some people even take their RV mattress and store it inside.
To properly clean your awning, you’ll start by hosing it down. This will get rid of any dust or debris that may have stuck on the canopy by chance. Hosing your awning down is also the most effective way of getting rid of mold formations, especially if you’re in the habit of rolling your awning while wet. After your clean awning has completely dried, you can condition it to make it last longer. Finish things off by applying 303-protectant over the entire surface of your awning.
Moisture Control
Moisture sometimes has more than enough ways to seeping through the RV, especially during winter. Therefore, learning how to keep the moisture from damaging your RV will end up saving you much struggle. First, you’ll be better off finding ways of keeping your RV well ventilated throughout the storage period. That’s the whole idea behind the use of a breathable cover which allows air to circulate freely, whether in and out of your RV.
The ordinary moisture absorbing crystals are quite sufficient when it comes to keeping the humidity levels inside your RV at the bare minimum. If moisture absorbing crystals aren’t appealing to you, feel free to purchase the DampRid Moisture Absorber or even better, if you leave your RV plugged in, an Electric Dehumidifier.
Once your RV has been fully winterized, the final piece of the puzzle will be covering it appropriately. Find a cover large enough to wrap the entire RV; from the roof, the sides to the tires. Find the right cover for your RV, that’s if you haven’t already. The best RV covers might be steeply priced. However, if you were to calculate the damage you’d have to incur repairing your RV if you don’t cover it, then spending that extra money getting the right cover would be the cheaper option.
Winterizing your RV is without a doubt a long and tedious process, but an important one nonetheless. Therefore, always to take your time and try to enjoy it as much as you can. If its too much work for you, then don’t hesitate to call in a professional to help you out.
Be the first to be notified about FREE tips, hints, coupon codes, and email-exclusive information. All for FREE!
Related Posts:

Similar Posts

What is the Best Type of RV Roof on the Market?
One of the things that RV owners are most concerned about is their RV roof. Chances are that you have put a lot of thought into what is the best type of RV roof for you. This is because the roof plays a crucial role in contributing to the longevity, leakproof, and comfort that you…

Are Travel Trailer Warranties Transferable?
Owning a travel trailer is a great addition to any family as it can take you on endless adventures that will help you create plenty of memories. No matter what destination you are heading to next, making sure your rig is covered will help you be confident driving down the road without worrying about high…

When to Winterize a Travel Trailer
If you have ever owned or considered purchasing a travel trailer, you know how costly of an investment it is. Unless you live in a warm climate, you will need to appropriately winterize your travel trailer. If you choose not to winterize your travel trailer, you will likely incur extreme costs in repairs. When do…

Fiberglass vs Aluminum Travel Trailers, What is Better?
There are two main types of siding that you will have to choose from when shopping for a travel trailer, fiberglass or aluminum. Both have benefits and weaknesses, and each make up about half the market of recreational vehicles. What is the difference between Fiberglass and Aluminum sided Travel Trailers, and what is better? In…

Why Does My RV Water Pump Pulsate When Not in Use and How to Fix It?
When it comes to your RV, there are plenty of inconvenient and annoying things that can happen. From flat tires and power surges to not having proper sway control or weight distribution, RVing is a complicated endeavor. However, one of the more troubling and annoying issues is having a water pump that’s pulsating, even when…

How long does it take for RV pipes to freeze?
The problem of frozen pipes is one of the biggest issues with winter camping. The rate at which RV pipes will freeze varies on the temperature and speed of temperature change. How long does it take for RV pipes to freeze? In general, the temperature has to dip below freezing (32 F) for approximately 24…
Join our Newsletter to stay up to date on the latest RV topics and receive our FREE RV Inspection Cheat Sheet Today. Use this tool to inspect new or used campers you are looking at purchasing.
No thanks, I’m not interested!

How to Winterize Forest River Shamrock & Roo Camper w Photos
By: Author Ben Esman
Posted on Last updated: January 12, 2024
Categories Camping & RVs

Share this post:
In this post I included photos and a YouTube video in which I decided to create a how to for the 2016 (and a few years surrounding it) Shamrock or Roo by Forest River on how to winterize the hybrid camper.
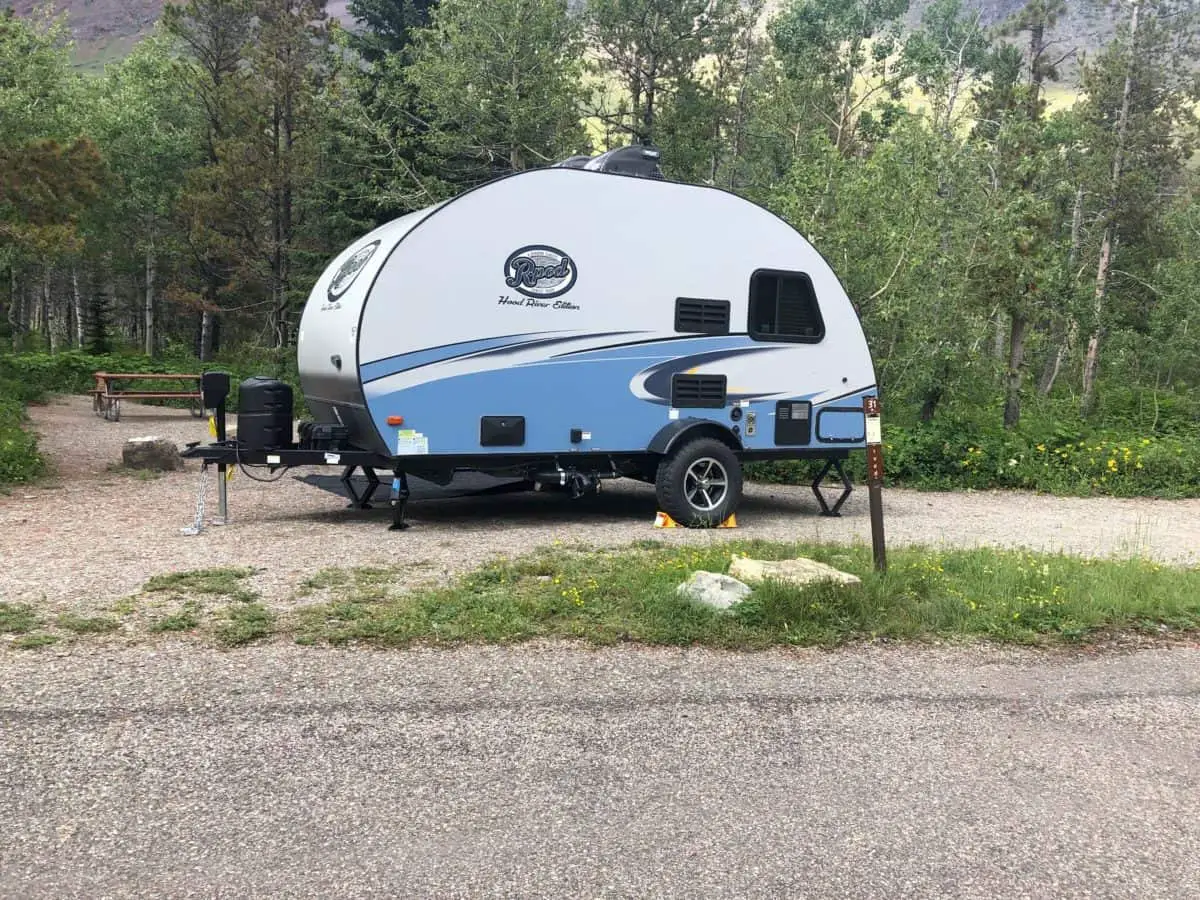
This hybrid model camper is a 23IKSS Shamrock by Forest River, but others are very similar if not identical in which the only differences are the color scheme.
The Winterization Process for a 2016 Shamrock / Roo Camper

Start out with a 1 1/16″ socket and remove the anode so the water heater can drain.

As the anode is removed you will start seeing water flow out from the hot water heaters tank.

To speed up the draining process and ensure there is not any water in the water heater with an air lock, open the pressure valve. This is done by lifting the pressure relief valve in which water will gush out much faster.

While the hot water tank is draining it is a good time to empty your water filter. To do this, open the back compartment and find it with in. Simply twist it counterclockwise / left and unscrew it.

Dump the water out and simply screw it back into place snugging it up. Further in winterizing your camper you will notice that this will be filled with pink antifreeze protecting it for the winter.

At this point the water heater tank should be pretty much empty. Close the pressure relief valve.
You can leave the anode out and just let it sit on the bottom throughout winter which will allow moisture to drain freely.

The water heater has been winterized for this part of the camper. It is safe to close the compartment back up.

Now it is time to get on to the rest of the camper. Start out by opening the bypass valve. This valve should be parallel to the pex pipes.

To prevent the hot water tank from filling again turn off the cold water supply feeding the hot water tank. The valve should be perpendicular to the hose.

Do the same for the hot water line.

One last step prior to moving on to getting some anti-freeze flowing. We must turn one more valve which prevents the fresh water tank from filling with anti-freeze. This is located right by the pump on the left-hand side.

Next you will need to find your low point drains. On this particular model there is 2, a hot water and a cold water low point drain.
The location is labeled above your power connection, so you know where to look under the camper for it.

On the Shamrock’s and Roo’s, you will see a blue (cold) and a red (hot) water line stubbed through the floorboard and capped right above your sewer drain valves. Go inside and open both the hot and cold water on kitchen sink.

This will allow for the pipes to drain. Once complete, unscrew both the hot water and cold water caps on the low point drains.

Allow the water to drain in which you can put the caps back on the camper and turn the kitchen faucets back off.

Grab your short 3-4 foot hose and connect it to the anti-freeze intake outlet.

The other end goes in the anti freeze in which you’ll want the hose to be at the bottom of the anti freeze container, so it doesn’t suck any air.

From here, we are good to turn the water pump on inside the camper. This will begin to suck the antifreeze into the lines in which you will notice quite a bit of it getting used up fairly quickly. This is because the water filter will be filling with the antifreeze.

Now that everything is pressurized it is time to start pumping anti freeze through the camper’s water lines. In doing this, pay attention to the anti-freeze container making sure you do not run out. You will need to swap this as needed. Don’t let it run empty as the pump can burn itself out.
Once you are sure you have enough anti-freeze, simply turn on the cold water in the kitchen and let it run until you see pink and then turn it back off.

Do the same thing for the hot water.

Now it is time to move along into the bathroom. Repeat this process, turn the cold on until you see pink and then turn it back off.

Same thing for the hot water.

Now, move along to the shower. Repeat this process by turning on the cold water until you see pink and then the hot water.

The toilet is up next. Simply flush until you get pink surrounding the bowl.

Once last stop and that is the exterior shower in which you are hopefully getting the hang of it. Turn the cold water on until you see pink.

Now the hot water.

At this point, everything is set except for the city water connection and the traps. To confirm you are good on the city water connection, simply pull the screen out.

Press the valve in so that it sprays water. Do this until you see pink and it is all set.
How to Winterize the Shamrock / Roo Campers Traps

To do this, you are simply dumping 1-2 cups of antifreeze down each drain to ensure the water in the traps does not freeze. Start out on the left side of the kitchen sink.

Followed by the right side.

Move along to the bathroom sink.

Followed by the shower.

Lastly, I also like to add some to the black tank, so I dump some right down the toilet.

This concludes winterizing the plumbing system of your Forest Rivers Shamrock / Roo Hybrid camper! You will notice that the water filter is filled with anti-freeze in which you are all set to go until the spring.
I also recommend disconnecting the battery, bringing it inside and putting it on a trickle charger to help prolong its life (in which you do not want to store the battery on the concrete).
Stay warm until the spring and happy camping!

How to Winterize Forest River Shamrock & Roo Camper
How to winterize a 2016 Forest River Shamrock & Roo camper. This specific model is the 23IKSS, but most models and years around 2016 are all very similar if not the same. It is that sad time of year again in which the camper must be put up for the winter!
- 3 Gallons - RV Antifreeze
- 3-4' Garden Hose
- 1 1/16" Socket Wrench
Instructions
- Start out by taking the 1 1/16" socket wrench and remove the anode from the water heater. The anode can be stored in the compartment over winter. Open the pressure relief valve by lifting it up in which the water will begin to gush out.
- While the water heater is draining, go into the rear compartment of the camper and remove the water filter. To do this simply turn it in a counter clockwise / left direction. Once removed, dump it and reinstall it.
- The hot water heater tank should be about emptied in which the pressure relief valve can be put back to normal and the cover can be reinstalled (leave the anode out so no moisture is trapped with in the tank)
- Find the hot water heater bypass valve located in the rear compartment of the camper and turn it. Once bypassed, also turn the cold and hot water valves so that the antifreeze can't enter the hot water heaters tank.
- There is one more valve that needs to be closed and that is the supply to the fresh water tank. This is located to the left of the water pump.
- Turn on the kitchen's hot and cold water faucet so there isn't an air lock in the lines. Locate the low point drain in which it should be under your camper right above your sewer line. Remove both caps, the hot and cold, and let it drain. Once drained, place the caps back on (don't forget to turn the hot and cold water off on the faucet kitchen).
- Connect the antifreeze hose to the antifreeze intake on the camper and insert the other end into the antifreeze. Ensure the hose reaches the bottom so it doesn't suck any air. Once complete, go in the camper and turn on the water pump. This will immediately deplete quite a bit of antifreeze due to the water filter being emptied.
- Keep an eye on the antifreeze so you don't run out (swap gallons as necessary).
- From here proceed to the kitchen sink in which you will want to run the cold water until you see pink coming out. This is followed by the hot water.
- Do the same in the bathroom sink and shower.
- Press the toilet flush pedal until you see pink swirling around the bowl.
- Once last thing to hit is the exterior shower in which you'll want to run both the hot and cold water until you see pink. Once complete, the water pump can be turned off.
- Once last cautionary step that needs to be taken is the drain traps. Take about a cup or 2 of antifreeze and dump it down the left side of the kitchen sink, right side of the kitchen sink, bathroom sink, shower drain & toilet to assist the empty black tank from freezing.
Sometimes the pink antifreeze can be hard to get off in the spring, so it is recommended to wipe it clean with paper towels to avoid the cleaning headache.

Ben has a bachelor’s degree in construction engineering. When not constructing or remodeling X-Ray Rooms, Cardiovascular Labs, and Pharmacies, you can find him at home with wife and two daughters. Outside of family, He loves grilling and barbequing on his Big Green Egg and Blackstone Griddle, as well as working on projects around the house.
-- If you want more backyard tips including recipes, how-tos and more, make sure you subscribe to my youtube channel
I accept the Privacy Policy
Wednesday 28th of September 2022
Thank you so much for doing this! I just bought a 2015 Flagstaff Shamrock 233S and I don't know what I'm doing! lol. This is very helpful.
Friday 30th of September 2022
No problem. Glad I could help!
Saturday 21st of August 2021
Very helpful, thank you!
No problem. Enjoy the fall camping season that is somehow already almost here!
Your privacy is important to us. This website uses cookies to enhance user experience and to analyze performance and traffic on our website. By using this website, you acknowledge the real-time collection, storage, use, and disclosure of information on your device or provided by you (such as mouse movements and clicks). We may disclose such information about your use of our website with our social media, advertising and analytics partners. Visit our Privacy Policy and California Privacy Disclosure for more information on such sharing.
- Owner Login
- Dealer Login
- Toy Haulers
- Fifth Wheels
- Travel Trailers
- Destination Trailers
- Tent Campers
Helpful Tools
- Find A Dealer
- RV Definitions
- Our Company
- Owners Page
- Forest River Corporate Home
- Privacy Policy
- Terms of Use
- Accessibility
- Forest River Apparel
travel trailers
Home > travel trailers
Filter Results
Request a quote, request a quote for, get update alerts, get update alerts for, alert sections.
- Specifications

Alpha Wolf Touring Edition

Campsite Reserve

Cherokee Black Label

Cherokee Grey Wolf

Cherokee Wolf Pack
Cherokee Wolf Pack Gold Series

Cherokee Wolf Pup

Flagstaff Classic Travel Trailers

Flagstaff E-Pro

Flagstaff Micro Lite

Flagstaff Shamrock

Flagstaff Super Lite Travel Trailers

Grand Surveyor

No Boundaries

Rockwood Geo Pro

Rockwood Mini Lite

Rockwood Roo

Rockwood Signature Travel Trailers

Rockwood Ultra Lite Travel Trailers

Salem Cruise Lite

Salem Hemisphere Travel Trailers

Surveyor Legend

Vengeance Rogue SUT

Viking 9000 Series & 12000 Series

Viking Travel Trailers

Wildcat Travel Trailers

Wildwood FSX

Wildwood Heritage Glen Travel Trailers

Wildwood X-Lite

Work and Play

XLR Hyperlite
Please select your region.
Alpha Wolf has floorplans and standard features designed for the area where they are sold. Please select your region from the map below.
Alpha Wolf Touring Edition has floorplans and standard features designed for the area where they are sold. Please select your region from the map below.
Aurora has floorplans and standard features designed for the area where they are sold. Please select your region from the map below.
Campsite Reserve has floorplans and standard features designed for the area where they are sold. Please select your region from the map below.
Cherokee has floorplans and standard features designed for the area where they are sold. Please select your region from the map below.
Cherokee Black Label has floorplans and standard features designed for the area where they are sold. Please select your region from the map below.
Cherokee Grey Wolf has floorplans and standard features designed for the area where they are sold. Please select your region from the map below.
Cherokee Wolf Pack has floorplans and standard features designed for the area where they are sold. Please select your region from the map below.
Cherokee Wolf Pack Gold Series has floorplans and standard features designed for the area where they are sold. Please select your region from the map below.
Cherokee Wolf Pup has floorplans and standard features designed for the area where they are sold. Please select your region from the map below.
Evo has floorplans and standard features designed for the area where they are sold. Please select your region from the map below.

Evo Northwest has floorplans and standard features designed for the area where they are sold. Please select your region from the map below.
Evo Southwest has floorplans and standard features designed for the area where they are sold. Please select your region from the map below.
Flagstaff Classic Travel Trailers has floorplans and standard features designed for the area where they are sold. Please select your region from the map below.
Flagstaff E-Pro has floorplans and standard features designed for the area where they are sold. Please select your region from the map below.
Flagstaff Micro Lite has floorplans and standard features designed for the area where they are sold. Please select your region from the map below.
Flagstaff Shamrock has floorplans and standard features designed for the area where they are sold. Please select your region from the map below.
Flagstaff Super Lite Travel Trailers has floorplans and standard features designed for the area where they are sold. Please select your region from the map below.
Grand Surveyor has floorplans and standard features designed for the area where they are sold. Please select your region from the map below.
Ibex has floorplans and standard features designed for the area where they are sold. Please select your region from the map below.
Nightfall has floorplans and standard features designed for the area where they are sold. Please select your region from the map below.
No Boundaries has floorplans and standard features designed for the area where they are sold. Please select your region from the map below.
Ozark has floorplans and standard features designed for the area where they are sold. Please select your region from the map below.
Rockwood Geo Pro has floorplans and standard features designed for the area where they are sold. Please select your region from the map below.
Rockwood Mini Lite has floorplans and standard features designed for the area where they are sold. Please select your region from the map below.
Rockwood Roo has floorplans and standard features designed for the area where they are sold. Please select your region from the map below.
Rockwood Signature Travel Trailers has floorplans and standard features designed for the area where they are sold. Please select your region from the map below.
Rockwood Ultra Lite Travel Trailers has floorplans and standard features designed for the area where they are sold. Please select your region from the map below.
r-pod has floorplans and standard features designed for the area where they are sold. Please select your region from the map below.

r-pod West Coast has floorplans and standard features designed for the area where they are sold. Please select your region from the map below.
Salem has floorplans and standard features designed for the area where they are sold. Please select your region from the map below.

Salem Cruise Lite has floorplans and standard features designed for the area where they are sold. Please select your region from the map below.
Salem Cruise Lite Northwest has floorplans and standard features designed for the area where they are sold. Please select your region from the map below.
Salem Cruise Lite Southwest has floorplans and standard features designed for the area where they are sold. Please select your region from the map below.
Salem FSX has floorplans and standard features designed for the area where they are sold. Please select your region from the map below.
Salem FSX Northwest has floorplans and standard features designed for the area where they are sold. Please select your region from the map below.
Salem FSX Southwest has floorplans and standard features designed for the area where they are sold. Please select your region from the map below.
Salem Hemisphere Travel Trailers has floorplans and standard features designed for the area where they are sold. Please select your region from the map below.
Salem Northwest has floorplans and standard features designed for the area where they are sold. Please select your region from the map below.
Salem Southwest has floorplans and standard features designed for the area where they are sold. Please select your region from the map below.
Sandstorm has floorplans and standard features designed for the area where they are sold. Please select your region from the map below.
Shockwave has floorplans and standard features designed for the area where they are sold. Please select your region from the map below.
Stealth has floorplans and standard features designed for the area where they are sold. Please select your region from the map below.
Surveyor Legend has floorplans and standard features designed for the area where they are sold. Please select your region from the map below.
Vengeance Rogue SUT has floorplans and standard features designed for the area where they are sold. Please select your region from the map below.
Vibe has floorplans and standard features designed for the area where they are sold. Please select your region from the map below.

Vibe West has floorplans and standard features designed for the area where they are sold. Please select your region from the map below.
Viking 9000 Series & 12000 Series has floorplans and standard features designed for the area where they are sold. Please select your region from the map below.
Viking Travel Trailers has floorplans and standard features designed for the area where they are sold. Please select your region from the map below.
Wildcat Travel Trailers has floorplans and standard features designed for the area where they are sold. Please select your region from the map below.

Wildwood has floorplans and standard features designed for the area where they are sold. Please select your region from the map below.
Wildwood FSX has floorplans and standard features designed for the area where they are sold. Please select your region from the map below.
Wildwood FSX Northwest has floorplans and standard features designed for the area where they are sold. Please select your region from the map below.
Wildwood FSX Southwest has floorplans and standard features designed for the area where they are sold. Please select your region from the map below.
Wildwood Heritage Glen Travel Trailers has floorplans and standard features designed for the area where they are sold. Please select your region from the map below.
Wildwood Northwest has floorplans and standard features designed for the area where they are sold. Please select your region from the map below.
Wildwood Southwest has floorplans and standard features designed for the area where they are sold. Please select your region from the map below.
Wildwood X-Lite has floorplans and standard features designed for the area where they are sold. Please select your region from the map below.
Wildwood X-Lite Northwest has floorplans and standard features designed for the area where they are sold. Please select your region from the map below.
Wildwood X-Lite Southwest has floorplans and standard features designed for the area where they are sold. Please select your region from the map below.
Work and Play has floorplans and standard features designed for the area where they are sold. Please select your region from the map below.
XLR Boost has floorplans and standard features designed for the area where they are sold. Please select your region from the map below.
XLR Hyperlite has floorplans and standard features designed for the area where they are sold. Please select your region from the map below.

Camper Outdoor
All about RVs & Campers
How to Winterize a Coachmen Freedom Express
As winter approaches, many RVers begin to think about how they should winterize their campers, especially when is a small travel trailer. If you own a Coachmen Freedom there are some specific things you need to do to make sure your travel trailer is ready for the cold weather, whether you are going to use it for traveling or living or just store it during winter. In this article, learn How to Winterize a Coachmen Freedom Express, Express Ultra Lite, etc., How to Store a Coachmen Freedom Express travel trailer During Winter, Winterization for Travel or Live In, and De-winterization. Also, if you are reading this and you need to winterize a Coachmen Catalina Camper, a Coachmen Viking, a Coachmen Clipper, Spirit, or an Apex travel trailer, you may want to continue reading this article. I believe you will find this information and the step-by-step for winterizing your Coachmen travel trailer very helpful.
Table of Contents
Do You Have to Winterize a Coachmen Freedom Express?
What if you don’t plan to use your Coachmen Freedom Express travel trailer during winter? Do you have to winterize a Coachmen Freedom Express if you just going to store it? Yes. Whether you plan on using your Coachmen Freedom Express or not, the water systems must be fully winterized with RV antifreeze to protect your investment and prevent burst pipes . We summarize the activities you should do to properly store the trailer during winter and to prepare it for the winter getaway.
Also, if you plan to winterize your Coachmen Freedom Express for travel or live in , even if the travel trailer hasn’t a furnace, proper insulation will keep the interior heated for the most challenging freezing temperatures , providing comfort and relaxation for maximum enjoyment of your travel trailer during the coldest season . One of the most frequent situations during winter is “the water pump is not turned on or operating properly”. Often the reason is that the water is frozen in the plumbing system because the Coachmen travel trailer water system was not properly winterized. A furnace is not enough to winterize the plumbing system.
So, the great advantage of a travel trailer, moreover if it is a small camper, like a Coachmen Clipper, is that it will be easy to stay warm .
Let’s see how to insulate, stay warm and winterize a Coachmen Freedom Express travel trailer.
Prevent Pipes and Pumps Damage During RV Winter Storage
For detailed winterizing procedures, consult the Coachmen’s manual (manual for owners). This is a brief step-by-step for winterization using the SHURFLO by-pass pump of many Coachmen travel trailers.
If the water in the system is allowed to freeze, the piping and pump may suffer significant harm. This kind of failure voids the warranty. The pump should be fully drained before doing the following since this provides the best protection against damage:
First, empty the water tank. If the tank lacks a drain valve, open all taps and let the pump run until the tank is completely empty.
Then, allow the pump to clear the water from the pipes by opening all of the taps (including the lowest valve or drain), and then switch the pump OFF.
Next, disconnect the piping at the pump’s inlet/outlet ports using a pan to capture any leftover water.
Switch on the pump and let it run until the water drains. Once the piping has been cleared, turn OFF the pump’s power. Never reattach the pump’s piping. Make a note that the plumbing is unplugged at the tank filling as a reminder.
Finally, to prevent any harm, all faucets must be left open. To prevent p-traps and toilet seals, you can pour potable antifreeze down drains and toilets. Before putting the plumbing back into operation, clean the system.
How to Store a Coachmen Freedom Express During Winter
If you are not going to use your Coachmen Freedom Express During Winter and want to keep it safe from bursting, you will need to winterize. Therefore, you will need to winterize your Coachmen travel trailer to store it during winter .
Here is this checklist to properly Store a Coachmen Trailer During Winter. Let’s see How to Winterize a Coachmen Freedom Express travel trailer for winter storage.
- Start by thoroughly cleaning both the inside and outside of your camper. Any dirt, dust, or debris that can create issues throughout the winter will be removed as a result of this.
- Empty the tank and turn off the electricity if you have an electric water heater.
- Shut off the gas if your water heater is gas.
- After that, you must flush the lines and empty all the freshwater tanks.
- After the freshwater tanks are empty, you must add RV antifreeze to them. Therefore, empty the fresh water tank and fill the tanks with RV antifreeze. This will shield your plumbing from the elements throughout the winter.
- The grey water tank is the next stop, so move over. You must totally empty it before adding a couple of gallons of RV antifreeze. Add RV antifreeze to the holding tank after flushing the toilet.
- Disconnect the water lines from the faucets, then fill them with RV antifreeze.
- Remember to prepare your furnace for the winter. The owner’s handbook that came with your vehicle should include detailed instructions on how to accomplish this.
- Winterize the refrigerator by removing the propane or cutting off the power.
- Disconnect the water lines from the faucets. The RV antifreeze should flow through them.
- Inspect the RV roof and patch any cracks or holes after adding the antifreeze to the plumbing system. Examine the roof and, if necessary, use RV roof sealant to repair any cracks. Additionally, check for leaks in the RV refrigerator roof vent cover (leaks repair guide) . This will lessen the chance of water damage to your Coachmen travel trailer as a result of leaks.
- Disconnect the battery or batteries and keep them at room temperature, dry, aired, and away from moisture. Before putting your deep-cycle RV batteries away, check their condition and give them a thorough recharge. Even though it’s not winter, always completely charge your batteries before storing them (see this guide to learn more about recharging your deep-cycle RV batteries ) . It is highly advised to recharge your stored batteries at least once every two to three months if stored at temperatures over 85°F (30°C), and more regularly if stored in cold conditions, even though a good deep cycle battery may be stored for up to nine months without a recharge.
- Checking the condition of the tires is an additional winterizing duty for your camper. Tire covers may be used to shield the tires of your camper from the elements. To reduce the weight on the tires, it’s also a good idea to put the camper on blocks. So, if necessary, think about employing RV leveling blocks .
- Cover your trailer’s top with a sturdy tarp. This will assist in shielding it from snow and ice. Put a tarp or shrink wrap over the air conditioner to protect it.
- Empty the refrigerator and freezer of any perishable food in your camper. To deter mice from entering your camper, make sure it is tidy and food-free.
- Install moisture collectors to stop mold from forming inside your camper or the inside from stinking due to humidity. These reasonably priced silica-gel-based moisture collectors will prevent condensation from building up within the camper, eliminating unpleasant odors and furniture damage. Read more about How to Prevent Mold in RV During Storage
- Ensure that all windows and doors are tightly sealed.
- Use a tarp or shrink wrap to cover the travel trailer.
- If at all possible, keep the camper in a dry, safe location.
By following these tips, you can winterize your Coachmen Freedom Express and be prepared for the cold weather.
How to Winterize a Coachmen Freedom Express travel trailer for Using
The water system must be winterized if you leave your recreational vehicle in an unheated location throughout the winter. The parts of the water system will be harmed if the necessary winterization procedures are not carried out.
Remember that any water storage device, such as a washing machine, dishwasher, refrigerator with an ice maker, or other, has to be winterized. The instructions should be in the product’s owner’s manual. The antifreeze method is suggested if no instructions are supplied for winterizing the appliance.
You must winterize the plumbing if you intend to use your Coachmen Freedom Express travel trailer in the cold months. To prevent the pipes from freezing, apply non-toxic RV antifreeze to the water system. Additionally, use space heaters. The freshwater tank should also be completely drained to avoid the water freezing and expanding, which might harm the tank.
If you own a small Coachmen travel trailer and want to be ready for winter, there are some things you need to do to winterize it. Here are some tips on winterizing a Coachmen Freedom Express for winter .
Let’s see How to Winterize a Coachmen Freedom Express travel trailer to travel during cold weather.
Winterize a Coachmen Freedom Express travel trailer Plumbing System/Water System
This is a brief explanation for Winterize a Coachmen Camper Plumbing System/Water System . In the following paragraphs, you will find a very thorough explanation of how to perform the winterization and de-winterization of a Coachmen Freedom Express travel trailer .
- Empty the tank of fresh water. To do this, turn on all of the RV’s faucets before turning on the freshwater tank’s drain valve. Close all of the faucets and the drain valve after the tank is empty.
- The next step is to cut the water line off from the city water connection. Open all of the RV’s faucets once the line has been severed to let any residual water in the pipes drain.
- Non-toxic RV antifreeze has to be added to the system now that the fresh water tank has been drained and the water pipes have been cut off. The plumbing in your RV may be shielded against freezing temperatures by using antifreeze designed specifically for RVs.
- Simply pour non-toxic RV antifreeze into the fresh water tank through the fill port to add it to the system. When the tank is full, open every faucet in the RV and let the water flow until colored antifreeze starts to come out.
- After all of the faucets have stopped dripping antifreeze, plug the fill hole in the freshwater tank.
- Ensure that all of your Coachmen Freedom Express plumbing pipes are filled with RV antifreeze. Pour RV antifreeze into the shower, sinks, and toilets, as well as the rest of the RV’s drains, to accomplish this. Run all of the RV’s faucets for a while after pouring antifreeze into the drains to ensure that it gets to all of the fittings. Your RV’s water system will be adequately winterized if the faucets are shut off after a short period.
- Remember to prepare your Coachmen Freedom Express furnace for winter. For detailed instructions on how to install this, be sure to refer to your owner’s handbook because the furnace brand may vary based on your Coachmen series, floor plan, and year.
Let’s step-by-step How to Winterize the Water System of a Coachmen Freedom Express , according to the Forest River’s manual.
Winterizing Using Air Compressed
Let’s review the winterization and de-winterization of a Coachmen Freedom Express by using air compressed.
- Never use antifreeze for cars. In the potable (drinking) water systems of your RV, only use non-toxic RV antifreeze. To avoid burst pipes, subsequent leaks, and damage to your Coachmen Freedom Express due to incorrect camper plumbing winterization, mix the non-toxic RV antifreeze in the proportion recommended by the antifreeze manufacturer.
- Remove the fresh water tank’s lid.
- Fill up the holding tanks for wastewater.
- By opening the bypass valve (A) and shutting the hot (B) and cold (C) valves as illustrated in the images below, you may adjust the bypass valve on the water heater.
- Water heater removal Consult your water heater’s owner’s handbook.

- Before changing the canister, remove and discard the filter cartridge if your machine has a water filtering system. Changing the filter will be essential after de-winterizing.
- Open all fixtures, both internal and exterior, including the flush valve, supply lines for the washing machine, shower heads, and low point drain. If you have a washing machine, use the warm cycle to wash your items until no more water comes out, and then spin the washer until all the water is gone.
- Turn on the water pump for at least 30 seconds to drain any water from the pipes.
- Limit the air pressure to 30 PSI at most.

- The City Water Connection screen (see the image above) needs to be taken out. A blowout plug (adapter) should be connected to the city water connection.
- As soon as the water is no longer visible running out of any interior or exterior fixtures, appliances, or lines, attach an air hose to the water lines and blow them out.
- Replace the Screen, take out the blowout plug from the city water connection, and shut all fittings, fixtures, and low-point drains.
- If the system has one, flush water from it and connects air to the Black Tank Flush inlet. There is no screen with the Black Tank Flush system.
- Fill the tank, p-traps, and interior and exterior drain with one quart of RV antifreeze (if provided).
- Pour 12 gallons of antifreeze into each toilet, close the flush valve, and then add enough antifreeze to cover the valve by one inch.
Winterizing with RV Antifreeze Only
Let’s review the winterization and de-winterization of a Coachmen Freedom Express by using RV antifreeze (instead of air compressed).
- 4-6 gallons of non-toxic RV antifreeze should be purchased.
- Drainage of all tanks is required (fresh water and waste water holding tanks).
- You can bypass the water heater by opening the Bypass Valve (A) and closing the Hot (B) and Cold (C) Valves.
- While the valve handle perpendicular to the water line is closed, the handle parallel to the water line is open. (These valves are situated close to the entering pipes at the rear of the water heater.) The water heater is typically located in a base cabinet in kitchens. An access panel may have to be taken off to access the bypass valve.)

- Consult your water heater’s owner’s handbook.
- Fill the water pump’s input with antifreeze by either: A. If a nearby valve is accessible, open it, then place the winterization hose inside the antifreeze container. B. Unplug the water line from the pump’s input and connect a short section of the hose to the antifreeze container.
- All interior and exterior faucets should have their cold water side open when the pump is turned on. Until the antifreeze (which is often pink in color) comes out, keep the taps open. Continually use the hot water side.
- Pour one gallon of antifreeze down the toilet to winterize the black holding tank after flushing the toilet until the antifreeze is visible in the bowl. If a toilet sprayer is available, use it until antifreeze is found.
- Fill each interior and exterior drain, p-trap, toilet, and tank with one quart of RV antifreeze (if fitted).
- Pour 12 gallons of antifreeze into each toilet, then shut the flush valve and cover the valve with one inch of antifreeze.
- If you have a black tank flush system, pour antifreeze into the Black Tank Flush inlet using a hand pump (available from your RV dealer).
We recommend watching the following water system winterization video from the manufacturer to visualize the step-by-step summary above. Then, continue reading this article to discuss more actions needed to protect your travel trailer during winter and to winterize for live-in or travel.
Maintain the Trailer’s Electrical Wiring
There are a few more steps you can take to winterize your Coachmen Freedom Express camper and keep it in good condition. To avoid any shorts, you should first wrap insulating tape over any exposed electrical wire. Additionally, you should keep all of your camping supplies inside the camper to shield it from the elements.
Prepare the Coachmen Travel Trailer Tires for Cold temperatures
Tire blowouts can result from the air in tires condensing in cold temperatures. Before starting any journey, make sure to check the tire pressure.
To avoid flat spots, you should lastly check that the tires are filled to the correct pressure.
How To Prepare The Camper Tires For Winter
When temperatures are going down, it’s time to prepare the travel trailer tires for winter. Here are some tips for winterizing a Coachmen Freedom Express:
- Verify your tires’ air pressure. Tires tend to lose air pressure more rapidly in colder climates, so it’s crucial to routinely check them and re-inflate them as necessary.
- To keep your tires from the elements and increase their lifespan, think about investing in tire covers.
- Make careful you store your travel trailer on a level surface if you intend to do so for the winter. This will lessen the likelihood of flat patches forming in your tires.
- Before each travel, make sure to check your tires for cracks or other indications of wear and strain. Before driving, have the tires checked for damage and fixed or replaced as necessary.
Review Status and Charge of Deep Cycle Batteries when Winterizing a Coachmen Freedom Express
When temperatures dip, batteries frequently lose their charge. Even if they are deep cycle batteries for RVs, lithium phosphate batteries are particularly affected by this. We frequently keep our batteries plugged in throughout the winter, which is incorrect. And it causes a significant amount of the batteries we use in the RV to degrade.
During the winter, it is preferable to disconnect the RV battery or batteries and store them somewhere warm and dry. Before storing them, check the status and charge them.
If you wish to travel throughout the winter in your Coachmen Freedom Express, make sure you have the appropriate deep cycle batteries for camping and that they are properly charged.
What are the Best Deep Cycle Batteries for RVs in Cold Weather?
Choosing the right batteries to keep your RV functioning smoothly is one of the most crucial factors to take into account while winterizing it. There are a few different types of deep-cycle RV batteries that are suitable for all types of recreational vehicles and boats. The best deep-cycle batteries during the coldest season are the RV AGM batteries.
Deep cycle batteries are made to be discharged and recharged several times over a year, making them ideal for those long winter evenings when you need to keep the lights and heaters on.
In comparison to other battery types like lithium batteries, AGM batteries are also less likely to freeze. As a result, you can relax knowing that your RV will be operational even when the outside temperature is at its lowest.
Whatever type of deep cycle battery you decide on for your RV, be careful to maintain a proper charge throughout the winter.
Take the time to maintain your travel trailer battery in good condition because a dead battery is one of the quickest ways to ruin your winter holiday. You can be confident that your Coachmen will be prepared for everything the winter may bring with a little forethought.
By following these simple tips, you can winterize your Coachmen Freedom Express and keep it in good condition all winter long.
Winterize a Coachmen Freedom Express for Live In or Travel
If you are living in a Coachmen Freedom Express or want to live in one , there are a few things you need to do to winterize it.
Let’s see How to Winterize a Coachmen Freedom Express travel trailer for Living or Travelling
Even while some of these preparations might seem simple, they are all crucial to ensuring that your camper is prepared for the cooler months.
You should first check to see that all of your pipes have been emptied. This applies to tanks holding freshwater, greywater, and blackwater. Additionally, make sure that all of the faucets are shut off and the toilet is flushed.
The drains in your sinks, showers, and toilets all need non-toxic RV antifreeze to be added next.
Additionally, you’ll want to confirm that your furnace is in good functioning condition. Additionally, winterize the furnace using RV antifreeze. This is crucial since, throughout the winter, you’ll want to be able to keep your camper warm.
Don’t depend solely on one sort of energy source to heat your Coachmen travel trailer , is another piece of advice. Don’t just say “electric systems” or “propane” if you want to stay somewhere or travel for a considerable amount of time. Try to combine them as much as you can. I recommended reading the article in the following link to better understand different options for How to Heat A Camper Without Electricity . I believe those tips can be very helpful if you are going to boondock or if suddenly you are in an unexpected situation like in a middle of a winter storm, not prepared, and running out of fuel.
If you plan on using your Coachmen Freedom Express camper during the winter, make sure to invest in a good-quality heater even if you own a model with a furnace.
Insulating your Coachmen travel trailer is another thing you should do to retain the heat inside and stay warm without using a lot of electricity. Weather stripping can be used around the doors and windows to achieve this. Additionally, you might wish to insulate your camper’s walls and ceiling.
Learn more about How to Winterize a Camper To Live In & Travel in our post
How to Insulate a Coachmen Freedom Express to Travel and Live In
One of the most important things you can do to winterize your Coachmen Freedom Express is to insulate it.
Be sure to take your time to insulate properly your Coachmen travel trailer . Even if you possess a travel trailer with a furnace, make sure to spend money on a high-quality heater.
How to Stay Warm in a Coachmen travel trailer
Verify the functionality of your heating system. This applies to the heater, stove, and any additional heat sources you intend to use. Make sure they are capable of keeping you warm by testing them before you go on your journey.
Don’t overuse space heaters. While space heaters can help keep you warm, inappropriate usage of them might result in a fire risk.
Dress warmly inside your Coachmen travel trailer to conserve energy. Even if the temperature inside your camper drops, wearing layers of clothing will keep you warm.
Learn more tips for Staying Warm in a Camper in Winter in our post.
How to Insulate a Freedom Express travel trailer
Let’s see How to Insulate a Coachmen Freedom Express.
There are a few different ways you can insulate a travel trailer with no inconveniences. Although there are several materials in the market, one option is to use Reflectix , which is a foil-backed bubble wrap insulation. It is a lightweight material, easy to cut.
When you install this material, the heat is reflected into your trailer, keeping the inside warmer during the cold time and helping you to save energy. Cut the Reflectix or similar material, to the size needed to cover windows, and doors if needed, to fit the right way, and then tape it to hold it to the surfaces of the Coachmen Freedom Express.
I like to insulate the floor of the Coachmen Freedom Express. Let’s be honest. The only thing to insulate the interior from the exterior at floor level is just a thin piece of wood. If you want to insulate the floor, I would suggest using foam sheets to cover the floor.
To keep the cold air out, whichever choice you use, be sure to cover all the windows and doors. Additionally, you need to guarantee that your camper is tightly sealed.
Installing an RV skirting system is another excellent approach to preparing your Coachmen Freedom Express for winter. This will shield your camper from the wind and the cold and prevents animals from crawling inside. You should be able to select an RV skirting system that exactly matches your camper because there are so many different types available.
Make sure the windows and doors are all properly closed. If there are any openings, fill them with caulk or weatherstripping. Placing plastic over the windows is a smart move as it will further insulate them.
After insulating your camper, you may add a few finishing touches to make it cozier yet. To help block drafts, hang drapes over the windows and doors. Bring some carpets or rugs inside so you can keep your feet toasty.
We recommend you read our article about How to Insulate a Camper to learn more about preventing heat loss.
By following these simple steps, you can ensure that your Coachmen Freedom Express will be ready for winter.
De-Winterizing a Coachmen Freedom Express
Now, let’s see the step-by-step to de-winterize a Coachmen Freedom Express Water System.
- Empty the fresh water tank and any holding tanks for wastewater.
- Fill up the fresh water tank with a garden hose.
- Attach the drain plug to the water heater and close the pressure relief valve.
- Switch on the pump, then turn all interior and external faucets’ cold water faucets. Close the faucets when the antifreeze has been flushed from the water lines and has been replaced with clean water.
- Repeat step 4 on the hot water side.
- Fill the water heater tank and switch the bypass valve on the water heater to NORMAL.
- Continue flushing the toilet until the toilet bowl is completely clear. Use the toilet sprayer, if available, until the water is clear.
- Refill the waste water holding tanks and drain the freshwater tank.
- Clean the water system in accordance with the directions in this handbook.
- If a freshwater filter has already been put in place, empty the water lines, take the assembly apart, clean it, and then put it back together using a new water filter.
- If available, OPEN the water supply line to the dishwasher, washer, and water/ice maker in the refrigerator.
When de-winterizing the travel trailer, sanitization is a must. Besides the importance of the quality of the water in our water system and removing chemicals, the most common cause of early pump failure and declining performance over time is improper sanitization . Lack of sanitizing can result in scale building on the valves and diaphragm, which will reduce flow and create leak back (occasional pump cycling when no faucets are open or tank filling when connected to city water).
De-Winterization Video
Final Thoughts When Winterizing a Coachmen Freedom Express
A final piece of advice when winterizing a Coachmen Freedom Express and any travel trailer (including Coachmen Catalina, Viking, Clipper, Spirit, Apex, etc.). Pay attention to the following precautions:
- Take the appropriate steps to prevent fresh water and drainage systems from being harmed by freezing. Understanding everything covered in the sections on the winterization of canneries and water systems is crucial because of this. The water system and any other water systems in the camper must be winterized whether you are taking a trip or storing the camper in a tank throughout the winter.
- If the propane tank contains moisture or has been overfilled, propane regulator freeze-ups can happen in any type of weather. Use only propane fuel free of moisture, and never fill the tank more than 80%. It is advised that you have systems that utilize various fuels. electricity, solar power, gas, etc. Don’t rely on a single source of energy.
- It is essential to keep utilizing your vents and vent fans during cold weather.
- Plan for more frequent furnace running, which will increase battery draw and gas consumption. This will prevent the wet air from leaving the building.
- More condensation will form if the camper is tightly closed in chilly weather. A dehumidifier can be required to reduce condensation during cold season use.
- Before opening or using the trailer’s compartment doors, locks, windows, vents, and other features, check the outside extrusions for moisture that has frozen.
- Make sure you carry adequate non-toxic RV antifreeze if you want to stay on the road or park for a while.
We hope this article about how to winterize the Coachmen Freedom Express will help you winterize your Coachmen travel trailer correctly, and encourage you to enjoy it during the winter.

About Ward Greenway
Since I was 5 years old, I remember being inside my father's pop-up camper crossing the USA. My passion for RVs and Campers grew until I graduated in Mechanical Engineering (Tennessee). Then, I took my passion to the next level. Because I wanted to improve the design and engineering of the RVs I enjoyed them so much. I have been lucky to work for Central RV New Zealand, Jayco Corporation Pty Ltd (Australia), Forest River Inc., and Mercury Marine, as a Mechanical Design Engineer. I have seen and improved hundreds of RV floor plans. Nowadays, I enjoy RV living full time in my Mallard travel trailer and the joy of meeting new friends along the way who help me put the best on CamperOutdoor.com
Leave a Comment Cancel reply
Save my name, email, and website in this browser for the next time I comment.
Marlin Ingram RV Center
The award winning Marlin Ingram RV Center has been at the same easy-to-find location since 1982. Since that time, our highest priority has never changed: A satisfied customer.
Shop By Type

Find Marlin Ingram RV Center
Here at Marlin Ingram RV Center, we have an experienced and certified staff to help you with any of your RVing needs. From Certified Technicians to repair, service or maintain your RV, to a full parts department to take care of your RV, to a handy dump station to maintain your RV, we have your RV needs covered. The members of our friendly, professional, and experienced sales staff are here, and you will always find someone to help you on your RVing journey, no matter where on that journey you are. We love RVs, we love RVing, and we love our fellow RVers.
Blue Compass RV Montgomery, formerly known as Marlin Ingram RVs is the best RV dealership in Montgomery, AL.
RV Parts & Service
Marlin Ingram RV Center features a full-service shop, where we are available to help with all of your repair and maintenance needs. Our service department is equipped to handle any RV repair. Our technicians are some of the most experienced in the RV industry. In addition to our Service Department, we also offer a well-stocked parts department, so that we can get you back on the road quickly.
Our recently enlarged parts department offers just about any RV part or accessory you might need. Overnight service is available on most parts not in stock. You can even order online and have the product shipped directly to your home. Our service department is equipped to handle any RV repair and minor chassis problems.

About Marlin Ingram RV Center
Wide rv selection.
We proudly feature Tiffin Motor Home brands Allegro Open Road, Allegro Red, Allegro Breeze, Allegro Bus, Phaeton, Zephyr, and Wayfarer. Tiffin products are renowned throughout the RV world for their workmanship, quality, and after-sale support. You can count on Tiffin to give you great value for your dollar.
We also stock a wide range of travel trailers from Riverside RV and Vanleigh . These trailers have a wide selection of floorplans, from spacious with bunk beds and room for the whole family to smaller, always popular rear living couples trailers, these lightweight easy-to-tow travel trailers are a perfect fit for anyone. From the easy towing capability of the Riverside RV Retro travel trailer to the home-like feel of the Intrepid fifth-wheel, we can help find the perfect RV for you. We also carry the luxurious Vanleigh fifth wheels manufactured by a family owned and family oriented with over 40 years experience backing them. If you want a small house in the country or at the shore, check out our Kropf park model trailers. They are fully equipped for full time living with central air, loft sleeping areas, and residential appliances. Whatever your RV needs, we can fill it. Check out our online inventory or give us a call.
Service Parts
Our recently enlarged parts department offers just about any RV part or accessory you might need. You can even order online and have the product shipped directly to your home. Our service department is equipped to handle your RV repair.
IMAGES
VIDEO
COMMENTS
Ira takes you through the basic steps to winterize your Forest River travel trailer.Website: https://www.forestriverinc.com
CARE AND MAINTENANCE Heating Pads Storage Tips 1. Park your RV on a level surface. 2. Winterize the chassis and the generator (optional) as outlined in the chassis's and the generator's owner's manuals. 3. Clean your recreational vehicle thoroughly, inside and out, as previously outlined in the section.
The following procedure is recommended if you are winterizing your RV. 1. Shut off the water supply to the filter system. 2. Relieve pressure from the water system by turning on cold water in shower and kitchen. Leave open during procedure. 3. Remove the filter housing by turning counter clockwise. 4.
drain low point drains. Drain fresh water. Remove water filter. Buy winterize kit to install antifreeze on suction side of pump. Do not dump antifreeze in fresh water tank. 3 gallons should do it. run all taps till pink run inside and outside showers till pink. Run toilet till pink. dump remaining antifreeze in traps.
This video is for anyone trying to understand how to winterize your travel trailer with compressed air. Water trapped in the lines that freezes can wreck you...
In this video, I try to keep it to the point and give you a step by step on winterizing your RV. I followed a guide I got off a Facebook group to do this vid...
Winterizing Geopro 19FD. I am going to winterize my trailer and I have 2 quick questions. 1. I watched a lot of videos where the owners did not blow out the lines with an air compressor. How necessary is this? 2. On the back of the trailer, beside the city water connection is an antifreeze inlet. Is this where the pump draws the antifreeze from?
Posts: 2,981. Forest River Guides To Winterizing Class C's. Forest River has produced guides for winterizing your rig. They are based on your chassis type; Transit, MBS Sprinter, or the E-450 / Chevy LE, not brand or model. I believe these guides are applicable to units made after 2015. Most of the info should apply to older units as well.
Take the small screen off the city water connection, then using a screwdriver (or anything long and pointy), push against the valves until the antifreeze comes out of it. You may need someone to turn the pump on to flow the antifreeze. Replace the small screen, and your water system will be winterized.
Join us as we winterize our travel trailer. Its new, so we had to install a Camco Kit to do it how we wanted. Vengeance 25V specific winterizing tips. In thi...
How To Winterize A Forest River R-Pod Travel Trailer. If you're not a snowbird who heads south during cold weather, you'll have to prepare your RV for its annual winter nap. This process - called winterization - prevents water in your RV's plumbing system from freezing, potentially damaging pipes and valve assemblies.
The Winterization Process for a 2016 Shamrock / Roo Camper. Start out with a 1 1/16″ socket and remove the anode so the water heater can drain. As the anode is removed you will start seeing water flow out from the hot water heaters tank. To speed up the draining process and ensure there is not any water in the water heater with an air lock ...
There is no such thing. Dewinterizing is something that is learned. There are so many variables between different RVs and the methods people use to dewinterize that it would be impossible to pen specific instructions for each and every different RV and RV owner. This forum is a great resource for you to learn all of the different methods.
Here are the two best ways to Winterize an RV. You can Winterize with an air compressor or RV Antifreeze. Here are a few of the things we used and recommende...
👇 *Click _"SHOW MORE"_* below to open the full video description! 👇*How to Winterize a Travel Trailer - Are you winterizing your RV properly?* Did you kno...
Wildwood FSX. Wildwood Heritage Glen Travel Trailers. Wildwood X-Lite. Work and Play. XLR Boost. XLR Hyperlite. Find the Forest River Travel Trailer that is right for you. Choose from a set of desired features to get matching brands and floorplans.
In the spring i connect ecy the hose to the camper and flush out the anti freeze, then un bypass the water heater and turn the water on to flush out any junk in water tank, then put teflon tape on the anode and screw it back in. It is best to remove the water filter in a/c compartment before putting in the anti freeze.
When de-winterizing the travel trailer, sanitization is a must. ... Jayco Corporation Pty Ltd (Australia), Forest River Inc., and Mercury Marine, as a Mechanical Design Engineer. I have seen and improved hundreds of RV floor plans. Nowadays, I enjoy RV living full time in my Mallard travel trailer and the joy of meeting new friends along the ...
Here's a quick video for the RV travel trailer owner who wants to winterize their RV in 16 easy steps. Our model trailer is a Visa Ultra Light but the proces...
Now put some water in your FW Tank and make sure the Winterizing valve is turned for Fresh Tank,now Open the LP Drains! Turn on pump and flush out PINK!Turn OFF Pump, Now put LP Drain caps back On and turn Pump back ON! Now Open ALL water Outlets 1 at a Time until there is NO Pink Toilet also!
We love RVs, we love RVing, and we love our fellow RVers. Marlin Ingram RVs. (334) 288-0331. 4504 Troy Hwy. Montgomery, AL 36116. Blue Compass RV Montgomery, formerly known as Marlin Ingram RVs is the best RV dealership in Montgomery, AL. View Location.
mcmilsw. Member. Join Date: Aug 2023. Posts: 51. Using RV During Winter Months. Hello, have a 2022 Forrest River Forrester Classic 2441DS. We purchased it in May and have been camping in it monthly, and will be 12 months out of the year. The tanks are heated and enclosed according to the brochure. Question is this:
Winterizing your motorhome.More motorhome basics at, https://youtube.com/playlist?list=PL5fW9VAN0wpxfF1oFYE3uMq0yLoQ3lRfgForest River Motorized Website: http...