How-To Geek
How to view a desktop site on mobile safari.
Your iPhone or iPad running mobile Safari can access desktop versions of websites as well. Next time you're stuck with a stubborn mobile site, remember this feature.

Quick Links
How to view desktop site in safari.
Safari is fast and optimized for mobile devices. That's usually a good thing. But there are still a few websites that refuse to adapt to mobile Safari or provide an inferior experience on their mobile site. In times like these, you can switch to the desktop version of the website.
Like many iOS features, especially ones for Safari, the Request Desktop Site feature is hidden. With iOS 13, Apple has changed the placement of this option, which makes it a bit easier to find. As iPadOS 13 automatically loads desktop websites, iPad users won't need to look for this feature after updating.
Here's how this feature works on devices running iOS 12 and iOS 13.
Related: iPadOS Will Almost Make Your iPad a Real Computer
iOS 12 and Below
Open the Safari app on your iPhone or iPad and load a website. Now, tap and hold on the "Refresh" button next to the URL bar.
You'll see a popup at the bottom of the screen. From here, select "Request Desktop Site."
The website will reload, and you'll now see the desktop version of the site . To go back to the mobile version, tap and hold on the "Refresh" button again and select "Request Mobile Site."
iOS 13 and Above
With the iOS 13 update, Apple has improved the Safari browser in a couple of important ways. While most improvements are seen on the iPad version, iPhone users get access to the new Safari Download Manager as well as a new customization menu for websites.
Tap on the "Aa" icon to see a couple of new menu options. From here, select the "Request Desktop Website" button to open the desktop version of the website.
Come back to the same menu to switch back to the mobile version.
And that's it. You now know how to access desktop websites on your iPhone and iPad using mobile Safari.
You are using an outdated browser. Please upgrade your browser to improve your experience.
How to request desktop versions of websites in Safari in iOS 15 and iPadOS 15

While this isn't quite as prevalent as it used to be, it's still a handy trick to keep in your back pocket. This is especially true for websites that require you to fill out forms, which sometimes do not work well with mobile versions.
Requesting the desktop version of a website on mobile can also cause some problems of its own — sometimes, certain elements do not work on mobile. However, it is easy to revert to the mobile version if you encounter problems.
How to request a desktop version of a site on iOS 15 and iPadOS 15
- Open Safari
- Go to the website you want to load
- Tap the aA icon
- Tap Request Desktop Site
To revert the changes, follow the steps above, but tap Request Mobile Site .
Of course, if you know that a site you frequent has issues when loading the mobile version, you can permanently request the desktop site, too.

How to permanently Request Desktop Website on mobile Safari
- Tap Website Settings
- Toggle on Request Desktop Website
Important: Not every website will have an apparent difference between mobile and desktop sites. This is especially true of websites that utilize responsive layouts — layouts that automatically adjust to the screen's resolution rather than the device you're on.
Top Stories

Apple's M3 MacBook Air with 16GB RAM drops to $1,199 with promo code

Kuo: iPhone 16 Pro replacing blue with rose titanium color

Mac Pro and Mac Studio refreshes may wait till 2025

iPhone 16 camera upgrades may be the best reason to upgrade

Apple TV hardware storage limits will keep most emulators away

iPad Pro hands on: Luxury technology in an impossibly-thin package
Featured deals.

Apple's popular 1TB 14-inch MacBook Pro is $250 off today
Latest exclusives.

Apple set to deliver AI assistant for transcribing, summarizing meetings and lectures

Apple's new Photos app will utilize generative AI for image editing

Siri for iOS 18 to gain massive AI upgrade via Apple's Ajax LLM
Latest comparisons.

13-inch tablet power compared — iPad Pro vs iPad Air

Flagship iPad head-to-head — M4 iPad Pro vs M2 iPad Pro compared

iPad Air shootout — 2024 M2 iPad Air vs M1 iPad Air compared
Latest news.

Core design: Why the iPad Pro can be faster than your Mac
Apple's fastest computers are the new iPad Pro, and M2 Ultra Mac Studio. Here's how, where, and when the iPad Pro can best Apple's speed-demon desktop.

New iOS & iPadOS update fixes reappearing photos bug
Apple has released a minor update for iOS and iPadOS, that fixes an issue in the Photos app that resurrected deleted images.

How Apple has steadily been dropping the 'i' from its devices for over a decade
From the first iMac in the 1990s to today, the prefix "i" has symbolized Apple — but Apple has been working to get rid of it since the original iPad in 2010.

LG's 34-inch UltraGear monitor plunges to $549 at Amazon today
Amazon's record-breaking 58% price drop on the LG 34GP950G-B 34-inch UltraGear display delivers the lowest price ever.

Apple Pencil Pro casts a fake shadow based on which tool you're using
A new video of the Apple Pencil Pro has surfaced, highlighting a nifty little feature that showcases Apple's commitment to detail.
Aqara M3 hub, Pitaka smart car charger, & hands on with Apple Pencil Pro on HomeKit Insider
On this episode of the HomeKit Insider Podcast, we hit the news for the week before diving into two hands on with the Apple Pencil Pro and Pitaka MagEZ Qi2 car charger.

Apple wants all of TSMC's 2nm chips, so they sent Jeff Williams in secret
Apple is preparing to start the production of chips using a 2-nanometer process, and sent COO Jeff Williams to Taiwan with a view to securing the first batch.

If you're buying a new iPad Pro, your old magnetic stand won't work
Don't even try using an old iPad Pro magnetic stand with the new models because they won't work, the iPad will slip, and so you could even damage your new device.

Latest Videos

Retro gold rush: which emulators are on the App Store, and what's coming

iPad, iPad Air, iPad Pro buyer's guide May 2024: which iPad to buy for any budget

iOS 17.5 is here with Repair State & EU Web Distribution
Latest reviews.

Keychron Q1 HE Review - Near-infinitely adjustable keyboard with impressive design

Atoto S8 Pro Wireless CarPlay receiver review: great, but fragile aftermarket solution

Unistellar Odyssey Pro review: Unlock pro-level astronomy with your iPhone from your backyard

{{ title }}
{{ summary }}
How to force your iPhone or iPad to load the desktop version of a website
Most of the time using a mobile-friendly website is just fine -- until it's not, and you need the full desktop version of a site.

One drawback to relying on an iPhone or iPad for your web browsing needs is that you're almost always using the mobile version of a website. And for the most part, mobile websites are fully capable versions of the same experience you would have using a full desktop-class browser.

However, there are times when the mobile version of a website lacks a feature or capability that the full website offers. If you find yourself in need of the full desktop version of a website, you can force mobile Safari to request and load the full version of a website with just a couple of taps.
When viewing a webpage in Safari, long-press on the Refresh button. A small prompt will show up just below the button, giving you the option to Request Desktop Site . Tap on the drop-down, which will prompt Safari to reload the current page, but this time it should reflect the same experience you would have on a Mac or PC.
Mobile Guides
- Best iPhone
- Best Galaxy S24 Deals
- Best iPhone Deals
- Samsung Galaxy S24 Review
- Best Android Phones
- Best Samsung Galaxy Phone
- Pixel 8 Pro Review
- iPhone 15 Pro/Pro Max Review
- Best iPhone 15 Deals
- Best Foldable Phones
- Galaxy Z Fold 5 Review
- OnePlus Open Review
- Best Galaxy Z Flip Deals
- Best Wireless Earbuds
- Best Noise Canceling Headphones
- Best Headphones
- Best Over Ear Headphones
- Best Wireless Earbuds and Headphones for Making Calls
- Best Headphones for Work at Home
- Best Noise Canceling Wireless Earbuds
- Best Sounding Wireless Earbuds
- Best Cheap Wireless Earbuds
- Best Wireless Headphones
- Best iPhone 15 Cases
- Best iPhone 14 Cases
- Best Power Bank for iPhone
- Best Airpods Pro Accessories
- Best Magsafe iPhone Accessories
- Best Speakerphone
- Best Wireless Car Charger and Mount
- Best iPhone Fast Charger
- Best Portable Chargers and Power Banks for Android
- Apple Watch Series 8 vs Series 7
- Best Apple Watch Bands
- Best Android Smartwatch
- Apple Watch Ultra Review
- Best Smartwatch
- Best Prepaid Phone Plans
- Best Cheap Phone Plans
- Best Unlimited Data Plans
- Best Phone Plans
- Best Phone Plan Deals
- Best Senior Phone Plans
- Best Family Phone Plans
- Best Travel Phone Plans
- Best Verizon Plans
How To Use Desktop Mode On Safari

- Software & Applications
- Browsers & Extensions

Introduction
Safari, the default web browser for Apple devices, offers a seamless and intuitive browsing experience. One of its notable features is the Desktop Mode, which allows users to view websites as they would appear on a desktop computer. This feature comes in handy when you want to access the full functionality of a website, especially when using a larger screen such as an iPad or Mac.
Enabling Desktop Mode on Safari is a straightforward process that can significantly enhance your browsing experience. Whether you're working on a project, conducting research, or simply prefer the layout of a desktop website, Desktop Mode provides a versatile solution.
In this article, we will delve into the intricacies of using Desktop Mode on Safari, exploring the steps to enable it, navigating within this mode, and customizing settings to suit your preferences. By the end of this guide, you will have a comprehensive understanding of how to leverage Desktop Mode to optimize your browsing experience on Safari.
Let's embark on this journey to uncover the functionalities and benefits of Safari's Desktop Mode, empowering you to harness the full potential of this feature for a seamless and efficient browsing experience.
Enabling Desktop Mode on Safari
Enabling Desktop Mode on Safari is a simple yet powerful way to access the full desktop version of websites, providing a more comprehensive browsing experience. Whether you are using an iPad or a Mac, activating Desktop Mode allows you to view websites as they would appear on a desktop computer, complete with all the functionalities and layout elements.
To enable Desktop Mode on Safari , follow these straightforward steps:
Open Safari : Launch the Safari browser on your device.
Navigate to a Website : Enter the URL of the website you want to view in Desktop Mode. This could be a news website, online shopping platform, or any site where you prefer the desktop layout.
Access the Share Menu : Tap the "Share" icon located at the top or bottom of the screen, depending on your device's orientation. This icon typically resembles a box with an arrow pointing upward.
Select "Request Desktop Site" : In the Share menu, scroll through the options and locate "Request Desktop Site." Tap on this option to activate Desktop Mode for the current website.
Confirmation : Once selected, Safari will reload the website, presenting it in the desktop layout. You will now have access to the complete desktop version of the site, including features and functionalities that may not be available in the mobile view.
By following these steps, you can seamlessly transition to Desktop Mode on Safari, unlocking the full potential of websites and enjoying a more comprehensive browsing experience.
Enabling Desktop Mode on Safari is a valuable feature that empowers users to access the complete functionality of websites, especially when using larger screens such as iPads or Macs. This mode not only enhances the visual experience but also ensures that you can utilize all the features available on the desktop version of a website.
With Desktop Mode enabled, you can interact with websites more effectively, access advanced features, and enjoy a browsing experience that closely mirrors the desktop environment. Whether you are conducting research, working on projects, or simply prefer the layout of a desktop website, Desktop Mode on Safari offers a versatile solution for optimizing your browsing experience.
Navigating in Desktop Mode
Once you have successfully enabled Desktop Mode on Safari, navigating through websites becomes a seamless and immersive experience. In Desktop Mode, you gain access to the complete desktop version of websites, allowing you to interact with the content and features as you would on a desktop computer. Whether you are exploring news articles, conducting online research, or engaging with multimedia content, navigating in Desktop Mode offers a range of functionalities to enhance your browsing experience.
Enhanced User Interface
In Desktop Mode, the user interface of websites is optimized for larger screens, providing a more expansive layout that accommodates additional content and features. This enhanced interface allows for improved navigation, making it easier to locate specific sections of a website, access menus, and interact with multimedia elements. The larger screen real estate facilitates a more comprehensive view of the website, enabling you to engage with the content in a more immersive manner.
Seamless Multitasking
With the desktop layout at your disposal, multitasking becomes more efficient and intuitive. You can open multiple tabs and windows, switch between different web applications, and seamlessly transition between tasks. This flexibility is particularly beneficial when conducting research, as you can compare information from various sources and manage multiple resources simultaneously, all within the expansive Desktop Mode interface.
Access to Advanced Features
Desktop Mode grants access to advanced features and functionalities that may not be available in the mobile view of websites. This includes comprehensive editing tools, advanced search options, and interactive elements that are optimized for desktop usage. By leveraging these advanced features, you can enhance your productivity, creativity, and overall browsing experience, making Desktop Mode an invaluable tool for users seeking a more robust web interaction.
Optimized Multimedia Experience
When engaging with multimedia content, such as videos, interactive graphics, or image galleries, Desktop Mode provides an optimized viewing experience. The larger screen size and enhanced interface allow for a more immersive multimedia experience, enabling you to enjoy high-quality visuals and interactive elements with greater clarity and detail. Whether you are streaming videos, exploring virtual tours, or engaging with interactive content, Desktop Mode elevates the multimedia experience to new heights.
Seamless Interaction with Web Applications
In Desktop Mode, interacting with web applications and online tools becomes more seamless and intuitive. Whether you are accessing productivity suites, collaborative platforms, or web-based tools, the desktop layout enhances the functionality and usability of these applications. This enables you to work more efficiently, collaborate with colleagues, and leverage the full potential of web-based tools, all within the expansive and feature-rich environment of Desktop Mode.
Navigating in Desktop Mode on Safari opens up a world of possibilities, empowering users to engage with websites, multimedia content, and web applications in a more comprehensive and immersive manner. By leveraging the enhanced user interface, seamless multitasking capabilities, access to advanced features, and optimized multimedia experience, Desktop Mode enhances the overall browsing experience, making it an indispensable feature for users seeking a versatile and powerful web interaction platform.
Customizing Desktop Mode Settings
Customizing Desktop Mode settings in Safari allows users to tailor their browsing experience to suit their preferences and optimize their interaction with websites in the desktop layout. Safari offers a range of customization options that empower users to personalize their browsing environment, enhance accessibility, and streamline their workflow within Desktop Mode.
Font and Text Size Customization
One of the key customization options in Desktop Mode is the ability to adjust font styles and text sizes to improve readability and visual comfort. Safari allows users to modify the default font settings and adjust the text size according to their preferences. This feature is particularly beneficial for users who require larger text for improved legibility or prefer specific font styles for a more personalized browsing experience.
Content Blockers and Privacy Settings
Safari's Desktop Mode provides access to content blockers and privacy settings, allowing users to manage website permissions, block intrusive content, and enhance their online privacy. By customizing content blockers, users can control the display of ads, pop-ups, and other distracting elements, creating a more focused and streamlined browsing environment. Additionally, privacy settings enable users to manage website tracking, cookies, and other privacy-related features, empowering them to maintain a secure and private browsing experience.
Reader View Customization
Safari's Reader View feature, available in Desktop Mode, offers customization options that enhance the readability of articles and long-form content. Users can customize the appearance of Reader View by adjusting the background color, text size, and font style, creating a personalized reading environment that aligns with their preferences. This customization feature ensures a comfortable and immersive reading experience, making it easier to consume textual content without distractions.
Tab Management and Organization
Customizing tab management and organization in Desktop Mode allows users to streamline their workflow and efficiently navigate between multiple open tabs. Safari offers options to customize tab behavior, group related tabs, and organize them according to specific categories or projects. This feature enhances productivity and multitasking, enabling users to manage their browsing sessions with greater efficiency and clarity.
Accessibility Customization
Safari's Desktop Mode includes accessibility customization options that cater to users with diverse needs. From adjusting contrast and color settings to enabling screen reader support, Safari empowers users to customize their browsing experience to accommodate visual, auditory, and motor impairments. This inclusive approach ensures that all users can access and interact with web content in a manner that suits their individual requirements.
By customizing Desktop Mode settings in Safari, users can create a personalized and optimized browsing environment that aligns with their preferences, enhances productivity, and promotes a more enjoyable web interaction experience. These customization options empower users to tailor their browsing environment, improve accessibility, and streamline their workflow within Desktop Mode, making Safari a versatile and user-centric web browser for a diverse range of users.
In conclusion, Safari's Desktop Mode offers a powerful and versatile solution for users seeking a comprehensive and immersive browsing experience. By enabling Desktop Mode, users can access the complete desktop version of websites, unlocking advanced features, enhanced user interface, and seamless multitasking capabilities. Navigating in Desktop Mode provides a seamless and immersive experience, empowering users to engage with websites, multimedia content, and web applications in a more comprehensive manner. Additionally, customizing Desktop Mode settings allows users to tailor their browsing environment, enhance accessibility, and streamline their workflow within the desktop layout.
Safari's commitment to user-centric design is evident in the range of customization options available in Desktop Mode, catering to diverse user preferences and accessibility needs. From font and text size customization to content blockers, privacy settings, and tab management, Safari empowers users to personalize their browsing experience, ensuring optimal comfort, security, and productivity. The inclusive approach to accessibility customization further reinforces Safari's dedication to providing a seamless and accessible web interaction platform for all users.
As technology continues to evolve, the ability to seamlessly transition between mobile and desktop browsing environments becomes increasingly essential. Safari's Desktop Mode not only meets this demand but also exceeds expectations by delivering a feature-rich and intuitive desktop browsing experience on Apple devices. Whether you are conducting research, engaging with multimedia content, or collaborating on web-based tools, Desktop Mode on Safari elevates the browsing experience to new heights, offering a versatile and powerful platform for users to explore, create, and connect.
In essence, Safari's Desktop Mode is a testament to the browser's commitment to innovation, user experience, and accessibility. By enabling users to access the full functionality of websites, customize their browsing environment, and navigate seamlessly in the desktop layout, Safari sets a new standard for web browsing on Apple devices. Whether you are a professional seeking a robust web interaction platform or an individual looking to optimize your browsing experience, Safari's Desktop Mode is a valuable feature that empowers users to explore the web with unparalleled flexibility and functionality.
Leave a Reply Cancel reply
Your email address will not be published. Required fields are marked *
Save my name, email, and website in this browser for the next time I comment.
- Crowdfunding
- Cryptocurrency
- Digital Banking
- Digital Payments
- Investments
- Console Gaming
- Mobile Gaming
- VR/AR Gaming
- Gadget Usage
- Gaming Tips
- Online Safety
- Software Tutorials
- Tech Setup & Troubleshooting
- Buyer’s Guides
- Comparative Analysis
- Gadget Reviews
- Service Reviews
- Software Reviews
- Mobile Devices
- PCs & Laptops
- Smart Home Gadgets
- Content Creation Tools
- Digital Photography
- Video & Music Streaming
- Online Security
- Online Services
- Web Hosting
- WiFi & Ethernet
- Browsers & Extensions
- Communication Platforms
- Operating Systems
- Productivity Tools
- AI & Machine Learning
- Cybersecurity
- Emerging Tech
- IoT & Smart Devices
- Virtual & Augmented Reality
- Latest News
- AI Developments
- Fintech Updates
- Gaming News
- New Product Launches
How to Use Email Blasts Marketing To Take Control of Your Market
Learn to convert scanned documents into editable text with ocr, related post, how to make stairs planet coaster, how to rotate camera in planet coaster, how to make a good roller coaster in planet coaster, where is the minecraft folder, how to update minecraft windows, how to update minecraft education edition, related posts.

How To Enable Desktop Mode On Safari

How Do You Turn Off Incognito Mode?

How To Get Safari Full Screen On IPad

How To Display Safari Full Screen On IPad

How To Make Safari Full Screen On Mac

How To Hide Top Bar On Safari Mac

How To Make Safari Open In Full Screen On Mac

How To Restart A Web Browser
Recent stories.

Top Mini Split Air Conditioner For Summer

Comfortable and Luxurious Family Life | Zero Gravity Massage Chair

Fintechs and Traditional Banks: Navigating the Future of Financial Services

AI Writing: How It’s Changing the Way We Create Content

How to Find the Best Midjourney Alternative in 2024: A Guide to AI Anime Generators

How to Know When it’s the Right Time to Buy Bitcoin
- Privacy Overview
- Strictly Necessary Cookies
This website uses cookies so that we can provide you with the best user experience possible. Cookie information is stored in your browser and performs functions such as recognising you when you return to our website and helping our team to understand which sections of the website you find most interesting and useful.
Strictly Necessary Cookie should be enabled at all times so that we can save your preferences for cookie settings.
If you disable this cookie, we will not be able to save your preferences. This means that every time you visit this website you will need to enable or disable cookies again.
Not an iPad Pro Review: Why iPadOS Still Doesn’t Get the Basics Right
Thoughts and first impressions on the new ipad pros from apple’s event in london, every app tells a story worth preserving, even warren buffet’s paper wizard, desktop-class safari for ipad: a hands-on look at the difference the ipados update makes to apple’s browser.

For about four years, I’ve sat down at my Mac to produce Club MacStories’ two newsletters using Mailchimp. There’s a lot I like about Mailchimp, but that has never included the company’s web app. Mailchimp relies heavily on dragging and dropping content blocks in a browser window to build an email newsletter, which abstracts away the raw HTML and CSS nicely, but didn’t work well or reliably on iOS.
That finally changed with iPadOS 13, which brought one of the most extensive updates to Safari ever. The result has been that roughly half of the issues of the Club’s newsletters have been produced on my iPad Pro since October. Before iPadOS, that simply wasn’t possible. Whenever I tried to assemble a newsletter on my iPad, I ran into a show-stopping roadblock at some point.
If you’re wondering why this matters, the answer is flexibility and choice. Whether I’m traveling to another city for several days or just sitting in a local coffee shop for a few hours, I know I can rely on a stable mobile data connection on my iPad. I don’t have to worry about whether WiFi will be available for my Mac or fiddle with tethering. I just open my iPad and start working. As a result, I prefer my iPad to my MacBook Pro when I’m away from my desktop Mac.
I also enjoy the freedom of picking the platform I use for a task. Some days that’s my Mac, but just as often it’s my iPad. Sometimes that’s driven by the platform I’m working on at the time, and other days it’s nothing more than the device I feel like using that day. Until iPadOS 13, though, if that day was a Friday and I had a newsletter to produce, nothing else mattered. I had to have a Mac, and if I was traveling for more than a couple of days, that often meant I brought both devices along.
This isn’t a tutorial on how to use Mailchimp on an iPad. Few people need that, and if you’ve built a newsletter in Mailchimp on a Mac, you already know how to do it on the iPad. That’s the whole point. Safari in iPadOS has become a desktop-class browser. There remain differences between it and its desktop sibling, but the gap has been dramatically narrowed and the differences that remain purposefully leverage the distinctions between the Mac and iPad. The result has transformed frustrating experiences with web apps that simply didn’t work before on the iPad into a productive environment for accomplishing tasks that once required a Mac.
I don’t know that I’ve ever used a web app that I prefer to something native to the Mac or iOS, but the reality of contemporary computing is that many people rely on a collection of web apps in their work and personal lives. The changes to Safari in iPadOS are an acknowledgement of that reality. The experience isn’t perfect, but the latest iteration of Safari is a major step forward that eliminates hurdles that make the difference between getting work done and not.
If you’ve run into roadblocks with web apps in the past, it’s worth revisiting them in the wake of iPadOS 13. For me, the updates to Safari in iPadOS have been a tipping point in the way I work that has opened up new options I didn’t have before. I suspect the same is true for others who are looking for the same sort of workflow flexibility, which is why I want to share my experience and thoughts on producing the Club MacStories newsletters using Mailchimp on my iPad Pro.
I’ve been producing issues of MacStories Weekly and the Monthly Log on my iPad for a few months now, but there’s a big difference between what can be done and what makes sense to do. That’s why I waited to write this story until now. I wanted to be sure that producing the newsletters on my iPad was close enough to creating them on the Mac that I’d stick with it, which I have. In fact, the process is close enough between the two platforms that I’ve found myself using my Mac and iPad Pro interchangeably for assembling the newsletters. What started as something I thought would be handy when I traveled has become just as useful when all I want to do is get away from my desk and work elsewhere for a while.

Editing the Monthly Log on my iPad Pro.
Before I dive into the details of how working in a complex web app on an iPad has changed, it helps to understand a little bit about Mailchimp. There are many services for creating and sending email newsletters and marketing campaigns. Still, over the course of Club MacStories’ four-year history, Mailchimp has offered the best mix of features for the newsletters we send, despite a few rough edges.

Dragging a text content block into the MacStories Weekly Mailchimp template.
When it comes to producing the newsletters, one of the primary advantages of Mailchimp is its content block UI. Instead of hand-coding HTML and CSS, Mailchimp relies on content blocks for things like text, images, and videos. You simply drag blocks from Mailchimp’s catalog of blocks into your document and modify them in the app’s editor. You can drill down into the code if you want, but the whole point of the service is that you shouldn’t have to do so often.
Our newsletters are based on a template that we created ourselves and revise periodically. The template includes every section we ever use in the newsletter. Each week, I copy it, delete the parts we aren’t using that week, and fill in the rest with that issue’s articles and images. It’s a long, complex template, but it ensures that the design of each issue is consistent from week-to-week.

The Club MacStories templates.
Mailchimp has an iOS app , but it’s very limited in what it does. The app is fine for checking analytics and managing email lists, but you can only create email campaigns using Mailchimp’s pre-defined templates. Our custom, Club MacStories templates aren’t available, which is why I use the web app instead.

Mailchimp’s iOS app is limited.
Until iPadOS 13, though, Mailchimp’s web app wasn’t reliable in Safari because the touch-based version of the browser had a hard time with the app’s pointer-centric drag and drop, panel-based UI. After experimenting with Mailchimp’s web app on my iPad on and off in the early years of the Club, I resigned myself to the fact that I’d need access to a Mac to use Mailchimp, regardless of where I was, or what I was doing. Federico’s experience with a variety of sites was similar as he explained in his iOS and iPadOS 13 review :
In the seven years I’ve been using the iPad as my primary computer, I’ve gotten used to the idea that certain websites just wouldn’t work in Safari; those assumptions no longer hold true in iPadOS.
Mailchimp wasn’t completely broken in earlier versions of Safari, but it may as well have been because it didn’t work with our templates. I couldn’t afford to hit an impasse when producing the newsletters, so I made sure I always had a Mac for the task.
However, with the release of iPadOS 13, Safari took a big step forward as a ‘desktop-class’ browser with a wide variety of enhancements that collectively eliminate a long list of complaints leveled against the app in the past. Safari’s ability to dynamically adjust the viewport to fit the iPad’s screen, enhanced support for pointer events, hardware-accelerated scrolling of frames and other regions of a webpage, along with other under-the-hood changes add up to a genuinely new browsing experience that has made work in sophisticated web apps like Mailchimp a viable option for the first time.
I don’t want to get too deep into Mailchimp, but it’s worth stepping through a few points of my workflow to get a better understanding of Safari’s capabilities. One of the first changes to Safari in iPadOS is evident immediately after logging into the service. Safari now advertises itself to websites as the macOS Catalina version of the app, except when it’s in the smallest Split View window or Slide Over mode, when it uses the mobile user agent. 1 The result is that websites like Mailchimp return the desktop version of its site as long as Safari is in 50/50 Split View mode or larger.

In Slide Over, Mailchimp’s functionality is limited to Campaigns, Audience, and Reports.
You can see the difference in Mailchimp’s UI. In compact Split View and Slide Over, Mailchimp offers a subset of its features that are limited to things like analytics and campaign management. The option to open and edit templates from the ‘Brands’ menu item isn’t available. In contrast, when Mailchimp is in full-screen mode, the web app’s full set of functionality is available.

In full-screen mode all of Mailchimp’s tools are available, as you can see from the menu at the top of the page.
I prefer to work in Mailchimp with Safari in full-screen mode, but after you’ve opened a template, you can switch to Split View if you’d like. However, the experience is subpar in Split View because Mailchimp uses a side-by-side, block-based previewer and editor that requires as much space as you can give it. That’s not really a limitation of Safari on iPadOS, though, because the same holds true when I use my 13-inch MacBook Pro. Mailchimp just needs a lot of horizontal space, or else working in it is cramped and inefficient.

The tab at the top of Mailchimp’s editor allows the editor to slide in from the side in Split View mode.
Although Mailchimp’s editor pane is cut off in Split View mode, the app displays a tab at the top of the editor that allows it to slide in from the side when tapped. It’s a handy option if you need to work in Split View with another app. Still, I usually put my text editor in Slide Over when I’m using Mailchimp because I only need the text editor to copy the text I want to paste into our newsletter template.
Using Slide Over, I can move my text editor out of the way after copying the HTML I need with a swipe, which is handy, but it’s worth noting that it’s also necessary. That’s because if I leave iA Writer in Slide Over and try to paste HTML into a field in Safari, it doesn’t always work. It appears that iPadOS occasionally has difficulty recognizing which app has the focus. As a result, when I type ⌘A to select the placeholder text I want to paste over in Mailchimp’s editor, iPadOS sometimes selects the text in iA Writer instead. It’s a small annoyance that’s solved by swiping iA Writer off the screen, but one that has cropped up for me in other contexts using Safari in Split View or Slide Over that I hope is addressed in iPadOS 14.

Occasionally, Mailchimp’s UI gets visually scrambled in Safari on iPadOS, but it’s easily corrected.
Moving between the editor for a block and Mailchimp’s content view isn’t always perfect either. The content view displays the types of blocks that can be added to the template, while the editor is for modifying an individual block. Sometimes after picking an image, the right-hand pane displays content blocks on top of the editor. The result looks worse than it is, though, because tapping ‘Save and Close’ or another tool in the editor refreshes that section of the page, returning it to the editor view. It’s a visual glitch that’s confusing when you first run into it, but it doesn’t affect the content I’m editing, so it’s become something I’ve learned to work around.
The only other bug I’ve run into is that the Mailchimp UI occasionally freezes, and the only way to get back to a state where I can scroll again is by refreshing the page. Because Mailchimp automatically saves my data every 20 seconds, I haven’t lost any data. However, if I’m working near the end of a long issue, it does mean scrolling back to where the problem occurred before I can get back to editing.

Using Mailchimp’s image editor on an iPad.
Another significant component of producing our newsletters is adding images. We have shortcuts that generate the icons we need, which are waiting for me in Mailchimp’s file picker UI when I need them, and resizing and placing them in the template is simple. The process is almost as simple for images that aren’t already in Mailchimp. I open the image’s URL in a separate tab and save it to my photo library or a folder in Files and then upload it to Mailchimp from its file picker UI. If an image is larger than what’s called for in Mailchimp’s specs, I can resize it in the service’s built-in image editor that pops up and hovers over the template editor, just as I would on my Mac.
The final step of producing an issue of our newsletters is sending it to Club members. That involves filling out a series of text fields, picking from drop-down menus, and tapping checkboxes, which has worked flawlessly every time.
I’d prefer it if Mailchimp offered native Mac and iPadOS apps. It’s a sophisticated editor that would benefit from the frameworks available to developers outside of a browser context. However, I’ve been working with Mailchimp for four years now, and it’s clear to me that the company is content to rely on its web app. That’s true of a lot of service providers that cater to users across multiple platforms, and I’m sure it makes sense from a business perspective. If a service came along that met our needs as well as Mailchimp but had a native app, I’d seriously consider switching, but so far, that hasn’t happened, which is why I’m so pleased Mailchimp is usable in Safari on the iPad now.
Web apps are a substantial part of most people’s workflows these days. Whether it’s Mailchimp and WordPress, which we use at MacStories, or something like Squarespace or your bank’s website, complex, desktop-centric web apps are everywhere. I wouldn’t be surprised if a lot of MacStories readers gave up on using certain web apps in Safari on an iPad long ago and haven’t gone back. If that sounds like you, I encourage you to give Safari another shot. There are still a few rough edges as I’ve outlined above, but at least with the web apps I use regularly, they aren’t impediments to getting work done, which was absolutely the case with Mailchimp before iPadOS 13.
With iPadOS, Apple eliminated many of the friction points to getting work done on an iPad. Of course, there’s more that could be done, and everyone’s needs are different, but as more of these sorts of bottlenecks are cleared, the iPad has increasingly become a viable alternative to the Mac for more people. I’m not giving up my Mac and using my iPad Pro for work full-time, but I’m much happier knowing I can leave home with just my iPad rather than feeling compelled to tote my MacBook Pro along with me just to produce our newsletters.
- Safari is so good at mimicking the Catalina version of the app that I had to verify my identity for the Slide Over screenshot below because Mailchimp thought I was using a different device to log in. ↩︎
Unlock More with Club MacStories
Founded in 2015, Club MacStories has delivered exclusive content every week for over six years.
In that time, members have enjoyed nearly 400 weekly and monthly newsletters packed with more of your favorite MacStories writing as well as Club-only podcasts, eBooks, discounts on apps, icons, and services. Join today, and you’ll get everything new that we publish every week, plus access to our entire archive of back issues and downloadable perks.
The Club expanded in 2021 with Club MacStories+ and Club Premier . Club MacStories+ members enjoy even more exclusive stories, a vibrant Discord community, a rotating roster of app discounts, and more. And, with Club Premier, you get everything we offer at every Club level plus an extended, ad-free version of our podcast AppStories that is delivered early each week in high-bitrate audio.
Choose the Club plan that’s right for you:
- Club MacStories : Weekly and monthly newsletters via email and the web that are brimming with app collections, tips, automation workflows, longform writing, a Club-only podcast, periodic giveaways, and more;
- Club MacStories+ : Everything that Club MacStories offers, plus exclusive content like Federico’s Automation Academy and John’s Macintosh Desktop Experience, a powerful web app for searching and exploring over 6 years of content and creating custom RSS feeds of Club content, an active Discord community, and a rotating collection of discounts, and more;
- Club Premier : Everything in from our other plans and AppStories+, an extended version of our flagship podcast that’s delivered early, ad-free, and in high-bitrate audio.

John Voorhees
John is MacStories’ Managing Editor and has been writing about Apple and apps since joining the team in 2015. He is also Federico’s business partner and co-hosts two MacStories podcasts: AppStories , which covers the world of apps and MacStories Unwind , which explores the fun differences between American and Italian culture and recommends media to listeners.
Comment: How “desktop-class” is Safari in iPadOS 13?
One of the tentpole features of iPadOS 13 was a desktop version of Safari. For as long as I can remember, I’ve been saying that Mobile Safari on the iPad was a significant weakness. Even when the iPad had the power of a laptop, it was still running a web browser that was limited. For the past few weeks, I’ve been testing Desktop Safari on the iPad to see if it’s genuinely a desktop browser. Is the iPad finally ready to be on the same level as the Mac? Does iPadOS 13 make it easier to go iPad only? Let’s dive in on a review of Desktop Safari on iPadOS 13.
Testing setup for Desktop Safari on iPad
For my testing of how well the desktop version of Safari on iPad works, I am using a 10.5-inch iPad Air (2019 version) with a Brydge Keyboard and an external mouse enabled through accessibility mode . All functions were tested without a mouse as well. My goal here was to create a laptop-type environment in which to compare Safari.
My previous iPads were the 2017 12.9-inch iPad Pro with a Smart Keyboard and a 2018 11-inch iPad Pro with a Smart Keyboard . Until I started using the Brydge keyboard, I didn’t realize how much I hated Apple’s Smart Keyboard for day-to-day use. While there are some excellent features like automatic pairing and a lack of charging, the Brydge keyboard pairs almost instantly and a battery lasts for a year. It feels more like a traditional keyboard in practice. If you are looking for the absolute best iPad keyboard, I highly recommend the Brydge keyboard. They have options for the iPad Mini , 9.7-inch iPad , 10.5 iPad Air , 11-inch iPad Pro , and the 12.9-inch iPad Pro .

Google Docs/Spreadsheet/Slides
Native access to Google’s productivity suite is a key task for me. My school runs off G Suite, so I use it daily. The iPad apps do not offer as full a featured experience as the web. Using the web interface on iPadOS is a much better experience. I was able to access all the features and work like I would on a Mac.
A few items can be a bit awkward, and it mainly relates to how Google has built-in tools for right-clicking, copy/paste, etc. Overall, iPadOS handles it with ease, though. In K–12, I believe you’ll see the web interface recommended over the native apps. The key challenge for Apple will be keeping it compatible as Google evolves the features and interface. Overall, I give it an A-.
Using WordPress isn’t a niche task. WordPress websites power at least 20% of the internet. A lot of popular websites are using WordPress behind the scenes, so the iPad working well with it is imperative to a lot of people who make their living working with content (writers, editors, etc.).
I have access to several WordPress websites for various projects, so I was excited to be able to try them out. You might be wondering why I don’t just use the WordPress app for iOS? Many WordPress installations have different features and plugins enabled, so I want to be able to access the entire experience in the browser.
Initially, everything seemed to be going well. I could see the entire dashboard in a very similar manner to the desktop. In practice, it’s just as frustrating as before. Even with a full web browser, the text selection on iOS is still more difficult than I’d like. In the WordPress window for this article, I wanted to rearrange some text, and it took me a few tries to get it all selected and moved. While the experience was passable for the occasional interaction, I wouldn’t want to have to work with desktop Safari on iPad with the native WordPress interface every single day. Overall, I give the experience a C+.
Squarespace
My school web runs on Squarespace. While Squarespace is far from perfect, it’s a robust platform to build a professional-looking website without needing to know how to write code. One of the foundational parts of Squarespace is the block system. If you want to add/rearrange content on a page, you can add a block for text, image, video, etc. It’s quite intuitive. For years, it was virtually impossible to work on a Squarespace site on iOS. Last year, they finally released native apps for iPad and iPhone, though. While I wouldn’t want to build and maintain a site from scratch using the apps, it’s quite handy for quick content updates.
Working inside of blocks is functional on desktop Safari on iPad, but moving them around doesn’t seem possible to me. On the desktop, you do this by clicking and dragging them. I tried using the mouse and my finger, but I couldn’t find a way to move them around. Overall, I give the experience a B+.
Misc notes and wrap-up on Desktop Safari for iPad
These are just three examples I worked through based on my needs and how Apple pitched with desktop Safari on iPad back at WWDC. Is my iPad the most powerful? No. Does it have the biggest screen? No. I do feel like the iPad Air sits in the middle, so I think it’s an excellent option for my testing. Desktop Safari on iPad is decent in iPadOS 13. I hope Apple expands it in iPadOS 14 and going forward. Functionally, a few things need to happen with iPadOS to continue to grow the functions where more people can use it as a primary machine.
While mouse support in iPadOS 13 is usable, I want to see it expand into acting more like a traditional cursor. While this may cause a lot of rethinking of how iPadOS functions, I think it’s imperative for long-term growth. One of the dreams I’ve always had for iPad is to make it be the most versatile machine. When I am at work, I want to use it in the traditional desktop sense with a larger screen and a keyboard/mouse. When I head to a meeting or want to watch some YouTube TV on the couch, I want it to act more like a traditional iPad where it’s touch-based and extremely portable.
I’ve often heard that the heaviness of macOS allows iOS to be light. I want iPadOS to become heavy. I want iPadOS to expand to where I can work as fast with files, websites, and text selection as I can on macOS. I want a touch version of iPadOS to be there when I am on the couch, but a desktop version of iPadOS to be there when I am at my desk. The iPad has a chance to be the machine that acts as our podcast editor, writing machine, teaching machine, gaming machine, etc. The adaptability of the iPad is part of its strength. Apple set a vision with iPadOS 13, and while it’s a significant first step toward expanding the capabilities of the iPad, the excitement lies on what is to come with this new vision.
More on iPadOS 13
- iOS 13: How to use a mouse with your iPad
- When to deploy macOS Catalina, iOS 13, and iPadOS 13
- Is the Reminders app ready to be considered a true task manager in iOS 13 and macOS Catalina?
- Five of the best under-the-radar features in iOS 13 [Video]
FTC: We use income earning auto affiliate links. More.

Check out 9to5Mac on YouTube for more Apple news:

Apple's tablet debuted in 2010. Since the origin…
iPadOS 13 was announced at WWDC 2019, and it wil…

Bradley lives in Chattanooga, TN.
Tips, feedback, corrections and questions can be sent to [email protected].
Bradley Chambers's favorite gear

MacBook Air
The MacBook Air is the best value on the market for laptops.

AirPods Pro 2
The best day to day headphones for iOS and macOS.

Manage push notifications
Safari in iPadOS brings desktop websites, but that’s only the tip of the iceberg

Apple introduced significant enhancements for Safari in iPadOS to make tablet browsing a desktop-class experience with new capabilities and features such as a dedicated download manager, desktop websites instead of mobile ones, easier multitasking and so forth.
iOS 13 and iPadOS were released for developer testing following the June 3 WWDC 2019 keynote. Both software updates will release to everyone in Fall 2019.
Here are all the new features for Safari in iPadOS and iOS 13.
iPadOS: new Safari features
Here are all the new features for the Safari browser in iPadOS.
Desktop websites
Safari now automatically displays desktop versions of websites you visit.
It does so by adapting the browser’s user agent so that web servers are fooled into believing that you’re using Safari on desktop. In addition, touch input now maps correctly and that’s huge because some websites don’t work properly on iPad because they expect a mouse or trackpad.

Desktop websites take full advantage of the larger iPad screen and you can now zoom in and out on a website’s text without its code preventing you from doing so, which has been an issue with many mobile websites that have dynamically adapting layouts.
Now websites like Google Docs, Squarespace and WordPress work without a hiccup in Safari.

Dieter Bohn, The Verge :
Google Docs has long been a huge problem on the iPad, for two reasons. First, Google’s own iPad app is god-awful and the company seems hell-bent on not updating it to work better. Second, Google Docs in Safari on the iPad right now redirects you to that app even if you ‘Request Desktop Site’. On iPadOS, however, Google Docs in Safari seems great. Admittedly, I only spent about five minutes poking around, but I went straight for the stuff I didn’t expect to work at all — and it worked. Keyboard shortcuts for formatting and header styling, comments, cursor placement and even watching real-time edits from another person in the doc all worked.
Changing Safari’s user agent on iPad and doing some clever things under the hood still doesn’t make iPadOS’s Safari a real desktop browser, but at least those problematic websites will no longer be frustrating to use and interact with on your tablet.
Easier multitasking
Safari on iPadOS makes it easy to see webpages side by side.
To create such a setup, just drag a piece of content like a website link or a webpage image and drop it into its own space. Doing so will instantly spawn another instance of Safari so you can have, say, search results in the left window while opening websites in the right Safari window.
Creating multiple windows from the same app was previously possible, but only within the Safari before. iOS 13 and iPad OS have extended that functionality to a plethoras of other apps, including Notes and Mail. In Mail, for instance, you can drag a window to compose an email next to your primary inbox so that you can view or copy from one message and paste it into another, all without obscuring either message.

iPadOS brings other multitasking enhancements to Safari. When browsing two webpages in Split View, it will now display the full toolbar, meaning fewer taps to get things done. And if you have an external keyboard connected to your tablet, you can navigate the web even faster with more than 30 new keyboard shortcuts. Just hold down the Command key on the keyboard to display keyboard shortcuts in any app that supports them.
Download manager
Safari is bringing a dedicated download manager to the experience.
Like in Safari for Mac, you can now finally download stuff such as ZIP files, documents and so forth and save them to the disk. Not only that, but Safari for iPad lets you download files in the background, while you’re doing something else, saving you time.

Both your web downloads from Safari and attachments from Mail are automatically saved into the Downloads folder which lives in Files. You don’t even have to open the folder because Safari lets you simply drag and drop any downloaded item and drop it into another app.
Photo upload resize
This another under-appreciated Safari feature has been around for years now.
In iPadOS, it’s getting even better. Now when you want to upload an image somewhere, you’ll be asked whether to automatically resize the image before uploading to save bandwidth. Similar to the Mail app, you can choose between Small, Medium, Large or Actual Size.
In addition to these major features, Safari in both iPadOS and iOS 13 is packed to the gills with a bunch of under-the-hood tweaks and nice-to-haves. Scrolling is now faster and you can now quickly zoom in and out on a website’s text even if the website has disallowed zooming.
An overhauled start page makes it easier to access your favorite, frequently visited and most recently visited websites. Similar to Safari in macOS, you can now easily adjust camera, microphone and location permissions, and more, on a per-site basis. These settings along with text size controls and Reader View are hidden underneath Safari’s new icon in the URL filed.

In terms of security and privacy, Safari’s elevated anti-fingerprinting protections make using web fonts more secure while iCloud end-to-end encryption means your synced bookmarks are no longer readable by anyone, Apple itself included. Indian users get new fonts in Safari, a bunch of of open tabs can now be bookmarked with a tap and you’ll now be warned when using weak passwords on websites. Siri brings suggestions to Safari for things like previously visited websites and links you receive through Messages.
On top of that, there are some noteworthy touches.
For instance, tapping the Share menu reveals new options for quickly emailing a webpage as a link or a PDF or access it in Reader view. And when you start entering a URL of the already-open website, Safari will forward you to its corresponding tab.
Lastly, even typing in URLs is faster thanks to a new gestural keyboard in iPadOS and iOS 13 .
Safari changelog
Some Safari features are exclusive to the iPad version of Safari—such as desktop websites and dragging to create new windows in side-by-side multitasking mode—while others are universally available across all supported iOS devices.
These features are specific to the iPad edition of Safari.
- Desktop websites : At long last, Safari in iPadOS automatically presents a website’s desktop version so now touch input maps correctly when a website expects mouse or trackpad input. And thanks to website scaling, these desktops sites take full advantage of the large iPad screen.
- Drag to create windows : Quickly open another Safari window by dragging the content like a URL into its own space, creating a side-by-side browsing environment.
- Full toolbar in Split View : Now you can access the full Safari toolbar in the Split View multitasking mode.
- Keyboard shortcuts : Navigate the web even faster with over 30 new keyboard shortcuts when you use an external keyboard.
- Faster scrolling : Scrolling within web pages is faster and more fluid.
iPhone and iPad
The following Safari capabilities are available on all iOS devices compatible with iOS 13.
- Photo upload resize : When using Safari’s support for mobile uploads, the browser can now resize your photo to small, medium, large or actual size before uploading.
- Download manager : Safari now packs in a dedicated download manager with background support. Not only does it let you see download progress, but also drag and drop any downloaded item into another app.
- Downloads in iCloud : A unified Downloads folder in the Files app gives you a central place to access both your web downloads and attachments from Safari and Mail
- Updated start page : An updated design of Safari’s start page now includes your favorites, frequently visited and most recently visited websites, so you can get to the site you want when opening a new tab with a tap.
- Weak password warnings : Safari will warn you if you attempt to use a weak password when signing up for a new website account.
- Jump to open tab : If you start to type the address of a website that’s already open, Safari directs you to the open tab.
- Expanded email sharing : When you choose Mail from Safari’s Share menu, you have new options for emailing a webpage as a link, PDF or in Reader view.
- Siri suggestions : Siri now offers personalized suggestions in Safari based on your browsing history, links sent to you in the Messages app and more.
- Website View menu : Found in the Smart Search field, this new menu is now your one-stop shop for text size controls, Reader view and per‑site settings.
- Per‑site settings : Control camera, mic and location access, view a website in its desktop or mobile version, use Reader view and enable content blockers, all on a per‑site basis.
- Page zoom : Quickly zoom in and out on a website’s text.
- Save open tabs as bookmarks : You can save a set of open tabs to your bookmarks.
- New fonts : Four New Indian language system fonts for Gurmukhi, Kannada, Odia and Gujarati are now available in Safari and other apps.
- iCloud end‑to‑end encryption : Your Safari history and open tabs that have synced with iCloud are now protected with end‑to‑end encryption.
- Enhanced anti-fingerprinting protection : Safari’s protections related to browser fonts have been expanded.
iPadOS and iOS 13 compatibility
iOS 13 is compatible with the following Apple smartphone models:
- iPhone XS Max
- iPhone 8 Plus
- iPhone 7 Plus
- iPhone 6s Plus
- iPod touch (7th generation)
iPadOS is compatible with the following iPads:
- 12.9-inch iPad Pro
- 11-inch iPad Pro
- 10.5-inch iPad Pro\
- 9.7-inch iPad Pro
- iPad (6th generation)
- iPad (5th generation)
- iPad mini (5th generation)
- iPad mini 4
- iPad Air (3rd generation)
To learn more, read Apple’s press release or visit apple.com/ios/ios-13-preview .
What do you think of these Safari changes? And while we’re at it, do you believe Apple when it says that Safari in iPadOS brings desktop-class browsing to the tablet experience?
Let us know by leaving a comment below.
We explain and teach technology, solve tech problems and help you make gadget buying decisions.
3 Best Ways to Open Sites in Mobile Mode in Safari for iPadOS

Dilum Senevirathne is a freelance tech writer specializing in topics related to iOS, iPadOS, macOS, Microsoft Windows, and Google web apps. Besides Guiding Tech, you can read his work at iPhone Hacks, Online Tech Tips, Help Desk Geek, MakeUseOf, and Switching to Mac.
Safari is a vastly improved web browser on iPads running iPadOS. You can customize websites, use content blockers, manage multiple file downloads , perform tons of keyboard shortcuts, and a whole lot more . It also loads websites in desktop mode, which makes web browsing more convenient.

By default, Safari for iPadOS masquerades itself as a desktop browser (with a Safari for Mac user agent string to boot). And with the desktop-oriented nature of iPadOS , that makes total sense.
However, the iPad still primarily resorts to touch-based input, and there are multiple instances where certain desktop sites will not work with your favorite gestures.
So you may want to switch certain sites to mobile mode whenever their desktop versions don’t respond all that well. But how do you do that?
Thankfully, Safari for iPadOS offers multiple ways to launch sites in mobile mode. Let’s check the three best methods that work flawlessly.
1. Load Single Site in Mobile Mode – Temporarily
You can easily instruct Safari to switch a tab to mobile view whenever you face issues with the site’s desktop view. Start by tapping the ᴀA icon to the left corner of the Safari address bar.

On the menu that shows up, tap Show Mobile Website. As soon as you do that, Safari will reload the tab automatically and show you the mobile version of the website.
The site within the tab will continue to show up in mobile mode, even if you navigate to a different page on the same site.

Note: The change only applies to the active tab that you are currently viewing and not to the entire browser. You must repeat this action for other tabs if you want to switch the other sites to mobile view.
If you want to roll back to the desktop mode, bring up the ᴀA icon-based menu again, and then tap the Show Desktop Site option. Safari will revert the tab to desktop mode automatically in case you stray away to another website.
2. Load Single Site in Mobile Mode – Permanently
If you want to load a specific website in mobile mode permanently, regardless of whichever tab it is that you are on, then you must make a slight configuration to the content settings of the site. Bring up the ᴀA menu, and then tap Website Settings.

On the Website Settings sheet that shows up, turn off the switch next to Request Desktop Site and tap Done to apply your changes.
Safari will automatically refresh the website and relaunch it in mobile mode. And it will continue to do so, even when you launch the site (and all related web pages) in other tabs. That will continue even if you quit the Safari app and reopen it.

If you want to go back to using the desktop version of the website, make sure to open the site in the tab you are currently on, bring up the Website Settings sheet from the ᴀA icon-based menu, and then turn on the switch next to Request Desktop Site.
Alternatively, you can request the desktop version temporarily by tapping the Show Desktop Site option on the ᴀA menu.
3. Load All Sites in Mobile Mode
Getting sick and tired of sites loading in desktop mode? You can actually configure Safari to load all websites in mobile mode by default. That is ideal if you don’t have a keyboard or mouse set up on your iPad , and instead want a great touch-based experience with Safari.
Start by opening the Settings app on your iPad. Go down the left-hand side, select Safari, and then flick through the list of Safari settings until you get to the Settings for Websites section. Tap the Request Desktop Website option underneath it.

On the Request Desktop Website screen that shows up, turn off the switch next to All Websites. That should prompt Safari to load all sites in mobile mode.

Note: Safari will continue to open sites in mobile mode until you go back to the Request Desktop Website setting within Settings > Safari and turn on the switch next to All Websites.
If there are sites that you’ve manually configured to show up in mobile mode using the previous method, then the Request Desktop Website screen will show up slightly differently.

In this case, you will see a list of all excluded sites, and the All Websites option will show up as Other Websites — turn off the switch next to it to make Safari load all sites in mobile mode.
Mobile Mode to the Rescue
Apple did the right thing by configuring Safari on iPadOS to launch sites in desktop mode by default. However, using a keyboard and a mouse to interact with some of the more complicated sites will certainly make a difference. So the next time a website gives you grief, know that mobile mode is a few taps away.
Next up: Did you know that you can use multiple Safari windows in iPadOS? Here’s everything you need to know about using them.
Was this helpful?
Last updated on 28 November, 2022
The above article may contain affiliate links which help support Guiding Tech. However, it does not affect our editorial integrity. The content remains unbiased and authentic.
Leave a Reply Cancel reply
Your email address will not be published. Required fields are marked *

The article above may contain affiliate links which help support Guiding Tech. The content remains unbiased and authentic and will never affect our editorial integrity.
DID YOU KNOW

Dilum Senevirathne
More in ios.

11 Best Ways to Fix iMessage Is Signed Out Error on iPhone

How to View Apple Notes on Android
Join the newsletter.
Get Guiding Tech articles delivered to your inbox.
You’re using an older browser version. Update to the latest version of Google Chrome , Safari , Mozilla Firefox , or Microsoft Edge for the best site experience.
- eLearning Blog
- eLearning Basics
- Instructional Design
- Corporate Training
- Course Selling
- Manufacturing
- Products iSpring Suite iSpring Learn
- Use Cases Onboarding Compliance Training Induction Training Product Training Channel Partner Training Sales Training Microlearning Mobile Learning
- Company About Us Case Studies Customers Partnership Course Development Contact Us
- Knowledge Hub Knowledge Hub Academy Webinars Articles Guides Experts on iSpring
- Language EN English Français Deutsch Español Italiano Nederlands Português Polski 中文 日本語 العربية Indonesia
- Shopping Cart
How to Make a Website Go Full Screen on Your iPad

You can view almost any type of web content on an iPad, but it doesn’t readily support full-screen mode. People who prefer to use the Safari browser on the iPad face a problem viewing web content without browser panels, elements, etc.
If you want to view a webpage, course, or HTML5 presentation, it will be much more convenient to do it in full-screen mode. Full-screen viewing looks more native and provides additional space for your content, while hiding all Safari elements but the main window.
In this article, we provide a brief guide on how to view a website full screen on an iPad — and you won’t even need to change your iPad settings.
How to Open Safari in Full-Screen Mode on an iPad
- First, launch the Safari browser from the home screen and go to the webpage that you wish to view in full-screen mode.

Note : This way of viewing a webpage, course, or presentation in full-screen mode works if the source code of the webpage contains the following tag:
<meta name=”apple-mobile-web-app-capable” content=”yes “>
You can add this tag to your webpage using a third-party tool like iWeb SEO Tool or any other tool you wish. Please note that you need to first add the tag, refresh the page, and then add a bookmark to your home screen.
How to View a Video in Full-Screen Mode on an iPad
To get a video to show in full-screen mode on an iPad, you’ll need to download a standalone video app. There are multiple apps on the market, but you can use YouTube’s app, for example. Its interface will look almost the same as it would in a browser on a PC, but there are some differences to YouTube on a touch screen device in regard to switching to a full-screen mode.
To make the YouTube app play in full-screen mode, choose and open a video. When the video starts playing, tap on it once. You’ll see several additional options, including dual arrows at the bottom right corner. Tap the arrows to go to full screen.

How to View a PowerPoint Presentation on an iPad
If you want to make your PowerPoint projects available on the iPad, you can easily do so by converting PowerPoint slides to HTML5 with iSpring Converter . It works as a PowerPoint add-in, so you can convert your presentation right from PowerPoint with all of its functionality and appearance preserved. If you want to protect your content from unauthorized access, you can add an extra layer of protection to your presentation by setting a password, restricting the time allowed for viewing, and adding a watermark.
Would you like to get more useful information about online content for your iPad? Discover the easiest way for you to view PowerPoint presentations on an iPad or how to create an iPad app easily using tools you’re already familiar with.
How to Make Apps Full Screen on the iPad
Some apps don’t fill the entire screen of the iPad, but you can resize them to take full advantage of the expanded aspect ratio.
To have an app take up the full screen, drag the handle to the bottom corner of the iPad. If you’re using a mouse or trackpad, then use the mouse pointer on any edge of the window to resize it.
How to Troubleshoot Safari Display Issues
If Safari doesn’t open a webpage or work as expected on your iPad, here a few solutions that might help:
- Reload the page
- Install software updates and restart
- Turn extensions off if there are any installed in your browser
- Try opening the website in a private browser window
- Check the privacy, security, and website settings
- Reload the page without Private Relay if you’re subscribed to iCloud+ and are using this feature
- Check your VPN or other security software if you have these installed on your iPad
- Check network settings
To get the details about using these methods, check out the official Apple website .
How to Remove Split Screen on Safari
Apple devices are multitasking tools. The clearest evidence of this is that the Safari browser features a split screen. It allows you to open two websites in two separate windows simultaneously. These split-screen windows work independently of each other and help users to be more productive. For example, you can open YouTube to watch an instructional video in one window and open another website next to it to find some additional information on a topic.
Split View is enabled by default, so you can’t disable it forever. But there are a few tricks that can help you get your iPad screen back to full size.
To close Split View, tap the Multitasking button in the Safari window that you want to keep, then tap the full screen button. You can also drag the central app divider left or right over the Safari window that you want to close.
You can also merge your Safari windows into a single one to enable full-screen mode. Just touch and hold the tabs button in the toolbar and tap Merge All Windows .
To go into more details about how to use split screen in Safari on your iPad, visit the Apple website .
What to Do if Safari Opens in a Small Window
If a website opens as a small, narrow window off to the side, you likely have an instance of Safari opening in slide-over view.
To make Safari full screen, pull down on the gray grab bar at the top of the browser view that allows you to transform the view into split screen. Then drag a central app divider all the way to the edge of the screen.
Fast PowerPoint to HTML5 Converter
Convert presentations to HTML5 with all effects and transitions preserved

Content creator:
Helen Colman
She enjoys combining in-depth research with expert knowledge of the industry. If you have eLearning insights that you’d like to share, please get in touch .
You might also like this

Subscribe to our blog
Stay tuned to get our latest eLearning tips and tricks!
By clicking “Subscribe”, you agree to our Privacy Policy . All emails include an unsubscribe link, so that you can opt-out at any time.
We use cookies to give you the best possible experience on our website and also for analytics and marketing purposes. You can enable or disable optional cookies as desired. See our Cookie Policy for more details.
Manage your cookies
Essential cookies are always on. You can turn off other cookies if you wish.
Essential cookies
Analytics cookies
Social media cookies
- I Tried Both: Apple Watch 9 vs Fitbit Charge 6
- Best Places to Print Photos Online
How to Get a Full Screen on iPad
Maximize your iPad screen
:max_bytes(150000):strip_icc():format(webp)/SamCostello-d7fcf106ec2048ccb06d1e2190b3396d.jpg "safari ipad pc mode")
- Ithaca College
:max_bytes(150000):strip_icc():format(webp)/image-5e6611aebe974bb7886a24b5070c834f.jpg "safari ipad pc mode")
What to Know
- There's no way to make your iPad full screen in every situation, but there are a few ways to make it work.
- Some websites can go full screen, but only if they're coded to support it.
- You can make videos and iPhone apps run on iPad full screen by tapping the button showing two arrows going in opposite directions.
This article explains the situations in which you can get full screen on iPad and how to do it.
If you want to get full screen on your iPad—that is, no clock, date, or battery icon on the screen—we've got bad news for you: There's no way to do it in every situation. The iPadOS doesn't provide that option. But, there are some cases in which you can do something similar in certain apps.
How to Get a Full Screen on iPad in Safari
One of the most common cases in which people want an iPad to be full screen is the Safari web browser . Getting iPad Safari in full screen appeals to people who wish to have the most immersive web browsing experience possible. Here's what to do:
This tip doesn't work on all websites. It works on relatively few. This tip is the only way to make Safari full screen on an iPad. It relies on web developers who have added a bit of code to the site, and most developers don't do that.
Find the website you want to view full screen.
Tap the action button (the button with the arrow coming out of it).
Tap Add to Home Screen . This creates a shortcut to the site on your iPad home screen (aka a web clip).
Edit the display name for the shortcut and then tap Add .
When you tap the shortcut from your home screen, it will open the website in Safari.
How to Get a Full Screen on iPad: For Video
Another way to get full screen on iPad is in video apps. Some video apps offer actual full screen, with no menu bar at the top, while others keep the menu bar but otherwise go full screen. Users can't control which is which; it's up to the developer of the app.
Whichever your video app supports, you can view it full screen by tapping the icon that looks like two arrows pointing in opposite directions.
If you're viewing the video picture-in-picture, tap the right-corner icon showing two squares with one that has an arrow in it.
Get the Latest Tech News Delivered Every Day
- How to Get Full-Screen Pictures for iPhone Calls
- How to Capture an iPad Screenshot
- How to Download and Save Photos and Images to the iPad's Camera Roll
- How to Change the Default Search Engine in Chrome for iOS
- How to Use Picture-in-Picture on iPhone
- 4 Ways to Go Full Screen in Windows 11
- How to Share Photos, Websites, and Files on the iPad
- How to Share Your Screen in FaceTime
- How to Get the Most Out of the iPad
- How to Add Safari Bookmarks on iPad
- How to Add and Save a Website to the Home Screen on Your iPad
- How to Use Split Screen on iPad
- How to Change Your Homepage in Safari
- How to Bookmark on an iPad
- How to Control F on iPad
- How to Use Picture-in-Picture on iPad (iOS 14)
How to turn on Safari dark mode on a Mac
How to turn on safari dark mode on an iphone or ipad, how to turn on safari's dark mode on any apple device to save battery life and reduce eye strain.
- You can enable dark mode for Safari on a Mac, iPhone, or iPad, which can help ease eye strain and extend your device's battery life.
- Turn on dark mode for your Mac in System Preferences in the General section.
- For an iPhone or iPad, enable dark mode in the Settings app by going to the Display & Brightness section.
In recent years, developers have been making it easier to enable dark mode for all your most common apps. That's good, because many people prefer dark mode because the palette is often easier on the eyes — especially at night — and it can even help extend your device's battery life by not illuminating the screen as brightly. Here's how you can turn on dark mode for the Safari browser on your Mac, iPhone, or iPad.
Safari automatically uses dark mode if you enable it in your Mac's System Preferences.
1. Click the Apple menu and then choose System Preferences…
2. Click General .
3. In the Appearance section, click Dark or Auto .
If you choose Dark , Safari and all other compatible apps will switch to a dark color palette right away and stay that way until you change this setting. Auto , on the other hand, sets the palette to dark at night and switches it to light during the day.
Just like on the Mac, Safari on your iOS device uses dark mode if you enable the feature in your iPhone or iPad's settings.
1. Start the Settings app.
2. Tap Display & Brightness .
3. In the Appearance section, tap Dark .
If you want Safari (and the rest of your device) to use dark mode automatically at night but switch to a light palette during the day, turn on Automatic by swiping the button to the right.
- Main content
- Press Releases
- Industry News
- Product Spotlight
- Fresh from Apple
- Video Production
- Installation Videos
- Explainer Videos
- Testing Lab
- Networking & Security
- Special OWC Deals
- The Other World
- Powered by OWC
- Space & Beyond
- Random Thoughts & Topics
- OWC Unplugged
- Article Archives
- Make a Suggestion
Send us a Topic or Tip
Have a suggestion for the blog? Perhaps a topic you'd like us to write about? If so, we'd love to hear from you! Fancy yourself a writer and have a tech tip, handy computer trick, or "how to" to share? Let us know what you'd like to contribute!
How to Use Your iPad as a Desktop Computer With Stage Manager Extended Display

With the release of iPadOS 16.2, iPads powered by an M1 or M2 processor have gotten closer than ever to being able to replace a laptop or desktop computer. In this video you’ll learn about Stage Manager extended display, which allows you to connect your iPad Pro or iPad Air to an external display and run up to 8 windowed apps simultaneously across your iPad’s built-in display and the one on your desktop.
With the introduction of iPadOS 16.1 in late 2022, Apple added some new features, including proper external monitor support. So, can the iPad be used as a desktop? We’re going to check out this new feature called Stage Manager and explore what kinds of apps you can run in this new mode.With the introduction of iPadOS 16.1 in late 2022, Apple added some new features, including proper external monitor support. So, can the iPad be used as a desktop?
We’re going to check out this new feature called Stage Manager and explore what kinds of apps you can run in this new mode.
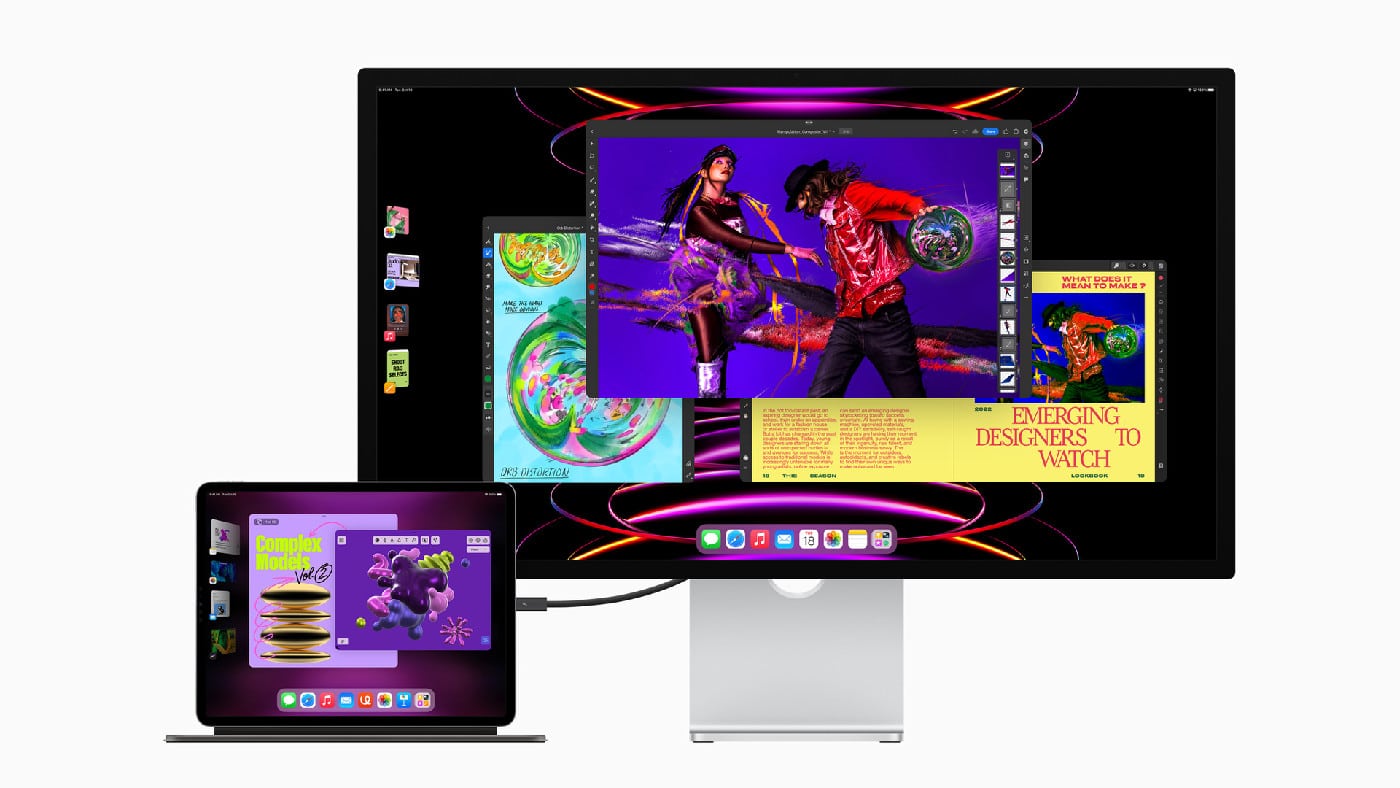
Apple introduced the iPad in 2010. Twelve years and 500 million in sales later, the iPad has become the gold-standard in tablet computing. Increasingly, the iPad has become more computer-like; offering mouse, touchpad, stylus, and keyboard support. With the addition of proper external display support, could the iPad become the one device to rule them all?
While in the past it was possible to mirror the iPad screen onto another monitor, television, or projector, the aspect ratio was limited to the same squarish 4×3 shape of the iPad. That’s all changed with the release of iPad OS 16.1, which brings proper external display support in extended mode; meaning that for the first time on an iPad, users will be able to run completely independent screens and multiple applications simultaneously. This works surprisingly well since we’re all used to taller-than-wide aspect ratios from working on mobile phones.
Supported iPads
Connecting to an external display in extended mode is limited to iPads powered by an M-series processor, such as the M1 or M2. Supported iPads at this time are:
iPad Pro 11-inch (3rd generation and later)
iPad Pro 12.9-inch (5th generation and later)
iPad Air (5th generation)
How to Use an iPad as a Desktop
To connect to a display, you will require a USB-C or Thunderbolt adapter . I tested DisplayPort, HDMI, and even a VGA monitor of varying resolutions without any issues.
Once connected, the display will be in mirror mode. There are a few settings to adjust:
- Move the iPad into landscape mode (physically)
- Open the Settings app
- Select Home Screen & Multitasking
- And Enable Stage Manager
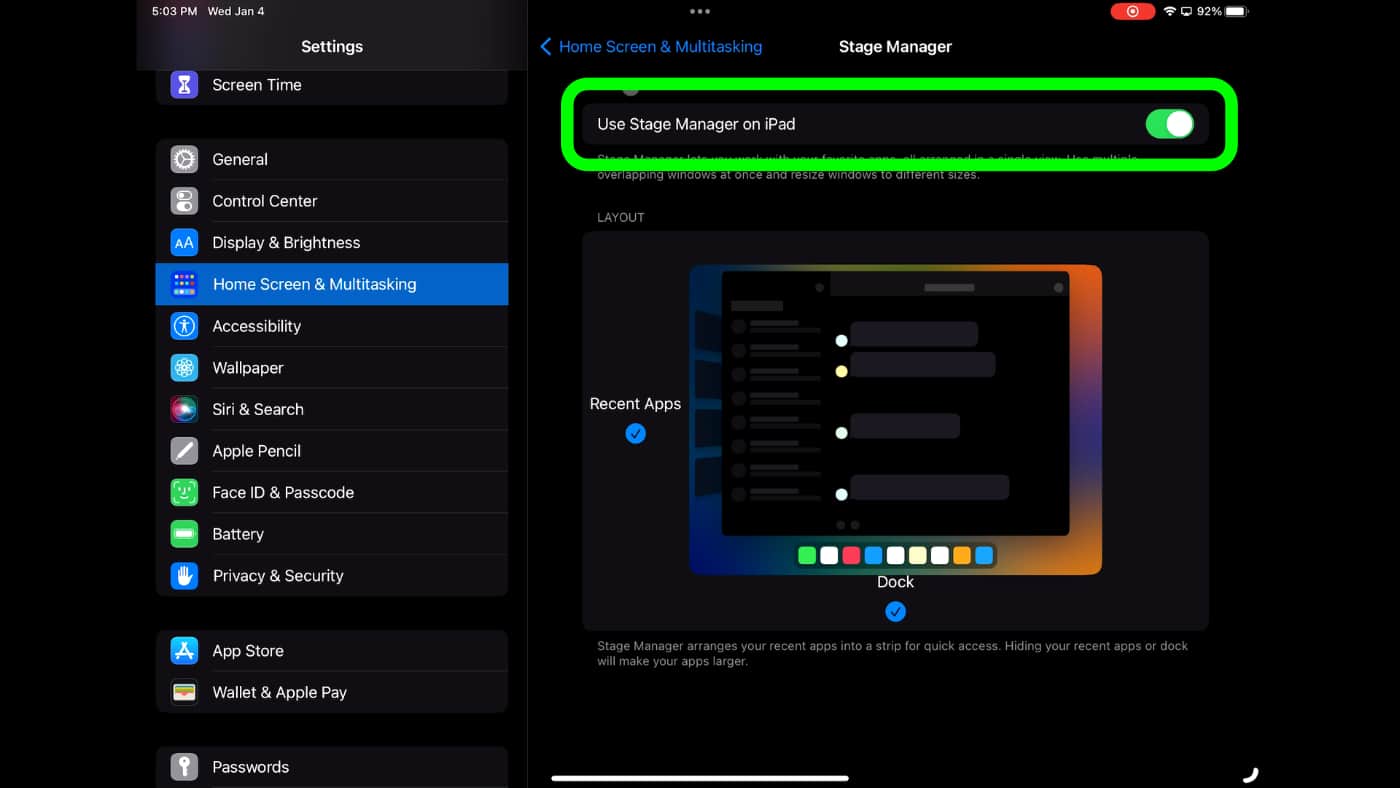
Stage Manager is a new iPad OS feature that enables multiple panels of apps that can be resized and moved around the screen.
Now, it’s time to configure the external display. Move into:
- Display & Brightness
- Under Displays, select Arrangement .
- Turn off the Mirror Display toggle if it’s on.
- (optional) You can also click-and-drag to reposition the layout of the monitors for mouse continuity.
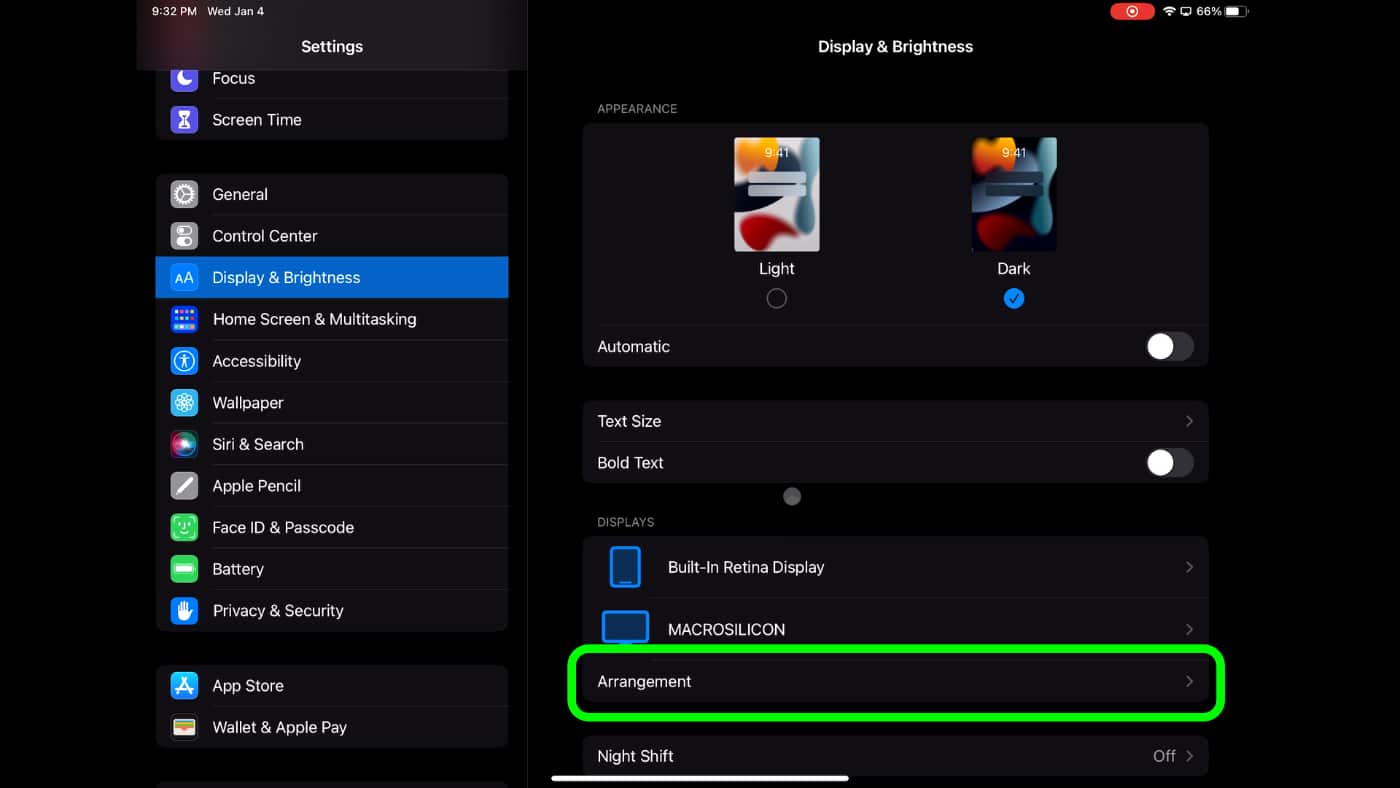
Working on the external display requires the use of a mouse or trackpad. This can be over Bluetooth using the Magic Mouse or Magic Trackpad. Wired mice also work when connected over a USB through a hub or dock.
Now that you’ve set up desktop monitoring and stage manager, what can you do?
Using the iPad as a Desktop
Running multiple apps on the iPad is very desktop-like. I started with an Adobe Express document. Click the 3dot multitasking panel to move from the iPad display to the external monitor. Like macOS, click and drag the lower corners of the app window to resize the panel; however, not all apps support this feature yet.
To load another app, open the App Library on either display, and launch. Send to the other monitor using the options panel. To see both applications in a side-by-side view, click the options panel, and choose Add Another Window .
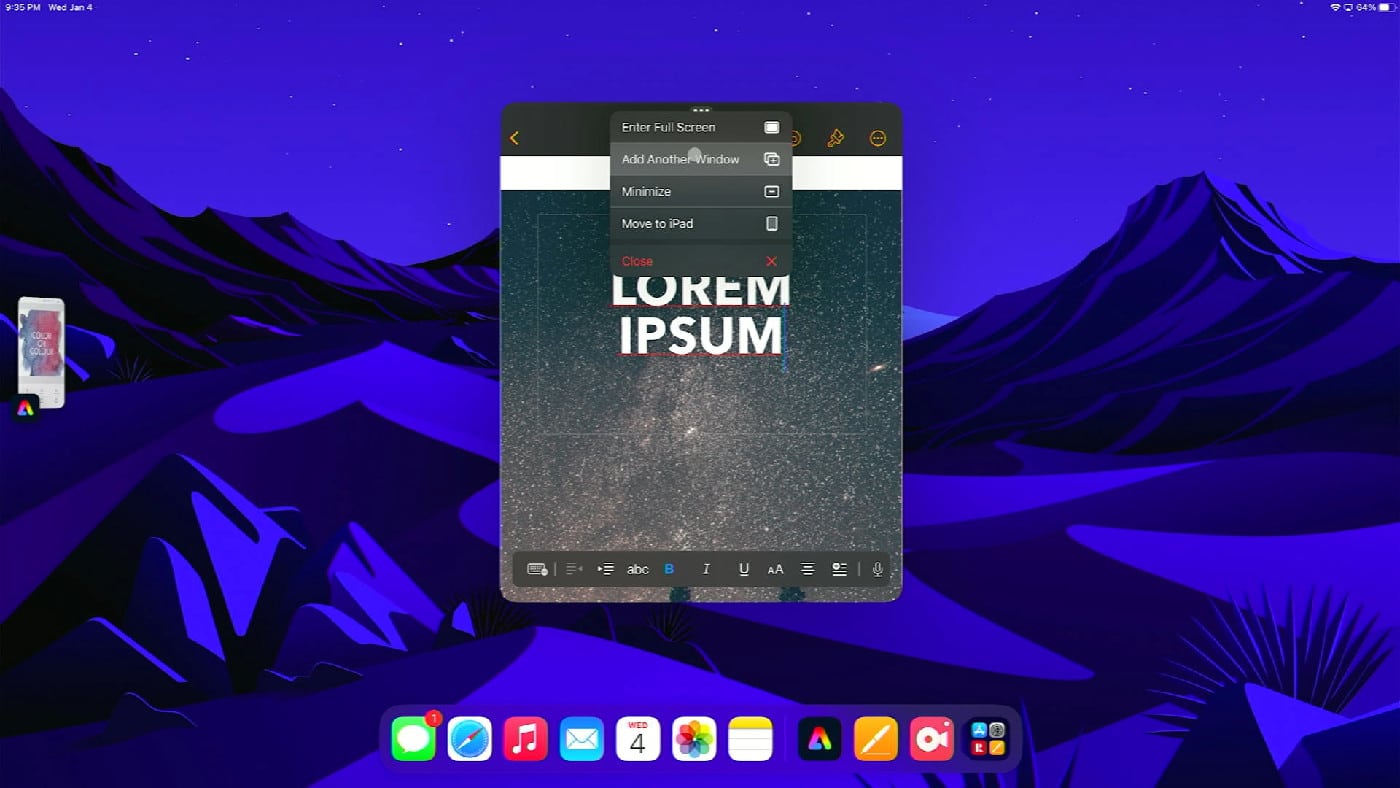
The app tiles cascade and click on the app you’d like to move to the foreground. Now, you can resize either panel. Following this, I can open up even more apps. Here’s what a quad-app setup looks like with Books and Files open as well.
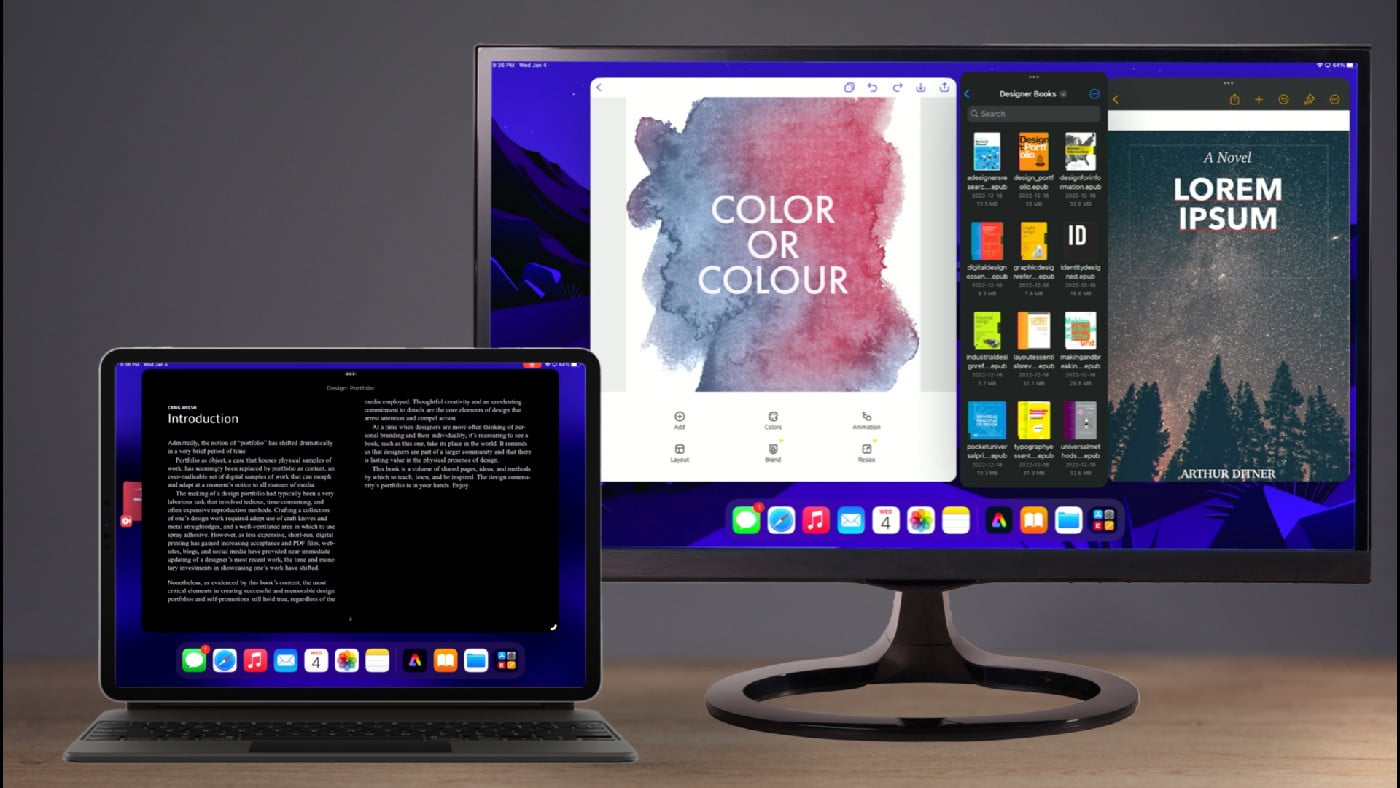
In another example, I can run DaVinci Resolve on the iPad, while I follow a tutorial on the Rocket Yard Blog on my main display.
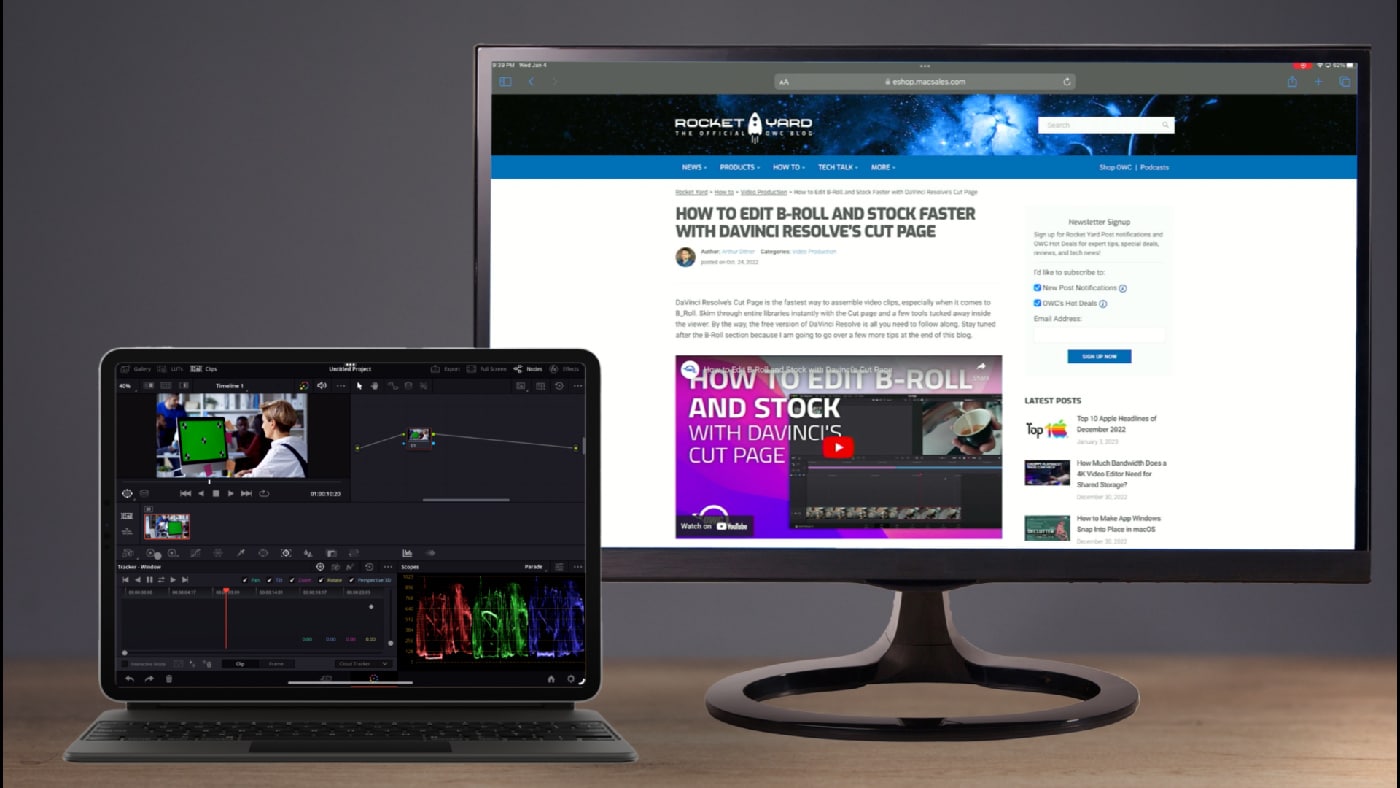
In this combination I have Procreate, Monument Valley, Weather, and Notes all running smoothly and looking great! Surprisingly, the experience is very fluid with no slow downs, the iPad is able to run all these apps simultaneously as if each one were in the foreground.
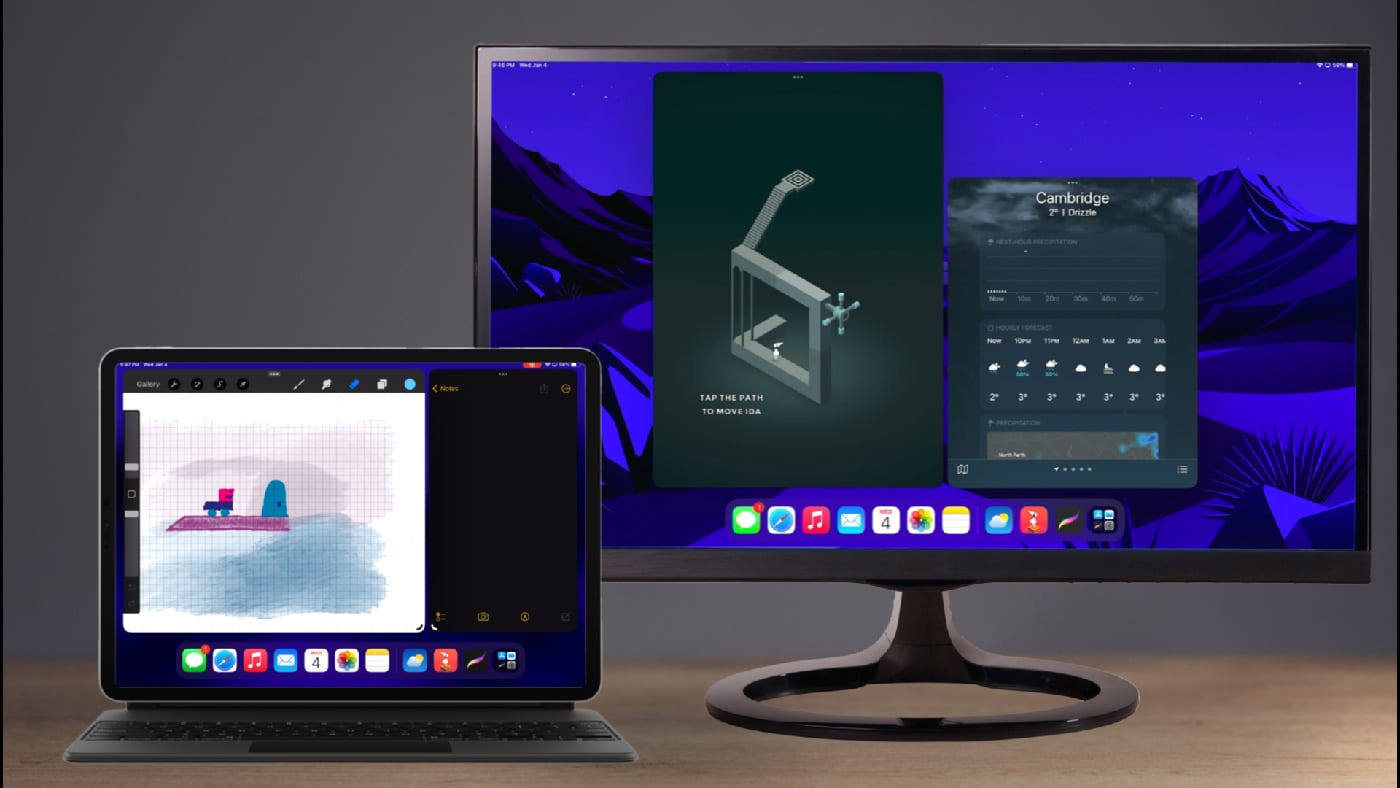
Or, I can keep all my camera images open in Files app while I’m processing over in Pixelmator on the iPad.
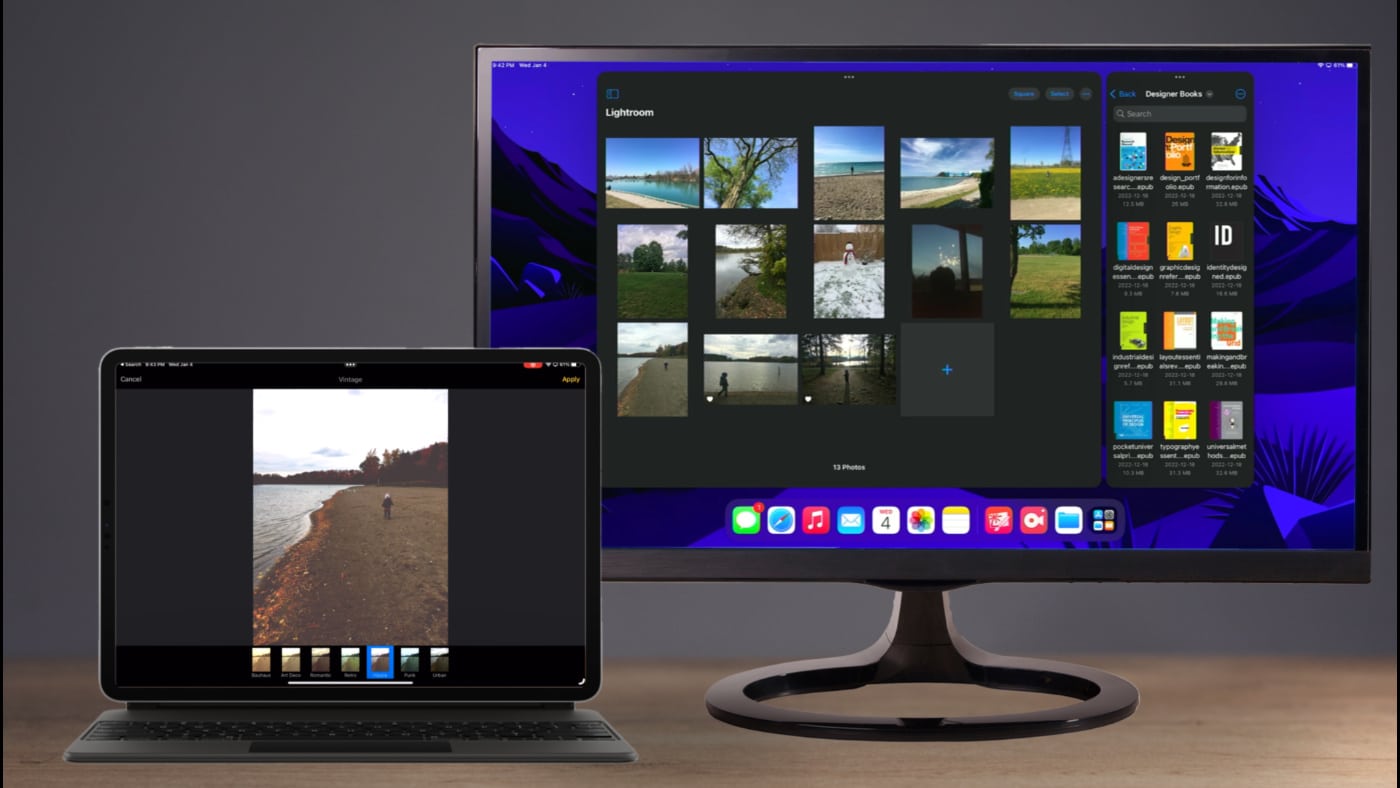
Essential Accessories
To get the most out of your iPad as a desktop, you’ll want to add a great dock to your setup. Preferably something with power-passthrough since there is only one connection port on the iPad. USB mice and keyboards work great, as do Bluetooth ones. You can even add wired ethernet to iPadOS for a more consistent internet connection at home or the office.
Who is this for?
I’m sure many are going to enjoy these features and it showcases the direction Apple is heading with the iPad. I would be hesitant to call this a true desktop replacement, but it’s very close. For a student wanting something very light to travel with between home and campus, this makes a lot of sense. Or, perhaps the iPad is the lightweight option to bring email and Zoom home from the office. You can even mount multiple hard drives to an iPad and connect to a local network over ethernet. And, with the recent launch of DaVinci Resolve for iPad, as well as great image editors like Adobe Photoshop and Affinity Photo, there is more and more professional work being done on iPadOS.
Who is this not for?
There are still a few strange limitations to iPadOS. Microsoft Excel on iPad doesn’t support all the features from the desktop version. Apple limits what kinds of applications can be released on the iPad and one such restriction is operating systems and programming languages; you can’t run an emulator, a terminal window, or Xcode or Swift. For most people this won’t be an issue, but for some professionals this is a show-stopper.
What do you think?
How are you using the iPad? Is it your go-to device for work, or something you use at home for Netflix and recipes? How would adding a proper monitor change your workflow? Let me know in the comments, I’d love to hear about it.
Other Topics You Might Like:

Leave a Reply Cancel reply
Save my name, email, and website in this browser for the next time I comment.
Notify me of follow-up comments by email.
Notify me of new posts by email.
Great overview, thanks. Using a 2nd Gen iPad Pro 11, so can’t use these features, but good to know when it’s time to upgrade.
Good article. I’m doing this at present, temporizing while waiting for a Mac Mini M2Pro to arrive. Since the Studio Display arrived…. I’m using an iPad Pro 12.9 (M1) with a Magic Keyboard and a Logitech mouse, both via Bluetooth. Everything works pretty well, as you noted. I’m not doing anything fancy, just web, mail, Music, Photos, and some work access stuff.
A couple of things that might be useful to note:
Settings>General>Trackpad & Mouse has controls for tracking speed as well as options for the secondary click and to turn off/on Natural Scrolling (Unnatural Scrolling?). Those using mice/trackpads with their iPads will have known all this, but it was new to me. Settings>Accessibility>Pointer Control lets you adjust the mouse pointer. I lost the low-contrast circle a few times (okay, yeah, I’m older). You can make it higher contrast and/or border the circle with color, as well as adjust the size. There’s also adjustment for scrolling speed here. Settings>Accessibility>Assistive Touch has options to customize mouse buttons. I haven’t, since my setup is temporary, but this is here.
Yes, I’ll hook up the new Mini ASAP, but this setup is, as you noted, surprisingly functional.
Thanks for the tips, Paul!
It’s awesome how much can be tweaked with the accessibility features. At first the iPad mouse made me uncomfortable, but now I’m actually loving the snapping it does.
You Might Also Like

Keep it Simple! Don’t Trust Your Photo Library’s Organization to Cloud and Editing Apps

How to Choose the Best Drives for Offloading Footage While Traveling

How to Choose a Memory Card for Best Performance and Compatibility

How to Edit B-Roll and Stock Faster with DaVinci Resolve’s Cut Page
Email Address
- Brand Assets
8 Galaxy Way Woodstock, IL 60098 1-800-275-4576 +1-815-338-8685 (Int)
All Rights Reserved, Copyright 2020, OWC – Since 1988 | Terms of Use | Privacy Policy
We use cookies to provide you with a full shopping experience, including personalized content, and to help us improve your experience. To learn more, click here .
By continuing to use our site, you accept our use of Cookies, Privacy Policy and Terms of Use .
iPad User Guide
- iPad models compatible with iPadOS 17
- iPad mini (5th generation)
- iPad mini (6th generation)
- iPad (6th generation)
- iPad (7th generation)
- iPad (8th generation)
- iPad (9th generation)
- iPad (10th generation)
- iPad Air (3rd generation)
- iPad Air (4th generation)
- iPad Air (5th generation)
- iPad Air 11-inch (M2)
- iPad Air 13-inch (M2)
- iPad Pro 10.5-inch
- iPad Pro 11-inch (1st generation)
- iPad Pro 11-inch (2nd generation)
- iPad Pro 11-inch (3rd generation)
- iPad Pro 11-inch (4th generation)
- iPad Pro 11-inch (M4)
- iPad Pro 12.9-inch (2nd generation)
- iPad Pro 12.9-inch (3rd generation)
- iPad Pro 12.9-inch (4th generation)
- iPad Pro 12.9-inch (5th generation)
- iPad Pro 12.9-inch (6th generation)
- iPad Pro 13-inch (M4)
- Setup basics
- Make your iPad your own
- Keep in touch with friends and family
- Customize your workspace
- Do more with Apple Pencil
- Customize iPad for your child
- What’s new in iPadOS 17
- Turn on and set up iPad
- Wake, unlock, and lock
- Set up cellular service
- Connect to the internet
- Sign in with Apple ID
- Subscribe to iCloud+
- Find settings
- Set up mail, contacts, and calendar accounts
- Learn the meaning of the status icons
- Charge the battery
- Show the battery percentage
- Check battery usage
- Use Low Power Mode to save battery life
- Read and bookmark the user guide
- Adjust the volume
- Learn basic gestures
- Learn advanced gestures
- Find your apps in App Library
- Switch between apps
- Zoom an app to fill the screen
- Quit and reopen an app
- Drag and drop
- Open two items in Split View
- Switch an app window to Slide Over
- View an app’s windows and workspaces
- Multitask with Picture in Picture
- Move, resize, and organize windows
- Access features from the Lock Screen
- Perform quick actions
- Search on iPad
- Get information about your iPad
- View or change cellular data settings
- Travel with iPad
- Change or turn off sounds
- Create a custom Lock Screen
- Change the wallpaper
- Adjust the screen brightness and color balance
- Customize the text size and zoom setting
- Change the name of your iPad
- Change the date and time
- Change the language and region
- Organize your apps in folders
- Add, edit, and remove widgets
- Move apps and widgets on the Home Screen
- Remove or delete apps
- Use and customize Control Center
- Change or lock the screen orientation
- View and respond to notifications
- Change notification settings
- Set up a focus
- Allow or silence notifications for a Focus
- Turn a Focus on or off
- Customize sharing options
- Type with the onscreen keyboard
- Dictate text
- Move the onscreen keyboard
- Select and edit text
- Use predictive text
- Use text replacements
- Add or change keyboards
- Add emoji and stickers
- Take a screenshot
- Take a screen recording
- Write and draw in documents
- Add text, shapes, signatures, and more
- Fill out forms and sign documents
- Use Live Text to interact with content in a photo or video
- Use Visual Look Up to identify objects in your photos and videos
- Lift a subject from the photo background
- Subscribe to Apple Arcade
- Play with friends in Game Center
- Connect a game controller
- Use App Clips
- Update apps
- View or cancel subscriptions
- Manage purchases, settings, and restrictions
- Install and manage fonts
- Buy books and audiobooks
- Annotate books
- Access books on other Apple devices
- Listen to audiobooks
- Set reading goals
- Organize books
- Create and edit events in Calendar
- Send invitations
- Reply to invitations
- Change how you view events
- Search for events
- Change calendar and event settings
- Schedule or display events in a different time zone
- Keep track of events
- Use multiple calendars
- Use the Holidays calendar
- Share iCloud calendars
- Take photos
- Take Live Photos
- Take a selfie
- Take a Portrait mode selfie
- Take videos
- Change advanced camera settings
- Adjust HDR camera settings
- View, share, and print photos
- Use Live Text
- Scan a QR code
- Scan documents
- See the world clock
- Set an alarm
- Use the stopwatch
- Use multiple timers
- Add and use contact information
- Edit contacts
- Add your contact info
- Send Contacts on iPad
- Use other contact accounts
- Hide duplicate contacts
- Export contacts
- Get started with FaceTime
- Make FaceTime calls
- Receive FaceTime calls
- Create a FaceTime link
- Take a Live Photo
- Turn on Live Captions
- Use other apps during a call
- Make a Group FaceTime call
- View participants in a grid
- Use SharePlay to watch, listen, and play together
- Share your screen in a FaceTime call
- Collaborate on a document in a FaceTime call
- Use video conferencing features
- Hand off a FaceTime call to another Apple device
- Change the FaceTime video settings
- Change the FaceTime audio settings
- Change your appearance
- Leave a call or switch to Messages
- Block unwanted callers
- Report a call as spam
- Connect external devices or servers
- Modify files, folders, and downloads
- Search for files and folders
- Organize files and folders
- Set up iCloud Drive
- Share files and folders in iCloud Drive
- Use an external storage device, a file server, or a cloud storage service
- Share your location
- Add or remove a friend
- Locate a friend
- Get notified when friends change their location
- Notify a friend when your location changes
- Turn off Find My
- Add your iPad
- Get notified if you leave a device behind
- Locate a device
- Mark a device as lost
- Erase a device
- Remove a device
- Add an AirTag
- Share an AirTag or other item in Find My on iPad
- Add a third-party item
- Get notified if you leave an item behind
- Locate an item
- Mark an item as lost
- Remove an item
- Adjust map settings
- Get started with Freeform
- Create a Freeform board
- Draw or handwrite
- Apply consistent styles
- Position items on a board
- Search Freeform boards
- Share and collaborate
- Delete and recover boards
- Get started with Health
- Fill out your Health Details
- Intro to Health data
- View your health data
- Share your health data
- View health data shared by others
- Download health records
- View health records
- Log menstrual cycle information
- View menstrual cycle predictions and history
- Track your medications
- Learn more about your medications
- Log your state of mind
- Take a mental health assessment
- Customize your Sleep Focus
- Turn Sleep Focus on or off
- View your sleep history
- Check your headphone audio levels
- Use audiogram data
- Back up your Health data
- Intro to Home
- Upgrade to the new Home architecture
- Set up accessories
- Control accessories
- Control your home using Siri
- Use Grid Forecast to plan your energy usage
- Set up HomePod
- Control your home remotely
- Create and use scenes
- Use automations
- Set up security cameras
- Use Face Recognition
- Configure a router
- Invite others to control accessories
- Add more homes
- Get music, movies, and TV shows
- Get ringtones
- Manage purchases and settings
- Magnify nearby objects
- Change settings
- Detect people around you
- Detect doors around you
- Receive image descriptions of your surroundings
- Read aloud text and labels around you
- Set up shortcuts for Detection Mode
- Add and remove email accounts
- Set up a custom email domain
- Check your email
- Unsend email with Undo send
- Reply to and forward emails
- Save an email draft
- Add email attachments
- Download email attachments
- Annotate email attachments
- Set email notifications
- Search for email
- Organize your email in mailboxes
- Flag or block emails
- Filter emails
- Use Hide My Email
- Use Mail Privacy Protection
- Change email settings
- Delete and recover emails
- Add a Mail widget to your Home Screen
- Print emails
- Use keyboard shortcuts
- Get travel directions
- Select other route options
- Find stops along your route
- View a route overview or a list of turns
- Change settings for spoken directions
- Get driving directions
- Report traffic incidents
- Get cycling directions
- Get walking directions
- Get transit directions
- Delete recent directions
- Get traffic and weather info
- Predict travel time and ETA
- Download offline maps
- Search for places
- Find nearby attractions, restaurants, and services
- Get information about places
- Mark places
- Share places
- Rate places
- Save favorite places
- Explore new places with Guides
- Organize places in My Guides
- Clear location history
- Look around places
- Take Flyover tours
- Find your Maps settings
- Measure dimensions
- View and save measurements
- Measure a person’s height
- Set up Messages
- About iMessage
- Send and reply to messages
- Unsend and edit messages
- Keep track of messages
- Forward and share messages
- Group conversations
- Watch, listen, or play together using SharePlay
- Collaborate on projects
- Use iMessage apps
- Take and edit photos or videos
- Share photos, links, and more
- Send stickers
- Request, send, and receive payments
- Send and receive audio messages
- Animate messages
- Send and save GIFs
- Turn read receipts on or off
- Change notifications
- Block, filter, and report messages
- Delete messages and attachments
- Recover deleted messages
- View albums, playlists, and more
- Show song credits and lyrics
- Queue up your music
- Listen to broadcast radio
- Subscribe to Apple Music
- Listen to lossless music
- Listen to Dolby Atmos music
- Apple Music Sing
- Find new music
- Add music and listen offline
- Get personalized recommendations
- Listen to radio
- Search for music
- Create playlists
- See what your friends are listening to
- Use Siri to play music
- Change the way music sounds
- Get started with News
- Use News widgets
- See news stories chosen just for you
- Read stories
- Follow your favorite teams with My Sports
- Subscribe to Apple News+
- Browse and read Apple News+ stories and issues
- Use Offline Mode to read downloaded stories
- Manually download Apple News+ issues
- Solve puzzles in Apple News
- Solve crossword and crossword mini puzzles on iPad
- Solve Quartiles puzzles
- Search for news stories
- Save stories in News for later
- Subscribe to individual news channels
- Get started with Notes
- Add or remove accounts
- Create and format notes
- Draw or write
- Add photos, videos, and more
- Scan text and documents
- Work with PDFs
- Create Quick Notes
- Search notes
- Organize in folders
- Organize with tags
- Use Smart Folders
- Export or print notes
- Change Notes settings
- Delete, share, or copy a photo
- View and edit Photo Booth photos in the Photos app
- View photos and videos
- Play videos and slideshows
- Delete or hide photos and videos
- Edit photos and videos
- Trim video length and adjust slow motion
- Edit Live Photos
- Edit Cinematic videos
- Edit portraits
- Use photo albums
- Edit, share, and organize albums
- Filter and sort photos and videos in albums
- Make stickers from your photos
- Duplicate and copy photos and videos
- Merge duplicate photos
- Search for photos
- Identify people and pets
- Browse photos by location
- Share photos and videos
- Share long videos
- View photos and videos shared with you
- Watch memories
- Personalize your memories
- Manage memories and featured photos
- Use iCloud Photos
- Create shared albums
- Add and remove people in a shared album
- Add and delete photos and videos in a shared album
- Set up or join an iCloud Shared Photo Library
- Add content to an iCloud Shared Photo Library
- Use iCloud Shared Photo Library
- Import and export photos and videos
- Print photos
- Find podcasts
- Listen to podcasts
- Follow your favorite podcasts
- Use the Podcasts widget
- Organize your podcast library
- Download, save, and share podcasts
- Subscribe to podcasts
- Listen to subscriber-only content
- Change download settings
- Make a grocery list
- Add items to a list
- Edit and manage a list
- Search and organize lists
- Work with templates
- Use Smart Lists
- Print reminders
- Use the Reminders widget
- Change Reminders settings
- Browse the web
- Search for websites
- Customize your Safari settings
- Change the layout
- Use Safari profiles
- Open and close tabs
- Organize your tabs with Tab Groups
- View your tabs from another device
- Share Tab Groups
- Use Siri to listen to a webpage
- Bookmark a website
- Bookmark a website as a favorite
- Save pages to a Reading List
- Find links shared with you
- Annotate and save a webpage as a PDF
- Automatically fill in forms
- Get extensions
- Hide ads and distractions
- Clear your cache and cookies
- Browse the web privately
- Use passkeys in Safari
- Check stocks
- Manage multiple watchlists
- Read business news
- Add earnings reports to your calendar
- Use a Stocks widget
- Translate text, voice, and conversations
- Translate text in apps
- Translate with the camera view
- Subscribe to Apple TV+, MLS Season Pass, or an Apple TV channel
- Add your TV provider
- Get shows, movies, and more
- Watch sports
- Watch Major League Soccer with MLS Season Pass
- Watch multiple live sports streams
- Control playback
- Manage your library
- Change the settings
- Make a recording
- Play it back
- Edit or delete a recording
- Keep recordings up to date
- Organize recordings
- Search for or rename a recording
- Share a recording
- Duplicate a recording
- Check the weather
- Check the weather in other locations
- View weather maps
- Manage weather notifications
- Use Weather widgets
- Learn the weather icons
- Find out what Siri can do
- Tell Siri about yourself
- Have Siri announce calls and notifications
- Add Siri Shortcuts
- About Siri Suggestions
- Change Siri settings
- Set up Family Sharing
- Add Family Sharing members
- Remove Family Sharing members
- Share subscriptions
- Share purchases
- Share locations with family and locate lost devices
- Set up Apple Cash Family and Apple Card Family
- Set up parental controls
- Set up a child’s device
- Get started with Screen Time
- Protect your vision health with Screen Distance
- Set up Screen Time
- Set communication and safety limits and block inappropriate content
- Set up Screen Time for a family member
- Set up Apple Pay
- Use Apple Pay in apps and on the web
- Track your orders
- Use Apple Cash
- Use Apple Card
- Use Savings
- Manage payment cards and activity
- Power adapter and charge cable
- Use AirPods
- Use EarPods
- Use headphone audio-level features
- Apple Pencil compatibility
- Pair and charge Apple Pencil (1st generation)
- Pair and charge Apple Pencil (2nd generation)
- Pair and charge Apple Pencil (USB-C)
- Pair and charge Apple Pencil Pro
- Enter text with Scribble
- Draw with Apple Pencil
- Take and mark up a screenshot with Apple Pencil
- Quickly write notes
- Wirelessly stream videos and photos to Apple TV or a smart TV
- Connect to a display with a cable
- HomePod and other wireless speakers
- iPad keyboards
- Switch between keyboards
- Enter characters with diacritical marks
- Use shortcuts
- Choose an alternative keyboard layout
- Change typing assistance options
- Connect Magic Trackpad
- Trackpad gestures
- Change trackpad settings
- Connect a mouse
- Mouse actions and gestures
- Change mouse settings
- External storage devices
- Bluetooth accessories
- Apple Watch with Fitness+
- Polishing cloth
- Share your internet connection
- Make and receive phone calls
- Use iPad as a second display for Mac
- Use iPad as a webcam
- Use a keyboard and mouse or trackpad across your Mac and iPad
- Hand off tasks between devices
- Cut, copy, and paste between iPad and other devices
- Stream video or mirror the screen of your iPad
- Use AirDrop to send items
- Connect iPad and your computer with a cable
- Transfer files between devices
- Transfer files with email, messages, or AirDrop
- Transfer files or sync content with the Finder or iTunes
- Automatically keep files up to date with iCloud
- Get started with accessibility features
- Turn on accessibility features for setup
- Change Siri accessibility settings
- Open features with Accessibility Shortcut
- Enlarge text by hovering
- Change color and brightness
- Make text easier to read
- Reduce onscreen motion
- Customize per-app visual settings
- Hear what’s on the screen or typed
- Hear audio descriptions
- Turn on and practice VoiceOver
- Change your VoiceOver settings
- Use VoiceOver gestures
- Operate iPad when VoiceOver is on
- Control VoiceOver using the rotor
- Use the onscreen keyboard
- Write with your finger
- Keep the screen off
- Use VoiceOver with an Apple external keyboard
- Use a braille display
- Type braille on the screen
- Customize gestures and keyboard shortcuts
- Use VoiceOver with a pointer device
- Use VoiceOver for images and videos
- Use VoiceOver in apps
- Use AssistiveTouch
- Use an eye-tracking device
- Adjust how iPad responds to your touch
- Auto-answer calls
- Change Face ID and attention settings
- Use Voice Control
- Adjust the top or Home button
- Use Apple TV Remote buttons
- Adjust pointer settings
- Adjust keyboard settings
- Control iPad with an external keyboard
- Adjust AirPods settings
- Adjust double tap and squeeze settings for Apple Pencil
- Intro to Switch Control
- Set up and turn on Switch Control
- Select items, perform actions, and more
- Control several devices with one switch
- Use hearing devices
- Use Live Listen
- Use sound recognition
- Set up and use RTT
- Flash the indicator light for notifications
- Adjust audio settings
- Play background sounds
- Display subtitles and captions
- Show transcriptions for Intercom messages
- Get live captions of spoken audio
- Type to speak
- Record a Personal Voice
- Lock iPad to one app with Guided Access
- Use built-in privacy and security protections
- Set a passcode
- Set up Face ID
- Set up Touch ID
- Control access to information on the Lock Screen
- Keep your Apple ID secure
- Use passkeys to sign in to apps and websites
- Sign in with Apple
- Share passwords
- Automatically fill in strong passwords
- Change weak or compromised passwords
- View your passwords and related information
- Share passkeys and passwords securely with AirDrop
- Make your passkeys and passwords available on all your devices
- Automatically fill in verification codes
- Sign in with fewer CAPTCHA challenges
- Two-factor authentication
- Use security keys
- Control app tracking permissions
- Control the location information you share
- Control access to information in apps
- Control how Apple delivers advertising to you
- Control access to hardware features
- Create and manage Hide My Email addresses
- Protect your web browsing with iCloud Private Relay
- Use a private network address
- Use Advanced Data Protection
- Use Lockdown Mode
- Receive warnings about sensitive content
- Use Contact Key Verification
- Turn iPad on or off
- Force restart iPad
- Update iPadOS
- Back up iPad
- Reset iPad settings
- Restore all content from a backup
- Restore purchased and deleted items
- Sell, give away, or trade in your iPad
- Install or remove configuration profiles
- Important safety information
- Important handling information
- Find more resources for software and service
- FCC compliance statement
- ISED Canada compliance statement
- Apple and the environment
- Class 1 Laser information
- Disposal and recycling information
- Unauthorized modification of iPadOS
- ENERGY STAR compliance statement
Get extensions to customize Safari on iPad
Add Safari extensions
Tap More Extensions to browse through extensions in the App Store.
When you find one you want, tap the price, or if the app is free, tap Get, then follow the onscreen instructions.
Note: Extensions you install for Safari on iPad that are also available on other platforms will appear in Safari settings on any iPhone, iPad, or Mac where you’re signed in with the same Apple ID , to make them easier to find and download.
Manage your extensions
Use extensions.
You can use an extension to customize the way your browser works. You can turn Safari extensions on or off at any time.
Tap each extension you want to give permissions to, then follow the onscreen instructions to choose how much access to give each extension.
Important: Check the extensions you have installed and make sure you’re familiar with what they do.
Change extension settings for an individual website
You can turn an extension on or off for an individual website without changing your overall Safari settings.
Turn each extension on or off.
Remove an extension
Swipe down on the Home Screen, then search for the extension you want to remove.
Touch and hold the extension icon, tap “Delete app,” then follow the onscreen instructions.
IMAGES
VIDEO
COMMENTS
With the iOS 13 update, Apple has improved the Safari browser in a couple of important ways. While most improvements are seen on the iPad version, iPhone users get access to the new Safari Download Manager as well as a new customization menu for websites. Tap on the "Aa" icon to see a couple of new menu options.
Step 1: Open the Settings app on iPhone and tap on Safari. Step 2: Find the Settings for the websites menu and select Request Desktop Website. Enable the toggle for all websites from the following ...
Open Safari. Go to the website you want to load. Tap the aA icon. Tap Request Desktop Site. To revert the changes, follow the steps above, but tap Request Mobile Site. Of course, if you know that ...
Change the display controls for a website on Safari. You can hide the search field, switch to Reader, and more. Open the Safari app on your iPad. Tap , then do any of the following: Hide the search field: Tap Hide Toolbar (tap the top of the screen to get it back). See a streamlined view of the webpage: Tap Show Reader (if available).
Add Safari back to your Home Screen. If you don't see Safari on your Home Screen, you can find it in App Library and add it back. On the Home Screen, swipe left until you see the App Library. Enter "Safari" in the search field. Press and hold , then tap Add to Home Screen. In Safari on iPad, view websites, preview website links, translate ...
If you find yourself in need of the full desktop version of a website, you can force mobile Safari to request and load the full version of a website with just a couple of taps. When viewing a ...
Whether you are using an iPad or a Mac, activating Desktop Mode allows you to view websites as they would appear on a desktop computer, complete with all the functionalities and layout elements. To enable Desktop Mode on Safari, follow these straightforward steps: Open Safari: Launch the Safari browser on your device.
Safari now advertises itself to websites as the macOS Catalina version of the app, except when it's in the smallest Split View window or Slide Over mode, when it uses the mobile user agent. 1 The result is that websites like Mailchimp return the desktop version of its site as long as Safari is in 50/50 Split View mode or larger.
For my testing of how well the desktop version of Safari on iPad works, I am using a 10.5-inch iPad Air (2019 version) with a Brydge Keyboard and an external mouse enabled through accessibility mode.
Some Safari features are exclusive to the iPad version of Safari—such as desktop websites and dragging to create new windows in side-by-side multitasking mode—while others are universally available across all supported iOS devices. iPad-only. These features are specific to the iPad edition of Safari.
Hello Guys, Welcome back to another video and, In this video i will show you how to enable desktop mode in safari on iphone or ipad. Safari request desktop w...
If you want to open a new tab in a separate Safari window, start by long-pressing the tab switcher icon. On the context menu that shows up, tap Open New Window. And voila! A fresh tab should open ...
1. Load Single Site in Mobile Mode - Temporarily. You can easily instruct Safari to switch a tab to mobile view whenever you face issues with the site's desktop view. Start by tapping the ᴀA ...
Now, here are 30 tricks to help you have a better experience when using Safari. 1. Navigate Tab Bar. (Credit: Lance Whitney / Apple) The jump to iOS 15 moved Safari's address bar to the bottom of ...
First, launch the Safari browser from the home screen and go to the webpage that you wish to view in full-screen mode. After locating the webpage, tap the Share button at the top of your screen. In the drop-down menu, tap the Add to Home Screen option. In the Add to Home window, you can give the new icon a title on the home screen of your iPad.
Find the website you want to view full screen. Tap the action button (the button with the arrow coming out of it). Tap Add to Home Screen. This creates a shortcut to the site on your iPad home screen (aka a web clip). Edit the display name for the shortcut and then tap Add .
Open the Safari app on your iPad. Tap , then tap Private. Follow the directions onscreen to unlock Private Browsing. To exit Private Browsing, tap , then tap a Tab Group. The websites you have open in Private Browsing stay open, and Private Browsing locks. To prevent Private Browsing from locking, go to Settings > Safari, then turn off Require ...
Just like on the Mac, Safari on your iOS device uses dark mode if you enable the feature in your iPhone or iPad's settings. 1. Start the Settings app. 2. Tap Display & Brightness. 3. In the ...
On the Home Screen, swipe left until you see the App Library. Enter "Safari" in the search field. Press and hold , then tap Add to Home Screen. In Safari on iPad, view websites, preview website links, translate webpages, and add the Safari app back to your Home Screen.
Move the iPad into landscape mode (physically) Open the Settings app. Select Home Screen & Multitasking. And Enable Stage Manager. Stage Manager is a new iPad OS feature that enables multiple panels of apps that can be resized and moved around the screen. Now, it's time to configure the external display. Move into:
Be sure to allow web inspector in your iPad. Download and install the remote webkit adapter. Using Powershell (As administrator): npm install remotedebug-ios-webkit-adapter -g. Execute the adapter: Using Powershell (as administrator): remotedebug_ios_webkit_adapter --port=9000. You should get a similar output:
Safari won't remember the pages you visit, your search history, or your AutoFill information. How to turn on Private Browsing. Open Safari on your iPad. Touch and hold the Tabs button. Tap New Private Tab. While Private Browsing is on, the Safari address bar appears black or dark instead of white or gray, and the buttons are black instead of blue.
Add Safari extensions. Open the Safari app on your iPad. Tap on the right side of the search field, then tap Manage Extensions. Tap More Extensions to browse through extensions in the App Store. When you find one you want, tap the price, or if the app is free, tap Get, then follow the onscreen instructions.