FREE SHIPPING ON ALL ORDERS OVER 50*
FATHER’S DAY SALE | 10% OFF SITEWIDE | AS LOW AS 0% APR FINANCING WITH AFFIRM | USE CODE FDAY10

- 1.877.533.4569
- Product Help Center
- Mon - Fri: 9:00 AM - 5:00 PM EST

1.877. LED .GLOW 1.856.768.5700
Mon-Fri 9:00 AM-5:00 PM EST

- Bluetooth Underbody Kit
- Multi-Color Underbody Kits
- Single Color Underbody Kits
- Replacement Parts
- Shop All Underbody Kits

- Bluetooth Interior Kit
- Multi-Color Interior Kits
- Single Color Interior Kits
- Shop All Interior Kits

- Wheel Well Kits
- Wheel Ring Kits
- Shop All Wheel Kits

- Running Board Lights
- Tailgate Light Bars
- Truck Bed Lights
- Tool Box Lights
- Shop All Accessory Lighting

- Shop All Truck Underbody Kits

- Litetrike Kits
- Slingshot Kit
- Can-Am Spyder Kit
- Can-Am Ryker Kit
- Kit Upgrades
- Shop All Motorcycle Kits
- Shop All Golf Cart Kits
- RV CAMPER LIGHT KIT

- Underbody Kit Upgrades
- Interior Kit Upgrades
- Accessory Lighting
- Bluetooth Motorcycle Kit
- Multi-Color Motorcycle Kits
- LiteTrike Kits
- Motorcycle Kit Upgrades
- Multi-Color Underbody Kit
- Add-On Accessories
- Dirt Bike Kit
- Snowmobile Kit
- Shop All Powersports Kits
- Shop All RV Lighting
- Multi-Color Marine Kit
- Blue Red Green White
- Shop All Marine Lighting Kits
- Shop All Engine Bay Kits
- Home Theater Kit
- Storefront Kit
- Car Underbody Kit
- Truck Underbody Kit
- Car & Truck Interior Kit
- Motorcycle Kit
- Shop All Limousine Lighting
- Shop All Install Accessories
- Million Color Parts
- Single Color Parts
- Advanced 3 Million Color Parts
- Slimline Parts
- Expandable Interior Parts
- Flexible Million Color Parts
- Advanced Million Color Parts
- Advanced Single Color Parts
- Wheel Well Parts
- Wheel Ring Parts
- Truck Bed Kit Parts
- Tool Box Kit Parts
- Running Board Kit Parts
- Engine Bay Kit Parts
- Home Theater Kit Parts
- Storefront Kit Parts
- Shop All Brand Apparel
- Shop All Open Box
- Shop All Clearance
- Track Order
- Returns & Exchanges
- LEDGlow Reviews
Stay Connected

RV LED Underbody Lights
LEDGlow RV Underbody LED Lights take your next road trip to another level by adding multi-color lighting and effects for your RV. Choose between (4) different kit sizes based on the length of your RV and install high-impact water-resistant SMD LED tubes that deliver one-of-a-kind RV underglow. The fun begins when you activate the Control Box and choose between colors and lighting effects to create custom patterns. Everything required for installation is included with instructions to walk you through the whole process.
- Multi-Color
Application
- Rigid Underbody
Control Type
- Wireless Remote

Million Color Slimline LED RV Camper Underbody Lighting Kit
- Give Your RV Some Personality with Multi-Color Underglow Lighting
- 4 Different Kits Available Based on RV Size
- Choose from 10 Solid Colors with 2 Rainbow Modes
- 13 Unique Lighting Effects
- Sound Modes React to Music Playing Inside the RV

6' Wire Extension for Million Color Slimline Underbody Kits
- Extend the Wire Length of Your Million Color Slimline Underbody Tube by 6'
- 4-Pin Connectors Feature Plug & Play Connectivity
- Compatible with Million Color Slimline Underbody Kits

3' Wire Extension for Million Color Slimline Underbody Kits
- Extend the Wire Length of Your Million Color Slimline Underbody Tube by 3'
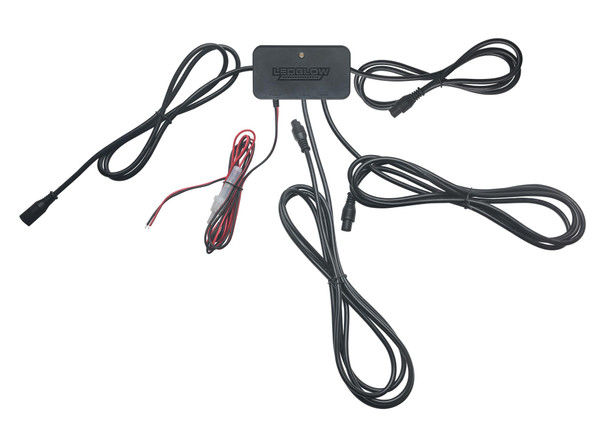
Million Color Slimline Expansion Hub
- Install Up To 8 Additional Lighting Tubes to Your Million Color Slimline Underbody Kit
- Ability to Connect Multiple Hubs to 1 Control Box Unit for Expanded Lighting
- Perfect for Larger Vehicles Such as RVs, Limousines & Busses
What Is An LEDGlow Slimline RV Underbody LED Light Kit?
LEDGlow Slimline Recreation Vehicle LED Underbody Lights feature ultra thin lighting tubes packed with bright wide-angle 5050 SMD LEDs. The result is that the tubes are more subtle, lighter and easier to install while still projecting the same vibrant LED lighting. 46”, 36” and 24” tubes are included with each kit version available. Slimline LED camper lights also come with a Hub System so you can expand the size of your kit and add more LED lighting tubes anytime.
Which Size LEDGlow RV LED Light Kit Is Best For Me?
Selecting a kit simply depends on the size of your recreational vehicle. LEDGlow RV LED strip light kits are designed for 20’-25’, 30’-35’, 40’-45’ and 45’+ models. Our camper LED lights are measured and manufactured specifically for RVs. Each version of these motorhome LED lights goes through a rigorous testing process to ensure they are a precise fit. That way you’ll know your camper LED strip lights match up seamlessly with the undercarriage of your specific vehicle.
How Do I Install RV Underbody Lights At LEDGlow?
You’re covered with everything needed for the installation of LEDGlow RV LED light strip kits. Wiring, extensions cables, mounting brackets, hardware and more are included. We also provide comprehensive installation instructions that show you every part of the process step by step using in-depth detail. Free Lifetime Tech Support comes with your purchase of camper underglow lights, so our in-house Tech Team is here to help with any questions. When you’re looking for the best LED camping lights, our goal is to give you an unrivaled lighting experience on your next trip.
Burns Brighter. Lasts Longer. Built Tougher.

- Looking for Something? QUICK FIND
- --> 800-847-1359
- Need Help? Call Us: 800-847-1359
Your shopping cart is currently empty.
Hi-Performance Super Bright LEDs for RVs, Semi-Trucks, Wreckers, Motorcycles, Boats, Golf Carts, Cars and More!
- RV, Trailer
End Cap LED Light Strips for RVs
Check out the Lighting Builder for a more customized experience.
Leave a Review
Replacement end cap led light strips for rvs.
Be sure to scroll down, expand each text group section and read the information presented. We think you'll find our product documentation is very thorough.
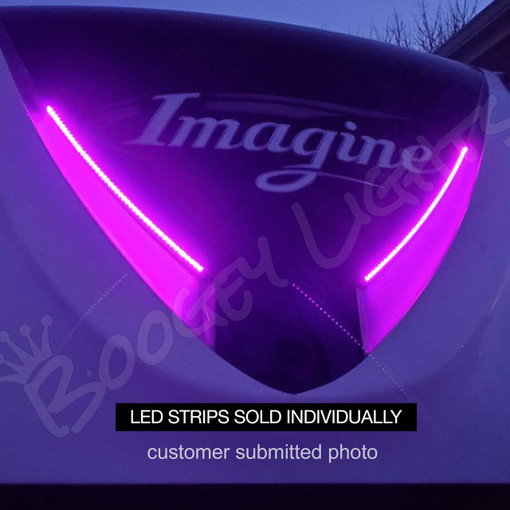
Many travel trailers and fifth wheel trailers today include LED lighting on the end cap of the trailer; usually facing forward. These lights are often the first lights to fail in new trailers mainly because they're facing forward and subject to wind/rain damage. Boogey Lights hi-intensity surface mounted LED light strips are built tougher. They're also brighter. Our impressively bright surface mounted hi-intensity LED flexible strips are ideal for End Cap LED Light replacements found on many travel trailers today. We offer them in a variety of single color options which in most cases can be a direct replacement for factory installed lights using existing wiring. Simply remove the existing LED strip and replace it with a Boogey Lights LED strip. If you want to upgrade to a multi-color RGB light strip, we offer that option too although it does require the purchase of an LED controller. Also, the installation is more complex since it requires the installation of the LED controller into the circuit which usually requires cutting at least one access panel hole in the inside wall facing the end cap. It's usually the only way to gain access to the area behind the end cap. NOTE: The price listed is for one single LED strip. Details below.
All Boogey Lights® RGB LED strips are COMMON CATHODE LEDS. They share a common ground and will only work with positively switched LED controllers. Most LED strips on the market today are COMMON ANODE (click the button below for details as to the difference in these two technologies). If your RV has multi-color RGB LEDs already installed, Boogey Lights® RGB LEDs will in almost all cases NOT work with the existing OEM LED Controller currently installed in your RV. You'll need to purchase a Boogey Lights® LED controller. NOTE: 3M Adhesion Primer is now included. Prior to 03/20/2024 it was optional.
PRODUCT HIGHLIGHTS
Built with two ounce copper PCB, the brightest 5050 LEDs available and 1.2mm of genuine 3M® VHB double sided tape, these LED strips are super easy to install yet made tough for motor sports applications. They're available on either white or black PCB in varying lengths ranging from 3 LEDs (about 2 inches long) to 300 LEDs (16' long).
The single color default configuration has a 12", two conductor (red + black) power lead hard wired to the end of the strip. This power lead connects to the existing end cap lighting circuit.
The multi-color default configuration has a 10', four conductor power lead. The LED strips can be cut every 3 LEDs. If you want longer power leads, we offer additional power lead length options. RGB and Single color low profile LED strip width is 3/8" (10mm). Height is 1/8" (3mm).
This product is not vehicle specific. It can be used on all types of campers in all types of configurations. Many campers only have one end cap light. Some have two. Some have three. Some have four. We've even seen some with five. As such, this product is sold PER ONE SINGLE LED STRIP . The price listed is for one single LED strip. If your RV has two end cap lights both the same length and you wish to replace both of them, you'll need to order TWO of this product.
HOW TO ORDER
Single Color Replacement You'll need to take a measurement of the LED strip you wish to replace. They're typically 24" to 36". Measure the existing LED strip on the RV now. In some cases you might be able to go a little longer. Each LED strip will need to be mounted to a smooth, mostly straight continuous surface. When taking that measurement be sure to allocate 1 to 2 inches from the end of the LED strip for the power lead wire coming off the LED strip. You can look at the close-up daylight photo of a Boogey Lights LED strip on this product page mounted on the end cap of a Grand Design travel trailer to see what we're referring to. Since the single color LED strip is replacing the existing strip on the RV now, the default 12" power lead is more than enough. NOTE: If your existing end cap light is only one color (e.g. white, blue, amber, etc), you have a SINGLE COLOR LED strip currently installed. That strip has a 2 conductor power lead. Multi-Color Upgrade You'll need two measurements for each LED strip you wish to replace: 1) the length of each LED strip, 2) the length of the power lead you want attached to the LED strip. The default configuration for the power leads in multi-color is 10' which should work for more installations but we offer the ability to increase that length if needed. Each LED strip will need to be mounted to a smooth, mostly straight continuous surface. The power lead needs to be long enough to reach the LED controller which for multi-color installs is typically inside the end cap area or near that area where 12vdc power is available. Once you have these measurements, you can place your order. For each LED strip and power lead combination you'll need to add one End Cap LED light strip product to your cart with those specifications. If you have any questions, give us a call and one of our product specialists can assist you with this process. Make sure you have some 3M Adhesion Primer, since it is NOT included with this strip.
2 CONDUCTOR OR 4 CONDUCTOR?
For Single Color LEDs, we offer the ability to order the strip with either a 2 conductor or 4 conductor power lead wire. The default is 2 conductor (black and red). Why would you want 4 conductor power lead on a single color LED strip? Each LED has 3 diodes. In a single color LED, all 3 diodes are the same color. We normally will bridge the 12vdc power at the end of the strip such that all 3 diodes are connected to the red power lead conductor. If however you want to be able to control the power going to each of the 3 diodes, we will use 4 conductor power lead cable. This configuration is ideal for situations where you're using the single color LED strip and want to control the brightness of the strip by lighting one, two or all three diodes. Installation Note: If you decide you want a 4 conductor power lead and your existing installation only has a 2 conductor, you will need to make sure you have figured out how you're going to connect to the two to take advantage of this feature. NOTE: If your existing end cap light is only one color (e.g. white, blue, amber, etc), you have a SINGLE COLOR LED strip currently installed. That strip has a 2 conductor power lead.
WHITE LEDS: 6000K, 4000K AND 2400k
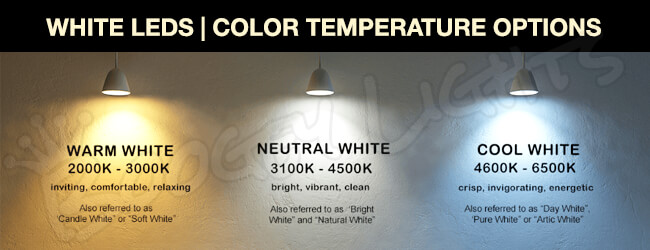
Color temperature is a method of describing the color characteristics - warmth or coolness - of a white light source. Commonly referred to as the Correlated Color Temperature (CCT), it's a gauge of how yellow or blue a white light source appears to the human eye. The spectrum of color temperature is assigned a numerical value, measured in degrees of Kelvin (K), on a scale of 1,000 to 10,000. Most Kelvin temperatures for modern lighting applications however fall somewhere on a scale of 2000K to 6500K. The color temperature of a light source lets us know what the look and feel of the light produced will be.
We offer three different Kelvin temperatures of WHITE as follows: COOL WHITE (6000K) , SOFT WHITE (2400K) and NATURAL WHITE (4000K) .
Cool White (aka Bright White) is the most popular and is by default what we ship the most. It's also the color of white that is created with RGB LEDs (mixing equal parts red + green + blue = cool white). It's excellent for functional lighting and is used the world over in offices, public places, warehouses and the like.
Soft White (aka Warm White or Candle White) is the second most popular since it provides a nice contrast to the Cool White. It's on the opposite end of the Kelvin scale with a 2400K temp. Soft White has a yellowish tint to it making it softer; easier on the eyes - not nearly as bright as Cool White though. It's great for creating ambiance but not functional lighting. You'll notice we offer an RGBW product that includes RGB + one diode of this soft white color which provides both Cool White and Soft White options (along with RGB of course). It's our most popular Multi-Color LED strip for this reason.
Lastly, we offer a Natural White (aka Neutral White) which has a Kelvin temp of 4000. This shade of white is middle of the road - half way between Soft White and Cool White. We offer it in a single color only. See below images to help demonstrate the differences.
IMPORTANT WARRANTY ALERT!
A Recessed Mounting Location is Essential . This product is designed and intended to be used to replace existing factory installed end cap led lights that have the wiring in place (single color usually) as well as a recessed location to mount the LED strip on the end cap. In most factory installed end cap lights there's a recessed structure the LED light strip fits or sits in. It's part of the end cap design and helps protect the strip from side shear wind / weather forces beating against it while the trailer moves down the road. If your RV doesn't have factory installed end cap LED strip lights OR if it does not have a very clear recessed indentation where the LED strip can be safely mounted protecting it from side wind shear forces, we do not recommend using this product as it will likely fail prematurely.
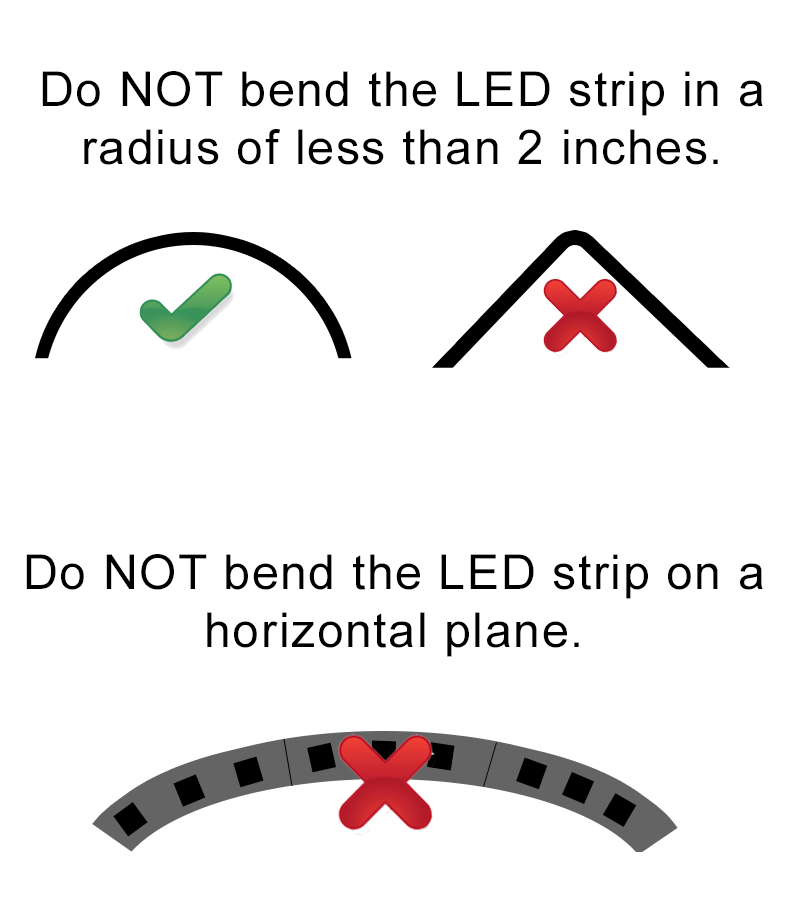
Do Not Bend on a Curve or a Horizontal Plane. These LED strips need to be mounted on a flat, straight smooth surface. They cannot be mounted on a surface that requires bending around a corner or bending on a horizontal plane. This is important. Our LED strips are wider than stock LED strips to support the larger, brighter LEDs. This however limits their ability to bend on a horizontal plane vs thin LED strips. Bending them on a horizontal plane will stress the solder joint in the PCB and cause the LED strip to fail prematurely.
Mounting this product on the face of an RV that does not have a clear recessed indentation to protect the LED strip from wind side shear or mounting them on a surface that isn't straight and flat will result in premature failure of the LED strips. Failures of LED strips mounted this way are not covered under warranty.
READ CAREFULLY!
Order the correct length. Yes, read the product configuration carefully. We list both the Number of LEDs and the LENGTH of the LED strip. Do not confuse the number of LEDs for the length. This product is considered a custom ordered product since it is cut to the length you specify. It may not be eligible to be returned - or if so, subject to additional fees and/or restrictions. Be sure to read our RETURN POLICY for details. NOTE: If needed, you can cut the LED strip every 3 LEDs. Details here: HOW TO CUT LOW PROFILE LED STRIP .
RETURN POLICY ALERT!
This product is considered a custom ordered product since it is cut to the length you specify. It may not be eligible to be returned - or if so, subject to additional fees and/or restrictions.Be sure to read our RETURN POLICY for details. NOTE: If needed, you can cut the LED strip every 3 LEDs. Details here: HOW TO CUT LOW PROFILE LED STRIP .
3M ADHESION PRIMER INCLUDED
This light kit has been updated (03-19-24) to include 3M Adhesion Primer (previously it was optional). To achieve the full adhesive strength of the 3M® tape affixed to the back of each strip 3M® Adhesion Promoter (aka Primer) must be applied to the mounting surface first. This is an important step to ensure a secure bond . The 3M® Adhesion Promoter creates a chemical bond between the tape and the mounting surface such that the LED strip will stay stuck (at least until you decide you want to remove it). Using any other solvent such as rubbing alcohol or acetone is not the same thing as using 3M® Adhesion Promoter. While these solvents will help clean the surface, they do not prime the surface. There is a big difference. We include enough 3M Adhesion Primer to properly mount the LED strips in this kit. You do not need to buy more. That said, some folks prefer to have extra on hand. If you're one of those people, you can purchase additional 3M ADHESION PRIMER on our website in one-half, one, two or four ounce bottles. A 1/2 ounce bottle when installed according to our directions should be sufficient for at least 4 LED strips of 96".
OPTIONAL WIRELESS REMOTE CONTROL
A Boogey Lights® RGB controller is required to power the multi-color LED strips listed on this product; it's however optional for Single Color LEDs. While single color LEDs can simply be hardwired into an existing SPST OEM switch on a 12vdc circuit (replacing the existing LEDs that came from the factory), adding the optional wireless controller allows you to turn the lights on/off remotely via the included RF wireless remote or your Bluetooth enabled smartphone (and our free APP). The controller also gives you the ability to easily dim the lights (7 levels) as well as set presets. The four LED wireless controllers offered for this product configuration are all RF + Bluetooth enabled LED controllers. The main differences are the LED capacity (300, 900 or 1800) and the type of wireless remote (compact Key FOB or larger format M7 tv style remote). In addition, we also offer wired push-button controller options if that's of interest. Important Installation Note: If you're adding an LED controller of any kind to the installation, you will likely need to install at least one access panel in the wall facing the end cap to gain access to the area behind the end cap.
CLEAR COATING OR SMOKE TINTED COATING
We offer the option of SMOKE TINTED COATING for our Black Multi-Color PCB LED strips instead of the standard clear coating on our END CAP LED Light kits. The smoke tinted LED strip (see photo above) has a nicer daylight look when mounted in plain sight. Some customers prefer this look on their RVs as it blends better particularly with darker color paint schemes. This is a cosmetic option only for LED strips that are mounted where they can be seen in the daylight. It is important to note that this smoke tinted coating does reduce the brightness of the LEDs by about 20%. Boogey Lights LED strips are already incredibly bright so most folks don't mind the reduction in brightness but it is something to be aware of. If you want the absolute brightest END CAP LIGHT strip, go with the default clear coat selection. If you want the LED strip to blend in better with your RV's paint scheme during the daytime (and the installation to look a little more finished) and you're OK with a little less light, the tinted coating might be better.
Installation
Note: It's simply not possible to provide detailed instructions for all installation scenarios. This information is intended to be used as a guide. You may need to vary your installation based on your RV configuration.
What You'll Need
- Rubbing alcohol, 3M Adhesion Primer, Clean rags
- Lexel, Butyl Putty or similar sealant.
- Cutting pliers, Wire Strippers, Heat gun (or hair dryer).
- Plastic putty knife or similar edged tool used to gently help remove existing OEM led light strip.
- Ladder (or similar) so you can reach the End Cap LED strips on the front of your RV
SINGLE COLOR vs MULTI-COLOR The vast majority of END CAP LED light installs are single color. This is because every factory installed End Cap LED light strip we know of is single color. Replacing a single color LED light strip using the existing factory installed wiring and wall switch is by far the easiest to do. Typical single color installation time is 1.5 to 2 hours to do both End Cap LED strips. Multi-color LED strip install is more complicated because you need to install an LED controller between the LED strip and the 12vdc power source. Doing so almost always requires that you install at least one (sometimes two) access panel holes in the interior wall just behind the End Cap. This allows access to the back side of the End Cap where you can run the extra wires needed for multi-color LED (4 instead of 2) and then route those wires down to the battery box or storage area where you can mount the LED controller and connect it to 12vdc power. Typical multi-color LED strip install is 5 to 6 hours.
SINGLE COLOR INSTALLATION PROCESS (Photos are provided at the bottom of page.)
- Remove the existing END CAP LED light strip from the face of the End Cap. We typically do one at a time, start to finish. Most OEM strips will peel off fairly easily. You may need some rubbing alcohol and/or a plastic putty knife to clean the surface completely. Just be careful not to scratch the RV's painted surface.
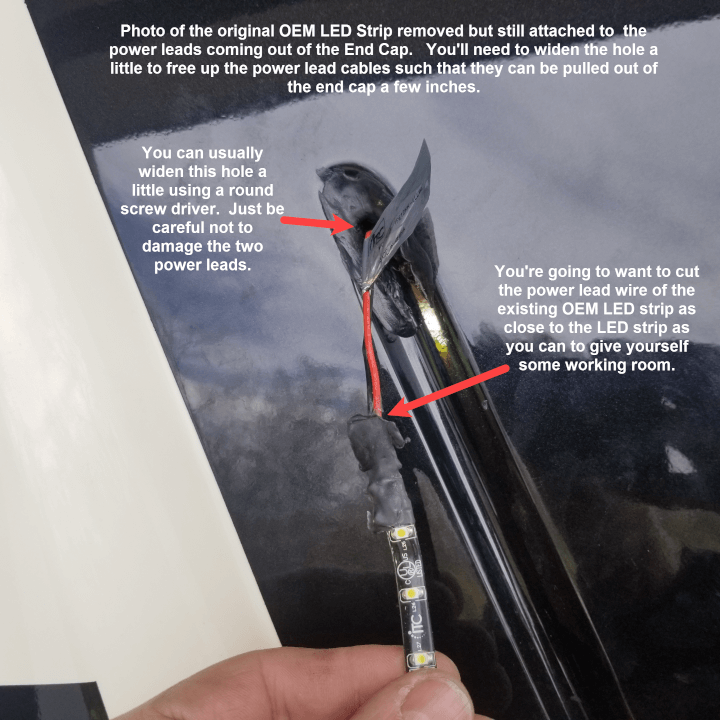
- The hole where the power lead wires of the existing LED light strip come out of the end cap is usually filled with a sealant of some type when it comes from the factory. You'll need to remove some of this sealant – at least enough of it to allow the power lead wires coming out of the end cap to move freely. You can usually insert a round screw driver or similar tool into the hole to widen it. Just be careful not to damage the power leads that come out of that hole; you need them!
- Carefully pull the extra power lead wire of the existing End Cap LED light strip from behind the End Cap out so you have some wire to work with. There's usually 3 or 4 inches you can pull out. Tape these wires to the end cap so they won't fall back into the End Cap when you cut them in the next step.
- Cut the existing power lead wires (should be 2 of them – usually a red and black wire) that attach to the existing End Cap LED light strip. Cut as close to the end of the existing LED strip as possible. You want to maximize the amount of existing power lead wire you have to work with.
- Strip one-half inch of the insulation away on the existing power lead wires that come out of the end cap. Do the same for the power lead wires coming from the Boogey Lights replacement LED strip.
- Slide a 2 or 3" piece of supplied heat shrink tubing over both the black and red power leads coming out of the Boogey Lights led strip. Push the heat shrink up to the LEDs as far as it will go and then using a heat gun, secure the heat shrink in that position. The goal here is to completely cover the immediate two or three inches of exposed power lead wire connected to the Boogey Lights LED strip with heat shrink.
- Slide a 1 to 2" piece of supplied heat shrink tubing over just the black Boogey Lights power lead. Twist the black Boogey Lights power lead together with the black existing OEM power lead coming out of the End Cap. You're going to want to make sure these wires are tightly twisted. Then, slide the heat shrink over the twisted bare wire connection and secure the heat shrink in that position with a heat gun. Make sure the twisted bare wire is fully covered with heat shrink.
- Repeat the above process for the red Boogey Lights power lead and existing red OEM power lead. NOTE: We know folks may be tempted to use electrical tape to cover these wires but we urge you to use the supplied heat shrink because the heat shrink has an adhesive glue backing which will make the seal around the twisted wires water tight.
- With the Boogey Lights LED strip now attached to the existing OEM wires going into the end cap, it's time to test the light before affixing it to the RV end cap. The light should work. If not, check your connections and/or switch/power source before proceeding.
- Push as much of the extra power lead wire back into the end cap as you can. You're going to want to position the Boogey Lights LED strip on the end cap surface where the previous OEM strip used to be. You don't want any extra power lead wire hanging from the end cap.
- Before you attach the Boogey Lights LED strip to the end cap you need to first clean the surface with rubbing alcohol. Next, apply 3M Adhesion Primer to the area where the strip will be placed. This is a critical step. Do not skip it. 3M Adhesion Primer must be used if you want your LED light strip to stay stuck.
- Starting at the end where the power lead feeds into the end cap, carefully peal the backing tape from the LED strip and gently position the LED strip against the RV surface. You'll need to do this for the entire length of the LED strip. Note that you only get one try at this. The instant the LED strip makes contact with a properly prepared surface it will bond to the surface; it cannot be moved without damaging the LED strip.
- Use Lexel or similar sealant to fill the hole where the power lead goes into the end cap. This is important as you do not want water to intrude into that front end cap.
- Repeat the above steps for the second End Cap LED Light strip.
8 Best RV Awning Lights – Exterior LED Waterproof Camper Lights
Sitting outside your RV is one of the joys of the RV lifestyle. RV awning lights let you take that joy even into the darkest nights, with attractive and functional options that give you everything from a gentle glow to bright light for delicate work. Today we’re reviewing the best RV awning lights on the market to help you find the ones that work best for your RV and lighting needs.
Table of Contents
- 1.1 RecPro RV Camper Motorhome Travel Trailer LED Awning Light
- 1.2 Camco LED RV and Camper Interior and Exterior Rope Lighting
- 1.3 Dream Lighting 12V Waterproof RV Awning Light
- 1.4 MICTUNING RV Exterior LED Porch Utility Light
- 1.5 Coleman LED String Lights
- 1.6 Adventuregy Magnetic LED RV Awning Lights
- 1.7 Camco Decorative RV Awning Globe Lights
- 1.8 Carefree of Colorado RV Awning LED Light Strip
- 2 Compare the Best RV Awning Lights
- 3 Types of RV Awning Lights
- 4.2 Ease of installation
- 4.3 Power Supply
- 4.5 Voltage
- 4.6 Brightness and Mood Settings
- 4.7 Weather Resistance
- 5 Top RV Awning Lights Video
- 6 Final Thoughts
Best RV Awning Lights

RV awning lights can be functional, decorative, or both. You’re spoiled for choice in the type, brightness, and style of light you choose, with many great options in just about every category.
Our list below includes a range of different RV awning light configurations to help you find the perfect model for your needs and aesthetics.
RecPro RV Camper Motorhome Travel Trailer LED Awning Light

Buy from Amazon
The RecPro RV LED Awning Light is a permanently mounted LED light strip designed for use inside and outside an RV. It’s designed for 12V systems, but also has the option for you to purchase a 120V AC adapter.
It measures 25’ long and puts out an exceptionally bright 2,250 lumens of white light. That’s plenty of light for late-night bbq’s, game night, or any other activity under your RV’s awning.
It works best when you wire it directly into your lighting system with a switch. That makes it much easier to use long-term. The system comes with six durable polycarbonate mounting strips to provide a secure permanent mount under your RV’s awning.
One of our favorite features was the IP68 water- and dust-proofing. It can stand up to anything mother nature has to throw at it and lasts for years, even under rainy and dusty conditions.
If you’re looking for a bright utility light for under your RV awning, the RecPRo RV LED Awning Light is a highly-effective and competitively priced option.
Camco LED RV and Camper Interior and Exterior Rope Lighting

The Camco LED RV and Camper Rope Lighting is designed for use both inside and outside your RV. It can be mounted pretty much anywhere with ease, including under or around your RV’s awning.
The light itself is a bright blue rope style light that puts out a surprising amount of light. It’s 16 feet long and quite thin, measuring just 6mm in diameter, perfect to fit into any nook or crevice you want to slip your lighting system into.
We wouldn’t say that this could be your only source of light on a very dark night, but it does add a comforting and attractive blue glow to your under awning space. They’re weatherproof and come with a water-resistant plug that fits into any standard 120V AC outlet.
While we wouldn’t recommend the Camco LED RV and Camper Rope Lights as your only outdoor lighting source, they do provide a lovely glow for what they are. These would make great outdoor or indoor night lights to help you get around without putting out too much light.
Dream Lighting 12V Waterproof RV Awning Light

The Dream Lighting Waterproof RV Awning Lights are 12V powered light strips designed for interior and exterior use. They measure 21.6 inches long and are rated at IP66 for a dust- and water-resistant setting.
The lights are mounted in a black aluminum housing that can be surface mounted and sealed to your RV using either screws or mounting tape. It connects to your RV’s 12V power system and provides 750 lumens of bright white light at the flick of a switch.
What’s cool about the Dream Lighting is how versatile it is. Its small size and multiple mounting options make it easy to install just about anywhere you need light, not only on your RV’s awning.
If you’re looking for a quality utility light for your RV’s awning, doorway, or any place really, the Dream Lighting Waterproof RV Awning Light is a great option.
MICTUNING RV Exterior LED Porch Utility Light

The MICTUNING RV Exterior LED Porch Utility Light is a compact heavy-duty Awning light. It measures just 3.9 inches wide yet provides a full 750 lumens of bright white light.
The housing of the light is made from die-cast aluminum and has an IP67 rating. It can stand up to outdoor use, including wind, rain, and even snow or ice.
It requires permanent mounting and wiring, using 12V DC power as its source. When checking it out, we found the actual installation process to be reasonably painless.
It comes with all the mounting hardware you need and requires nothing from you other than a bit of sealer around the edges. The price was one of its best features. The MICROTUNING was one of the most affordable yet functionally useful lights we reviewed here.
If you’re looking for a no-nonsense awning light that provides a lot of useful light, the MICTUNING RV Exterior LED Porch Utility Light is a good and affordable option.
Coleman LED String Lights

Coleman is one of the biggest names in the outdoor and RV space. One of their most famous products, the ubiquitous Coleman lantern, is now available in a string of LED lights.
Each string has ten small LED versions of the classic lantern. It stretches over 80 inches total and is powered by three AA batteries. We’ll admit it, we really, really got a kick out of these lights. They aren’t that bright (for decoration at least), certainly not enough for utility purposes, but they’re just downright cool.
The little lanterns glow around your awning, adding a touch of whimsy and a nod to the camping of yesteryear. Given their relatively low price we don’t see any reason not to pick up a string or two to brighten up your campground.
Adventuregy Magnetic LED RV Awning Lights

The Adventuregy Magnetic LED RV Awning Lights are modular light strips designed for use on a variety of different awnings and materials. The system comes with four individual light strips plus all the connectors you need to get them set up.
Unlike most of the awning lights on our list the Adventuregy can be used either individually or as a full set. It comes with three different power options, a standard 120V AC plug, a DC cigarette style plug, and a pair of battery clamps that let you run the lights directly from a car or RV battery.
The lights themselves each produce 480 lumens, plenty for most uses. They can be connected together with a series of switches and even come with a remote control for easier use.
We honestly loved this lighting system. They can be mounted to the metal portions of your RV, your RV awning, or even to the underside of something like a portable canopy using both the integral magnets or hook-and-loop fasteners. We found them incredibly easy to setup, extremely versatile in how they were used, and just a joy to work with.
If you like the idea of having multiple lights in a single awning light kit, the Adventuregy Magnetic LED RV Awning Lights are the ones for you. Best of all, they’re very reasonably priced for the value they provide.
Camco Decorative RV Awning Globe Lights

The Camco Decorative RV Awning Globe Lights are hanging lantern style lights that come in a string of six or ten. The ten string can extend up to 30 feet to cover the full length of your RV’s awning or be shortened some for a closer lighting effect.
They use a round globe lantern shape and are available in a range of different colors. They’re easy to hang up as well, with small clips that fit seamlessly into your awning’s mounting track.
They use standard 60 watt A19 bulbs, but unfortunately don’t come with any bulbs from the manufacturer. You also have to do some assembly to set them up and they can’t be mounted permanently outside your RV.
That being said, they’re still attractive lanterns that give a gorgeous ambiance to your outdoor space. One thing to keep in mind though is that they are quite pricey, especially when you factor in the need to purchase additional bulbs.
Carefree of Colorado RV Awning LED Light Strip

The Carefree of Colorado RV Awning Light Strip is a flexible LED strip that can be attached almost anywhere on your RV. It’s designed to fit all standard Carefree brand awnings but is also usable on a variety of other awning types.
The strip is a total of 195 inches long with an 8 inch power cord coming off the end. It’s quite easy to install just about anywhere, but doesn’t provide the polished look of some other awning lights.
The upside of this design is that you can adjust the length of individual sections just by cutting them with scissors at specific points. You’ll need to have a basic knowledge of wiring to do this effectively, but it gives you a ton of flexibility in where and how you use the lights.
If you’re confident in your DIY skills and want the most versatile awning light possible, the Carefree of Colorado RV Awning LED Light Strip is the way to go.
Compare the Best RV Awning Lights

Types of RV Awning Lights
There are too many different types of lights, light strips, and light cords to count, but for most RV purposes, the five options below provide the best value.
LED Porch Lights – LED porch lights are the most basic and utilitarian awning light option. Little more than a few lights placed strategically around your RV’s awning, they provide ample illumination without using much power but do little to add to the ambiance.
The bright side is that they’re inexpensive, easy to install and last for thousands of hours of use with their durable LED bulbs.
Rope Lights – Rope lights are one of the easiest to install, most durable, and least expensive awning light options out there. They’re fully contained within a plastic or rubber sheath to protect against wind and rain while still providing a reasonable amount of light.
They generally aren’t quite as bright as other types of awning light, but they are near the top from a longevity standpoint.
Fairy Lights – Fairy lights are available in several different forms, with one of the most common being functionally identical to classic Christmas lights. They’re strings of lights that have small individual bulbs.
You can choose from those pulled close to the power cord or many that dangle beneath them, creating the illusion of small fairy’s twinkling in the night.
There’s a wide range of different bulb types, sizes, brightnesses, and colors available in fairy lights.
LED Light Strips – One of the newest products to become available for the RV market are LED light strips. These are similar to basic twinkle lights, but provide far more light in a more directed fashion.
They’re a flat strip of LED bulbs that can be permanently attached to the edges of your RV’s awning and other parts of your RV. One place we often see them is along the bottom of your RV or even as additional decorations on the roof or sides.
LED light strips are inexpensive, available in a wide range of different colors and brightness levels, and modular.
They can be attached with nothing but special tape using innovative design elements that allow you to create complete circuits.
Hanging Lanterns – Hanging lanterns are another popular option. They’re very similar to fairy lights, but with far fewer individual lights that are generally brighter.
They were initially based on traditional East and Southeast Asian paper lanterns, but have since become available in various styles and forms. Hanging lanterns are considered by many to be one of the classiest ways to light your RV’s awning.
Buyer’s Guide to Buying Best RV Awning Lights
The best RV awning lights combine function with a pleasing form. Picking them out comes down to a few key factors such as price, installation difficulty, brightness, and the type of light they are.
RV awning lights are an affordable add-on for your RV under most circumstances. You can get very serviceable LED lights for around $20 that provide a lot of utility lighting.
As you get into the more decorative lights prices start to go up, with some of the most expensive topping out above $100.
Ease of installation
There are different types of RV awning lights, depending on what level of installation you’re comfortable with. Some are designed to go up and come down when you extend your awning, allowing you to put them out as needed or leave them off.
Others require permanent mounting and must be hardwired into your RV’s electrical system. Consider whether you prefer a more involved initial installation or are alright with a lighting system that you have to put up like a lantern.
Common installation methtods include adhesive strips, hanging clips, or slipping into the mounting rail of your RV.
Power Supply
In the past, your only real options for RV awning lights were hardwired strings of Christmas twinkle lights or individual porch lights. Thankfully, you can get everything from solar-powered lights to battery-operated ones with both primary and rechargeable battery packs now.
We’re big fans of the solar-powered lights because of how easy they are to use, but keep in mind that they’re often somewhat dimmer than battery-powered or hardwired lights and won’t function unless you had plenty of sun during the day.
Lights wired into your RV’s electrical system require more initial hassle but don’t need recharging.
White lights are most common but you can also find a wide variety of other colors. These include gentle yellow, light blue, and other ‘utility’ colors as well as more fanciful mood lighting such as red, green, purple, etc.
The voltage of RV awning lights is a key factor in whether or not they can be readily used on an RV. Most RVs have both 12V and 120V electrical systems, but for lighting, you should only consider 12V lights.
They’re much easier to wire or plug into your system and generally draw less power than a 120V set up would.
Brightness and Mood Settings
Something that only became available within the last decade for RV awning lights was different brightness, twinkle, and mood lighting settings. Many of the best RV awning lights allow you to change the brightness between various settings or even alternate the light’s color.
Some are even programmable for really cool displays if you purchase a separate module.
Weather Resistance
RV awning lights need to be certified safe for outdoor use. That means the ability to stand up to wind, rain, and even ice as required. Thankfully, most RV awning lights offer significant water resistance and can handle any wind your RV’s awning will survive.
Top RV Awning Lights Video
Final Thoughts
RV awning lights are a practical add-on for your RV that has the added benefit of being a stylish accessory.
You can go for a utilitarian option with bright white LED light strips or pick out something more fanciful and decorative.
So long as you know the basics of what you’re looking for it’s easy to pick out the best RV awning light for your needs.
About The Author

Karan Riley

How to Install LED Strip Lights on Your RV Awning
This post contains affiliate links.
Whether you’re replacing the LED light strip on your RV awning or installing a brand new one, I’ll take you step-by-step through the process. DIY projects like this can seem daunting – it sure did for me – but don’t worry, with the right tools and know-how it’s really not that hard.
To install LEDs on your RV awning you’ll start by choosing the right LED strip lights, then measure and cut to size, and install the strips under the awning or on the awning roller. Once that’s done, you just have to wire them into existing power.
There’s definitely a few things I wish I’d known before trying to install LEDs. My husband and I decided to surprise his parents with new LED strip lights on their motorhome last year, and first and foremost it would have helped to know what tools we needed ahead of time. I hope to save you some of the headaches that we went through with this guide.

Table of Contents
Selecting LED Strip Lights for an RV Awning
When deciding on what lights to go with, most people initially look at cost. I did, and I found that when it comes to value you get what you pay for with most of these lights.
The $15 strip may be much more appealing to your wallet than the $55 strip, but the $55 strip is more likely to be outdoor rated, have higher lumens, and come with helpful accessories like an adhesive back or a protective channel.
Some companies will even pre-cut the strips before shipping them to you to meet your specific RV’s dimensions. These are all important things to consider when you’re looking at lights, and you’ll thank yourself later for getting a quality product now.
There are also many bonus features you can browse and consider when looking at lights. For example, I went with multicolor lights that can be controlled through a remote because I liked the ambiance they created and the convenience of the remote.
You can find single-color light strips with remotes as well, and even ones that connect to apps over Bluetooth or WiFi. You can get lights that are sound-sensitive and will pulse and dance when music is playing, and no matter you’re style and preference you can probably find a product to match your needs. These LED strip lights from Amazon have more features than you can imagine!

- Adjustable Lighting: Download the 'illumi home' app to adjust brightness, change colors, and control the LED strip lights
- Easy Installation: Comes with upgraded double-sided tape for easy mounting without tools
- Safe and Reliable: UL listed power adapter and cords meet strict safety standards and automatically shut down if overloaded
Installing LED Strip Lights
It doesn’t matter if you’re installing your strip lights under the RV’s awning or along the roller, you’re going to need to clean the surface first. You can use a household cleaner, alcohol, or even just water, but any dirt and grime on the awning will prevent your lights from sticking and affect their lifespan.
Once the surface is clean, then you have to measure and cut the lights to size. When cutting LED light strips make sure you only cut in the designated areas on the strip – otherwise you risk damaging lights.
These areas are typically marked by copper pads aligned in rows, though your user manual for your lights will be able to tell you for sure. You shouldn’t need more than a ladder, a tape measure, and a sharp pair of household scissors to get the lights measured and cut, and then you’re ready to place them.

Most light strips will come with some form of adhesive backing for mounting, but if you want something that will last a little longer you may want to put down a strip of double-sided outdoor tape where you’re going to put the lights.
Scotch and 3M (links to Amazon) both have high-rated exterior tape that’ll get the job done, and 3M has an adhesive primer (see on Amazon) that helps your tape stick better. Most LED strips are half-inch wide, so if you end up getting one-inch tape just plan to cut it in half.
If you’re replacing an existing LED light strip on your RV’s awning, you’ll want to cut the wires going to the old strip as close to the LEDs as possible. This leaves plenty of wire to attach to the new lights. Make sure power to the LEDs is OFF before you start snipping wires.
Next, carefully remove the old strip from the RV or awning, making sure you get as much of the old adhesive off as you can. Using a product like Goo-Gone (Amazon Link) will help remove any leftover tape residue, just clean the surface well afterward so your new tape sticks properly.
Things you’ll need:
- Wire cutters (if replacing)
- Double-sided tape (optional)
Installing Under the RV Awning (Along the Body of the RV)
For this approach, you’ll want to install the LED strip below the awning reel along the body of the RV. The advantage of placing the lights here compared to the edge of the roller is you can still use them even when the awning is closed.
You’ll need your ladder but this part is usually pretty easy. When measuring, you probably want to stop an inch or so from the edge of the awning. So cut your light strip and adhesive tape about 2 inches shorter than the total length of your awning.
To get your strip lights evening placed measure down your desired amount from the bottom of the awning. Do this with the awning closed. Make a mark at either end then draw a line between these two marks. A chalk line will make this easy but it’s not necessary.
If you are using adhesive tape place the tape on the camper’s body following the line you just marked. Then you can remove the backing from the light strip and carefully mount the lights onto the tape.
Installing on the RV Awning Roller (End of the Awning)
If you install your RV awning lights along the awning roller, i.e. the end of the awning, you will only be able to use the lights when the awning is fully extended. This is because the lights will be covered by the unrolled awning fabric if it’s not fully extended.
The advantage is you have more options of where you can direct the light based upon where you place the stript on the awning roller. Again you’ll want to leave about an inch of space from either end of the awning roller when you install your light strip.
Obviously, you’ll need your awning fulling extended for this install but depending on your awning, you may not need a ladder to easily access the roller tube.
Once you’ve decided where you want your LEDs placed you can install your double-sided tape along the awning roller. Again to ensure the LEDs are installed evenly it’s helpful to mark a line along the roller you can follow with your tape. Once you have your tape set, peel the backing off the LED strip and mount it to the line of tape.
Fix It Yourself RV Maintenance Course
The most costly parts of RV ownership are repairs and maintenance. That’s why I recommend learning to do your own RV repair and maintenance.
The Fix It Yourself RV Maintenance Course is the perfect way to learn how to do the most common repairs and maintenance on your RV. A Certified RV Technician wrote and filmed the course so you know the information is actually correct.
Plus it’s downloadable so you can access it from anywhere, even when boondocking in the middle of nowhere with no service.
Find out more about the best RV Maintenance and Repair Course available !

Wiring and Powering LED Strip Lights Under an RV Awning
There are many ways you can go about powering your newly-installed LED strip lights. If you are replacing old LEDs you have it easy – you just have to strip the wires where you cut them by the old strip to expose the metal ends, then you can use a soldering iron to attach them directly to the copper pads of the new LED strip or you can use a connector.
If you need some help soldering your wires onto the light check out our video below where we changed one of our lights over the LEDs . You can follow the same steps for soldering the wires onto your new strips lights.
The connector you need will depend on the LED lights you bought, check the user manual and the product listing for what type of connectors your can use. The only exception is if you’re putting in a module for a remote-controlled or color-changing strip when you didn’t have one previously, then you’ll have to run a wire to the electrical control panel.
If you are installing an LED light strip on your awning or awning roller for the first time, you’ll have to decide what power source you want to use for your LEDs. If you have a porch light you may be able to wire the strip to the existing porch light wires but this means the porch light will need to be on in order for your LEDs to work.
If you want to run a longer wire you could possibly thread it through the same hole the porch light wires come through and attach it directly to the battery or another 12V power feed.
If that won’t work or you don’t have a porch light, you may need to drill a hole into the compartment with your battery for the wires to run through. If you do have to drill a hole make sure you weatherproof it when you’re done with silicone sealant, and make sure all wire connections are insulated with heat-shrink sleeves.
Keep in mind your LED strip lights may come with a power adapter but will function normally if wired to a 12V source. This means you will not need that chunky power block that came with your lights.
For those who are looking to install LEDs on the awning roller, your best bet is to run an insulated wire down the extension arm of the awning and back to where you can hardwire it in. You would have to take care to ensure the wire isn’t pinched by the arm when you roll the awning in, but otherwise you should be good.
Things you’ll potentially need:
- Soldering iron (Amazon Link) – this is a simple kit with everything you need
- Wire connectors
- Flexible conduit for exposed external wires
- Heat-shrinking wire tubing
- Silicone sealant
- Voltmeter (Amazon Link) – my favorite tool for check if there is power or not
- Wire strippers
- Terminal connectors
- Patience, if you’re as far from an electrician as I am
Alternatives to Installing LED Strip Lights

If you’re looking for outdoor lighting that is a little less permanent, you can also consider string lights, rope light or patio lanterns. These would plug into your exterior outlet and hang on the awning. They would be easily removable if you need to quickly bring your awning in for conditions like wind or other bad weather.
Camco makes awning hanger clips (Amazon Link) that you attach directly to the awning roller. They slide into the awning channel and you add hooks on to hang your lights. You can quickly remove the hooks and retract your awning with the hanger clips still installed. But I wouldn’t recommend leaving the hangers rolled up for long periods of time since they could leave indents in your awning fabric.

- Hang party lights, signs, plants and more from your RV awning roller bar.Fit Type: Universal Fit
- Slide easily into roller bar channel
- Supports up to 15 lbs.
While string lights and rope lights are a great way to spruce up your exterior, if you’re looking for a long-term solution to your outdoor lighting needs you’re probably better off installing LED strip lights on your RV awning. Otherwise, you have to worry about setup, breakdown, and storage while you travel.
Closing Thoughts
Installing LED strip lights under your awning or on your awning roller is a great DIY project that’s not too hard with the right tools. Just measure your awning, cut and mount your lights, wire them in, and you can start enjoying your newly-lit outdoor living space. A much harder project is shortening your RV awning , which is still very doable.
If you are looking for more info on how your RV awnings work then check out my guide about how mechanical and electrical awnings function . Or if you want more ideas on great DIY RV projects read our list of 21 upgrades to make to your RV.

Fix It Yourself is a self-guided online course where certified RV tech Ed Wilcox walks you through all the steps you need to know to properly maintain your rig and fix problems when they come up. Check it out HERE !
Diane is a lover of all things travel. She and her young family wanted to explore North America from the comfort of their own home so they bought an RV. After fully rehabbing a 1994 Safari Trek, they set out to explore both Canada and the USA.
Recent Posts
Why You Need to Disconnect Your RV Battery When Not In Use
It's always fun to get the RV ready for another adventure after it's been in storage but what isn't fun is finding out your house batteries are dead. Without your house batteries, most of the...
Best Campgrounds in Yellowstone National Park for RVs
Yellowstone National Park is one of those places that should be on your bucket list. And one of the best ways to get there and enjoy the park is in your RV. Whether you are looking for a full...

21 Best Things to Do in St. Pete at Night | 2024 (with Photos)

Staša Petrović - Travel Writer
Last Updated: January 4, 2024
Hi there! I'm Stasha, a passionate traveler and explorer. Through my personal experiences, I've curated a list of the 21 best activities to enjoy in St. Pete at night, complete with stunning photos to inspire your unforgettable adventure.
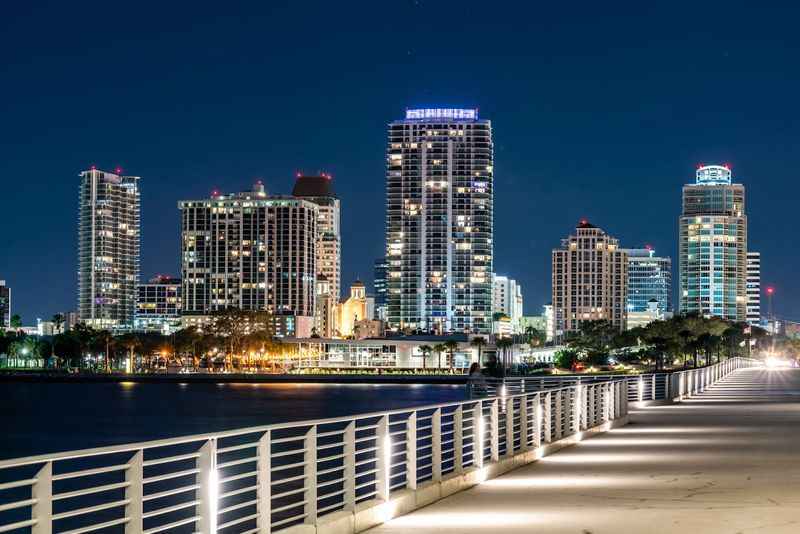
If you've ever wondered where the sun shines bright even at night, welcome to Saint Petersburg, Florida.
Known as the Sunshine City, St. Pete is a radiant gem on Florida's Gulf Coast. With its vibrant nightlife, an array of fine arts, and a unique blend of fun places to visit, St. Pete becomes a destination like no other.
From the historic St. Pete Pier to the bustling Downtown St, from the Tampa Bay Rays games to the serene Boyd Hill Nature Preserve, this city has something for everyone.
So, read on to discover the best things to do in St. Pete at night.
Most Recommended Thing to Do
Dali Museum
Top Choice Hotel
The Vinoy Renaissance St. Petersburg Resort & Golf Club
Our Top Choice Restaurant
Birch & Vine
Our Top Choice Bar for Nightlife
The Canopy Rooftop Lounge
Best Time to Visit
Summer offers ideal weather for visiting St. Petersburg.
Average Temperature
The average temperature in St. Petersburg, USA is mild.
Transportation Options
Buses, taxis, rideshares, bikes, walking, car rentals, ferries.
Average Cost ($, $$, $$$)
My Top Recommendation
Immerse yourself in the cultural tapestry of the city by wandering through the vibrant downtown area, which is filled with charming boutiques, art galleries, and bustling cafes.
Delve into the city's rich history by visiting the awe-inspiring Salvador Dali Museum, where you can marvel at the works of the famed surrealist painter. Take a leisurely stroll along the picturesque waterfront, soaking in the breathtaking views of Tampa Bay, and enjoy a sunset cruise to truly capture the enchanting charm of St. Petersburg.
What You'll Need to Bring
- Valid identification (such as a passport or driver's license)
- Comfortable walking shoes
- Weather-appropriate clothing
What Not to Miss
- The Salvador Dali Museum
- St. Petersburg Pier
- Fort De Soto Park
- Sunken Gardens
- Museum of Fine Arts
What to Avoid
- Crowded tourist hotspots
- Ignoring local customs and etiquette
- Wandering too far from well-lit and populated areas at night
Table of Contents

1. Enjoy the Breathtaking Views of Tampa Bay from St. Pete Pier
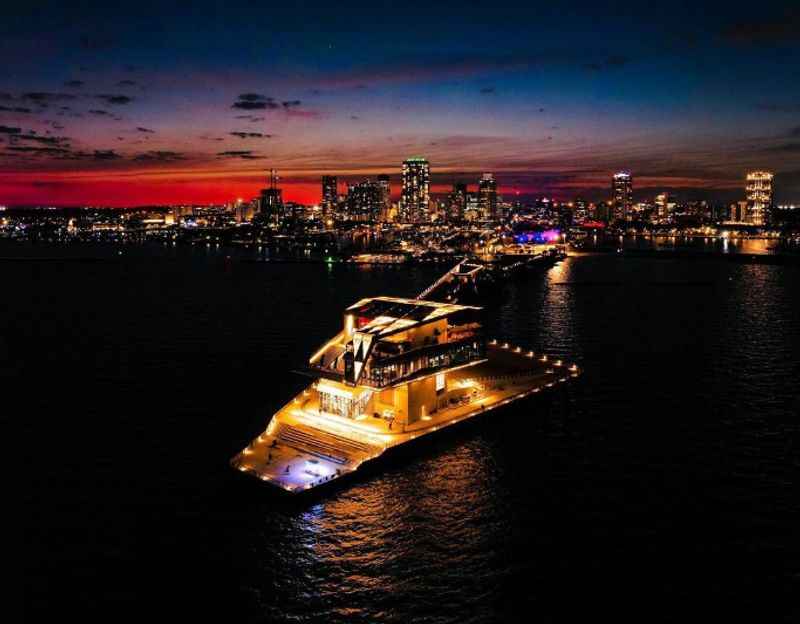
St. Pete Pier, beautifully located in downtown St. Petersburg, FL, offers visitors a stunning panorama of Tampa Bay, especially under the starlit sky. At night, the whole area comes alive with the lights reflecting off the calm bay waters, creating a mesmerizing view.
The Pier, a beacon of modernity and innovation, boasts several attractions worth exploring. A nighttime stroll along the Pier reveals a spectacular perspective of the Sunshine City and the adjacent downtown waterfront, glistening in the captivating Florida night.
The Pier's landscape is further enhanced with contemporary glass art installations, standing as a testament to the city's thriving art scene. The Imagine Museum, renowned for its exceptional collection of studio glass, illuminates the cityscape with its architectural design and internally lit exhibits.
Also, the two fishing piers on the site offer an excellent opportunity for a serene fishing experience under the moonlight. The sight of seabirds and the occasional appearance of sea turtles add to the charm of the night.
2. Visit Downtown St. Pete for a Live Music Show

St. Petersburg, affectionately known as St. Pete, is a city brimming with energy, especially at night. The Downtown St. Pete area is a vibrant cultural hub, buzzing with live music shows that appeal to every musical palate.
Whether it's the rhythmic beats of a jazz band, the soulful strumming of an acoustic guitar, or the high-energy performance of a rock band, St. Pete's nightlife has it all.
The Salvador Dalí Museum, an architectural marvel, often serves as an iconic backdrop for outdoor concerts. And when the sun sets, the live performances against the luminous Dalí museum become a sight to behold.
Downtown St. Pete's music scene is not just confined to nightclubs and concert halls. The city's streets, especially the bustling Central Avenue, often host talented street musicians, and their performances add a charming vibrancy to St. Pete's nightlife.
Even the Saturday Morning Market, a popular local spot for fresh produce and artisan goods, transforms into a lively venue for music and entertainment as the night draws in.
3. Unwind at a Beach Bar on the St. Pete Beach

St. Pete Beach, nestled along the Gulf Coast, is a paradise for beach lovers. After a day of sun and surf, there's nothing more soothing than unwinding at one of the many beach bars that dot the coastline.
These bars offer a laid-back atmosphere, cold beers, fresh seafood, and an unobstructed view of the Atlantic Ocean, making them the perfect spot to experience St. Pete at night.
As the sun dips below the horizon, painting the sky in shades of purple and gold, the beach bars become vibrant gathering spots. You can dig your toes into the white sand, savor the cool ocean breeze, and sip on a tropical cocktail while listening to music under the twinkling stars.
Whether you're looking for a romantic evening with your loved one or a fun night out with friends, St. Pete Beach offers the perfect setting.
4. Attend a Major League Baseball Game under the Lights

One of the most exciting ways to spend an evening in St. Pete is by attending a Major League Baseball game. The city is home to the Tampa Bay Rays, and their games at the Tropicana Field are a popular nighttime attraction.
The stadium comes alive with the thrilling sounds of bats hitting balls, the roar of the crowd, and the vibrant lights illuminating the diamond-shaped field.
Even if you're not a die-hard baseball fan, the energy and excitement that fills the stadium during a game are contagious.
The sight of the players taking their positions under the bright lights, the crack of the bat as it connects with the ball, and the roar of the crowd as the players make their runs all contribute to an unforgettable experience.
At the Tropicana Field, it's not just about the game. There are also numerous other attractions like the Ray Tank, where you can touch and feed rays, and the Ted Williams Museum and Hitters Hall of Fame.
There's something for everyone, making it a fun-filled evening for the entire family. After a night of thrilling baseball action, it's easy to see why attending a Rays game is one of the must-do things in St. Pete at night.
5. Visit the Salvador Dalí Museum

In the heart of downtown St. Pete, the Salvador Dalí Museum stands as a tribute to the surrealist master and his eclectic body of work.
A visit to this museum is a must for art enthusiasts, but it offers a special charm when experienced at night.
The building, a work of art itself, with its distinct geodesic glass bubble structure, is dramatically lit, casting a mystic glow that reflects beautifully on the waters of Tampa Bay.
Once inside, the dreamlike world of Dalí unfolds, with an impressive permanent collection of over 2,000 works.
As the lights are dimmed, the vibrant colors and bizarre shapes of Dalí's paintings take on a new depth, their strange beauty enhanced by the shadows.
Walking through the quiet halls of the museum after dusk, surrounded by the artist's stunning works, offers a surreal experience that resonates with the essence of Dalí's art.
6. Explore the Impressive Collection of Fine Arts at the Imagine Museum

St. Pete is not only famous for its natural beauty but also for its thriving art scene. The Imagine Museum, located near Central Avenue, is one such cultural treasure.
This gem of a museum features an extensive collection of contemporary studio glass art, beautifully lit and displayed against dark backgrounds to enhance their vibrant colors and intricate details.
When explored at night, the illuminated works of art radiate a mesmerizing glow, reflecting and refracting the light in a spectacle of color and brilliance. The pieces, ranging from whimsical figures to abstract forms, demonstrate the versatility and beauty of glass as a medium.
As you stroll through the museum under the soft lights, the shimmering displays offer a visual treat that can be appreciated by art connoisseurs and casual visitors alike.
7. Take a Sunset Cruise around the Bay for a Romantic Evening
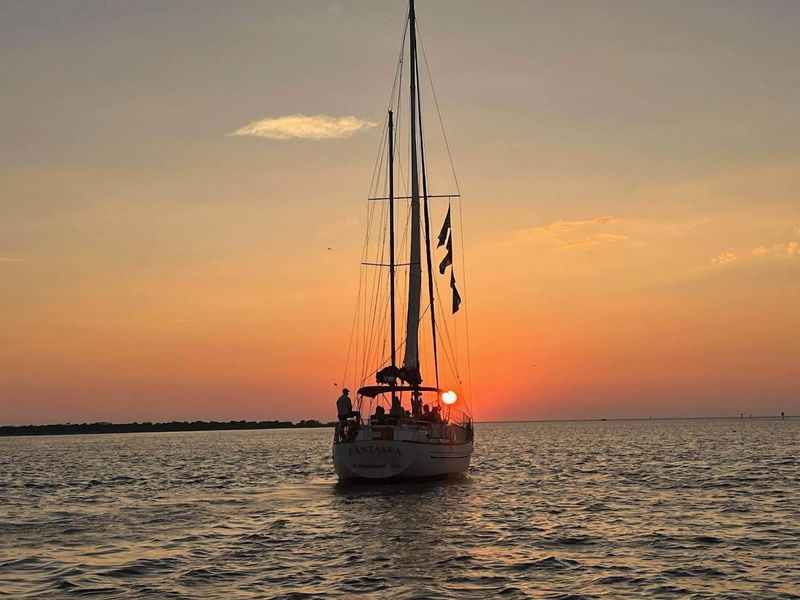
A visit to St. Pete wouldn't be complete without experiencing the beautiful Tampa Bay area from the water, especially at sunset. This is, undoubtedly, one of the best things to do in St Pete at night.
A variety of companies offer sunset cruises that take you along the bay, providing breathtaking views of the Florida sun slowly dipping below the horizon, casting a golden glow on the waters.
As the evening descends, the vibrant hues of the sunset make way for the twinkling city lights reflecting on the calm bay waters, creating a mesmerizing spectacle. Some cruises even offer the opportunity to spot dolphins and other wildlife, adding an element of adventure to the romantic evening.
Sipping on a glass of champagne under the starlit sky while taking in the beautiful sights makes for an unforgettable night in St. Pete.
8. Experience the World's Largest Shuffleboard Club in Downtown St. Pete
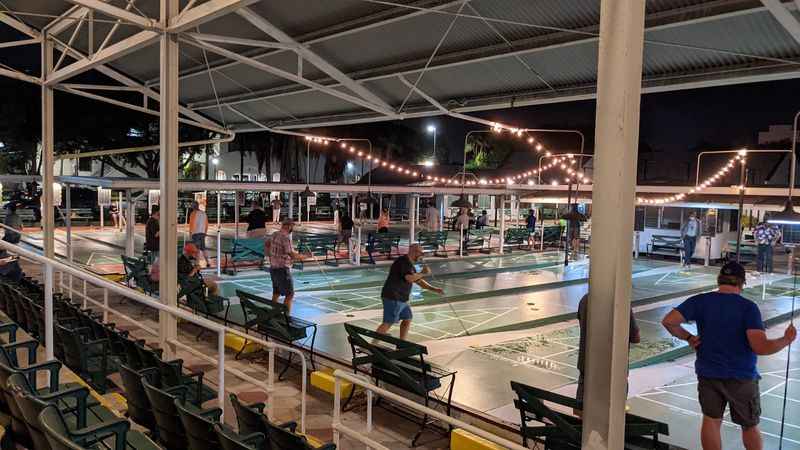
In the heart of St. Pete lies the world's largest shuffleboard club, a testament to the city's unique blend of history and fun. The St. Pete Shuffleboard Club, established in 1924, has become a beloved local icon and a must-visit spot, especially in the evening.
Under the warm Florida night sky, the club buzzes with life as people of all ages engage in friendly matches.
The courts lit up under the outdoor lights, create an atmosphere of excitement and camaraderie. Whether you're a shuffleboard expert or a curious first-timer, the club welcomes everyone to enjoy the game.
After an exciting round of shuffleboard, visitors often head to Central Ave for a cold beer and amazing cuisine, making it the perfect ending to a fun night in St. Pete.
The combination of friendly competition, laughter, and community spirit make a night at the Shuffleboard Club an experience not to be missed.
9. Visit the James Museum of Western and Wildlife Art

Situated in downtown St. Pete, the James Museum of Western and Wildlife Art is a true treasure trove of American art and history. The museum is home to an impressive collection of paintings, sculptures, and artifacts that pay tribute to the spirit of the American West.
As night falls, the museum takes on an atmospheric allure, with its warm lighting lending an extra layer of charm to the art pieces.
The life-size wildlife sculptures and detailed landscapes appear even more dramatic and lifelike under the evening lights. The collection showcases the diversity and majesty of the American West, transporting visitors to a different era.
The museum's beautiful architectural design, echoing the rugged landscapes of the West, is also beautifully illuminated at night, enhancing your journey through the rich narratives of the art.
10. Enjoy a Scavenger Hunt around the City

Exploring St. Pete at night presents a unique and exhilarating adventure with a scavenger hunt. Scavenger hunts provide an interactive way to explore the city's landmarks, from downtown St. Pete to the waterfront area, under the cover of darkness.
Guided by a series of clues, participants navigate through the city's streets, experiencing the vibrant nightlife and discovering hidden gems.
Stops may include popular destinations like St. Pete Pier, the Salvador Dalí Museum, and the vibrant Central Avenue. As you solve riddles and overcome challenges, you also get to enjoy the city's architectural beauty, lit up brilliantly against the night sky.
This fun, thrilling experience not only allows you to uncover St. Pete's charms but also creates lasting memories of your night-time adventure.
11. Take a Stroll down Central Avenue
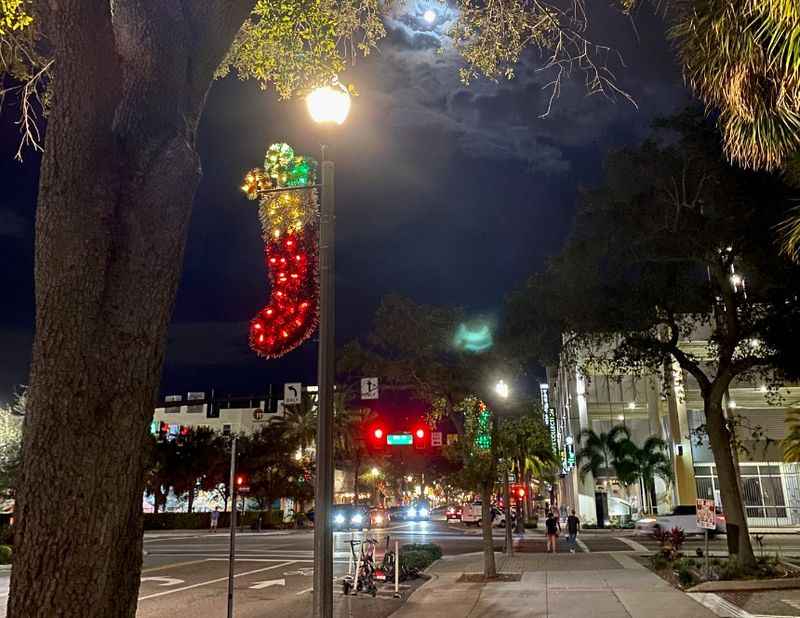
Central Avenue is the heartbeat of St. Pete, bustling with energy, especially after sundown. This lively thoroughfare, stretching from the bay to the gulf, is packed with a variety of eateries, bars, shops, and art galleries.
The warm Florida night, coupled with the vibrant street lights and lively chatter, creates a captivating atmosphere that's perfect for a leisurely evening stroll.
Whether you're in the mood for a fine dining experience, a casual beer at a local brewery, or some music, Central Avenue has something for everyone. The unique shops along the avenue, many open late, offer a range of local goods, from vinyl records to handcrafted jewelry.
As you walk, you can appreciate the mix of historic architecture and modern murals that give Central Avenue its distinctive character.
12. Explore the Vibrant St. Pete Nightlife in the Edge District
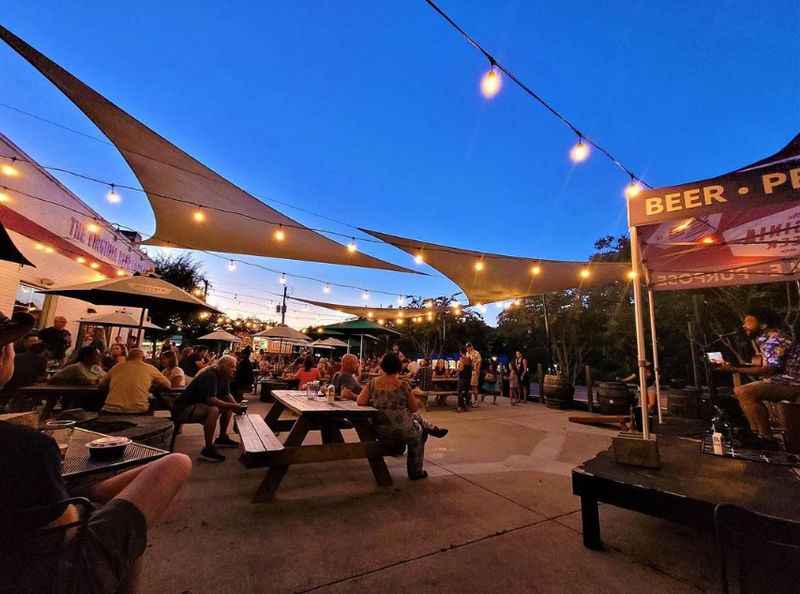
The Edge District, a vibrant neighborhood in St. Pete, is a hotspot for nightlife, offering a dynamic mix of entertainment options.
As the sun sets, the district comes alive with locals and tourists alike drawn to its bustling bars, concert venues, and diverse culinary scene.
The district's many venues regularly host music performances, adding to the energetic vibe of the area. From intimate indoor venues to larger outdoor stages, there's always a chance to catch local and visiting bands playing a range of genres.
The area's craft beer scene is also worth exploring, with several breweries offering a taste of Florida's thriving craft beer culture.
Whether you're looking for a quiet cocktail at a stylish rooftop bar or a night of dancing, the Edge District provides a memorable St. Pete's nightlife experience.
13. Visit The Petersburg Museum of History
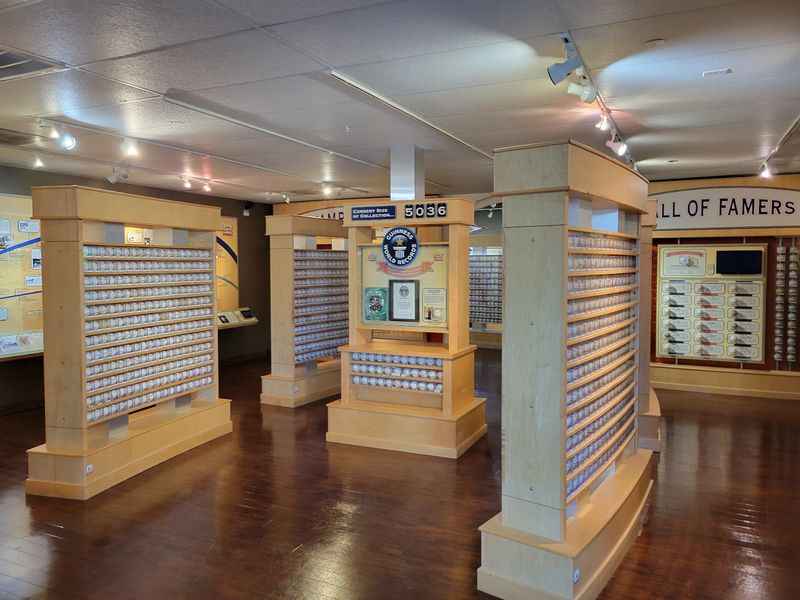
Immerse yourself in the captivating world of Florida's past by visiting the Petersburg Museum of History in downtown St. Pete. This historic landmark, nestled close to the waterfront, offers a rich tapestry of narratives from various eras.
As you stroll through its galleries, you'll find museum displays showcasing artifacts, photographs, and narratives that tell the story of Pinellas County and the development of St. Pete.
Special exhibits reveal more about Florida's involvement in the Second World War, the unique nature of the Gulf Coast, and even the sunshine city's influence on the game of baseball. The museum also houses an impressive collection of vintage aircraft.
14. Visit the Florida Holocaust Museum for an Insightful Evening

As the sun sets on the Gulf Coast, take a moment to reflect and learn at the Florida Holocaust Museum in downtown St. Petersburg, FL.
This deeply moving museum is home to one of the largest collections of World War II and Holocaust-related artifacts in the United States. Visiting this place after dark can be a profoundly impactful experience.
In the quiet of the evening, you can explore the museum's displays that tell heartrending stories of loss and survival.
With its compelling narrative and historical artifacts, including one of the few railway boxcars used to transport Jews during the Holocaust, the museum illuminates a dark period in human history.
This thoughtful and reflective experience is an essential stop in St. Pete at night.
15. Take a Trip to the Clearwater Marine Aquarium

A trip to the Clearwater Marine Aquarium, situated in nearby Clearwater Beach, is a must for nature lovers.
This isn't your typical aquarium. Instead, it serves as a marine animal hospital specializing in the rescue, rehab, and release of marine animals.
It's the perfect place to learn about sea turtles, sea birds, and many other sea creatures in their interactive exhibits. Witness the heroic rescue efforts for these magnificent creatures firsthand and get a behind-the-scenes look at their rehabilitation process.
The Clearwater Marine Aquarium offers an insightful and fun experience that ties together education, conservation, and a profound respect for the wildlife of Florida's Gulf Coast.
16. Go on a Tour of The Boyd Hill Nature Preserve
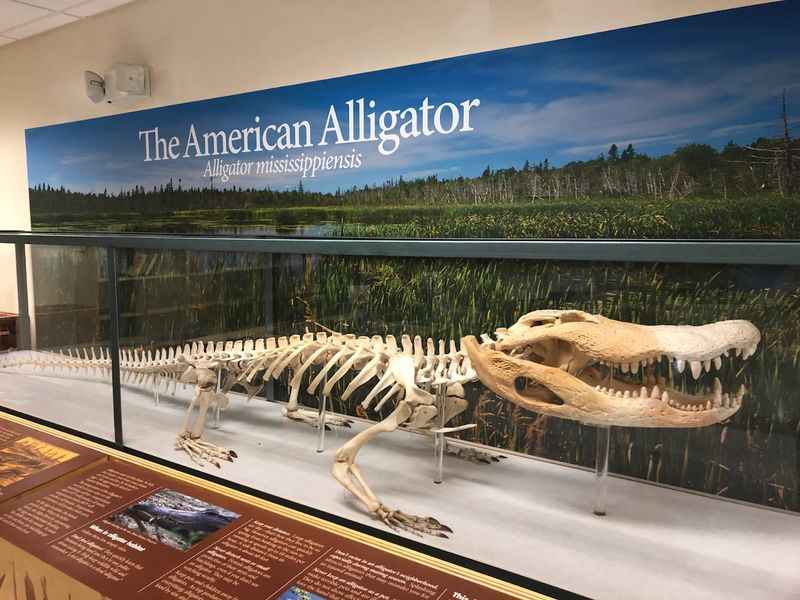
Located in South St. Pete, the Boyd Hill Nature Preserve is a hidden gem for nature enthusiasts.
This sprawling, 245-acre park is home to a variety of ecosystems and wildlife, offering trails that meander through willow marsh, pine flatwoods, swamp woodlands, and more.
It is an important nesting site for sea turtles and an excellent spot for bird watching. You can embark on a self-guided tour or join one of the regular guided tours that provide more in-depth information about the Preserve's ecosystems.
This Nature Preserve is truly a testament to St. Petersburg’s dedication to preserving and celebrating its natural environment.
17. Explore the Mazzaro's Italian Market
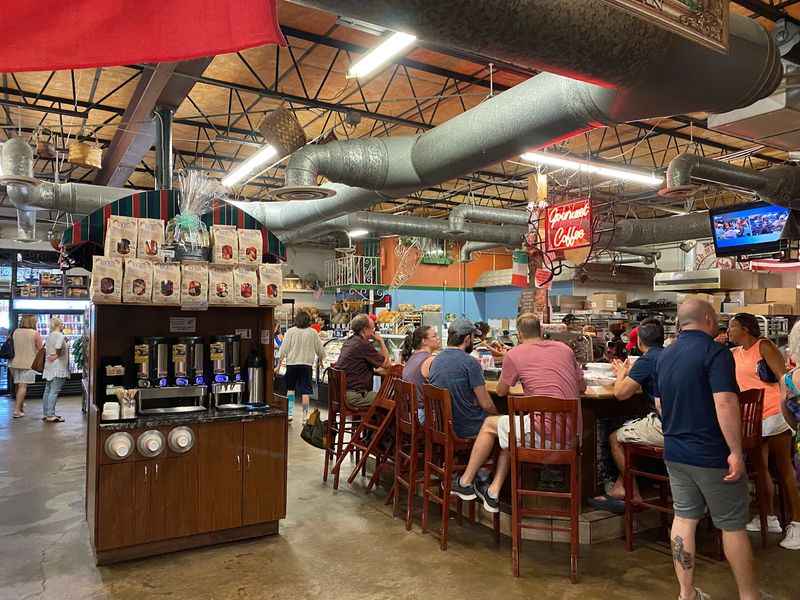
Mazzaro's Italian Market is a cornerstone of St. Petersburg, Florida's food scene, providing residents and tourists with an authentic taste of Italy.
As you enter the market, your senses are overwhelmed with the rich aromas of fresh fruit, gourmet cheeses, and an array of other Italian delicacies. Your taste buds tingle as you sample their selection of fresh produce and artisan foods, handpicked from the finest sources.
All in all, a visit to Mazzaro's Italian Market is a culinary adventure, a journey through the flavors and traditions of Italy right in the heart of St. Petersburg.
Whether you're a food lover or a casual shopper, Mazzaro's offers a unique and memorable experience that will make you feel like you've stepped into a market in the heart of Italy. So, when you're in St. Pete, make sure to stop by Mazzaro's – your taste buds will thank you!
18. Enjoy an Evening at the Sunken Gardens
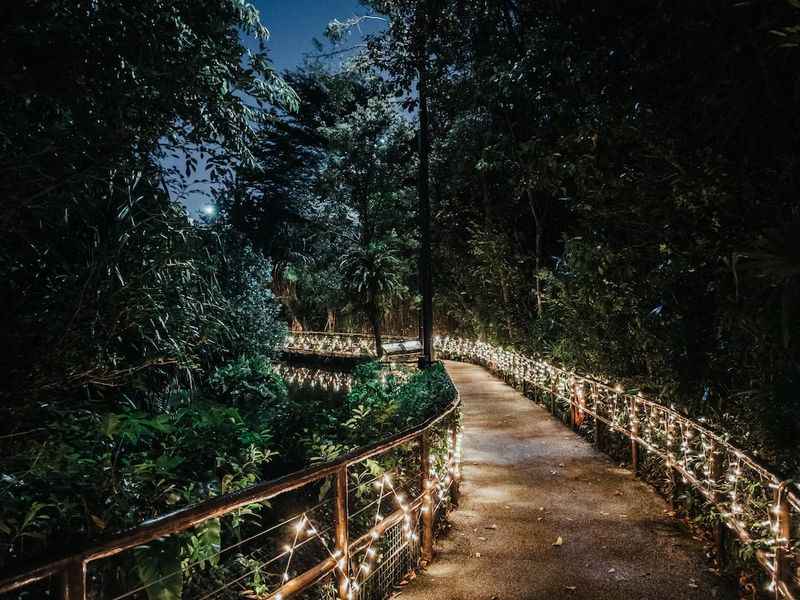
The Sunken Gardens is a true oasis in the heart of St. Petersburg, Florida. The Sunken Gardens is a century-old living museum that's home to over 50,000 tropical plants and flowers and is a sanctuary of tranquility, especially under the romantic starlit Florida sky.
Walk on winding paths, past cascading waterfalls and beautiful demonstration gardens, to a setting that's as enchanting as it is restorative.
The landscaped miniature waterfalls create a serene atmosphere that invites visitors to slow down and appreciate the beauty around them. Visiting the Sunken Gardens under the starlit sky is an experience you won't want to miss.
19. Take a Helicopter Tour for an Aerial View of St. Pete
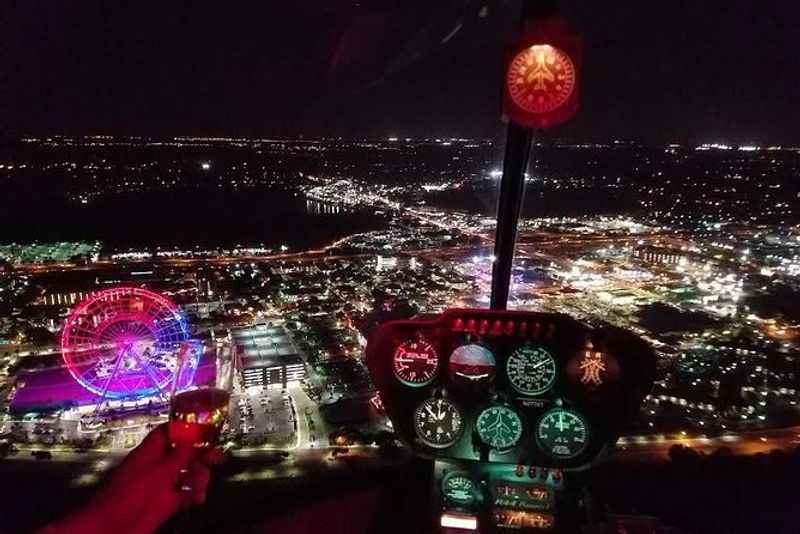
For those seeking an unforgettable experience, taking a nighttime helicopter tour over St. Petersburg provides a thrilling perspective of the city.
Witness the stunning sights of Tampa Bay, the twinkling lights of downtown St. Pete, and the Sunshine Skyway Bridge from high above.
It's a unique way to see the city's landmarks, beautifully lit against the night sky.
The St. Pete helicopter tour is an extraordinary way to appreciate the beauty of the city and its surrounding areas.
20. Relax with a Drink at a Rooftop Bar in St. Petersburg, Florida
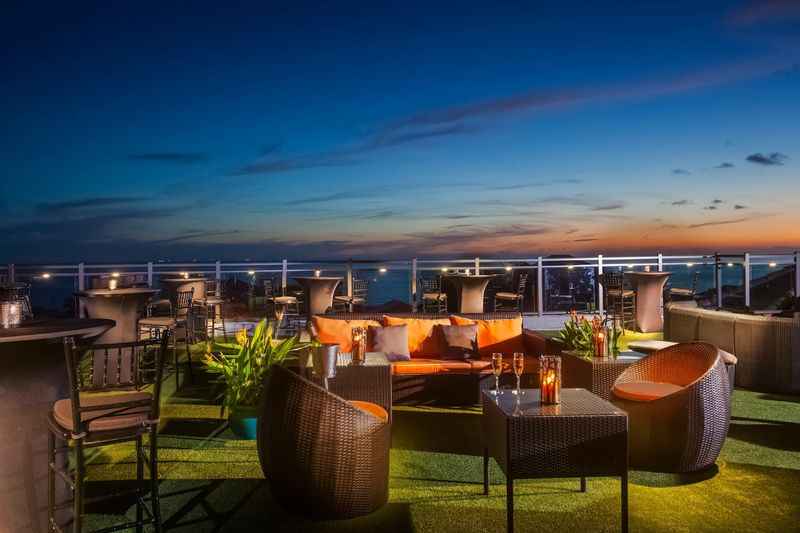
Rooftop bars are becoming an increasingly popular part of St. Pete's nightlife, offering stellar views of the city and a relaxed ambiance.
Sip on beers or a cocktail as you watch the sunset over Tampa Bay, painting the sky with a riot of colors.
Enjoy the panoramic views of nearby cities, the Tampa Bay Rays stadium, and the ever-charming St. Pete.
The central avenue is home to numerous rooftop bars, each with its unique vibe. Close to the historic fort and the vinyl record store, these rooftop bars offer the perfect setting to unwind after a fun-filled day exploring the city.
A visit to a St. Pete rooftop bar is a must for those seeking to experience the city's lively nightlife.
21. Take an Evening Stroll at Fort De Soto Park
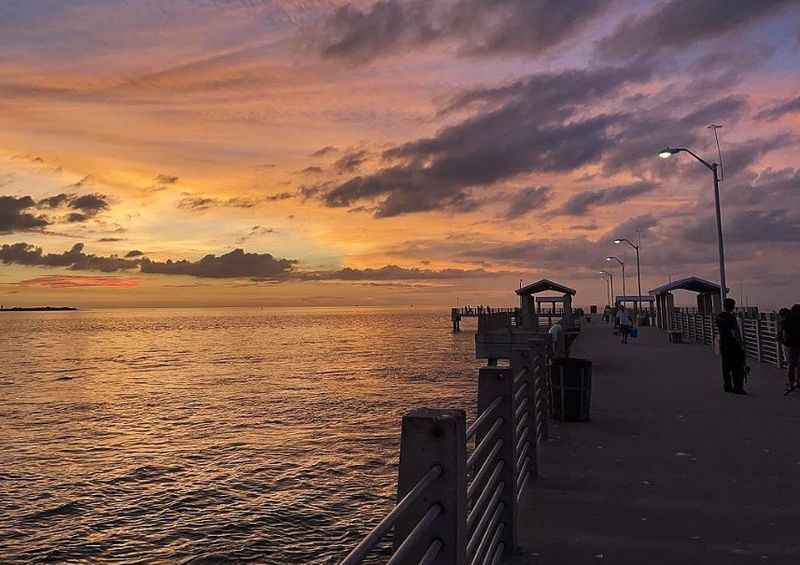
Fort De Soto Park, a gem on Gulf Coast, becomes a haven of tranquility as night falls. This historic fort, which once stood as a sentinel during the Spanish-American War, is now a peaceful place for evening strolls.
Listen to the gentle lapping of waves against the fishing piers and the distant call of sea birds returning to their nests. The park is also a nesting site for sea turtles, adding to its natural charm.
The park's pristine landscapes and its serene atmosphere at night make it a must-visit spot in St. Petersburg .
After your peaceful stroll, drive down to nearby Key West for some delicious seafood, completing your evening in this Floridian paradise.
FAQs Regarding Things To Do in St. Pete
In this section, we answer some of the most common questions that people have when looking for fun things to do in St. Pete at night.
Does St. Petersburg have nightlife?
St. Petersburg, FL, boasts a vibrant nightlife with a variety of options. Downtown St. Petersburg is a hotspot, with a plethora of bars, concert venues, and even the Salvador Dali Museum that's open late.
St. Pete Beach offers beachfront bars, while Central Ave is known for its music. Additionally, there's always a Tampa Bay Rays game or an event at the only indoor venue, making for an exciting night out.
Can you drink alcohol in St Pete Beach?
Yes, you can drink alcohol in St. Pete Beach. However, it's essential to note that the consumption of alcohol is only permitted within licensed establishments and not on the beach itself. Beachfront bars and restaurants are plentiful for those wanting to enjoy a drink with their toes in the sand.
What is there to do in Saint Petersburg for free?
Saint Petersburg offers plenty of free activities. Nature lovers can enjoy the Boyd Hill Nature Preserve, Fort De Soto Park, and the Sunken Gardens. Walking down the historic St. Pete Pier or the Fred Marquis Pinellas Trail is also free. In addition, some museums have specific days or hours where admission is free, like the Great Explorations Children's Museum.
Can you drink alcohol on St. Pete Pier?
Alcohol consumption at St. Pete Pier is allowed in designated areas within restaurants and bars. It's not permitted to carry open containers of alcohol around the pier or in other public spaces, according to St. Petersburg city laws. Always ensure to enjoy yourself responsibly and adhere to the local regulations when visiting.
What are some lesser-known attractions worth visiting in St. Pete?
Some of the lesser-known attractions worth visiting would be John's Pass, the Quartermaster Museum, Palm Harbor, Tarpon Springs as well as Fairgrounds St. So, if you have some extra time, or you don't want to stand in a long line, you can give these places a visit.
Summing Up: The Best Things to Do in St. Petersburg at Night
As you can see, there are plenty of things to do in St Petersburg at night.
Our journey has taken us from St. Pete Pier, alive with activity under the starlit sky, to the warm sands of St. Pete Beach.
We've delved into the world of fine arts at the Salvador Dali Museum, cheered on the Tampa Bay Rays, and uncovered nature's beauty at Boyd Hill.
We've strolled down Central Ave and experienced an array of delicious cuisine and craft beers.
St. Petersburg, with its fun places and exciting nightlife, truly lives up to its reputation as the Sunshine City, even after the sun goes down.
Enjoy the Breathtaking Views of Tampa Bay from St. Pete Pier.
Visit downtown st. pete for a live music show., unwind at a beach bar on the st. pete beach., visit the salvador dalí museum., take a stroll down central avenue., explore the vibrant st. pete nightlife in the edge district., related articles, featured in.


IMAGES
VIDEO
COMMENTS
Amazon.com: rv led light strips. ... Motorhome Travel Trailer Canopy Led Lights, Waterproof RV Exterior Strip Lights, RV Outdoor Lights. 4.5 out of 5 stars. 723. 400+ bought in past month. $19.99 $ 19. 99 ($1.22 $1.22 /Foot) FREE delivery Tue, May 7 on $35 of items shipped by Amazon. Add to cart-
Trailers. Truck Beds. Hardwired. 11 - 20 Inch Long. Cool White. Optronics. This 17' LED light strip has a weatherproof exterior that makes it perfect for indoor or outdoor use. 300 Diodes produce a bright white light. Cut-to-fit installation with peel-and-stick adhesive backing. Hardwires to any 12V power source.
Premium Slim LED Strip Light - Weatherproof - 3,638 Lumens - 60" Long - Expandable. Upgrade your boat's interior accent lighting with this premium, 47-1/2" x 1/2", LED strip light with 72 diodes. Can also be used on trucks or RVs. Aluminum housing. 2-Wire harnesses on either side allow you to link lights together.
Use anywhere around the RV that you need light—in hatches, around awning or near steps and hitches. Waterproof, low profile strips are 3/8"W and offer over 30,000 hours of life. 16' of colorful programmable LED lights in White, Purple, Red, Yellow, Blue, Green and Cyan. Remote key fob has on/off button and works up to 125' away.
Vision X LED Light Strip - Touch Activated - 12" Long - White - Qty 1 - XIL-ST12. Our Price: $109.00. Add to Cart. Add 328 raw lumens of bright white light in your vehicle, toolbox, kitchen, or shop with this LED light strip. Long-lasting LEDs deliver 30,000 hours of light. Switch activated and dimmable.
LEDGlow RV Underbody LED Lights Combine Colors and Effects to Create Custom Patterns for the Ultimate RV Underglow Lighting Experience On Your Next Trip. ... LEDGlow RV LED strip light kits are designed for 20'-25', 30'-35', 40'-45' and 45'+ models. Our camper LED lights are measured and manufactured specifically for RVs.
Camper & RV. LED lights are an energy-efficient solution for RV and camper lighting. Products range from interior LED dome lights, to LED puck lights, and LED strip light kits. As well as a large selection of tail lights, and a variety of other replacement bulbs.
Here are some common LED light types. JC10 LEDs have 75 lumens of brightness and 10 watts and are commonly used as replacement lights in many light fixtures. They have two wires at the bottom, though the tops differ. 921/912 With 105 lumens and 60 lumens, respectively, these types are also quite common replacements.
Boogey Lights direct replacement LED light strips for RV Travel Trailer End Caps are here! These lights are often the first lights to fail in new trailers mainly because they're facing forward and subject to wind/rain damage. Boogey Lights hi-intensity surface mounted LED light strips are built tougher. They're also brighter.
1.1 RecPro RV Camper Motorhome Travel Trailer LED Awning Light. 1.2 Camco LED RV and Camper Interior and Exterior Rope Lighting. 1.3 Dream Lighting 12V Waterproof RV Awning Light. 1.4 MICTUNING RV Exterior LED Porch Utility Light. 1.5 Coleman LED String Lights. 1.6 Adventuregy Magnetic LED RV Awning Lights.
Trailers. Truck Beds. Hardwired. 11 - 20 Inch Long. Cool White. Optronics. This 17' LED light strip has a weatherproof exterior that makes it perfect for indoor or outdoor use. 300 Diodes produce a bright white light. Cut-to-fit installation with peel-and-stick adhesive backing. Hardwires to any 12V power source.
So cut your light strip and adhesive tape about 2 inches shorter than the total length of your awning. To get your strip lights evening placed measure down your desired amount from the bottom of the awning. Do this with the awning closed. Make a mark at either end then draw a line between these two marks.
Step by step guide on removing the existing LED light strip : Unroll the awning, and remove the cover on the hardware to expose the wires. Remove the silicone sealant and pull out the wires from the wall. Cut the two wires closest to the light strip, set them aside for reference. Slide the light out of the track.
Travel Trailer (4,485) Class A (2,412) Fifth Wheel (1,858) Class C (1,745) Class B (979) Toy Hauler (509) Park Model (188) Pop Up Camper (78) Truck Camper (35) Disclaimers. RV Trader Disclaimer: The information provided for each listing is supplied by the seller and/or other third parties. RVTrader.com is not responsible for the accuracy of the ...
With Outdoor Lighting Perspectives of Clearwater & Tampa Bay, you can expect the quickest response time, highest level of service and unmatched attention to detail. Let us show you how we can enhance your St. Pete-area home and outdoor living spaces. Call today at (727) 513-3420 or fill out our form.
This 17' LED light strip has a weatherproof exterior that makes it perfect for indoor or outdoor use. 300 Diodes produce a bright white light. Cut-to-fit installation with peel-and-stick adhesive backing. ... Fusion LED Combination Tail Light Bar for Trailers over 80" Wide - Submersible - Clear Lens (224 reviews) Code: STL264RCB. Retail: $49.99 ...
20. Relax with a Drink at a Rooftop Bar in St. Petersburg, Florida. Rooftop bars are becoming an increasingly popular part of St. Pete's nightlife, offering stellar views of the city and a relaxed ambiance. Sip on beers or a cocktail as you watch the sunset over Tampa Bay, painting the sky with a riot of colors.
Pulkovo Airport (Russian: Аэропорт Пулково, IPA: [ˈpuɫkəvə]) (IATA: LED, ICAO: ULLI) is an international airport serving St. Petersburg, Russia.It consists of one terminal which is located 23 km (14 mi) south of the city centre. The airport serves as a hub for Rossiya Airlines and as focus city for Smartavia.It is responsible for serving the citizens of Saint Petersburg and ...