Follow Polygon online:
- Follow Polygon on Facebook
- Follow Polygon on Youtube
- Follow Polygon on Instagram

Site search
- Dragon’s Dogma 2
- Zelda: Tears of the Kingdom
- Baldur’s Gate 3
- Summer Game Fest schedule
- PlayStation
- Dungeons & Dragons
- Magic: The Gathering
- Board Games
- All Tabletop
- All Entertainment
- What to Watch
- What to Play
- Buyer’s Guides
- Really Bad Chess
- All Puzzles
Filed under:
- Zelda: Tears of the Kingdom guide
‘A Trip Through History’ quest steps in Zelda: Tears of the Kingdom
Search the four ring ruins around Kakariko Village
Share this story
- Share this on Facebook
- Share this on Reddit
- Share All sharing options
Share All sharing options for: ‘A Trip Through History’ quest steps in Zelda: Tears of the Kingdom
/cdn.vox-cdn.com/uploads/chorus_image/image/72282737/TOTK_Ring_Ruins.0.png)
“A Trip Through History” is one of many side quests you can find in The Legend of Zelda: Tears of the Kingdom .
Starting in the Kakariko Village, meet with Bugut who tells you about four stone slabs spotted around the village, but they’re too high up and he’s afraid of heights. It’s your job to read each slab and tell him what they say.
Check out the sections below to find out where each stone slab is located and how to get to them.
‘A Trip Through History’ starting location
:no_upscale()/cdn.vox-cdn.com/uploads/chorus_asset/file/24659204/TOTK_Trip_Through_History_Start.png)
Speak with Bugut, who can be found in the center of Kakariko Village , to start the “ A Trip Through History ” side quest. Bugut will wander the road going through Kakariko Village, so be on the look out for a Hylian man with a shaved head and a backpack roaming the street.
Stone slab locations
:no_upscale()/cdn.vox-cdn.com/uploads/chorus_asset/file/24659215/TOTK_Ring_Ruin_locations.png)
There are four ring ruins scattered around Kakariko Village, and in each ring ruin you’ll find a stone slab. To see where each of the four ring ruins are located, check out the image above.
:no_upscale()/cdn.vox-cdn.com/uploads/chorus_asset/file/24659222/TOTK_Josiu_Shrine.png)
Our first recommendation is to unlock the Josiu Shrine which is located above Kakariko Village on a Sky Island at the coordinates (1759,-1208, 0924) . In doing so, you’ll be able to fast travel to the shrine and glide down to each of the stone slabs with ease rather than sprinting to each one on the surface. To reach the Josiu Shrine, launch from the Sahasra Slope Skyview Tower and glide over to the sky islands above Kakariko Village. The Josiu Shrine may look a little different than what you’re used to: the main entrance is gone! Don’t worry though, you can still interact with the shrine to activate the teleport waypoint.
There is a fifth ring ruin guarded by Calip — ignore this ring ruin! This ring ruin is not a part of the “A Trip Through History” side quest, so don’t waste your time trying to find the stone slab here!
Stone Slab at the Large Ring Ruin - 1
:no_upscale()/cdn.vox-cdn.com/uploads/chorus_asset/file/24659234/TOTK_Large_Ring_Ruin.png)
Glide down from Josiu Shrine to the wooden scaffolding beside the vertical ring on top of the northern hill of Kakariko Village. On top of the scaffolding, you’ll find a few pavilions with researches inside, and underneath one of them will be Ollie sleeping on top of the stone slab. Interact with the open book on top of a bench beside the slab at the coordinates (1737, -0902, 0199) to learn about the reigning king’s sacrifice.
Stone Slab at the Eastern Ring Ruin - 2
:no_upscale()/cdn.vox-cdn.com/uploads/chorus_asset/file/24659260/TOTK_Eastern_Ring_Ruin.png)
Head over to the ring ruin on the northeastern side of Kakariko Village. You can either glide down from Josiu Shrine or walk up the hill to the ring-shaped ruin. Walk past the tents on the wooden scaffolding, and continue up to the top of the hill to find a wooden pathway into the ruins. At the end of the hallway on your right, you’ll find the stone slab along with a notebook with the translations in front of it at the coordinates (1901, -0812, 0199) . The translated text teaches you about the power attained by secret stones.
Stone Slab at the Nestled Ring Ruin - 3
:no_upscale()/cdn.vox-cdn.com/uploads/chorus_asset/file/24659284/TOTK_Nestled_Ring_Ruin.png)
Head over to the ring-shaped ruin to the southwest of Kakariko Village to find Olkin, Steen, and Drenja outside. Make your way inside to find three Bokoblins huddled around a campfire and one Bokoblin on top of the ruin’s walls. Defeat all of the Bokoblins and then head into the chamber located in the back right section of the ring to find the stone slab. Interact with the notebook on the bench at the coordinates (1632, -1178, 0218) to learn how people become sages.
Stone Slab at the Southern Ring Ruin - 4
:no_upscale()/cdn.vox-cdn.com/uploads/chorus_asset/file/24659302/TOTK_Southern_Ring_Ruin.png)
Glide down from the Josiu Shrine or climb up the hill on the southeastern side of Kakariko Village to the southern ring ruin. Turn right inside of the ring-shaped ruin to find the stone slab. Interact with the notebook on the bench at the coordinates (1938, -1081, 0166) to find out more about the sages who protected Hyrule from the Demon King.
‘A Trip Through History’ side quest reward
Once you’ve read all four stone slab translations, return to Bugut in the center of Kakariko Village and tell him what you’ve found. After you speak with Bugut and tell him what the stone slabs said, he’ll give you three thunderwing butterflies .
Zelda: Tears of the Kingdom walkthrough and guides
- Beginner’s guide to what you should do first
- 10 tips to know before starting
- Where to find Goddess Statues for Lights of Blessing
- Hearts or Stamina: What to upgrade first?
- How to get the paraglider
- How to get the Travel Medallion and Shrine Sensor
- How to get gloom resistance
- How to get cold resistance
- How to get heat resistance
- How to become fireproof
- How to make stamina food and elixirs
- How to upgrade armor
- How to increase weapon durability
- How to increase your inventory
- How to Fuse and Unfuse gear
- Amiibo rewards and unlocks
- How to parry, dodge, and Flurry Rush
- What to sell to make easy money
- Regional Phenomena best order
- Camerawork in the Depths quest steps
- Where to find Captain Hoz’s location
- Sidon of the Zora walkthrough
- Where to find ancient arowana
- Where to find Toto Lake for ‘The Broken Slate’
- Where to find King Dorephan for the ‘Clues to the Sky’ quest
- How to use the ‘watery bridge’ to find the Land of the Sky Fish
- How to beat the Sludge Like boss
- Ancient Zora Waterworks walkthrough
- Wellspring Island walkthrough
- Tulin of Rito Village quest steps
- Yunobo of Goron City walkthrough
- Riju of Gerudo Town walkthrough
- How to get through the Lost Woods
- How to get rid of the gloom in Korok Forest
- Find the Fifth Sage at Ring Ruins walkthrough
- How to beat Demon King Ganondorf, Demon Dragon
- ‘Hornist’s Dramatic Escape’ quest
- ‘Gloom-borne Illness’ quest
- ‘A New Signature Food’ quest
- ‘Team Cece or Team Reede?’ quest steps
- ‘The Beast and the Princess’ quest
- ‘Out of the Inn’ quest steps
- ‘Potential Princess Sightings!’ quest steps
- ‘White Goats Gone Missing’ quest
- ‘A Call From the Depths’ quest steps
- ‘Princess Zelda Kidnapped?!’ quest steps
- ‘Ruffian-infested Village’ quest steps
- ‘Lurelin Village Restoration Project’ quest steps
- ‘Messages from an Ancient Era’ stone tablet locations
- Great Sky Island walkthrough
- Water Temple walkthrough
- Wind Temple walkthrough
- Lightning Temple walkthrough
- Fire Temple walkthrough
- Crisis at Hyrule Castle walkthrough
- Guidance of Ages Past, Spirit Temple walkthrough
- How to get to Ganondorf
- Tears of the Kingdom interactive Hyrule map
- Shrine locations and shrine map
- Skyview Tower locations
- Great Fairy Fountain locations
- Stable locations
- Dragon locations and routes
- Dragon Tear memory locations
- Bargainer statue locations, rewards list
- Where to find diamonds
- Where to find Hestu
- Where to find the Light Dragon
- Where to find Tarrey Town and Koltin’s Shop
- How to reach the Sky Islands
- How to glide to the Temple of Time
- How to get to Gerudo Town
- How to get to Hateno Village
- How to get to Kakariko Village
- How to get to Rito Village
- How to get into the Forgotten Temple
- How to unlock the Royal Hidden Passage
- How to find the Apapes Lightroot
- How to unlock all abilities
- How to get your BOTW horses in TOTK
- How to unlock Autobuild
- How to unlock fast travel
- How to tame a horse
- How to get Zelda’s golden horse
- How to find the Great White Stallion
- How to find Ganon’s Horse
- What to do with Bubbul gems
- How to use Sage’s Will, locations
- How to increase max energy cell capacity
- How to light up the Depths
- How to make a campfire
- How to use (and find) star fragments
- How to solve Hudson Construction puzzles
- How to respec at the cursed statue
- How to use rockets creatively
- How to shield surf
- How to beat Gloom Hands
- How to beat Phantom Ganon
- How to beat Flux Construct 1
- How to defeat Hinox
- How to defeat Frox
- How to defeat Lynel
- How to defeat Gleeok
- How to defeat King Gleeok
- How to defeat the Stone Talus and use the Stone Talus Heart
- How to defeat the Battle Talus
- How to use the duplication glitch
- What is the Ring Garland?
- How does the Blood Moon work?
- How to get sunset fireflies
- How to get ancient blades
- How to earn and use Pony Points
- How to farm dragon materials
- Where to get bomb flowers
- Full armor set and set bonus list
- Best weapons
- Best early shield location
- Hylian Shield location
- How to get Majora’s Mask
- Best early Fuse combinations
- Champion’s Leathers location
- How to get the Master Sword
- How to get Misko’s Treasure
- Archaic Tunic location
- Miner’s Armor set location
- Zora Armor set location
- Barbarian Armor set location
- Climbing Armor set location
- Fierce Deity Armor, Sword location
- Glide Armor set location
- Time Armor set location
- Frostbite Armor set location
- Ember Armor set location
- Rubber Armor set location
- Yiga Armor set location
- Soldier’s Armor set location
- Tingle “Armor” set location
- Royal Guard Armor set location
- Snowquill Armor set location
- Radiant Armor set location
- Stealth Armor set location
- Froggy Armor set location
- Hylian Armor set location
- Flamebreaker Armor set location
- Zonaite Armor set location
- Charged Armor set location
- Dark Armor set location
- Depths Armor set location
- Awakening Armor set location
- Desert Voe Armor set location
- Twilight Armor set location
- Phantom Armor set location
- Wind Armor set location
- Hero Armor set location
- Wild Armor set location
- Mystic Armor set location
- Evil Spirit Armor set location
- Sky Armor set location
The next level of puzzles.
Take a break from your day by playing a puzzle or two! We’ve got SpellTower, Typeshift, crosswords, and more.
Sign up for the newsletter Patch Notes
A weekly roundup of the best things from Polygon
Just one more thing!
Please check your email to find a confirmation email, and follow the steps to confirm your humanity.
Oops. Something went wrong. Please enter a valid email and try again.
Loading comments...

The Legend of Zelda: Tears of the Kingdom Walkthrough & Guides Wiki
- Main Quests
- Side Quests
- Side Adventures
- Tips & Tricks
- Interactive Map
A Trip through History Walkthrough and How to Unlock

▲ Get Pristine Weapons from the depths or an amiibo ! △ All 1000 Koroks | All 4 Great Fairies ▲ All 81 Addison Signs | All 147 Caves | All 58 Wells △ Starter Tips: Farm Rupees | Starting Armor ▲ Advanced Tips: Best Weapons | Best Armor | Best Food
A Trip through History is a Side Quest in The Legend of Zelda: Tears of the Kingdom (TotK) that can be found in Kakariko Village. Read on to learn how to unlock A Trip through History, its location and rewards, walkthrough, as well as how to complete it.
List of Contents
- How to Unlock
- Location and Rewards
- Walkthrough Guide
- Related Guides
How to Unlock A Trip through History
Talk to bugut in kakariko village.

Go to Kakariko Village and check each Shop's front until you see Bugut. He is roaming around in the village, so keep an eye out for him!
A Trip through History Location and Rewards
West necluda - kakariko village.

The exact coordinates for this quest on the map are 1843, -0970, 0115 .
West Necluda Region Map
A Trip through History Walkthrough Guide
All slab locations.

You can find all the Deciphered Slabs in broken Ring Ruins near Kakariko Village .
First Slab Location

Go southwest from the Kakariko Village and head to the ruins. The exact coordinates are 1634 , -1178 , 0218 .
Defeat Enemies

There will be several Bokoblins camping the area. Defeat them first so you can read the slab notes safely.
Read the Deciphered Slabs

Read through slab notes behind the camp and move on to the next one.
Second Slab Location

Go to north of Lantern Lake to get to the next Slab. The fastest way to get there is to get to teleport to Makasura Shrine and climb up the mountains. The exact coordinates are: 1738 , -0900 , 0199
- How to Climb Efficiently
Read the Deciphered Slabs in a Small Camp

Third Slab Location

Head to the ruins east of Kakariko Village . You should find its entrance near a Zonai Dispenser . The exact coordinates are 1938 , -1081 , 0166 .
Read the Deciphered Slab

Fourth Slab Location

Go to the ruins on East Hill for the last Deciphered Slab. You can find it northeast of Kakariko Village, near the Chasm . The exact coordinates are 1900 , -0811 , 0199 .

Claim Your Reward

Talk to Bugut and tell him everything about the Slabs. He will give you three Thunderwing Butterflies as a reward, and that will be the end of the quest!
Unlock Makasura Shrine

Makasura Shrine Walkthrough
The Legend of Zelda: Tears of the Kingdom Related Guides

List of All Walkthroughs
List of all side quests.

We at Game8 thank you for your support.
In order for us to make the best articles possible, share your corrections, opinions, and thoughts about 「A Trip through History Walkthrough and How to Unlock | Zelda: Tears of the Kingdom (TotK)」 with us!
When reporting a problem, please be as specific as possible in providing details such as what conditions the problem occurred under and what kind of effects it had.
Do you want to send this information?
Walkthrough Menu
- TotK Wiki Top
Walkthroughs
Tips and tricks.
- Beginner's Guide
New Features
- How to Confuse Enemies
- How to Cure Gloom
- How to Blind Enemies
Combat Guides
- Flurry Rush, Sneakstrike, and Deal Critical Damage
- Weapon Modifiers Explained
- How to Raise Defense
- Passive Abilities for Weapons Explained
- How to Upgrade Armor
- How to Defeat Shielded Enemies
- How to Throw Items and Materials
- How to Repair Weapons
- How to Get Earthwake Technique
- How to Increase Weapon Durability
- How to Parry
- How to Sneakstrike
- How to Perfect Dodge and Flurry Rush
- Stealth Mechanics Explained
Exploration Guides
- How to Get Cold Resistance
- How to Dive
- How to Shield Surf
- How to Break Cracked Rocks
- How to Use Minecarts
- How to Chop Down and Use Fallen Trees
- How to Cross the Freezing Water
- Fast Travel Guide: How to Warp
- Weather Effects and How to Change the Weather
- How to Get Heat Resistance
- How to Make an Axe
- How to Tame Wild Horses
- What to Do During a Thunderstorm
- How to Pass Time
- How to Light Up Dark Areas
- How to Get Epona
- How to Check Coordinates
- How to Break Wooden Boxes
- How to Make a Fire
- How to Make a Raft
- How to Make a Hover Bike
- How to Use Rocket Shields
General Tips and Tricks
- Zonai Dispenser Guide
- How to Get the Paraglider and All Paraglider Designs
- How to Expand Inventory
- Pony Points Guide
- How to Increase Health and Stamina
- Best Settings to Use
- How to Swap Hearts for Stamina
- amiibo Unlocks and List of Compatible amiibo
- Blood Moon Explained
- Missables and One-Time Events Guide
- Where to Find Wild Greens
- Whistle Effects and How to Use
- How to Farm Crops
- How to Heal
- Post Game Content Guide
- Kochi Dye Shop Guide: How to Recolor Armor
- Ending Explained: How to Watch the True Ending
- List of Unlockables
- How to Get Ganon's Horse
Farming Guides
- How to Farm Arrows
- Bubbul Gem Guide
- How to Get More Energy Cells
- Early Game Rupee Farming
- How to Farm Weapons
- Dragon Part Farming Guide
- How to Get Pristine Weapons
Notable Item Location Guides
- How to Get the Travel Medallion
- How to Get the Champion's Leathers Early
- How to Get the Hylian Shield Early
- How to Restore the Master Sword
- How to Get the Classic Green Tunic
- How to Get Ring Garland
- Misko's Treasure Locations
- How to Get Monster Medals
Puzzle Solution Guides
- How to Solve the Water Temple Spinning Tower
- Where to Find King Dorephan
- How to Solve the Gerudo Light Puzzle
- Voe and You Class Solutions
Map Location Guides
- All Stable Locations
- All Sage's Will Locations
- How to Get to Hyrule Castle
- How to Get to Lost Woods and Enter Korok Forest
- Great Fairy Locations and How to Unlock
- How to Find the Light Dragon: Location and Drops
- How to Find Farosh: Location and Drops
- How to Find Naydra: Location and Drops
- How to Find Dinraal: Location and Drops
- Satori Cherry Blossom Tree Locations and Guide
- How to Reach Abandoned Hebra Mine
- How to Unlock Royal Hidden Passage
- All Addison Sign Locations
- How to Get into Gerudo Secret Club
- All Coliseum Locations and Rewards
- Koltin Locations and List of Rewards
- Satori (King of the Mountain) Locations
- Where to Find Dondons
- All Forge Construct Locations
- How to Get to Toto Lake
- All Goddess Statue Locations
Tier List Guides
- Best Early Game Armor
- Best Armor Sets (Equipment)
- Best Weapons and Shields
- Best Horses
- Best Equipment for Exploration
- Best Fuse Materials and Weapon Combinations
- Best Modes of Travel
Glitches and Exploits
- List of Glitches and Exploits
- How to Duplicate Weapons, Bows, and Shields
- How to Duplicate Materials
- Can You Pet the Dogs?
- What Transfers Over From Breath of the Wild?
- Should You Play BotW First?
- What Happens When You Die?
- How Does Autosave Work?
- What Happened to Link's House?
- Do Materials Respawn?
- How to Change the Difficulty
- How to Lower and Raise Hylian Hood
- When Do Shops Restock?
- Is There a Master Mode?
- All Abilities and How to Unlock
Zonai Arm Abilities
Purah pad abilities.
- Travel Medallion
- Shrine Sensor
- Hero's Path Mode
Sage's Abilities
- Vow of Tulin
- Vow of Riju
- Vow of Sidon
- Vow of Yunobo
- Interactive Map of Hyrule and All Locations
- Hyrule Surface Map and Regions
- Hyrule Sky Map and Regions
- Hyrule Depths Map and Regions
- Korok Seed Map and How to Use
- All 147 Caves
- All 58 Wells
- All Lightroot Locations and Maps
- All Chasm Locations and Maps
- List of Towns and Settlements
- All Tower Locations
- Lookout Landing Tower
- Hyrule Field Tower
- Gerudo Highlands Tower
- Lindor's Brow Tower
- Rospro Pass Tower
- Pikida Stonegrove Tower
- Thyphlo Ruins Tower
- Eldin Canyon Tower
- Ulri Mountain Tower
- Rabella Wetlands Tower
- Sahasra Slope Tower
- Popla Foothills Tower
- Gerudo Canyon Tower
- Upland Zorana Tower
- Mount Lanayru Tower
- List of All Shrines
- All 31 Shrine Quests
Great Sky Island Shrines
- Ukouh Shrine
- In-isa Shrine
- Gutanbac Shrine
- Nachoyah Shrine
Hyrule Field Shrines
- Ren-Iz Shrine
- Tsutsu-um Shrine
- Riogok Shrine
- Kamizun Shrine
- Sepapa Shrine
- Taki-Ihaban Shrine
- Ishodag Shrine
- Teniten Shrine
- Tajikats Shrine
- Yamiyo Shrine
- Kyononis Shrine
- Jiosin Shrine
- Jojon Shrine
- Serutabomac Shrine
- Tenmaten Shrine
- Sonapan Shrine
- Usazum Shrine
- Kyokugon Shrine
- Tadarok Shrine
- En-oma Shrine
- Susuyai Shrine
- Mayachin Shrine
- Makurukis Shrine
- Runakit Shrine
- Sinakawak Shrine
- Jinodok Shrine
Tabantha Shrines
- Oromuwak Shrine
- Gatakis Shrine
- Nouda Shrine
- Wao-os Shrine
- Iun-orok Shrine
- Turakawak Shrine
- Gasas Shrine
- Mayausiy Shrine
- Ikatak Shrine
- Ga-ahisas Shrine
- Ganos Shrine
- Taunhiy Shrine
Hebra Shrines
- Sahirow Shrine
- Rutafu-um Shrine
- Otak Shrine
- Eutoum Shrine
- Sisuran Shrine
- Oshozan-u Shrine
- Mayaotaki Shrine
- Tauyosipun Shrine
- Orochium Shrine
- Ijo-o Shrine
- Tenbez Shrine
- Taninoud Shrine
- Mayaumekis Shrine
- Kahatanaum Shrine
Great Hyrule Forest Shrines
- Sakunbomar Shrine
- Pupunke Shrine
- Ninjis Shrine
- Musanokir Shrine
- Kikakin Shrine
- Kiuyoyou Shrine
- Ekochiu Shrine
- Mayam Shrine
- Simosiwak Shrine
Akkala Shrines
- Rasiwak Shrine
- Jochi-iu Shrine
- Igashuk Shrine
- Sinatanika Shrine
- Rasitakiwak Shrine
- Jochi-ihiga Shrine
- Gatanisis Shrine
- Domizuin Shrine
- Kamatukis Shrine
- Gemimik Shrine
- Gikaku Shrine
- Mogisari Shrine
- Natak Shrine
Eldin Shrines
- Kisinona Shrine
- Minetak Shrine
- Mayak Shrine
- Sibajitak Shrine
- Sikukuu Shrine
- Timawak Shrine
- Mayachideg Shrine
- Sitsum Shrine
- Marakuguc Shrine
- Kadaunar Shrine
- Moshapin Shrine
- Jiotak Shrine
- Kimayat Shrine
- Isisim Shrine
- Momosik Shrine
Lanayru Shrines
- Ihen-a Shrine
- Mogawak Shrine
- Jonsau Shrine
- Maoikes Shrine
- Joniu Shrine
- Apogek Shrine
- Yomizuk Shrine
- Kurakat Shrine
- Morok Shrine
- O-ogim Shrine
- Jikais Shrine
- Tukarok Shrine
- Zakusu Shrine
- Igoshon Shrine
- Mayanas Shrine
- Jirutagumac Shrine
- Sihajog Shrine
Necluda Shrines
- Susub Shrine
- Zanmik Shrine
- Jochisiu Shrine
- Jogou Shrine
- Anedamimik Shrine
- Tokiy Shrine
- Utojis Shrine
- Sifumim Shrine
- Bamitok Shrine
- Marari-in Shrine
- Eshos Shrine
- Makasura Shrine
- Mayahisik Shrine
- Joju-u-u Shrine
- Josiu Shrine
- Ukoojisi Shrine
- Kumamayn Shrine
- Yansamin Shrine
Faron Shrines
- Jiukoum Shrine
- Ishokin Shrine
- Utsushok Shrine
- Joku-u Shrine
- Joku-usin Shrine
Gerudo Shrines
- Soryotanog Shrine
- Mayatat Shrine
- Miryotanog Shrine
- Suariwak Shrine
- Otutsum Shrine
- Mayamats Shrine
- Rakakudaj Shrine
- Irasak Shrine
- Karahatag Shrine
- Chichim Shrine
- Siwakama Shrine
- Motsusis Shrine
- Kitawak Shrine
- Turakamik Shrine
- Rotsumamu Shrine
- Siyamotsus Shrine
- Mayasiar Shrine
- Rakashog Shrine
- Kudanisar Shrine
- List of All Bosses and Minibosses
- Master Kohga
- Marbled Gohma
- Sludge Like
- Queen Gibdo
- Seized Construct
- Phantom Ganon
- Demon King Ganondorf and Demon Dragon
- Obsidian Frox
- Flame Gleeok
- Thunder Gleeok
- Frost Gleeok
- King Gleeok
- Flux Construct
- Flux Construct II
- Flux Construct III
- Stone Talus
- Stone Talus (Luminous)
- Battle Talus
- All Weapons and Equipment
- List of All One-Handed Weapons
- List of All Two-Handed Weapons
- List of All Spears
- List of All Bows
- List of All Shields
- All Champion Weapons
- List of amiibo Weapons
- List of All Armor
- List of All Headgear
- List of All Body Armor
- List of All Legwear

Temples and Dungeons
- All Temple Locations and Dungeon Guides
- Wind Temple
- Lightning Temple
- Fire Temple
- Water Temple
- Fifth Temple
- List of All Items
- List of All Materials
- List of All Zonai Devices
- List of All Key Items
- Basic Cooking Guide
- Advanced Cooking: Adding Buffs
- List of Cooked Dishes and Recipes
- List of Roasted Dishes and Recipes
- List of Frozen Dishes and Recipes
- List of Elixirs and Recipes
- All Monsters and Enemies
- Gloom Hands
- All Yiga Schematics and Schema Stones
- New and Returning Characters
- Latest News and Updates
- Ver. 1.2.0 Update Patch Notes
- New Zelda and Ganondorf amiibo
- Ver. 1.1.2 Update Patch Notes
- Release Date Guide
- Pre-Order Bonuses
- Will There Be DLC?
- Story Summary and Timeline
- Easter Eggs and Secrets
- New Features & Gameplay
- Will the Champions Appear?
- Is the Hookshot a Useable Item?
- Will There Be a Demo?
- Multiplayer Features
- List of Official Trailers
- Why Is the Master Sword Broken?
- How Long to Beat
- 3/28 Gameplay Trailer Analysis
- TOTK Edition Switch OLED
- Four New Abilities Introduced
- Sky Islands Explored
- Who are the Zonai?
- 4/13 Final Trailer Analysis
- Where is Daruk's Successor?
- Is Demise Returning?
- All Voice Actors Cast
- Is TOTK the Last Zelda Game?
- Preload Date and Guide
- Collector's Edition Differences
- How to Get TOTK Cheaper
- Hands-On Previews: Everything We Learned
- Where to Pre-Order Guidebook
- Tears of the Kingdom 1.1 Patch Notes
- Are Hearty Durians Still in the Game?
- What Happened to the Divine Beasts?
- Where is Kass?
- Message Boards
- Game Help & Questions (9)
- Discussion & Review Board (6)
- Fan Theory Sharing Board (7)
Other Zelda Wikis
- Breath of the Wild
- Link's Awakening
- Hyrule Warriors: Age of Calamity
- Skyward Sword HD
Japanese Wiki (日本語版)
- ティアーズオブザキングダム攻略
- 1 How to Get Horriblin Guts
- 2 Where to Find Boss Bokoblin: Loc...
- 3 West Necluda Region Map: Korok S...
- 4 West Gerudo Underground Ruins Bu...
- 5 All Stone Talus Locations and Ho...
- We could not find the message board you were looking for.
Gaming News

Stellar Blade’s Skin Suit Makes It Harder

Wuthering Waves Full Review (May 2024)

Concord is Overwatch Meets Guardians of the Galaxy

Monster Hunter Wilds Trailer Shown at Sony State of Play ...
More Gaming News
Popular Games

Genshin Impact Walkthrough & Guides Wiki

Honkai: Star Rail Walkthrough & Guides Wiki

Pokemon Scarlet and Violet (SV) Walkthrough & Guides Wiki

FF7 Rebirth Walkthrough & Guides Wiki

Stellar Blade Walkthrough & Guides Wiki

Monster Hunter Rise: Sunbreak Walkthrough & Guides Wiki

Persona 3 Reload Walkthrough & Guides Wiki

Palworld Walkthrough & Guides Wiki

Pokemon UNITE Walkthrough & Guides Wiki

Call of Duty Modern Warfare 3 (MW3) Walkthrough & Guides Wiki
Recommended Games

Elden Ring Walkthrough & Guides Wiki

Super Smash Bros. Ultimate Walkthrough & Guides Wiki

Pokemon Legends: Arceus Walkthrough & Guides Wiki

FF7 Remake Walkthrough & Guides Wiki

New Pokemon Snap Walkthrough & Guides Wiki

Hyrule Warriors: Age of Calamity Walkthrough & Guides Wiki

The Legend of Zelda: Breath of the Wild Walkthrough & Guides Wiki
All rights reserved
© Nintendo. The Legend of Zelda and Nintendo Switch are trademarks of Nintendo. The copyrights of videos of games used in our content and other intellectual property rights belong to the provider of the game. The contents we provide on this site were created personally by members of the Game8 editorial department. We refuse the right to reuse or repost content taken without our permission such as data or images to other sites.
- Popular Articles

Zelda Tears of the Kingdom A Trip through History Walkthrough
June 29, 2023 by imbroken963 Leave a Comment
A Trip through History is a Side Quest in The Legend of Zelda: Tears of the Kingdom (TotK). This walkthrough will guide you through all objectives of the A Trip through History side mission.
Location: Kakariko Village Quest Giver: Bugut Requirement: None Reward: x3 Thunderwing Butterly Quest Info: Stone slabs have been found in the Ring Ruins that fell around Kakariko Village. Bugut has come to see the writing on the slabs but is afraid of heights and can’t visit the ruins. If you read what’s written on each slab, let him know what they say. You have 4 more to tell him about.
Objectives:
Speak to Bugut
Head to the first ring ruin, head to the second ring ruin, head to the third ring ruin, head to the fourth ring ruin, return to bugut, starting location: a trip through history.

Speak to Bugut who is roaming around Kakariko Village to start this side quest.

Head back into Kakariko Village and speak to Bugut wherever his marker is on the map (He roams the village a lot). Once you speak to Bugut you will receive your reward for this quest and completion of the quest.
This finishes A Trip through History Side Quest in The Legend of Zelda: Tears of the Kingdom (TotK).
For all other Quests refer to The Legend of Zelda: Tears of the Kingdom Walkthrough .
Leave a Reply Cancel reply
Your email address will not be published. Required fields are marked *
- Terms of Service
- Privacy Policy
- Cookie Policy
Ring Ruins and how to complete A Trip through History in Zelda Tears of the Kingdom
Ring around the village.
The Ring Ruins in Kakariko Village have transformed the once-quiet village into a tourist destination in Zelda: Tears of the Kingdom .
One of those tourists has a task for you: the A Trip through History side quest. Completing A Trip Through History in Zelda: Tears of the Kingdom might not reward you with the most lucrative treasures, but you do get some extra insight into Hyrule’s past - and what’s coming next.
Below you’ll find out where each Ring Ruin location is and how to get the stone slab text back to Bugut in Kakariko Village .
On this page:
- How to complete A Trip Through History
- Ring Ruins locations
Zelda Tears of the Kingdom Ring Ruins rewards
If you'd like to learn more Link's adventure, visit our Zelda: Tears of the Kingdom walkthrough .
How to complete A Trip Through History in Zelda Tears of the Kingdom
The ruin in the village itself is blocked off until later on in Zelda: Tears of the Kingdom, when you’re completing the Sage of Light questline. A Trip through Time is the quest you can tackle at any point just by visiting each of the open ruins.
Speak with Bugut to start the quest, or to finish it if you explore the ruins first. He’s wandering around the center of Kakariko Village, usually between the Ring Garland stall and the general store. He wants to know what the inscriptions say on the stone slabs inside the broken ruins, but he’s terrified of heights. That’s where you step in.
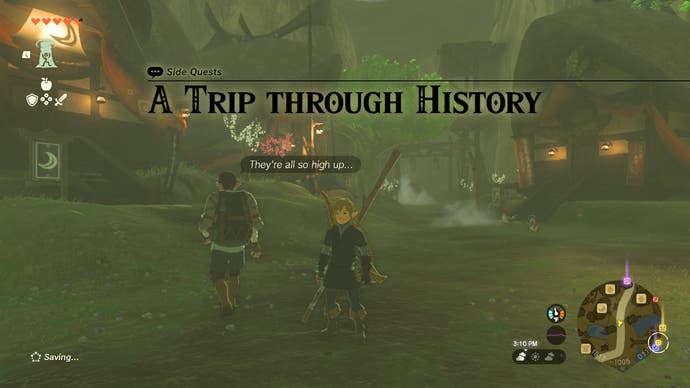
The quest description might sound like you need someone on the Zonai Expedition team to translate for you, but someone’s already done the work. All you need to do is find the slab in three ruins, and read the translation on a workbench near the slab. The fourth ruin is a bit different, as you can’t actually get inside to read the translation.
Ring Ruins locations in Zelda Tears of the Kingdom
You can visit the ring ruins in any order in Zelda: Tears of the Kingdom, but the easiest one to start with is the southwestern ruin, since you can access them quickly from Makasura Shrine . Fast travel there, climb up the hill, and glide across to the ruins. You’ll see two elderly villagers arguing about offense and defense. If you spoke with the general store owner, you can listen to their argument as part of her quest, though it’s not required.
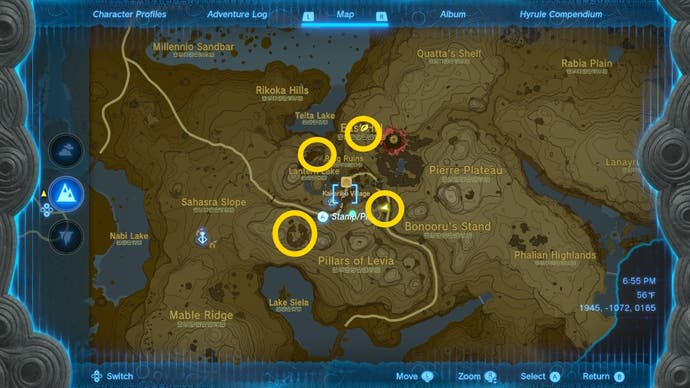
This ruin has a set of blue Bokoblins camping out in the middle. Defeat them however you see fit, and head to the back of the ruins. Turn right at the campfire, and you’ll see the slab and translations in front of you.
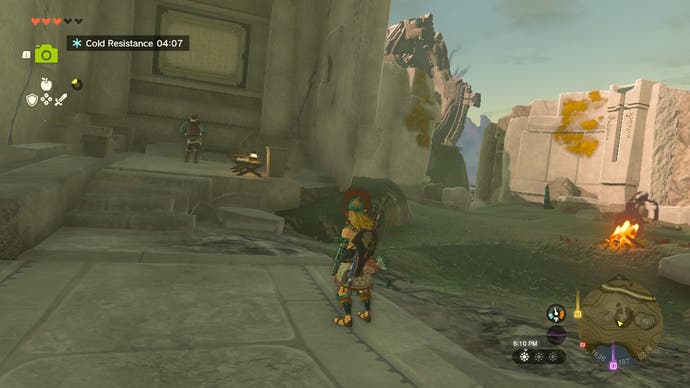
Travel back to the shrine, and head east this time. Glide over the village, and follow the wooden walkway into the ruins.
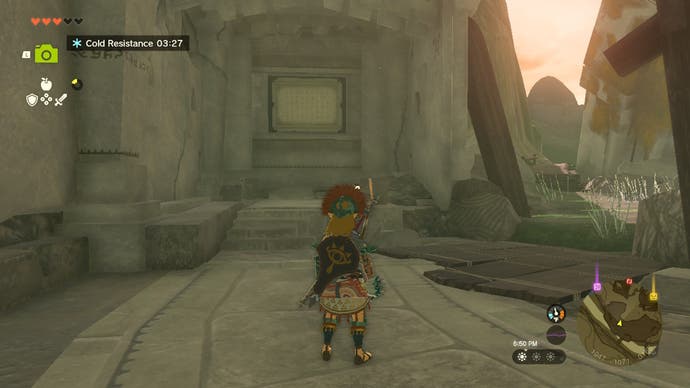
Face north from these ruins, glide over to the cliff face near the woods, and follow the forest’s edge until you see a large set of scaffolding ahead. Glide over to it, climb up, and follow the walkway to the ruins.
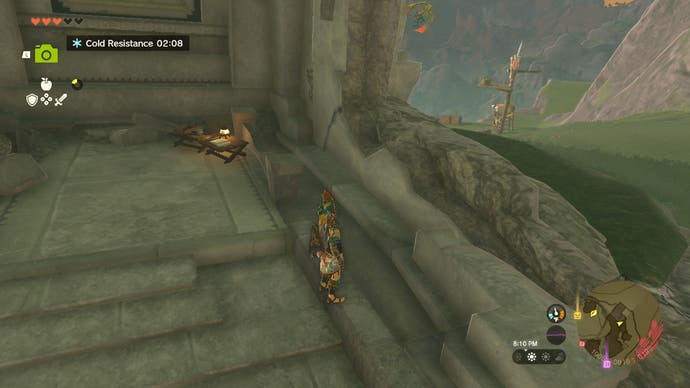
Leave, and turn towards the village again. You’ll see Makasura Shrine ahead, and the forbidden ruins a bit closer. Turn right and head down the hill, avoiding the fence around the forbidden ruins until you reach the edge of the cliff, facing the giant Ring over the waterfall.
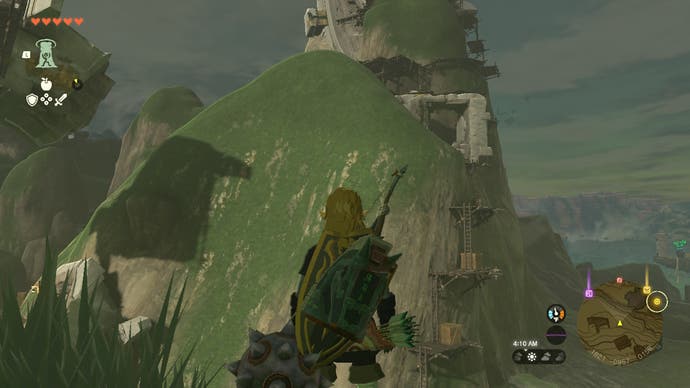
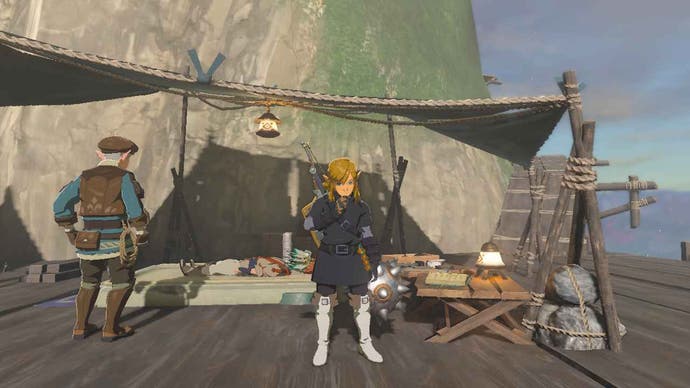
The slab isn’t in the ruin this time, so you don’t have to climb it. Instead, glide over to the scaffolding, and climb up it. It eventually leads you to a large, open platform with someone sleeping on the stone slab. You can’t wake them, nor do you need to. The translation is, as ever, on a table next to you.
After visiting the four accessible Ring Ruins in Zelda: Tears of the Kingdom, float back down to Kakariko Village, and speak with Bugut again.
He rewards you with three Thunderwing Butterflies, which you can mix with monster parts to create an elixir that increases your resistance to electricity. The only other reward is the translated stone slab lore, which sheds some light on past events in Tears of the Kingdom.
If you'd like to learn more about Link's adventure, visit our Zelda: Tears of the Kingdom walkthrough .
Read this next
- The Legend of Zelda movie is being made in "close collaboration" with the "true genius" of Miyamoto
- Nintendo forecasts Switch will overtake Nintendo DS this year, becoming company's best-selling platform
- Zelda: Tears of the Kingdom devs explain why it was a much bigger overhaul than you'd think
Today’s Connections hint and answer on 31st May for 355
Today's Wordle hint and answer on Friday 31st May for 1077
Anime Punch Simulator codes
Latest Cabin Crew Simulator codes
King Legacy codes
Anime World Tower Defense codes
Eternal Piece codes
Silly Tower Defense codes
GameSpot may receive revenue from affiliate and advertising partnerships for sharing this content and from purchases through links.
Zelda: Tears Of The Kingdom - A Trip Through History Kakariko Ring Ruins Guide
Discover the missing tablets in Kakariko's Ring Ruins in The Legend of Zelda: Tears of the Kingdom.
By Jason Rodriguez on May 18, 2023 at 10:28PM PDT
The Legend of Zelda: Tears of the Kingdom Ring Ruins in Kakariko Village are mysterious stone slabs and structures that fell from the sky. Believed to be Zonai in origin, various researchers have wondered if they hold a secret. Here's our guide to help you complete A Trip Through History via the Ring Ruins in Zelda: Tears of the Kingdom.
The Legend of Zelda: Tears of the Kingdom - Ring Ruins and Trip Through History guide
The Zelda: Tears of the Kingdom Ring Ruins and A Trip Through History quest can be started by talking to an NPC named Bugut, who's chilling in the center of Kakariko Village.

Bugut says that four of the Ring Ruins are way up high, and he doesn't want to climb them. As such, it's up to you to head to those locations.
Your main goal is to find a tablet in each Ring Ruin, then read the booklet that has research notes and translations . We've marked down these locations on the map below:
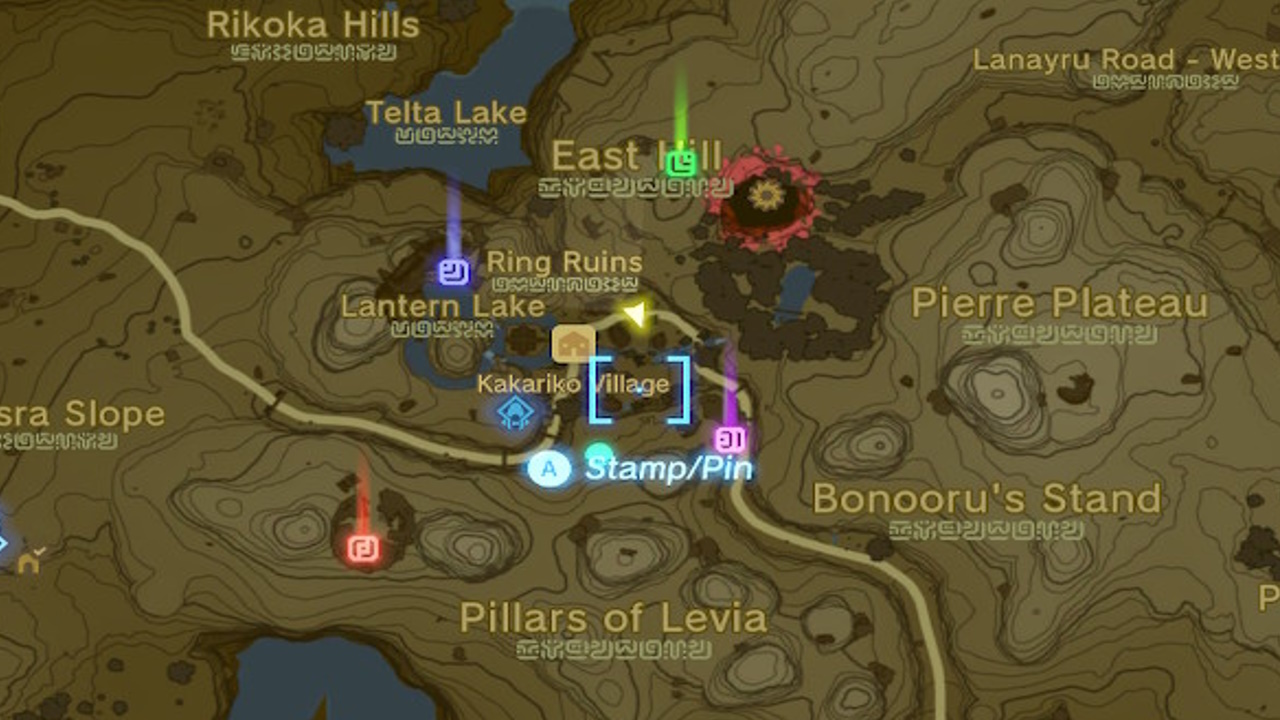
In most cases, the task is fairly straightforward. However, there are two locations (in the southwest and northwest), where you have to put in some extra effort:
- Southwest - You have to clear the Bokoblins in the area before you can access the room with the stone slab.
- Northwest - The NPC is sleeping, and you need to obtain a Hearty Truffle to wake them up. There's one behind the waterfall at the edge of the village. Still, you can skip this part if you've already found a Hearty Truffle through other means.

In any case, once you're done, talk to Bugut. This will complete the Zelda: Tears of the Kingdom Ring Ruins side quest. One more thing to add is that there's yet another stone slab in the Ring Ruins, which is unreachable through normal means. For that, you'll need to progress further in the campaign, as that's also tied to a main quest.
As of the time of this writing, we're not sure if this side quest has to be done before that main quest objective becomes available. In any case, if you're curious about that part, you can head over to our Fifth Sage guide .
There are numerous mechanics and facets to learn in The Legend of Zelda: Tears of the Kingdom. For more information, you can visit our guides hub .
Got a news tip or want to contact us directly? Email [email protected]
- Leave Blank
Join the conversation
Use your keyboard!
Log in to comment
- Terms of Service
- Privacy Policy
Zelda: Tears of the Kingdom (TotK) — A Trip Through History Quest Guide
The Legend of Zelda: Tears of the Kingdom A Trip Through History quest will take you back to Kakariko Village. When you arrive, you’ll notice some things have changed. Most notably, there are now ruins of a structure that the residents call Ring Ruins due to their shape. To complete the TotK A Trip Through History, you’ll need to research them all. Our guide tells you how.
How to Complete A Trip Through History Quest in Zelda: Tears of the Kingdom
A trip through history quest location.
Since the TotK A Trip Through History quest takes place in Kakariko Village, head back there at (1808, 0984, 0113) on the map. The quickest way to get to Kakriko Village is by using the Sahasra Slope Skyview Tower and locating the village from the sky.
Coincidentally, I also found this to be a great landmark for this quest, as well. Traveling back here to fly to the next Ring Ruin quickly is certainly one way to get from one location to another.
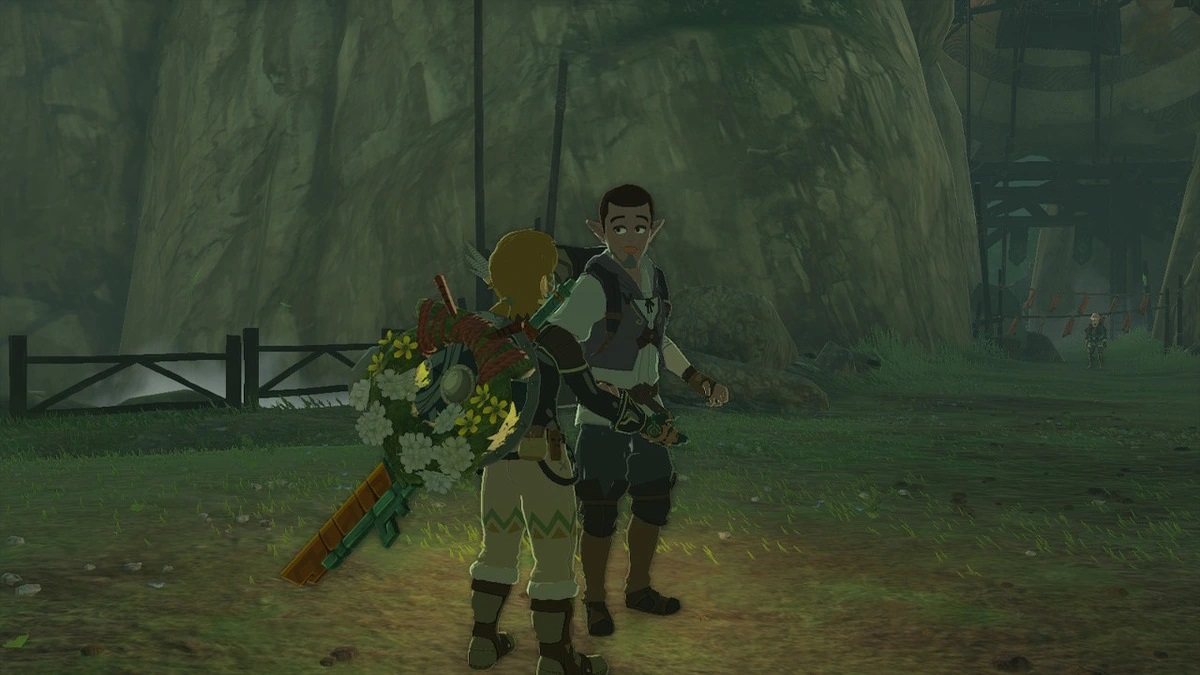
In Kakariko Village, find an NPC named Bugut. He has a beard and short hair and is typically hanging out in the center of the village.
TotK A Trip Through History Quest Walkthrough
After talking to Bugut, you’ll be tasked to go to each ruin and relay the research team’s findings. Your main goal is to find a tablet in each Ring Ruin and translate the research notes you find there by examining them.
Below is a map with each of the locations of the four Ring Ruins for the TotK A Trip Through History quest. As you can see, each one is depicted on the map if you zoom in close enough. They can be found in the northeast, northwest, southeast, and southwest.
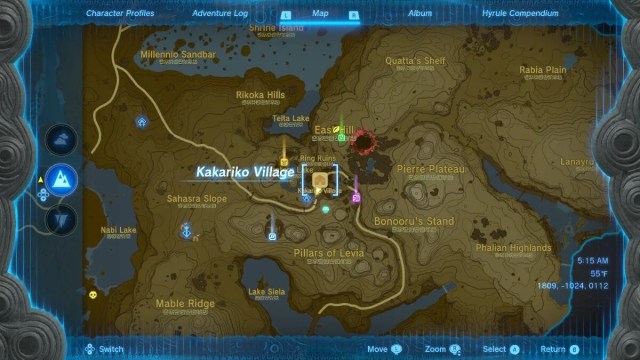
East Hill Ring Ruin Location (Northeast)
The East Hill ring ruin is northeast of Kakariko Village, marked green in the screenshot above. Solving this ring ruin for the TotK A Trip Through History Quest is pretty simple.
All you have to do is make your way to the marked location — I recommend coming in from above by using a Tower — and search around until you find a nook with a slab on the wall. Below that, there will be a book on a table that you can Examine. Doing so will cause Link to piece together the notes to relay to Bugut.
Lantern Lake Ring Ruin (Northwest)
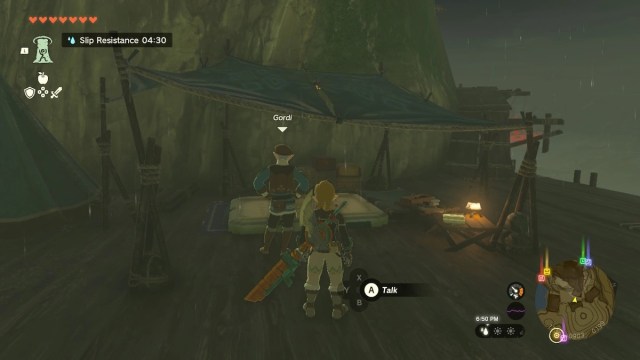
The Lantern Lake ring ruin is northwest of Kakariko Village, marked with a yellow pin in the map shot above. The slab has been retrieved by some researchers, who you’ll run into on a bridge near this location. One of them has fallen asleep and needs a Hearty Truffle to wake up.
If you don’t have one in your inventory, the other NPC will point you to a waterfall in the village where you can retrieve one. After you give the sleeping researcher his truffle, you’ll be able to examine the next set of research notes.
Pillars of Levia Ring Ruin (Southwest)
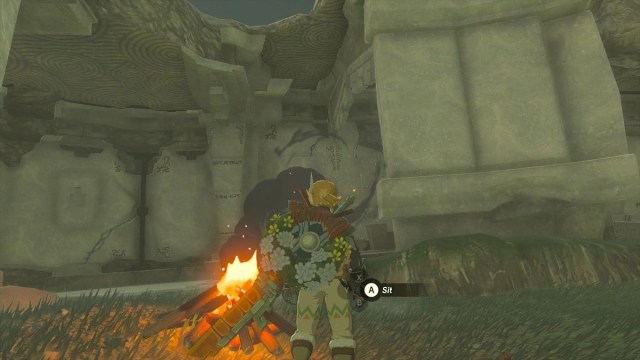
The Pillars of Levia ring ruin is southwest of the village, marked by a blue pin on the map screenshot above. Outside of this ring, you’ll run into two bickering old villagers.
They’ll ask you to dispatch the Bokoblin camp inside the Ring Ruin. Once you do, you’ll be able to examine the research notes, moving on to the last part of the Tears of the Kingdom A Trip Through History quest.
Eastern Kakariko Ring Ruin (Southeast)
The Eastern Kakariko ring ruin is located just southeast of the village. I’ve put a purple pin there in the map screenshot above. It’s easy to reach this one from Kakariko Village, and there’s no extra requirement for this one. Just find the notes and examine them to get the info you need for the quest.
When you’ve examined the last ring ruin research note, return to Kakariko Village and talk to Bugut to complete the Tears of the Kingdom A Trip Through History quest. For more quest walkthroughs and tips, check out our Zelda:TotK guide hub .

How to find all the Kakariko Village Ring Ruins in Zelda: Tears of the Kingdom

Written by
Harry Boulton
Published
16th May 2023 11:59
The A Trip Through History quest in Zelda: Tears of the Kingdom can be quite challenging, as the various Ring Ruins locations that you have to visit are not marked on your map. There are lots of quests like this in The Legend of Zelda : Tears of the Kingdom , and this one can be among some of the most confusing in the game for many.
You thankfully won't need to do much once you eventually reach the Ring Ruins, but you might have to show off your climbing gear skills, as some of the spots you'll need to visit can be rather vertical.
So, make sure to read the rest of this guide to find out how to complete the A Trip Through History quest in Zelda: Tears of the Kingdom , alongside all of the Kakariko Village Ring Ruins map locations.
Where are the Kakariko Village Ring Ruins?

As shown in the map screenshot above, the TOTK Kakariko Village Ring Ruins map locations are quite spread apart, and there are a couple that you might otherwise easily miss.
While there are five Ring Ruins in total within the village, you only need to visit four as the fifth has been forbidden by Princess Zelda and thus is inaccessible. Check out the table below to learn where to find the four Ring Ruins in Kakariko Village alongside their map coordinates:
They aren't too tough to find once you know where they are, and they are obviously quite visually distinctive too. All you need to do once you've found them now is head inside, which we've explained in more detail below.
- Find out what the best recipes in Zelda: Tears of the Kingdom are here in our comprehensive guide.
How to complete A Trip Through History in Zelda: Tears of the Kingdom

In order to complete A Trip Through History in Zelda: Tears of the Kingdom , you must read all of the ledgers within the Ring Ruins and then report back to the quest giver with your findings.
The ledgers themselves are typically found next to the ancient Hylian stone carvings , so once you find that the ledger should be in the immediate vicinity. Once you've found the ledger, all you need to do is interact with it and the information should be displayed in several speech boxes.
Then, head back to the quest giver who will be shown on the map as the quest marker and speak to him to complete the A Trip Through Time quest in Zelda: Tears of the Kingdom , showing you all of the Ring Ruins map locations in Karariko Village to help you out.
Make sure you also check out all Necluda Shrine locations in Zelda: Tears of the Kingdom , as they are all in the same region as this quest.
If you're looking for more Zelda news and guides however, make sure to check out our game page for all of the latest content - you won't want to miss out!

Established in 2019, we don’t just cover games - we live them. Our expert team is full of dedicated gamers, qualified journalists, and industry insiders who collectively boast decades of experience covering gaming and esports. This deep-rooted expertise allows us to provide authoritative and nuanced perspectives first-hand from a team who are playing, and researching every game covered on our website.
Our foundation is built on a profound commitment to editorial independence, ensuring our content remains free from external influence and advertising pressures and is held to the highest level of editorial conduct, integrity, and quality.
Every article on GGRecon comes from rigorous research, informed analysis, and a passion for gaming that resonates with our readers. We uphold these standards through a transparent editorial policy, accessible here , which governs our processes and maintains our accountability.

- Breath of the Wild
- Tri Force Heroes
- A Link Between Worlds
- Skyward Sword
- Spirit Tracks
- Phantom Hourglass
- Twilight Princess
- The Minish Cap
- The Wind Waker
- Oracle of Ages
- Oracle of Seasons
- Majora’s Mask
- Ocarina of Time
- Link’s Awakening
- A Link to the Past
- The Adventure of Link
- The Legend of Zelda
- Fan Content
- Nintendo News
- Artists of Legend
- Best Zelda Ever
- Caption Contest
- Fan Fiction Friday
- Hyrule Compendium
- Inspired By Zelda
- Photoshop Contest
- The Champions’ Cast
- Zelda Warfare
- Zelda Runners

- Daily Debate
- All Original Content
- Diversity in Zelda
- Game Review
- Legendary Pictures
- The Zelda Cast
- Tier Force Heroes
- Facebook (Dungeon)
- Facebook (Informer)
A Trip through History
A Trip through History is a Side Quest in Tears of the Kingdom .
- 2 Requirements
- 3 Walkthrough
- 4 Adventure Log
- 5 References
Bugut wants to know what's written on a set of four stone slabs in the Ring Ruins, but he's afraid of heights. If Link finds them and reads them, he can tell Bugut what they say for a reward.
Requirements
Codgers' Quarrel will need to be finished to clear the monsters out of the area where one of the slabs is, as well as Out of the Inn , as the innkeeper is sleeping on one of the slabs. Starting Secret of the Ring Ruins will also allow you easier access to the ruins.
Walkthrough
There are four stone slabs to visit. Read the journal on the table next to the slab to get a translation. Note that the translation is in the journal closest to the slab - there may be random journals you can read nearby that are not part of the quest.
- Speak to Bugut to start the quest. He'll be wandering around near the quest marker near the shops in town or under the tree next to the arrow shop if it's raining.
- ( 1631 , -1173 , 0218 ) is in the Ring Ruins on the hill south-west of town. This is also the ruins for Codgers' Quarrel . You will have to finish that quest and come back for the translation to become available.
- ( 1935 , -1085 , 0166 ) is in the south-eastern ruins on the hill.
- ( 1733, -0902 , 0199 ) is high up on the scaffolding near the largest ring ruin (north-west ruin). If you haven't completed Out of the Inn , the innkeeper Ollie will be asleep on the slab.
- ( 1899 , -0809 , 0199 ) is up on the north-east hill, just west and above the chasm.
- Read all four journals and return to Bugut to report your findings to get your reward of 3x Thunderwing Butterfly .
Adventure Log
- Tears of the Kingdom Side Quests
Navigation menu
Zelda: Tears of the Kingdom - How to Find The Four Stone Slabs In Kakariko Village (A Trip through History Side Quest)

Your changes have been saved
Email Is sent
Please verify your email address.
You’ve reached your account maximum for followed topics.
Zelda: Tears of the Kingdom Player Builds Incredible Mechanical Dragon
One lost zelda trope could set the next game's link apart from botw, totk, tears of the kingdom: 5 classic items that should've been fusible.
In The Legend of Zelda: Tears of the Kingdom , it's always worth talking to NPCs; they will often provide tips and hints on where Link should go next to make an interesting discovery. In this game, players won't only be following their map, they're encouraged to talk to the people of Hyrule and follow any advice they might be given.
RELATED: Zelda: Tears of the Kingdom - Molli the Fletcher's Quest Guide (Where to Find Ice Fruit and White Chuchu Jelly)
Bugut is an NPC in Kakariko Village; he's there to find out more about the stone slabs that were found in the Ring Ruins. Unfortunately, he's afraid of heights and can't bring himself to climb and go search for them himself - this is where Link comes in to help. This guide will show players where they can find the four Stone Slabs in Tears of the Kingdom .
Starting A Trip Through History
Before searching for the Stone Slabs, players should first find Bugut and talk to him in order to add the A Trip Through History side quest to their Adventure Log. Bugut often hangs around the western part of the village , near the Inn and General Stores.
Once players receive this quest, there is no right order to visit the ruins and locate the Stone Slabs. As soon as they've found the Stone Slab and read the Deciphered Slabs journal, they can return to Bugut and tell him all about it .
This guide contains no spoilers. Players can read the Deciphered Slabs journals near the Stone Slab locations to learn more about the Zonai and the Ring Ruins .
West Ring Ruins Stone Slab
There are some Ring Ruins southwest of Kakariko Village, near the Pillar of Levia. The exact location of the West Ring Ruins Stone Slab is 1634, -1179, 0217 .
Players can actually complete the Codgers' Quarrel side quest near this location if they talk to the General Store clerk back in Kakariko Village. The objective here is to solve an altercation between two villagers by taking care of the monsters camping near this Stone Slab.
Eastern Village Entrance Stone Slab
If players enter Kakariko Village through the east, it's likely that this Stone Slab will be the first one that they find - its coordinates are 1938, -1083, 0166 . Here, gamers can also talk to an NPC named Cori and learn key information about the Sundelion .
East Hill Ruins Stone Slab
The East Hill Ruins Stone Slab is quite easy to find. When inspecting the map, players will quickly notice the East Hill that overlooks the East Hill Chasm. The Stone Slab's coordinates are 1900, -0811, 0199 . Gamers can get up there by hiking up the path that leads opposite the Eastern Village Entrance Stone Slab.
Lantern Lake Stone Slab
Behind Paya's residence, where players could previously find Impa in Breath of the Wild , there is a lake called Lantern Lake, and behind it are large ruins. The coordinates of this Stone Slab are 1736, -0902, 0199 .
Here are the four Stone Slabs locations marked on the Tears of the Kingdom map:
A Trip Through History Reward
After finding the four Stone Slabs and passing on the information to Bugut, he will be quite thankful and even give Link a reward for his efforts.
Link will receive three Thunderwing Butterflies for completing the A Trip Through History side quest . These rare butterflies only appear when it rains, and players can use them to create elixirs that will provide electrical resistance .
The Legend of Zelda: Tears of the Kingdom is available for the Nintendo Switch.
MORE: Zelda: Tears of the Kingdom - How to Dye Armor
A Picture for Woodland Stable Walkthrough
The legend of zelda: tears of the kingdom - complete guide & walkthrough, a wife wafted away walkthrough.
- The Legend of Zelda: Tears of the Kingdom
- The Legend of Zelda
- Ethics Policy
- Ownership Policy
- Corrections Policy
Tears of the Kingdom – A Trip Through History Quest Steps & Ruin Ring Locations
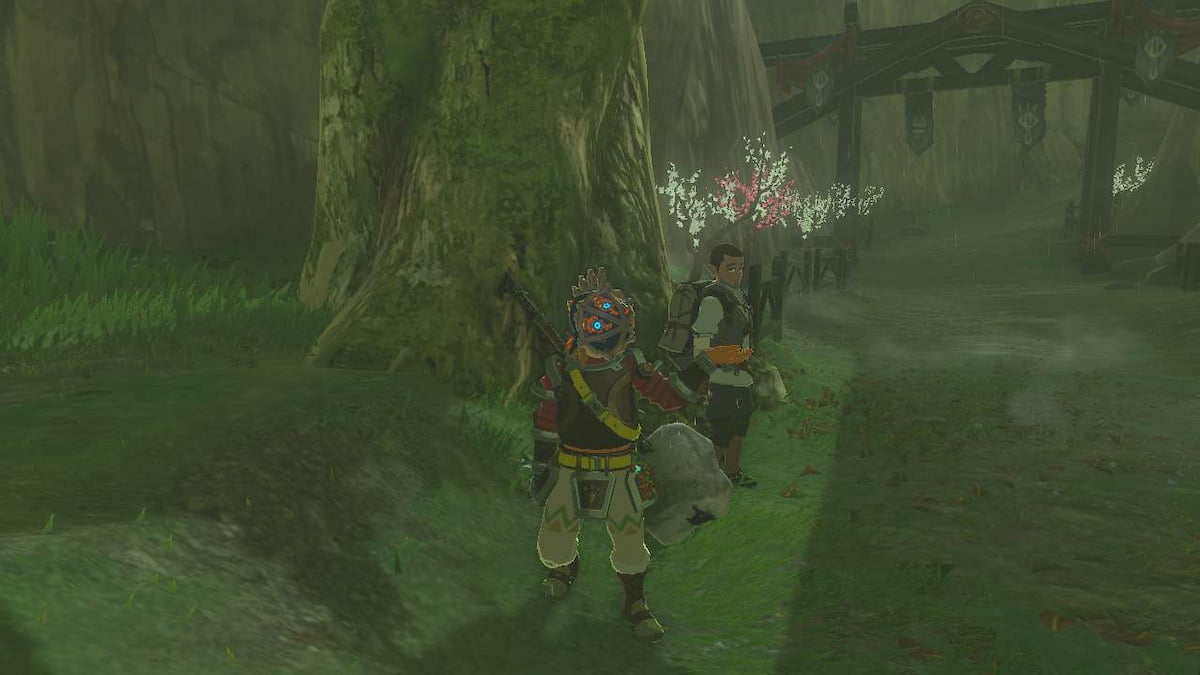
Kakariko Village has seen better days in Tears of the Kingdom. When we initially arrived, it turns out that massive Ruined Rings have fallen throughout the village, and there was one blocking a notably large pathway, preventing us from entering the city from the east. There’s a researcher alongside the other survey teams who are trying to learn more, named Bugut in A Trip Through History Quest.
He’s asked us to help out to figure out what the team has learned about these rings and what else we can do about them to potentially help out the village. The survey team at this dig site has written down a few notes, and it’s our job in TotK to track them down for Bugut in A Trip Through History .
All Ring Ruin Slab Locations in Tears of the Kingdom
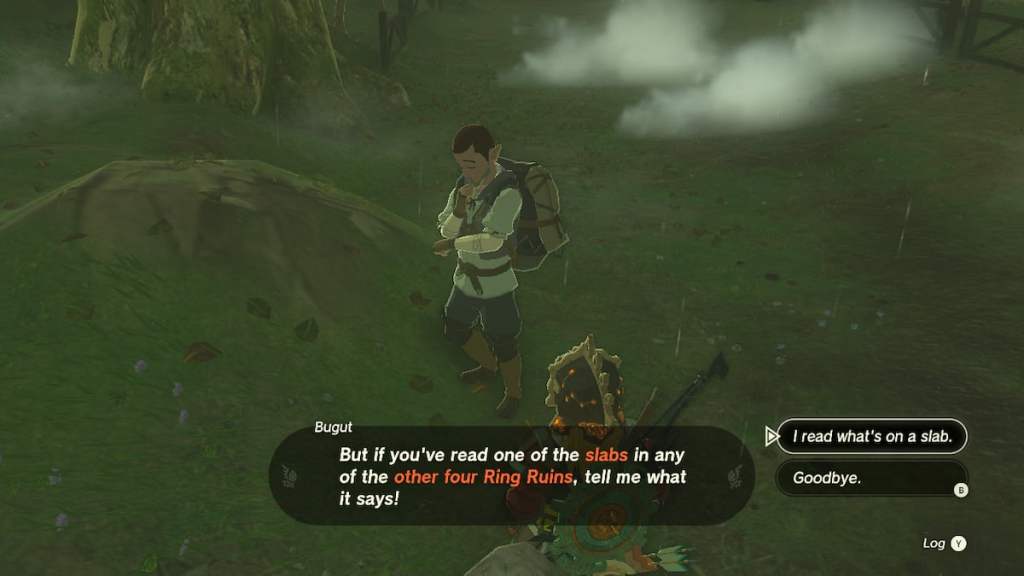
Bugut asks that we track down the four Ring Ruin Slabs and the translations that were made about them while exploring Kakarito Village in Tears of the Kingdom . For the quest, we don’t have the exact locations of these Stone Slabs shared on the map , so we’ll need to explore the immediate area where all of the Ring Ruins have landed and look where the survey team was working to learn more.
The first Stone Slab is on the southwest part of the village , up on the hill overlooking the Makasure Shrine. When you enter this ruined location, there are a handful of monsters standing near a firepit. These were relatively easy to deal with, and after we dispatched them, the notes for the Stone Slab were off to the left side.
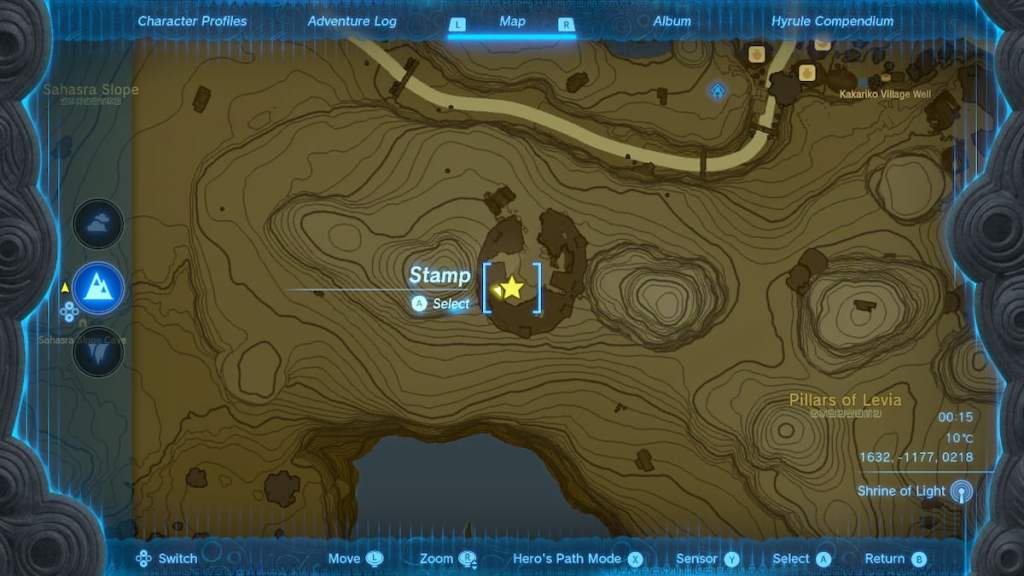
The second Ring Ruin Slab is to the east of the current one, on a nearby hill. We decided to make our way straight there, climbing many of the hills on the outside of Kakariko Village in Tears of the Kingdom and speaking with some of the researchers about what they were discovering regarding the Ruins. When we arrived, we turned to the left to discover the set of research.
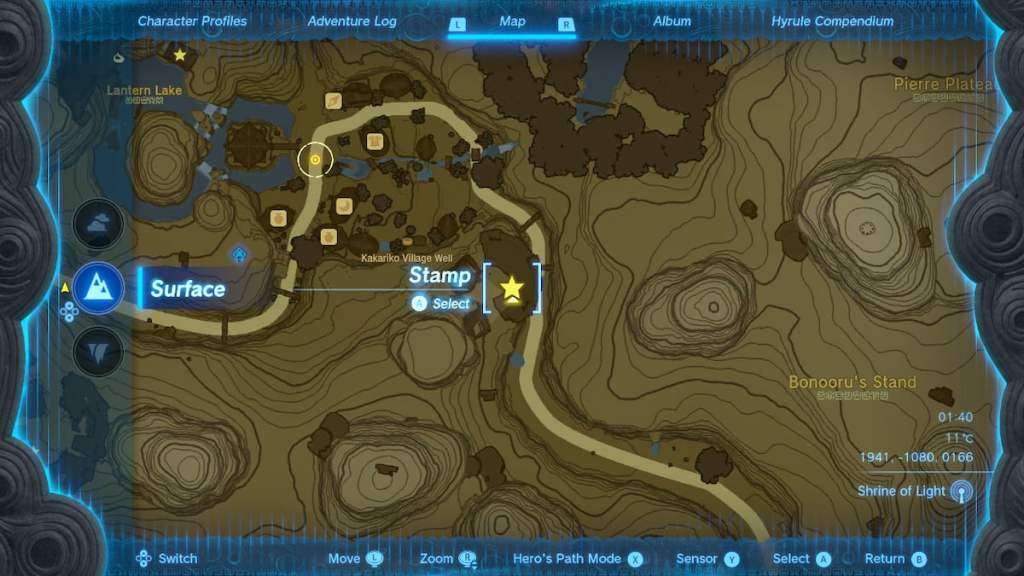
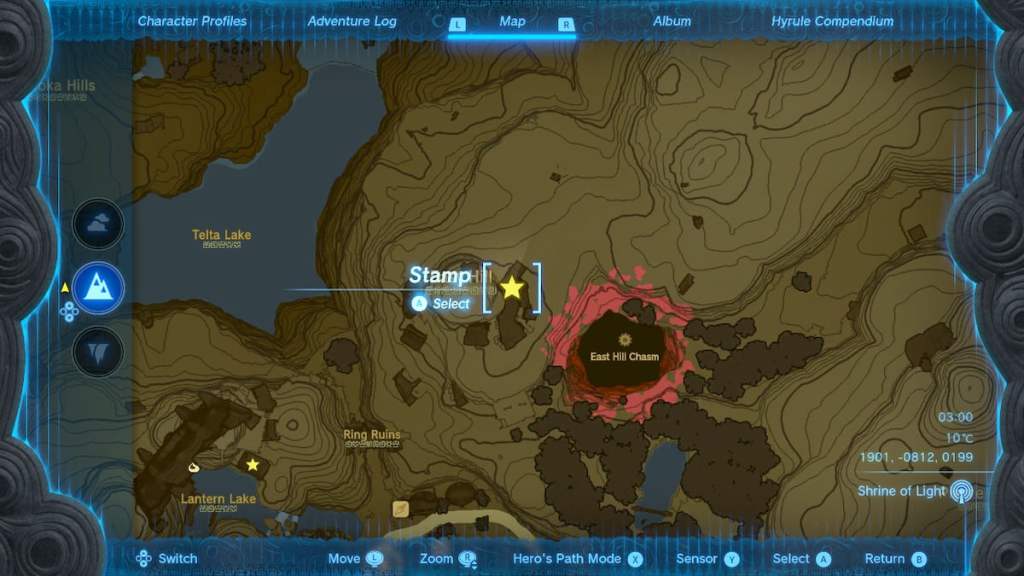
The third Ring Ruin Slab is almost outside of the village, alongside the East Hill Chasm. After doing a bit of digging around, were able to find the next piece of information by looking through the ruins on top of East Hill.
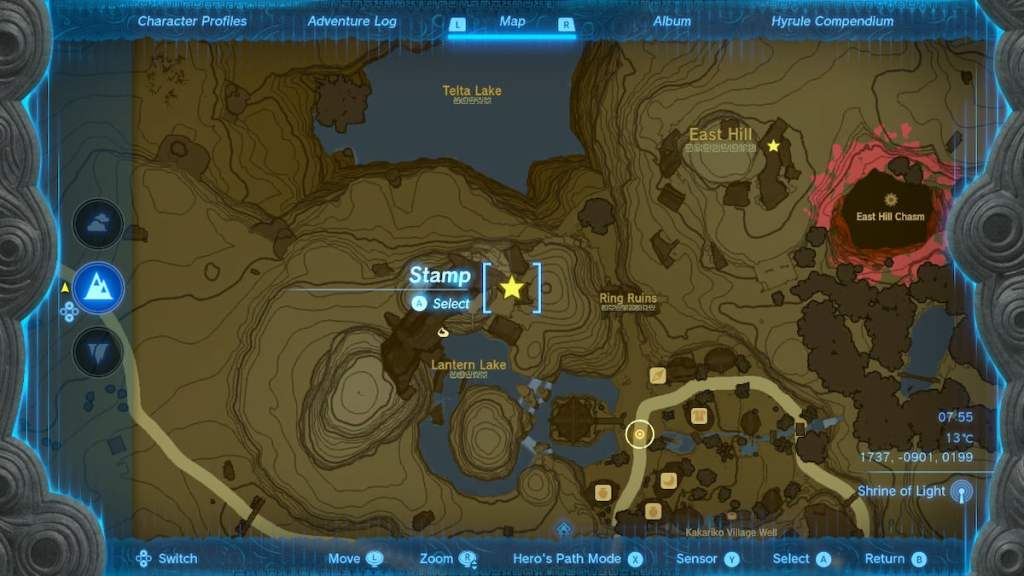
The fourth Ring Ruin Slab is on top of a nearby hill, overlooking Lantern Lake in Kakariko Village. We were able to quickly reach this point by climbing up the east side of the hill, and using the various ladders leading up to the top, next to a research team member. The book with the Ring Ruin Slab information is on a chair to the right of the researcher.
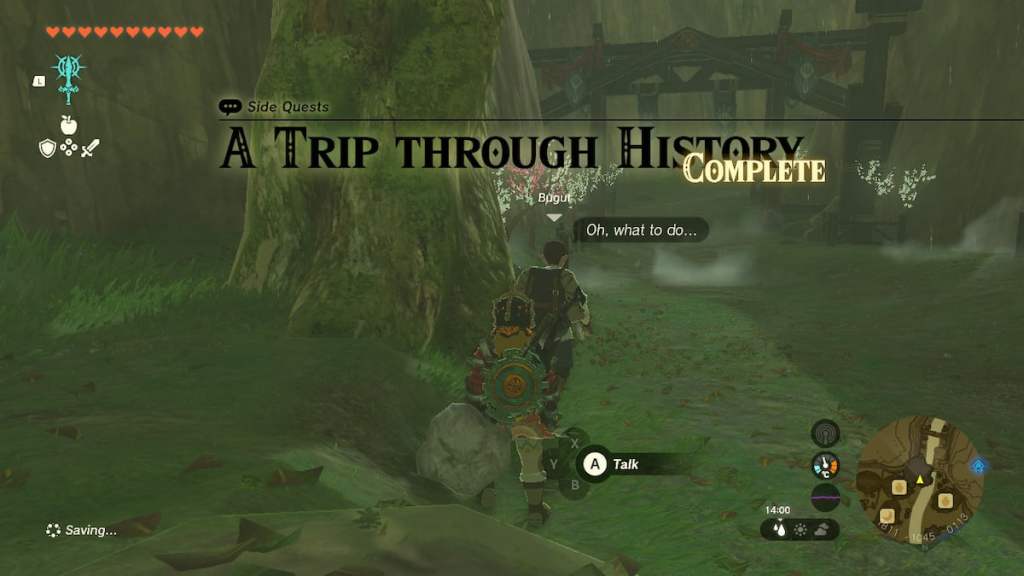
Now that you’ve discovered all four of these locations, return to Bugut, who should be down at the center of the village. Link will inform him of everything that he read at each of the Ring Ruins, thus completing the quest for A Trip Through History in TotK.
And that’s it! Check out our other The Legend of Zelda: Tears of the Kingdom guides below to help with crafting, exploring, and tackling challenges across Hyrule.
Tears of the Kingdom Complete Guide | Every Ability & How To Unlock Them | How to Get The Paraglider | How to Get & Use The Travel Medallion | All Armor Locations & Where to Find Them | All Construct Materials & Where to Find Them | All Shrine Locations & Strategies | How to Get More Heart Containers

DualShockers
The legend of zelda: tears of the kingdom - kakariko village guide.
Your changes have been saved
You’ve reached your account maximum for followed topics.
Finding Kakariko Village can be tricky in the early part of the game. We'll show you how to find it, and how to learn more about the Ring Ruins there.
Quick Links
Kakariko village location, a trip through history, how to get into the restricted area.
One of the most iconic locations in all Zelda games is Kakariko Village. This humble homestead is home to memorable characters, unique armor, and enough cuckoos to make a small army.
Related: The Legend of Zelda: Tears of the Kingdom - All Shrine Of Light Locations
In The Legend of Zelda - Tears of the Kingdom , Kakariko Village also plays a bigger role in the main story. But finding the village and learning about the Ring Ruins' ancient history can be a bit tricky. We’ll show you where it is on the map and how to grab the quest related to the ruins.
Updated by Emma Ward on November 15, 2023: This article has been updated to include improved formatting and links to additional related articles to help guide our readers to Kakariko Village, and how to uncover the history and secrets behind the Ring Ruins.
The Legend of Zelda: Tears of the Kingdom
Follow the road north from the dueling peaks.
It can be tough to find Kakariko Village when your map is not entirely filled out. It is hidden deep inside a mountain range, making it tough to just accidentally stumble upon. When looking at the Hyrule map, you’ll find Kakariko Village positioned just northeast of the West Necluda mountains and to the west of Mount Lanayru.
The easiest path to the village starts at the base of the Dueling Peaks in the Sahasra Slope Skytower region. There is a river that runs through the peaks. Follow the river upward until you discover the horse stable. From here, follow the path to the north up the mountain to discover the village.
Related: The Legend Of Zelda: Tears Of The Kingdom - Main Characters Overview
Uncovering The Mystery Behind The Ring Ruins
If you played Breath of the Wild, then you were probably shocked when you first arrived at Kakariko Village. The entire area looks completely different due to all the sky island rubble that rained down on it. After doing a little bit of exploring, you’ll likely find that one of the larger pieces that fell on the village is in a restricted area per Princess Zelda’s orders. Even your sneakiest attempts to get past the guards will fail.
To learn more about the Ring Ruins, start by finding Bugut in Kakariko Village, and he’ll give you the quest - A Trip Through History . This quest has you exploring the other four Ring Ruins around Kakariko Village in an attempt to translate the ancient slabs each of them holds. Without speaking to Bugut, you won’t be able to translate what is on those slabs, so make sure Kakariko Village is one of the first places you visit when starting the game.
The Secret Of The Ring Ruins
After exploring the four Ring Ruins around Kakariko Village, you are probably left wondering how you can get into the large one in the restricted zone. Despite how sneaky you are, or even if you try to approach the ruins from the sky, the moment you cross the barrier, you'll be kicked out.
In order to access this area, you'll actually need to complete the majority of the main story, including all four of the main temples . After doing so, you'll eventually get the Secret Of The Ring Ruins quest, which will naturally direct you back to Kakariko Village to explore the inside of the ruins in the restricted zone. Without spoiling all the details, what you find inside will help you progress through the final arc of the story.
If you want to learn even more about the history of the Ring Ruins and claim some great rewards while doing so, be sure to speak to Wortsworth in Kakariko Village after completing the quest - Camera Work In The Depths . He will give you an additional quest to find the stone tablets within the other Ring Ruins floating in the skies above Hyrule.
Next: The Legend of Zelda: Tears of the Kingdom - Wind Temple Guide
The Legend Of Zelda: Tears Of The Kingdom - All Kakariko Village Side Quests

Your changes have been saved
Email Is sent
Please verify your email address.
You’ve reached your account maximum for followed topics.
Fallout Would Be Better Off Without The Karma System
10 games that best used the wii u gamepad, konami announces silent hill transmission for may 30, where 'game updates' will be shared, quick links, how to get to kakariko village, all kakariko village side quests, additional quests in kakariko village.
The iconic Kakariko Village once again makes an appearance in The Legend of Zelda: Tears of the Kingdom . This location has appeared in numerous games in the series before, and was a focal point for your adventures in Breath of the Wild .
RELATED: The Legend Of Zelda: Tears Of The Kingdom - All Rito Village Side Quests
While Kakariko Village itself won't be drastically different from before, the village has been impacted by the Upheaval. Ruins from the skies have crashed down around the village; Impa's granddaughter, Paya, has taken over as Chief of Kakariko Village; and you will uncover even more secrets when you reach the main quest that involves the village, " Secret of the Ring Ruins ."
Located in the West Necluda region , Kakariko Village can be approached from any direction, depending on where you are in your adventures. If you are starting from Lookout Landing , your first stop upon reaching the Surface, you will need to travel west on the path out of the settlement.
You can follow the roads that take you over the Hylia River , and continuing on the roads leading you southeast will bring you right to Kakariko Village's doorstep. Along the way, you can make a slight detour to activate the Sahasra Slope Skyview Tower in order to uncover the West Necluda portion of your map.
Upon reaching the village, make sure to complete the local Makasura Shrine so you will have an easy fast travel point for whenever you need to return.
Kakariko Village has adapted to the new ruins around them, and the phenomena has even attracted tourists to the area. Between Kakariko's citizens and visiting tourists , there are a few side quests that see you helping the local community.
Here are all the Kakariko Village side quests , with who to talk to in order to pick it up, and a short description:
Completing all the quests in the area will give you some extra materials, ingredients, and other benefits.
For example, if you ever want to buy the Stealth Set or Radiant Set that are sold in the Enchanted armor shop, completing "Gloom-Borne Illness" is necessary to bring the prices down .
The Ring Garland
While there is no official quest tied to Koko , the woman who sells ring garlands for five Rupees in Kakariko Village , there is at least one use for such an item. This involves bringing the ring garland all the way to Gerudo Town , which means you will have to carry the garland or fuse it to your shield .
If you make your way to the Gerudo Shelter in the evening , you'll be able to find a class being taught by Ashai . With your ring-garland-shield equipped, listening in on the class will open up new lines of dialogue with the character Deltan.
The ring garland doesn't have an official quest or reward — it just adds even more depth to the world of Hyrule and its inhabitants.
Messages From An Ancient Era
The next quest that will take you to Kakariko Village is " Messages From An Ancient Era ." You first pick up this quest in Lookout Landing from an archaeologist named Wortsworth . From there, he and his team then travel to Kakariko Village.
This quest sees you finding and photographing various stone tablets around the map. To make progress with "Messages from an Ancient Era," you will have to continuously return to Kakariko Village to talk to Wortsworth .
NEXT: The Legend Of Zelda: Tears Of The Kingdom - All Hateno Village Side Quests
- Triple-A Games
- The Legend of Zelda: Tears of the Kingdom
A Trip through History
" A Trip through History " is a Side Quest in Tears of the Kingdom . [1]
- 1.1 Objectives
- 2 Nomenclature
- 3 References
Nomenclature
- ↑ " A Trip through History Kakariko Village " — Adventure Log ( Tears of the Kingdom )
- Side Quests
- Side Quests in Tears of the Kingdom
- Incomplete sections
- Incomplete Tears of the Kingdom sections
Navigation menu

IMAGES
VIDEO
COMMENTS
"A Trip Through History" is one of many side quests you can find in The Legend of Zelda: Tears of the Kingdom.. Starting in the Kakariko Village, meet with Bugut who tells you about four stone ...
A Trip through History Guide. To start the Side Quest "A Trip through History" you need to speak to Bugut, who can be found wandering around Kakariko Village. Bugut tasks you with reading 4 Zonai ...
A Trip through History is a Side Quest in The Legend of Zelda: Tears of the Kingdom (TotK) that can be found in Kakariko Village. Read on to learn how to unlock A Trip through History, its location and rewards, walkthrough, as well as how to complete it. List of Contents.
A Trip through History is a Side Quest in The Legend of Zelda: Tears of the Kingdom (TotK). This walkthrough will guide you through all objectives of the A Trip through History side mission. Location: Kakariko Village Quest Giver: Bugut Requirement: None Reward: x3 Thunderwing Butterly Quest Info: Stone slabs have been found in the Ring Ruins that fell around Kakariko Village.
The Ring Ruins in Kakariko Village have transformed the once-quiet village into a tourist destination in Zelda: Tears of the Kingdom.. One of those tourists has a task for you: the A Trip through ...
The Zelda: Tears of the Kingdom Ring Ruins and A Trip Through History quest can be started by talking to an NPC named Bugut, who's chilling in the center of Kakariko Village.
How to Begin A Trip Through History Side Quest in TOTK¶. To get the quest underway, you'll need to track down Kakariko Village which is located to the northwest of the Necluda Region and the easiest way to reach the village is by fast traveling to the Sahasra Slope Skyview Tower.From here, you'll want to use the tower to be taken up into the sky, then you'll want to glide down to the ...
To start A Trip Through History, you will need to find the tourist named Bugut who wanders around Kakariko Village.He will usually stick to the main paths in the village. Bugut will comment on how there are stone slabs at four of the Ring Ruins with ancient writings on them, but they are too high up for him to check out himself.. Since you look like a plucky young adventurer, he'll ask you ...
How to Complete A Trip Through History Quest in Zelda: Tears of the Kingdom A Trip Through History Quest Location. Since the TotK A Trip Through History quest takes place in Kakariko Village, head back there at (1808, 0984, 0113) on the map. The quickest way to get to Kakriko Village is by using the Sahasra Slope Skyview Tower and locating the village from the sky.
› A Trip Through History • Codgers' Quarrel • Dantz's Prize Cows • Follow the Cuccos • Out of the Inn • Dad's Blue Chest • A Way to Trade, Washed Away • Rattled Ralera • Lurelin ...
My guide to the side quests Out of the Inn, A Trip Through History, and Codgers Quarrel at Kakariko Village in Legend of Zelda Tears of the Kingdom. If you f...
The A Trip Through History quest in Zelda: Tears of the Kingdom can be quite challenging, as the various Ring Ruins locations that you have to visit are not marked on your map. There are lots of quests like this in The Legend of Zelda: Tears of the Kingdom, and this one can be among some of the most confusing in the game for many.. You thankfully won't need to do much once you eventually reach ...
Adventure Log. Step. Description. 1. Stone slabs have been found in the Ring Ruins that fell around Kakariko Village. Bugut has come to see the writing on the slabs but is afraid of heights and can't visit the ruins. If you read what's written on each slab, let him know what they say. You have _COUNTER_ more to tell him about.
Side Quests and Side Adventures in Kakariko Village. An Uninvited Guest; Codgers' Quarrel; Follow the Cuccos; A Trip Through History; Out of the Inn; Gloom-Borne Illness; Merchants and Services
If players enter Kakariko Village through the east, it's likely that this Stone Slab will be the first one that they find - its coordinates are 1938, -1083, 0166.
A Trip through History quest walkthrough The Legend of Zelda Tears of The Kingdom. Tears of The Kingdom Goddess A Trip through History quest guide. You can s...
The second Ring Ruin Slab is to the east of the current one, on a nearby hill.We decided to make our way straight there, climbing many of the hills on the outside of Kakariko Village in Tears of ...
In The Legend of Zelda - Tears of the Kingdom, Kakariko Village also plays a bigger role in the main story. But finding the village and learning about the Ring Ruins' ancient history can be a bit ...
Out of the Inn. To start the Side Quest "Out of the Inn" you need to head into the Shuteye Inn in Kakariko Village. Speak to the man behind the counter, Dai, who will tell you he's just ...
"A Trip Through History" Bugut Kakariko Village's main paths Bugut is a tourist interested in the Ring Ruins, and the ancient writings found within. He's scared of heights, though, and can't go look himself. "Out of the Inn" Dai Shuteye Inn
Stage. Description. 1. Stone slabs have been found in the Ring Ruins that fell around Kakariko Village. Bugut has come to see the writing on the slabs but is afraid of heights and can't visit the ruins. If you read what's written on each slab, let him know what they say. You have 4 more to tell him about.
You should accept the side quests "A Trip through History" from Bugut, ... Bugut can be found wandering through Kakariko Village, while Dai is watching over the Shuteye Inn near the southwest ...