How to Replace the Chainring on Your Bike
Lay down enough miles and your bike’s chainring will need a refresh.

Gear-obsessed editors choose every product we review. We may earn commission if you buy from a link. How we test gear.
Like that first cup of coffee and a post-ride high: nothing lasts forever—not even your chainring. A well-maintained chainring will last longer than its chain and cassette counterparts, often several times over, but inevitably, the time may come for you to replace it.
The good news is: It’s easy to replace and the signs that your chainring is past its prime are easy to spot. The teeth will be visibly worn-down to a defined point—by comparison, the teeth on a new chainring are flat at the top— and the chain may stick to it instead of easily releasing while pedaling.
If you’re replacing your chainring(s), it’s a good time to check your cassette and chain for wear, too, and possibly replace those at the same time since they wear down together. (Here’s how to replace your cassette and how to replace your chain .)
Join Bicycling All Access for more tips and tricks
Below, we cover how to replace a single or double chainring, how to remove your crank to access it, and which tools you’ll need for the job.

What You’ll Need:
- Hex wrench set or Torx wrench set, depending on chainring bolt style
- Nut wrench tool, depending on chainring bolt style
- Threadlocker, like Loctite
- Bike grease
- New chainring
- Torque tool, preferably, to properly tighten chainring bolts and crank bolt
Tools for Changing a Chainring
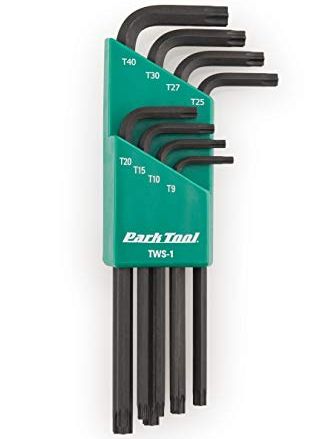
Park Tool L-Shaped Torx Compatible Wrench Set
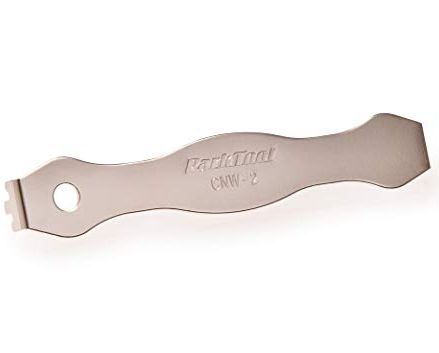
Park Tool Chainring Bolt Wrench for Slotted Nuts
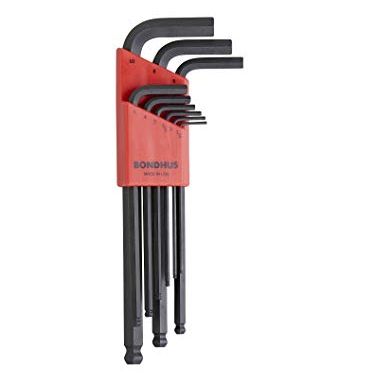
Bondhus L-Shaped Hex Wrench Set
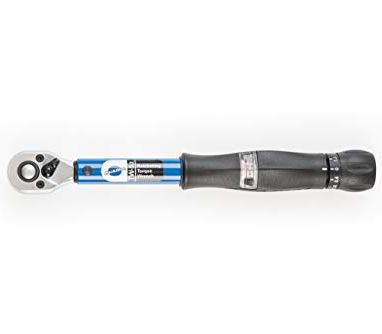
Park Tool Ratcheting Click-Type Torque Wrench
The new chainring.
First, you’ll need to pick up your new chainring(s). The easiest thing to do is to pick up a new version of the chainring that’s on your bike currently, if you can—it’s guaranteed to fit and be compatible with the rest of your drivetrain.
Should I get a different size chainring?
Perhaps you’d like to use this opportunity to make your ride even better by changing the size of your chainring. Chainring size can make a big difference, especially if your bike only runs one, like on singlespeed bikes , track bikes, most modern mountain bikes , and many gravel bikes .
If you find yourself riding in the easiest gears in your cassette most of the time, and often have a hard time turning over the pedals , you should consider a smaller chainring with less ‘teeth.’ If you find yourself riding in the hardest cogs most of the time and frequently spin out, then you might want to consider getting a bigger chainring. Even changing to the next size chainring, up or down, with a difference of just two teeth will feel noticeably different.
If you’d like to get a larger chainring, make sure your front derailleur can accommodate it; review the manufacturer’s specifications, or contact them. Likewise, if you’re going with a different size chainring, bigger or smaller, you’ll likely need to adjust the length of your chain, too.
There are a few other things to keep in mind when getting a different type of chainring, regardless of size. Many chainrings attach to a part called the ‘spider’ which then attaches to (or is integrated into) the crank. (Some manufacturers make direct-mount chainrings that mount directly to the crank arm instead of a spider.) Make sure the new chainring has the correct number of mounting holes, typically four or five, and matches the spider or crank; it will also need to use the correct size bolt circle diameter (BCD).
Regardless, make sure your new chainring is compatible with the rest of your drivetrain.
Removing the Crankset
Depending on your setup, you may be able to remove the chainring(s) without having to remove the crankset. If not, there are many different types of cranksets and, subsequently, ways to remove them. Regardless, first you’ll remove the chain from the chainring, letting it rest on the chainstay.
Self-Extracting
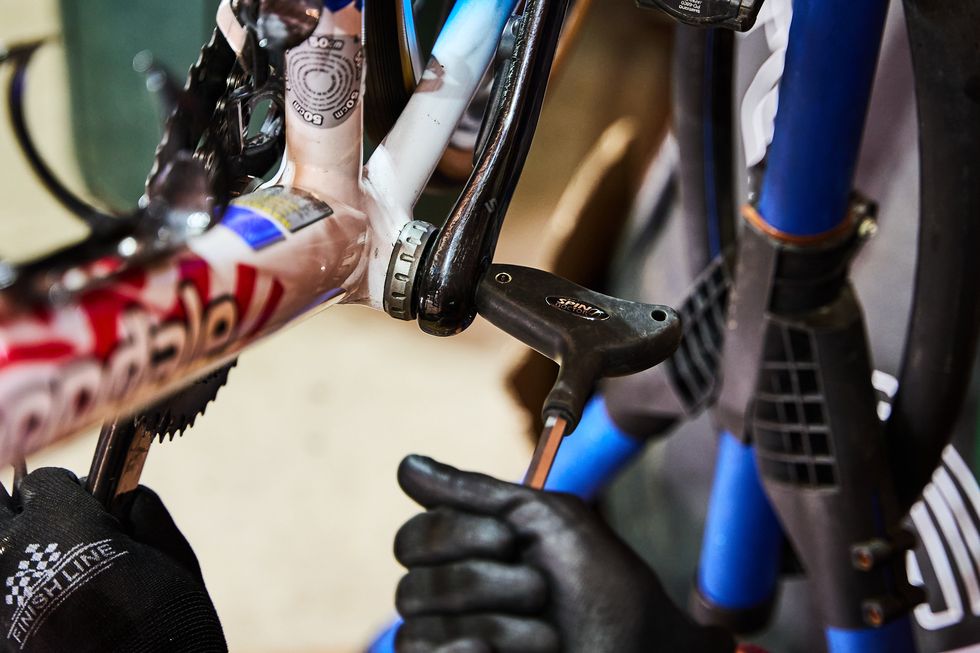
Most cranksets use a crank bolt to secure one or both cranks. If there is a crank bolt on the right crank (with the chainring), remove it counterclockwise with a hex wrench, typically size 8mm. Note, the crank bolt will likely take quite a bit of force and leverage to remove. If there’s a retaining ring over the bolt, keep it in place (and tighten if needed with a pin spanner or larger hex wrench, you want it secure)—you can still remove the bolt, just fit the hex wrench past the ring. There may be a dust cap over the bolt instead, which may or may not need to be removed to access the bolt. If your crank is self-extracting, these are the only steps you’ll need to follow to remove the crank.
Some cranksets only feature a bolt on the left crank. Follow the same instructions above and remove it with a hex wrench. If that’s all that’s needed to remove the left crank, you can now pull out the right crank, which will be attached to the spindle that fits through the bottom bracket. You may need to use a rubber mallet to gently tap the spindle and crank out.
Non-Self-Extracting
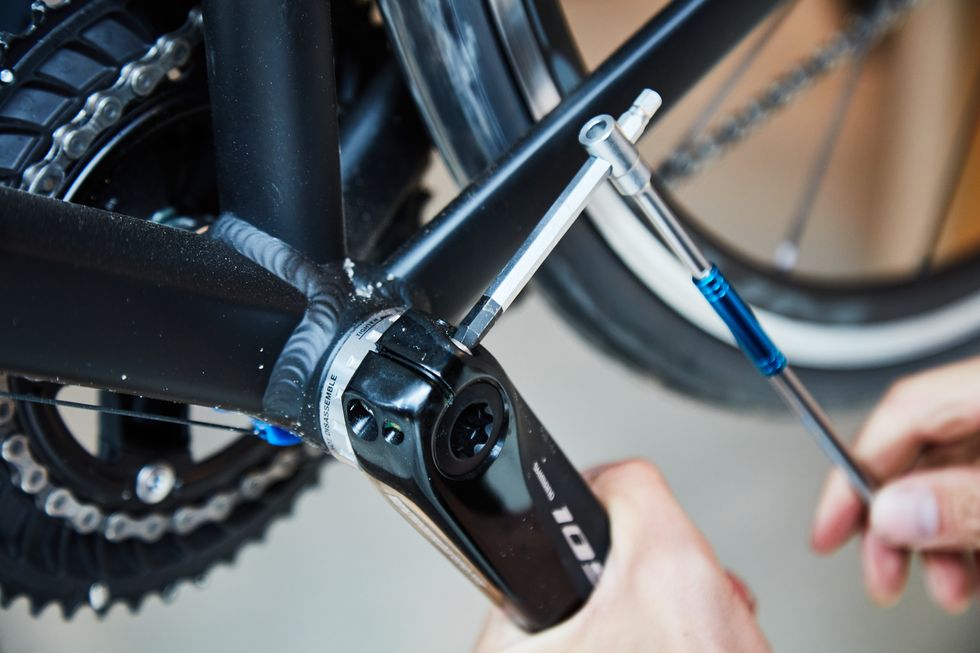
If removing the crank bolt does not free either the right or left crank, you have a non-self-extracting setup. You may then need a crank remover —as indicated by internal threading that may now be visible—also called a crank puller, that matches your crank bolt size. Or, once you remove the bolt, you may find either a square taper spindle, an 8-spline spindle, or a 10-spline spindle, and will need the right proprietary tool to remove the crank.
Alternatively, if there are two pinch bolts at the base of the crank, you will need to loosen those first and partly pull out the stop plate from the gap before removing the crank bolt. Some two piece cranks instead have a preload collar that will need to be loosened first.
Lastly, there are other less common variations of cranksets that require different methods of removal, like older Campagnolo cranksets and one-piece cranksets commonly found on older and classic-style bicycles.
Replacing the Chainring
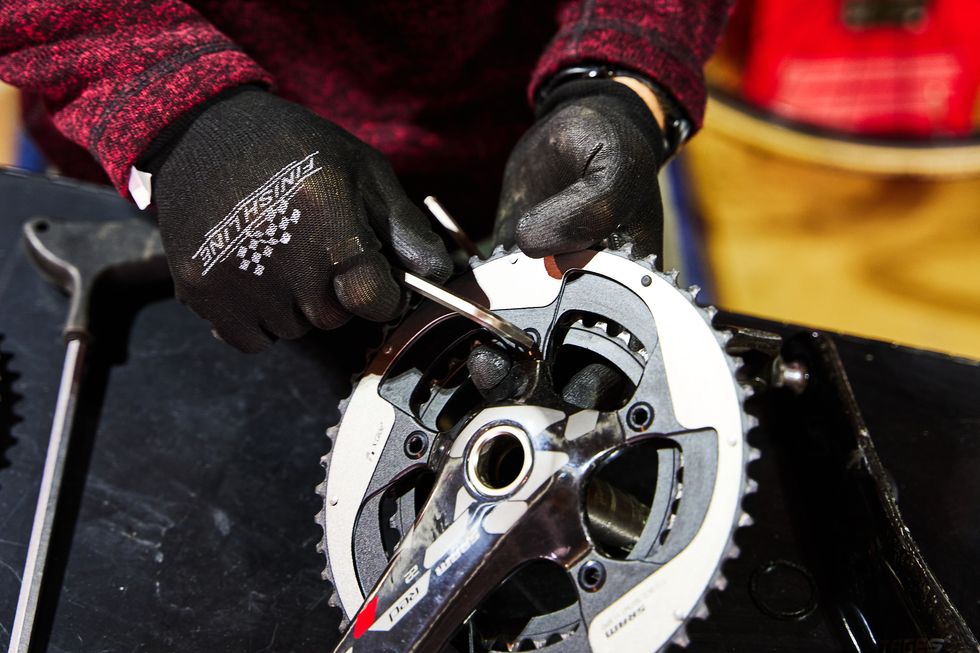
To remove the chainring, you’ll need either a hex wrench (typically size 5mm) or a Torx wrench to remove the bolts—locate the bolts on the back of the chainring and turn counterclockwise to remove. In some crankset styles, the chainring bolts face outside instead and require a tool like a nut wrench tool to hold it in place from behind while you use a hex or Torx wrench to remove it from the front. Again, the bolts may take a bit of force and leverage to remove.
With the chainring(s) off, take this opportunity to wipe down the spider, crank, bolts, and spindle (if attached) with a clean cloth.
To help with correctly positioning the new chainring(s), note the orientation of your old chainring(s) before removing.
To install, line up the bolt holes on the new chainring with those on the crank/spider, position the chain stop pin on the large chainring behind the crank, and make sure any writing is facing out, away from the bike. If you’re also installing a second, smaller chainring, place it on top of the larger chainring, line up the holes and any indicator (orient it behind the crank), with the writing facing in towards the bike. Reinstall the chainring bolts—preferably with threadlocker compound, like Loctite , applied to them—to the recommended torque spec in a star-shaped pattern.
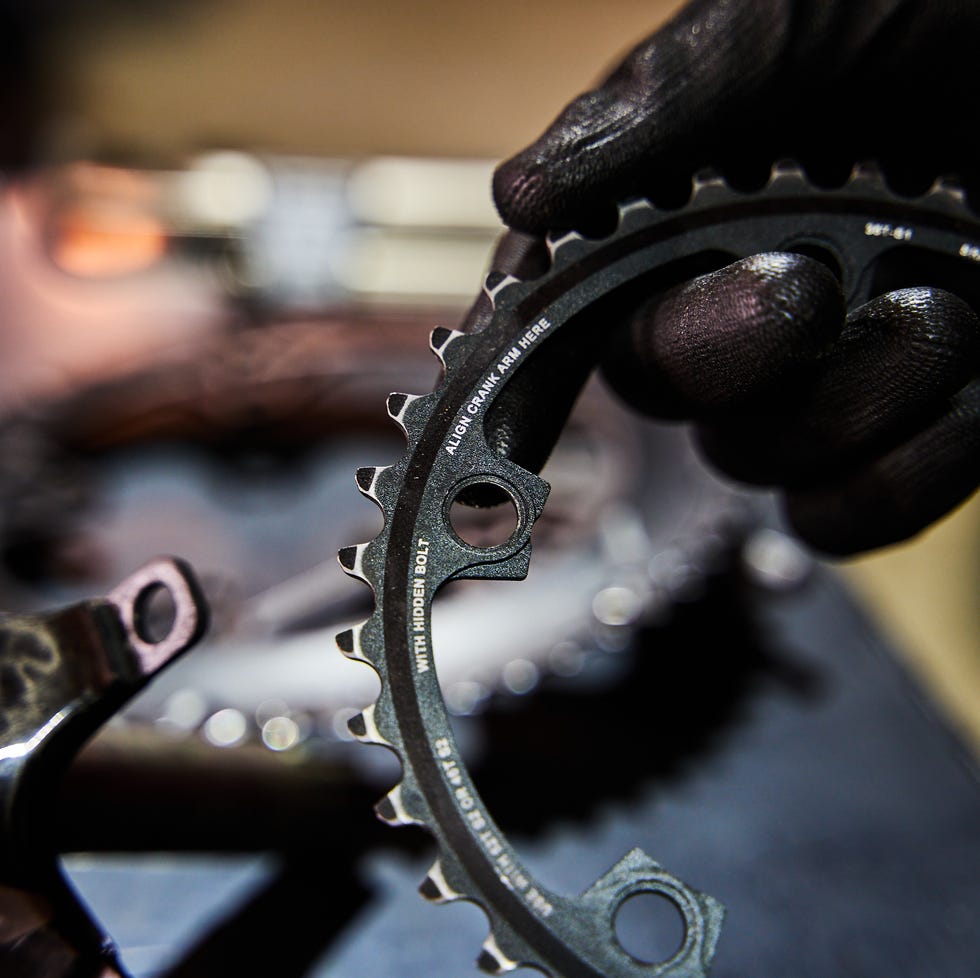
Now, reinstall the crank, carefully ensuring that any splines are correctly lined up. If there is a spindle attached, grease the outside of it and any threads or splines at the end before fitting it through the bottom bracket. Tighten the crank bolt to the recommended torque spec—it will be fairly high, 27 Newton meters or more.
A properly-installed chainring should run smoothly and without creaking . If that isn’t the case, check that all bolts are properly tightened to their recommended torque spec. When in doubt, rely on your local shop mechanic to help you finish the job.
When she’s not out riding her mountain bike, Jessica is an editor for Popular Mechanics . She was previously an editor for Bicycling magazine.
How to Do It

Your Guide to Staying Safe on Strava

A Guide to Road Cycling for Beginners

15 Popular Cycling Groups in the U.S.

6 Things To Do Before Every Ride
How to Diagnose and Fix These Common Bike Noises

Start Riding a Bike Again After Having a Baby

How to Handle These 7 Tricky Group Ride Situations

How to Know if That Second-Hand Bike Will Fit You

How to Find Hills in Your Area

How to Enjoy Group Rides

How to Sell Your Bike
How to Clean Your Bike
How to Replace Your Chainrings
Basic removal and installation instructions for 5-bolt chainrings on 3-sprocket systems.
This tutorial will demonstrate how to remove and install chainrings. Since there are so many different crank and chainring sizing combinations, I’ll stick to the basics and give a general overview of the process based on a 5-bolt, 3-chainring system.
For this job, you’ll typically need a 5mm allen key , a chainring nut wrench , and some waterproof grease . On some bikes, you may find it easier to remove the right crank arm before you begin.
Chainring Removal
Before removing the largest two chainrings you’ll often have to remove the smallest one, which is often threaded directly into your crank arm. Use your allen key to loosen all of the bolts that hold the chainring in place, and then use a marker to make a note of the chainring’s position in relation to the crank before removing it completely. Some chainrings have a bump sticking out that should be lined up with your crank arm.
The largest two rings are usually bolted to each other with a nut and bolt. Here you’ll need to hold the nut in place with the special chainring wrench while you loosen the bolt with your allen key. Once again it’s a good idea to mark the chainring’s position in relation to your crank arm. The two largest outer rings often have a few spacers or washers in between, so be sure to note exactly how they came apart so they can be reinstalled correctly.
While it’s ok to install a new chainring that has a different number of teeth, you’ll want to make sure that your new chainrings have the same side profile as the old ones.
Chainring Installation
Before you reinstall the bolts, apply a thin layer of grease to the threads to keep out moisture. Now you can reassemble all of your chainrings the same way they came apart.
Make sure all of the bolts are finger tight and then begin tightening them evenly in a star pattern. Start by tightening the first bolt, and then every second bolt until you’ve gone all the way around. Repeat this process until all of the bolts are tight. Be careful not to over-tighten. Park Tools recommends 44-88 inch pounds of torque for aluminum bolts, and 70-95 inch pounds for steel bolts.

A bicycle geek since early childhood, spent his twenties as a mechanic in bike shops. His passions include flatland BMX, unicycles, cycle touring, mountain biking and road riding.
Related Links
- Sheldon Brown: Chainrings
- Utah MTB: Chainwheel Repair
- Bicycle Torque Specifications
Recommended Tools
- Shimano TL-FC20 Dustcap Pin Tool
- Park Tool HXS-1.2 Hex Wrench Set
- Shimano TL-FC10 Crank Extractor
- Park Tool PAW-12 Adjustable Wrench
- Park Tool SK-3 Starter Mechanic Tool Kit
- Park Tool PK-3 Professional Tool Kit
Discuss this topic in the Bicycle Repairs and Mechanics Forum
Broken bottom bracket.
After 6,000 or so touring miles, the bottom bracket on my Trek 920 broke. Does anyone know what is compatible for a replacement? If I were to choose to replace the entire drive train, what would be compatible? Finally, if I were to replace the drive train, should I go with a 1x for gravel?...
Mavic XM319
Hello. I have a Mavic XM 319 rear wheel with a 10 speed Shimano/SRAM free hub which I want to convert to 11 speed. Which replacement free hub do I need and will it fit/work? Understand Mavic uses a particular freehub/pawls arrangement so I want to get it right....
Can't center front hydraulic break caliper
My dad gave me his Scalpel 29 4 2013 and I've been working to get it to a good riding state since it sat unused for a long time and the challenge I'm struggling with is disc brakes rubbing. I learned to gravity bleed the brakes, and in the process I cleaned the bike, the calipers and equipped it with new shimano disc rotors and pads (my dad had uberbike ones, they were a little rusted and I wante...
Shimano TZ replacement/adapter
20240529_144516.jpg (Size: 40.86 KB / Downloads: 36) 20240731_104315.jpg (Size: 52.87 KB / Downloads: 35) 20240731_104315.jpg (Size: 52.87 KB / Downloads: 35) Hi All: I have been using Shimano and VGsports freewheels on my ebike to get a 34t low gear. The gearing is cool but these hubs suck for beach work, one little splash of salt water and they ar...
How should a wheel hub feel turning?
Hello, I'm new here, my dad has given me his 2013 Scalpel 29 4 since he no longer rides and I'm gradually learning how to maintain it because it feels like a bike well worth learning repairs and maintenance for. I'm slowly figuring out what it does and doesn't need to have maintained, what has and hasn't stayed in good condition in the time since he used it. While doing some unrelated work (takin...
Schwinn Meridian (Adult Trike) Back Wheels Stopped Turning
Hi all, I just got a Schwinn Meridian Trike and went on a nice short uneventful ride today - it worked well - and then after doing something else for a bit, I got back on the bike and the pedals wouldnt turn the rear 2 wheels. Both chains seem to be attached and turning, but for some reason the front chain isn’t moving the rear 2 wheels. I don’t understand what could’ve possibly happened. D...
Sturmey gearing.
Hi ... the Sheldon bike calculator does not address changing a 3 speed hub input gear that I could find. Example: 34t crank - 24t input 3 speed - 22t output 3 speed - 28t cassette. I'm getting nowhere trying to juggle 4 gears. Can someone help this tired old biker? Thanks, Zene...
Bottom bracket
I have Shimano BB -UN72 mm110. I’m sure it’s British thread. What is a compatible shimano part number....
Trike drive.
Hi ... odd question, but is there any difference between rear adult trike wheel right or left wheel drive? All are right, but I have the keyway to do either. Not sure why right, must be a good reason. I tend to travel around town counterclockwise. Left drive seems as if it would be better. Thanks, Zene...
E-Bike Power Goes OUT
I have had a ViVi MT20 e-bike for over a year.I recently changed the worn out brake pads. With a fully charged battery, I rode on throttle only for about a mile. After that, the power went completely out. I turned the key on and off. The LED lights came back on. I twisted the throttle and went about 10 feet and the bike completely shut off.again. Any idea what might be the problem? Thank you!...
Single speed conversion issue
First post, be gentle. I'm in the process of converting a 2019(ish) Trek FX 2 Disc to a single speed. I'm using the DMR revolver kit in the back and up front I bought a Shimano Nexus FC-C6000 crankset. I bought it on eBay but I feel like it may be a European model because I never see it on US sites. I removed the derailers, changed the shifter/brake combos to just brakes (Shimano Sora) and re...
Freehub pawls or ratchet : Grease or oil?
Hi guys. What are your thoughts on putting heavy viscosity oil on a freehub pawls? Would it work better than using grease?...
Upgrading The Vilano Diverse 3.0 DriveTrain
I bought this Vilano Hybrid in 2020 as my “old person’s Chinese Cheapie”. It was - (and is) - FAR from equaling the “serious” bikes that I owned back in the 1990’s. The first Trek I had was a gorgeous blue road bike - worthy of all the gawkers it inspired. My Klein Pro Race MTB was the finest all-round “terrain-chewing animal” I ever mounted. It never failed. It never said...
Schwinn meridian fork replacement
Hi I want to replace the fork on my dads schwinn meridian. I’m looking for one with suspension. What size is the fork I should buy? I been looking on internet for the fork size but couldn’t find anything. Thanks in advance...
NBD: 2004 Brompton 6 speed
NBD (New Brompton Day) As my other Brompton is going to need a full restoration, I bought a newer version. This is a 2004 6 speed with rack. It has the Sachs/SRAM 3pd rear hub and Brompton 2sp gear cluster. 449871542_464409869643387_6008118043075040837_n.jpg (Size: 201.62 KB / Downloads: 13) Was in pretty good condition when I got it, with everything mechanically running quite w...


Mountain Bike Nut
Tips & tricks for mountain biking enthusiasts, how to replace a mountain bike chainring – step by step.
The key to having a smooth riding experience is having properly functioning drivetrain components. The chainrings are vital to your bike’s efficiency and performance, but no matter how well maintained, the chainrings wear out eventually. n this guide, we’ll cover everything you need to know to choose a new chainring that’s right for your drivetrain and bike and how to replace a mountain bike chainring.
To replace a mountain bike chainring, begin by securing the bike to a stand, release the chain tension, disconnect and remove the chain, loosen the pinch bolts, and remove the crank bolts. Then remove the left and right crankarms and loosen the chainring bolts and chainrings. Then clean and lubricate the crank and other components, install the outer and inner chainrings, reinstall the crank and chain, and test the new chainrings.
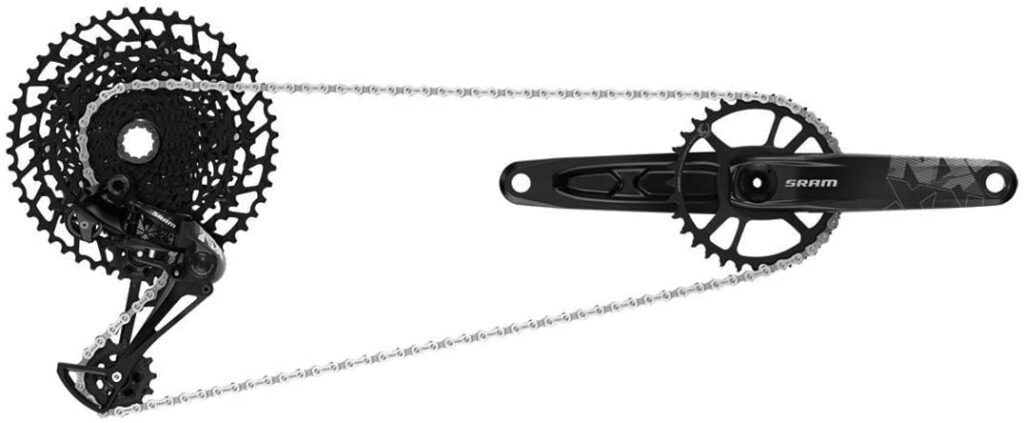
The chainring is part of the power center of the bike, responsible for pulling the chain and transmitting force from the rider’s pedaling action to the rear wheel. You can check out this article from the Journal of Sports Science on Exploratorium to learn how your muscles work to create the pedaling action. Turning the pedals rotates the chainrings and chain, which in turn rotates the cassette and rear wheel, pushing the bike onwards. Several bike accessories like pedals help improve pedal efficiency for every level of rider. To help you choose, we provide detailed comparisons in our articles on pedal straps vs. toe clips , pedal straps vs. cages , and toe clips vs. clipless pedals .
When Should I Replace the Chainring on My MTB?
Your chainring is an important part of your mountain bike’s drivetrain and affects many other components of your bike.
Replace the chainring on an MTB when problems like chain suck, chain slipping, and faulty gear shifting start to happen often. These problems occur when the teeth of the chainring get worn down and do not hook into the chain as well as they should.
As this book The Complete Bike Owner’s Manual by DK Publishing explains, mountain bike chainrings are made of carbon or a solid piece of aluminum to make them strong enough to transfer your pedaling force without flexing. However, they tend to get worn with time and can cause damage that is expensive to repair. Aside from seriously affecting the drivetrain performance, worn chainrings can also ruin other components. As a result, it is important to inspect your MTB regularly and know when it’s time to replace them. The good news is the signs of wear are usually plain to see.
Here are the symptoms that your mountain bike needs to be replaced:
1. Chain Suck
One of the signs of extreme wear is your chain getting jammed and failing to disengage from the chainring teeth when you shift gears. This situation is referred to as ‘chain suck.’ In this case, the chain binds to the teeth as the chainring turns, wrapping back up and around the chainring towards the front derailleur and may even slam into the derailleur cage. The chain could also get jammed between the inner chainring and chainstay. It usually occurs when force is applied to the chain during a downshift and is worse on muddy terrains. As a result, you could find yourself having to push your bike to make it up steep hills. This YouTube video tutorial by RJ The Bike Guy goes into further detail on this issue.
Chain suck is usually caused by wear on the chainring teeth pressure faces. Rather than being straight and uniform in size and shape, worn chainring teeth will be hook-shaped. As a result, the chain links and rollers get hooked and do not release properly at the final stages of shifting. In addition, the bottom teeth of the chainring get overloaded by the chain pedaling tension, greatly increasing friction at this point between the chain and chainring.
Chain suck can be quite frustrating when it occurs. Pedaling action stops suddenly, causing you and your bike to fall over. In addition, the wedged chain can get permanently twisted and damage the chainring teeth, chainstay, and even the rear derailleur. This can also lead to chain breaking. Check out our article on how to fix a mountain bike chain that keeps breaking for alternative causes and solutions to this problem. The best course of action when it occurs is to take off the drive-side crank arm and chainrings. You can then free the chain wedged between the crank and chainstay.
Another common cause of this issue is fitting a new chain on an old but not worn-out chainring. This occurs because the previous chain would have stretched the chainring teeth, causing excessive friction between the new chain and the old chainring. Other causes include a dirty and gritty chain, dry or rusty chain, low rear derailleur spring tension, worn or damaged chain, or a chain that’s too long. Check out our article that provides fixes for if your mountain bike chain is too long .
2. Chain Slipping
Another indication that you might need to replace your chainring is when your chain keeps slipping off your chainring. Bent and deformed chainring teeth can cause your MTB chain to drop off when changing gears. This is because the chain will not fit properly over the teeth. The wear can either occur naturally from use over time or be caused by poor bike maintenance or a worn chain.
Just as a worn chain can wear out the chainring, a worn chainring can also wear out your chain in the first place. The chainring teeth start to look like shark teeth, and the spacing between the teeth gets wider, accelerating wear on the chain. A worn chain will also get stretched out, exacerbating the problem. As a result, you must address this issue as soon as possible.
It is best to replace your chain and chainring once you notice the signs of wear, to prevent further damage to your drivetrain. If only a few teeth are bent, you can try carefully bending them back into shape. If the teeth break off or are too chewed up, this is your cue to get a new chainring like this one. We’ll discuss how to find a chainring that suits your bike later on in this article.
Other causes of chain drop include a loose chain, loose bolts, dirty chain, poor quality shifters, bent derailleur hangers, and faulty or misaligned derailleurs. Our article on how to fix a mountain bike chain that keeps coming off will prove useful if you’re experiencing this problem.

3. Faulty Gear Shifting
Deteriorating shifting performance is another indication that you need to change a mountain bike chainring. MTB chainrings are directly involved in the bike’s gearing system as they represent the front gears. Some mountain bikes make use of a “1x” single chainring, some have two chainrings, and others have three chainrings like this . The more chainrings the bike uses, the wider the range of gears available.
Bigger rings like these have more teeth indicating a higher gear ratio that is harder to push, while smaller rings give a lower gear ratio (easier to push). As a result, shifting your chain to the smallest front chainring makes pedaling in the lowest gear easier, and moving your chain to the largest chainring makes it harder. You can switch between the two depending on the terrain and the level of control you need.
The left-hand shifters usually control the front gears by moving the chain up and down the different front chainrings. As such, chainrings are essential to gear shifting on your bike and will affect the mechanism if worn or faulty. With a worn chainring, the chain will skip and jump gears when you try shifting through the front gears.
Another common cause of difficult shifting is a chain that’s too short. If this is the case for you, our article that explains what to do if a mountain bike chain is too short will come in handy.
You could also have a gear shifter that is stiff or stuck which is covered in our article on how to fix a mountain bike grip shifter that is stuck , in detail.

Be sure to also read up on these mountain bike front chainring size options as well for more tips and tricks.
How to Change a Chainring on a Mountain Bike
Cycling is a sport enjoyed by many people on a professional and recreational level and there are many reasons why this sport is practiced and followed by so many of us.
To change a chainring on a mountain bike first remove the chain and crankarms. Then, remove the old chainrings and get a good quality compatible chainring. Next, fit the new chainring properly and reinstall the crankarms and chain. Finally, test the new installation, checking that the bolts are properly tightened, and the crankset runs smoothly.
According to this article by Better Health, cycling is a great way to improve overall fitness. It has numerous health benefits, including decreased stress levels, improved posture, and coordination, increased muscle strength and flexibility, strengthened bones, and protection from diseases such as heart attack, obesity, stroke, diabetes, depression, and arthritis. However, to ensure your cycling experience is as safe as possible, it is essential you carry out regular maintenance on your mountain bike as outlined in our ultimate list of tools needed for mountain bike maintenance . To get maximum mileage and satisfaction from your bike, you must ensure you regularly examine and change your chainring when necessary.
Once you begin to notice the shape of your chainring teeth having flattened edges, round tips, or hooked edges, then it might be time to replace the chainring. Another check is to lift the chain from the top of the chainrings. If the chain lifts more than one tooth, the chain and maybe the chainring must be replaced with a chain like this and a chainring like this . If only an individual tooth or a few teeth are affected, you can attempt to fix them. You can try to remove minor gouges and burrs in the teeth with a file. You can also try bending the affected tooth back in shape with a pair of pliers like this or a crescent wrench like this . If it cannot be improved or most of the teeth are affected, then you need to replace the chainrings.
Apart from replacing faulty or worn chainrings, you may also want to change the size of your chainrings, upgrade them or experiment with some new models. Regardless of your reason, we’ll take you through all the steps of the process. Before getting started, you’ll have to get the necessary tools. If you’re interested in putting together a bike maintenance kit, check out our mountain bike tool kit essentials guide.

Here is a summary of the tools needed to replace the chainring on your mountain bike:
Mountain bikes typically have 1 to 3 chainrings. The chainrings have evenly spaced teeth, usually between 22 and 53 teeth, for the chain links to slot onto. Together with the crankarms, the chainrings make up the crankset which rotates around the bottom bracket as you turn the pedals. Because several crankset systems exist, the removal and installation process may vary slightly.
Some systems do not accept separate chainrings – they come as a set, while some have chainrings integrated with the crankset. Some setups do not need you to remove the entire crank to remove the chainrings. Here is a step-by-step guide to changing your mountain bike chainring. You can also check this Shimano manual for the manufacturer’s instructions on installing and maintaining chainrings.
Step 1. Set Up Your Bike
To replace a mountain bike chain ring, you’ll have to first position your bike properly. It is best to secure your bike on a stand like this . This makes it easier to work on the bike. You can also prepare a clear spot where you can lay out the parts as you remove them. In addition, you can place a drop cloth underneath to catch any grease during the process.

Step 2. Release Chain Tension
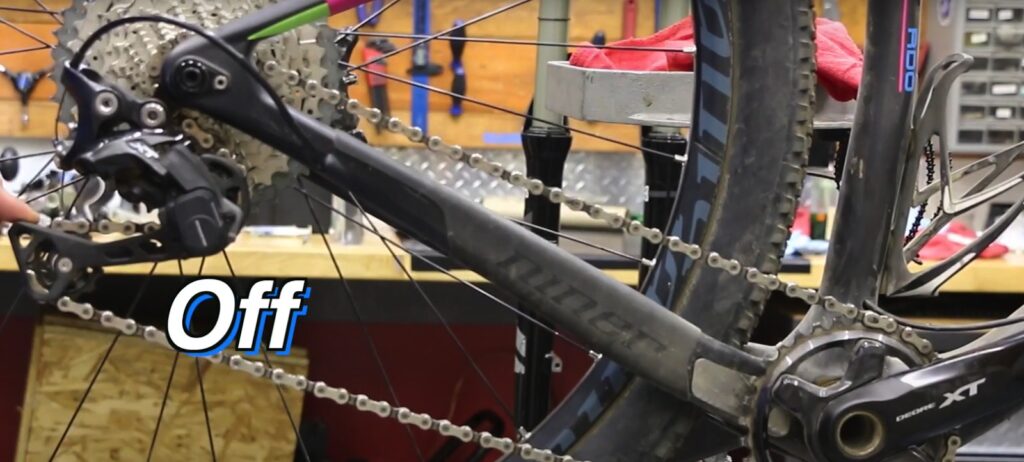
The next step is to remove your chain for easy access to the cranks. First, shift the chain down to the small/small gear combination – smallest front chainring and smallest rear cog. Next, check if the derailleur uses a clutch mechanism or cage lock feature. As this YouTube video tutorial by Bike Teacher demonstrates, turn off the clutch mechanism to free up the chain if your derailleur has the feature. Alternatively, if you use an SRAM derailleur with a cage lock, engage the lock to loosen the chain, as demonstrated in this infomercial from SRAM.
Step 3. Disconnect the Chain
Now that the chain is slack and loosened, you can easily locate and disconnect the chain. Your method for disconnecting the chain will vary depending on its connection system. Check out our article on how to replace a chain on a mountain bike for more information.
For Chains With Quick Links
The quick link usually has a different color and design than the other chain links. Once you locate the link, squeeze the center and push the ends towards each other. If the link does not disengage easily, use a master link plier like this . Place the teeth of the pliers between the ends of the link and apply a bit of force to pop off the links.

For Chains With Connector Pins
Some chains make use of specially reinforced pins like this . The connecting link with the pins is usually darker than the other links. You can use a chain tool like this to disconnect these chains. Position the chain link in the outer slot of the tool and align the chain tool pin with the chain pin. Tighten the chain tool clockwise to drive out the pin. If the chain uses a simple chain pin, ensure you do not drive out the pin completely, as you won’t be able to get it back in the link. Just push the pin far enough to disconnect the chains.

Step 4. Remove the Chain
Once you’ve disconnected the chain, carefully unthread the chain from the chainrings, cassette, and derailleurs.
Step 5. Loosen the Pinch Bolts
The next step is to loosen the crank bolts. Use a 5mm Allen key like this to loosen, without removing, the two pinch bolts on the crankarm on the non-drive side of the bike. This is usually the left-hand crankarm.

Step 6. Remove the Crank Bolt
Next, remove the crank bolt counterclockwise using this 8mm Allen wrench or this 14mm socket wrench. If there is a retaining ring over the crank bolt, hold it in place with an adjustable pin tool like this and fit the hex wrench past the ring to loosen the bolt. If, instead, there is an adjustment (dust) cap over the bolt, remove it using a 5mm Allen wrench, two-pin dust cap tool, or a screwdriver to access the bolt.
If there is a washer, ensure you extract it with the bolt. Otherwise, you will not be able to pull the crank out. For Shimano cranks with safety tabs, use a flat-head screwdriver to disengage the safety tab by pushing it upward.

Step 7. Remove the Crankarms
With the safety tab disengaged and the crank bolt removed, the left-hand crank should slide freely from the spindle/axle. However, you may have to wiggle the crank side to side to dislodge it. Once you’ve removed it, you can now pull out the right-hand (drive) side crank, which is attached to the axle that fits through the bottom bracket.
If you find it hard to budge the right crank, use a rubber mallet like this to tap the axle and crank out carefully. Gently pull the crankset and put it aside.
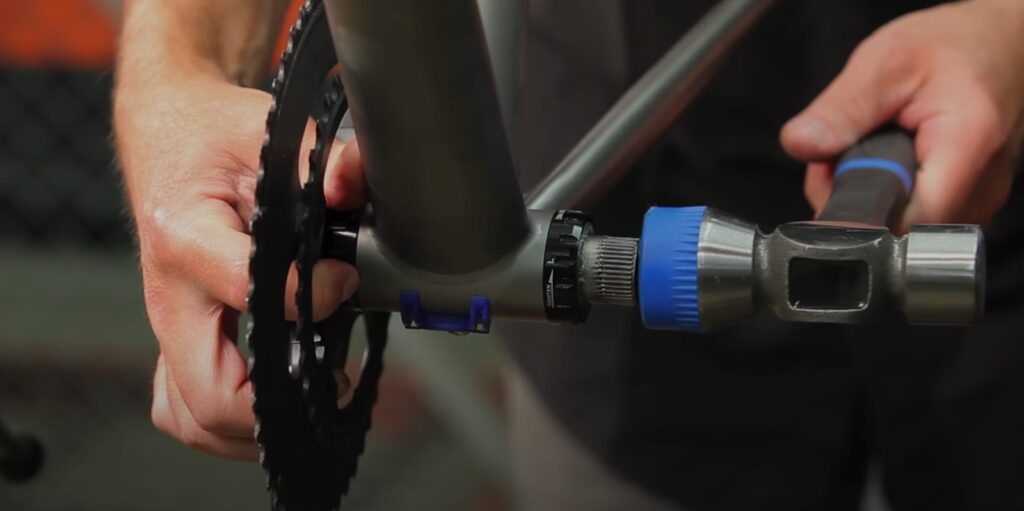
Step 8. Make Use of the Crank Puller
If the right or left crank does not move freely on removing the crank bolt, you may need a crank puller or crank remover tool like this . Screw the threaded end of the crank puller clockwise into the hole in the left crankarm by hand. Then, insert a wrench or a hex key into the crank puller and turn the end to push the crank off the frame and away from the axle. Unscrew the puller from the crankarm and repeat for the right crank.
Step 9. Loosen the Chainring Bolts
Once you remove the crankset, find the chainring bolts on the crank. Using a 5mm Allen key or this Torx T30 wrench, unscrew the bolts counterclockwise. You’ll have to use a bit of force and leverage to turn them. You can also use a penetrating spray to loosen them up.
The nut on the backside may turn as you unscrew the bolt, so you’ll have to hold it in place. You can use a two-pronged chainring-nut tool like this or a 6mm hex key like this to achieve that. After loosening the bolts, you should be able to take them off by hand and put the bolts safely aside.
Step 10. Remove the Chainrings
As you take the last bolt off, the chainring should come away from the cranks. You can make a note or take a picture of which way the chainring was mounted.
Step 11. Inspect the Bottom Bracket
Inspect the BB shell for loose bits and check how smoothly the bearings roll. If the bearings feel gritty or you note any irregular resistance or metallic noise, you may need to replace the bottom bracket.
Step 12. Clean and Lubricate the Cranks
Use a clean rag to wipe away any dirt or grime inside the bottom bracket. This manual by Shimano advises against the use of high-pressure jets of water to wash the bottom bracket. Instead, use a neutral detergent. Clean the inner surfaces of the plastic bearing covers on the bottom bracket where the spindle sits. Also, grease the internal face of the bearing cover. Use brake cleaner like this to clean off the bolts, washers, axles, and cranks, and dry off with a clean rag. Just be sure to use this product with caution as it is toxic to the environment.
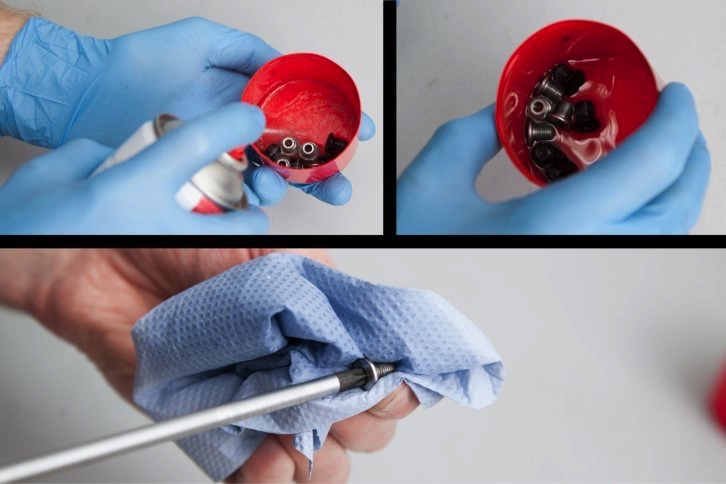
Step 13. Clean and Lubricate the Chainring Bolts
Use a degreaser like this to clean the bolts. Then lubricate the bolts and bolt holes/recesses using ceramic lube like this . In addition, apply some anti-seize paste to prevent them from seizing up or drying out. It will also make the bolts easier to remove next time.
Step 14. Get New Compatible Chainrings
As different brands of products are often incompatible, ensure the chainrings you purchase are compatible with the crankset and drivetrain. In addition, the chainrings you get will depend on the number of chainring teeth you need, the number of bolts attaching the chainring to your bike, and the bolt circle diameter.
Step 15. Fit the Larger Chainring
Always fit the larger outer chainring before the smaller inner one. Check the chainring for an alignment arrow that indicates the correct position with respect to the crank. Alternatively, you can make use of the chain pip as a guide. This is the small stop pin or tab on the outer chainring that must align with the crank arm. It helps prevent the chain from getting stuck between the chainring and crankarm as it comes off the big ring. Position the chainring so the pip sits behind the crank and protrudes away from the bike. Ensure the chainring brand name faces outward away from the bike and the ramped edges of the ring face inward.
Set the chainring up against the crank spider so the bolt holes on the chainring line up with those on the crank. Fit in one of the chainring bolts by hand, applying a thread locker compound like this . Repeat for the opposing bolt, and then the rest. Hold the back side of each bolt still with your chainring bolt tool and tighten the other side using your Allen key. Once all the bolts are installed, go over them all again, tightening each to the manufacturer’s recommended torque spec. This video tutorial by the Global Cycling Network explains the process very clearly.

Step 16. Fit the Smaller Chainring
You can now install the inner ring. Position the chainring so that the bump lines up under the crankarm. Ensure the chainrings are aligned, so the bolt holes match up in the correct position and are not facing inward toward the spider. If there is any brand name or labeling on the ring, check that it faces outward as you put the chainring on.
Like with the outer chainring, fit the bolts back on with the thread locker and tighten each a little at a time. Then check with a torque wrench and tighten to the recommended torque spec.


Step 17. Reinstall the Crankset
Reinstall the crankset by reversing the removal steps. First, grease the axle and insert it through the bottom bracket as far as possible by hand. You can also use a rubber hammer to fit it properly. Next, slide the non-drive side crankarm onto the axle. Finally, push down and re-engage the safety tab.
You can now screw on the center crank bolt. Apply grease and anti-seize and tighten to the specified torque, usually 27Nm or more. Replace the dust cap if the crank has one. Lastly, tighten the two pinch bolts using a torque wrench.

Step 18. Reinstall the Chain
Now that the crankset is installed, it’s time to reinstall your chain. First, clean the chain and lubricate its moving parts as explained in our quick steps to clean a mountain bike chain properly and lube it . Now, check that your gear is still in the small/small gear combo. Then route your chain through the rear derailleur, over the upper and lower jockey wheels. Next, thread the chain over the smallest rear cog and guide it over the smallest front chainring. Finally, connect the two ends of the chain using a quick link and master link pliers or connector pin and a chain tool, as applicable. You can check out our article on mountain bike chain installation for a detailed guide on the topic.
Step 14. Test the Installation
Now that you know how to replace a mountain bike chainring, you just have one last step. Once you’ve connected the chain, test the entire installation. Begin by turning the crank slowly and checking if the chainrings wobble back and forth. As this book , Zinn and The Art of Mountain Bike Maintenance by Lennard Zinn explains, excessive wobbling of the chainring compromises shifting. So, ensure there is no excessive wobbling. The chainring should run smoothly with no creaking or metallic noise.
Next, refer to the manufacturer’s instructions for the correct torque specifications and check that all the bolts and nuts are properly tightened. Finally, recheck the torque after one ride since the crank could settle in and loosen the bolts. It is also recommended you check the torque periodically.
Your crankarms might spin less freely due to the fresh grease. This usually resolves itself as you ride and the bottom bracket beds in.
Is Replacing a Front Chainring Different From Replacing a Rear Chainring?
One may think that replacing your front chainring would be different from replacing your rear chainring but it is not.
The process for replacing a front chainring is the same as replacing a rear chainring. For both chainrings, remove the chains and the crankset, remove the chainring bolts and the chainrings, install the new large and small chainrings, reinstall the crankset and chain, and test the installation.
Chainring Size Guide
As stated earlier, chainrings are crucial to the efficiency of your bike. When you are learning how to replace a mountain bike chainring, it’s important to note that mountain bikes usually vary between single-ring, double-ring, and triple-ring cranksets, each having its own benefits.
Chainring sizes are as follows: a chainring with 24 teeth is typically 103.7 mm in diameter, and a chainring with 30 teeth is typically 128 mm in diameter for adult bicycles.
Triple-ring systems provide a wide range of gears; double-rings allow for weight-saving, while single-ring sets are preferred for simplicity. MTB chainring sizes are often expressed in the number of teeth and diameter. The higher the number of teeth, the higher the gear ratio and the harder it is to pedal the bike forward. As a result, riders that regularly ride steep terrains usually prefer smaller chainrings for easy pedaling. On the other hand, riders who spend time on flat terrains or want more top-end speed prefer bigger chainrings. However, some bikes have a limit on the maximum chainring size due to the bike clearance.
Most mountain bikes come with 30t or 32t chainrings; however, you can upgrade your chainring size as you need. Your chainring size matters as it determines the gear range you’ll use on your local terrain. Below we provide a table to help you determine if a chainring will fit your bike and the right number of teeth your chainring should have.

Mountain bike chainrings usually come in 2-tooth increments. You can usually change two teeth up or down without changing your bike chain length. Decreasing by more than two teeth will mean you have to shorten your chain. As the table shows, chainring size can vary from as low as 24 to as high as 50 teeth. Depending on your need, you can easily switch from a bigger chainring to a smaller one and vice versa. You can also increase or decrease the number of rings on your bike. You just have to take note of a few factors to ensure you have the best fit. If you’re unsure of which size to get, you can compare chainring options using this gear calculator from Sheldon Brown.
A smaller chainring allows for easier pedaling and more efficient climbing. If you’re switching to a smaller chainring, you will have to shift your front derailleur down a bit. You may also have to switch your crankset entirely.
A bigger chainring allows you to ride faster downhill and on flat terrains. You will have to shift your front derailleur up if switching to a bigger chainring. You should avoid having a difference of more than 16 teeth between your outer and inner ring.

How to Find a New MTB Chainring That Fits Your Bike
Chainrings come in various sizes and designs that can be used for different purposes. Also, there are several crankset manufacturers, meaning that the chainring might not always be compatible with your other components. As a result, it is important to check for full compatibility when purchasing your chainring so that you can replace a mountain bike chainring properly. However, buying the right one can be quite tricky.
To find a chainring that fits a specific bike, count the teeth, calculate the BCD, and count the bolts.
Here are the steps to consider before buying your new mountain bike chainring:
Step 1. Count the Teeth
One of the most important factors to consider when purchasing a new MTB chainring is the chain size. The chain size is determined by the number of teeth. You can cross-check the table above to get the diameter based on the number of teeth. You can get a smaller chainring for an easy gear combination or a larger chainring for higher speed. You can also get both using a double-ring set to switch between the options. An example of a standard chainring size format is 50/34T. This signifies that the outer ring has 50 teeth while the inner ring has 34 teeth. Most chainring manufacturers label the number of teeth on the chainring. If not, you can simply count the number of teeth the chainring has.
One important point to note is that the difference between your adjacent chainrings should not be more than 16 teeth. Any more and your shifting performance will be affected. Your chain will also slip off often.
Step 2. Calculate the BCD
BCD stands for Bolt Center Diameter. This stands for the diameter of a circle as drawn right through the center of the hole on the crankset, usually measured in millimeters. It refers to the size of the mounting for chainrings. This must match for the chainrings and crank to fit properly. The most common BCDs for four bolt holes are 64mm, 80mm, 104mm, and 120mm. For five bolt holes, common BCDs include 74mm, 110mm, 130mm, and 135mm.
Many chainrings and cranksets usually have the BCD stamped right on them. If not, you’ll have to measure it.

Here are the methods for you to measure the BCD:
Method 1. Measure the Distance Between Opposite Diagonal Bolt Holes
This method works for cranksets with an even number of bolt holes. Position a caliper like this and place the lower jaws in the center of two diagonal bolt holes. Round the distance to the nearest millimeter. You can then check the measurement on a crib sheet like this from Sheldon Brown to get the chainring size and chainrings compatible with the crankset.

Method 2. Measure the Distance Between Adjacent Bolt Holes
This method works for cranksets with an uneven number of bolt holes. Take a ruler and place it across the adjacent bolt holes to measure the distance between the edges. You can also check the measurement on a crib sheet to get the BCD and compatible chainrings.
Now that you have your BCD, you can then search for a chainring with the same BCD for optimum compatibility.
Step 3. Count the Bolts
Another factor to consider when purchasing your chainring is the number of bolt holes. Chainrings typically use either 4 or 5 bolts. Before getting a new chainring, count the number of bolt holes on your former chainring or your crank. You must have the exact number for your new chainring to fit with your crankset. Whether you’re getting a bigger or smaller-sized chainring, as long as you have the same number of bolts, fixing it should be easy.
Once you have the number of teeth, the BCD, and the number of bolts, you can take the measurements to a bike shop or online and find a good replacement chainring.

Leave a Reply Cancel reply
You must be logged in to post a comment.
Disclosures
How to replace a chainring (video)
Our mechanic Al Vines shows you how to replace a chainring
- Sign up to our newsletter Newsletter
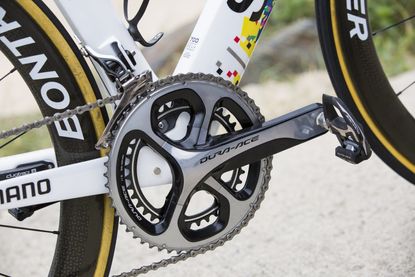
Here, we'll be explaining how to replace a chainring, in this case the inner one, as it tends to be the one that wears first. Happily, it's a piece of cake to do and doesn't require many tools or much know how.
How to replace a chainring: What you'll need:
- Allen Keys/Torx Keys
- Chainring Nut Wrench
- Loctite Blue 243
- Paper towels
Before you get stuck in, there are a couple things that are best checked. Firstly, make sure your replacement chainring has the right number of holes (usually four), and check the bolt circle diameter (BCD) of these holes.
You'll also want to check the number of teeth in case you want to change up your gear ratios and make things a little harder (or easier) for yourself.
To replace a chainring, you don't necessarily have to remove the chainset, but the job is easier to do off of the bike. We go through the process in this video on how to change a pressfit bottom bracket .
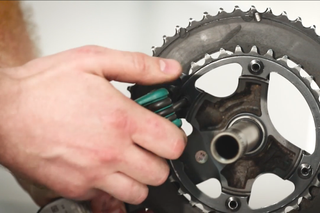
Once the chainset is off of the bike, the next step is to crank open the bolts and lift the inner chainring out of position and give everything a good old clean. Sadly, if you leave stuff grubby there's every chance it'll be the source of some frustrating creaking noise in the future.
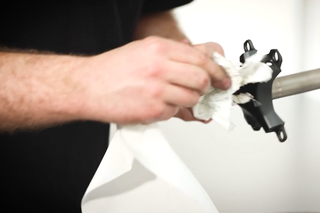
With everything spic and span, it's time to reassemble your chainset around your new inner ring. Start by making sure it's orientated correctly and the right way up – a little tab should sit by the crank arm and the writing should face towards the bike.
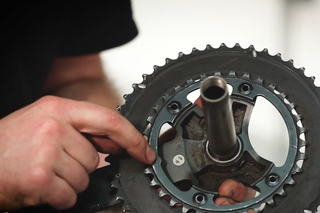
Secondly, drop some Loctite on each bolt which will help stop them from slipping and then tighten them into place, connecting the inner and the outer ring.
If you've changed the number of teeth you'll probably need to change your chain to make it's the right length.
Finally, you just need to attach the chainset back onto the bike and get out riding.
Thank you for reading 20 articles this month* Join now for unlimited access
Enjoy your first month for just £1 / $1 / €1
*Read 5 free articles per month without a subscription
Join now for unlimited access
Try first month for just £1 / $1 / €1
Get The Leadout Newsletter
The latest race content, interviews, features, reviews and expert buying guides, direct to your inbox!

Slovenian full of 'confidence and motivation' after winning final warm up race before Zurich
By Tom Thewlis Last updated 16 September 24

By Michael Hutchinson Published 15 September 24
Useful links
- Tour de France
- Giro d'Italia
- Vuelta a España
buyers-guides
- Best road bikes
- Best gravel bikes
- Best smart turbo trainers
- Best cycling computers
- Editor's Choice
- Bike Reviews
- Component Reviews
- Clothing Reviews
- Contact Future's experts
- Terms and conditions
- Privacy policy
- Cookies policy
- Advertise with us
Cycling Weekly is part of Future plc, an international media group and leading digital publisher. Visit our corporate site . © Future Publishing Limited Quay House, The Ambury, Bath BA1 1UA. All rights reserved. England and Wales company registration number 2008885.
- MAGAZINE OFFERS
- BIKE INSURANCE
- Best Products
- Maintenance
- Accessories
- Long-Term Reviews
- First Look Friday
- Bike of the Week
- Tech Features
- Routes and Rides
- Bike Galleries
- BikeRadar Bargains
- Buyer's Guides
- Fitness & Training
- Sizing & Fit
- Mountain Biking UK
- Cycling Plus
- BikeRadar Podcast
How to change chainrings – video
Replace bike chainrings with our easy step-by-step guide
BikeRadar / Immediate Media
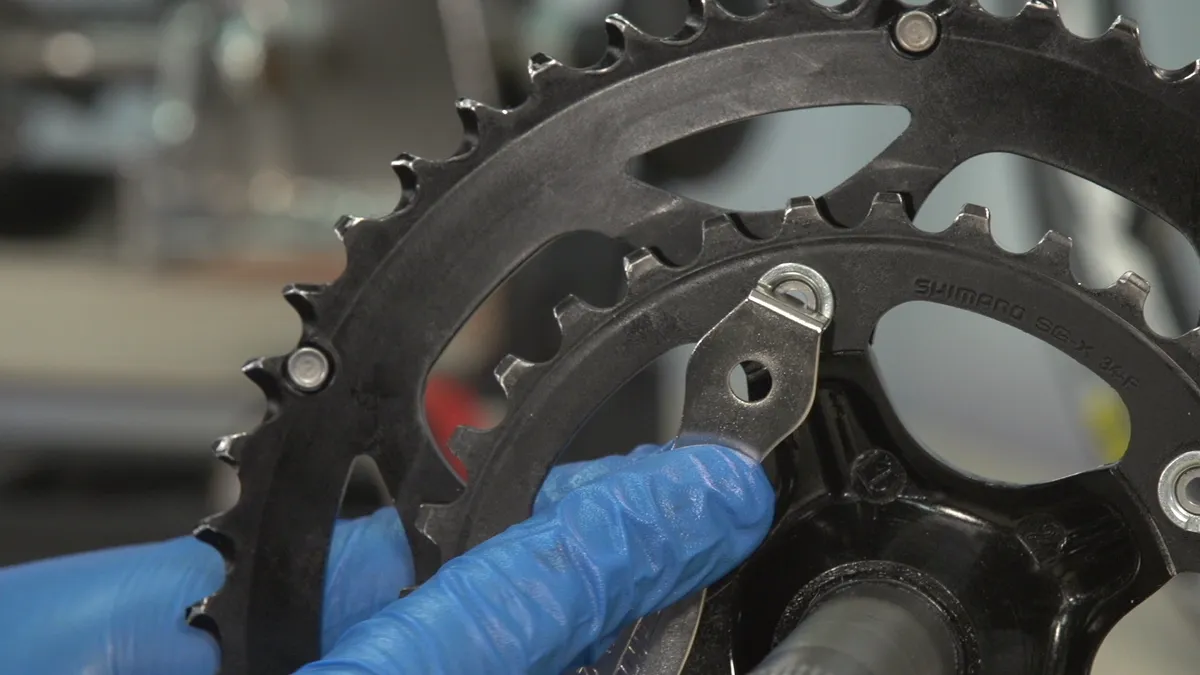
Changing a chainring on your road bike or mountain bike is a fairly simply task, but one that needs performing promptly when chainring teeth become worn. You can also swap chainrings to alter gear ratios to give you fewer teeth for easier climbing, or more teeth for on-the-flat time trial efforts.
Check out the video below to take you through changing chainrings.
Before you start, you’ll need to bear in mind your chainset’s bolt circle diameter (BCD) when buying new rings. BCD is usually either 110 or 130mm – or essentially compact or traditional sizing. If your bike came with 50x34T chainrings, it’s almost certainly 110 BCD. If it came with 53x39T chainrings it’ll be 130 BCD. Of course, you can always measure the diameter of your old chainring from bolt hole to bolt hole to check. There’s always an exception and in this case, it’s the four-bolt systems used on the newest 11-speed Shimano groupsets, for which a variety of chainring sizes are available without the worry of different BCDs.
Video: how to change a chainring
Video: How to change chainrings
This video is part of the Park Tool Maintenance Monday series. You can purchase the Park Tools used in the video at a number of dealers across the UK and internationally. For more maintenance videos, subscribe to the BikeRadar YouTube channel.
Tools for the job
- Hex or torx keys
- BB removal tool
- Chaining nut wrench tool
How to replace a chainring
1. remove chainset.
Unless you’re only changing the outer chainring – which it’s often possible to do by un-bolting it and slipping it over the crank arm – you’ll need to start by removing the chainset. Check out our how to replace a crankset video for how to do this.
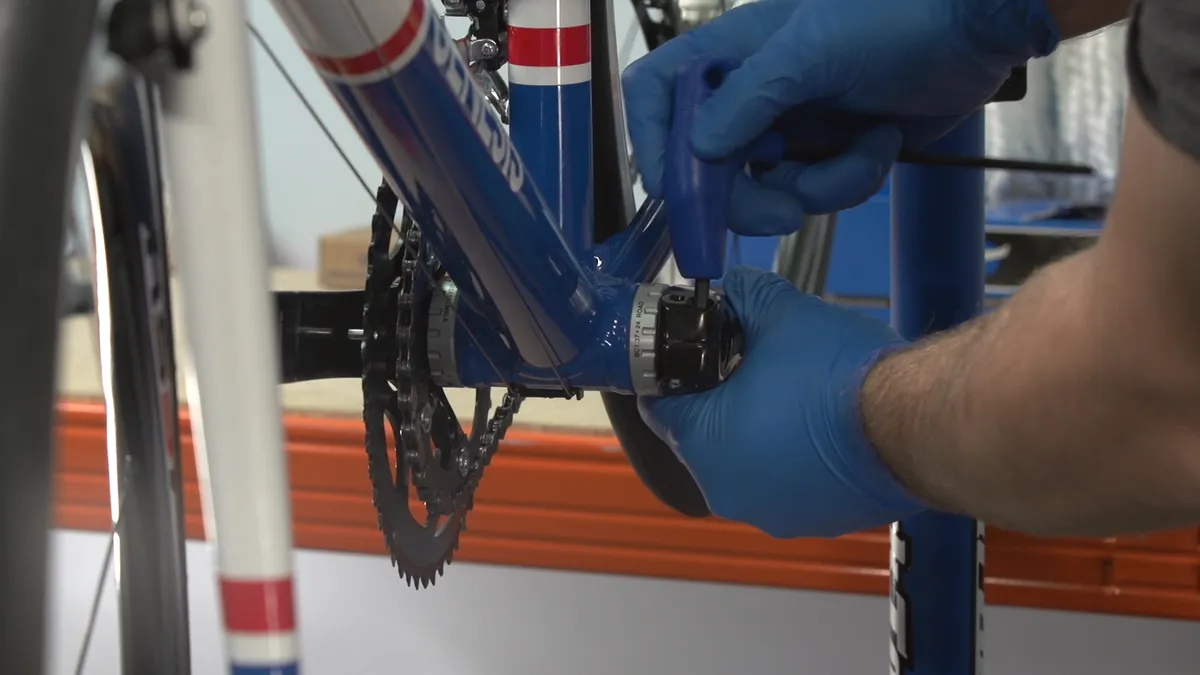
You will usually have to remove the chainset to replace the chainrings
2. Remove chainring bolts
Some high-end cranksets allow you to remove the chainring bolts with only a hex or torx key, but if your chainset uses traditional bolts, you’ll need either a chainring nut wrench tool to sit in the slotted recess of the chainring nut or another hex key (often 1mm larger than the front) to hold in the rear nut and prevent it turning.

The chainring nut tool keeps the chainring nut secure while screwing or unscrewing the bolt
Secure the nut and unscrew the bolts in an anti-clockwise direction. Remove the bolts, taking care to keep them safe for installation of the new rings. You can now remove the old chainrings to discard or thoroughly clean if you’re only changing one ring to alter ratios.
3. Replace chainrings
When replacing the chainrings, you need to pay attention to their rotational alignment.
The outer (largest) ring usually has a small pin sticking out from its surface. The ring should be installed so that the pin is positioned behind the crank-arm, where it can help avoid a total chain jam in the event of the chain over-shifting and falling between the outer ring and crank.
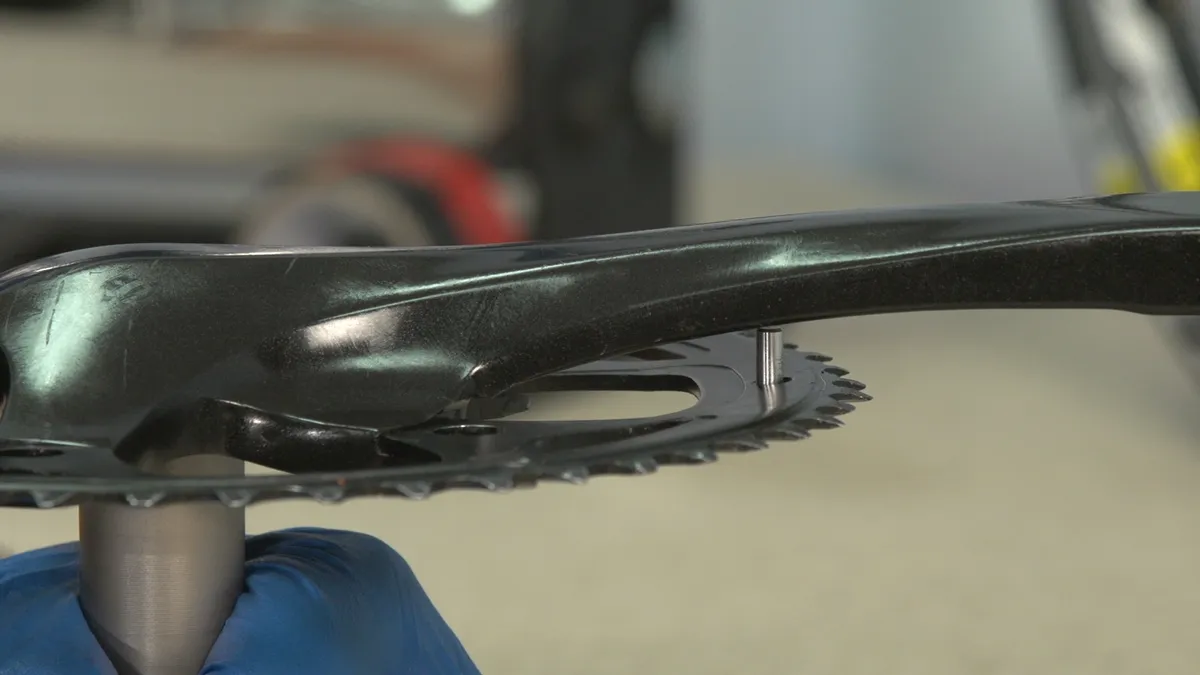
The pin stops the chain getting stuck between the crank arm and chainring
The inner ring will usually have a small tab on the inside of the outer part of the ring, which also needs to be fitted behind the crank.
The ramped edge of the teeth – which aids shifting – or any branding or other markings should be visible as you place the ring on.
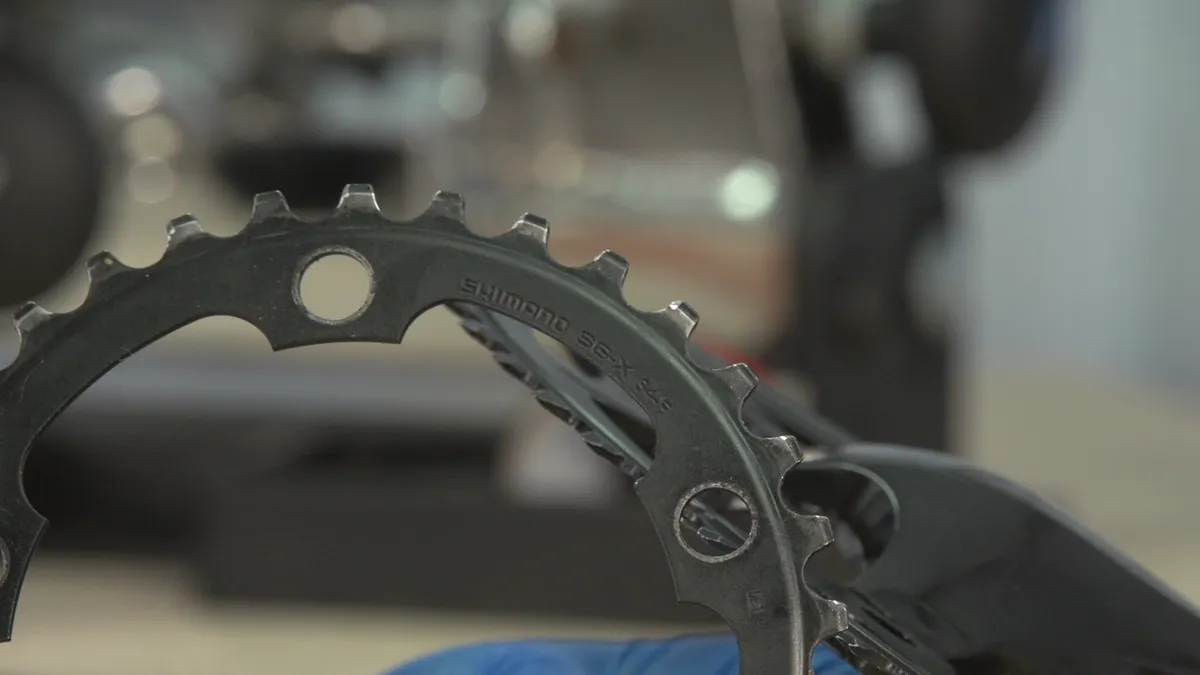
The branding faces outwards – setting the teeth the right way round for smooth shifting
With rings aligned, place each nut into the bolt hole. Securing the nut with chainring nut wrench or hex key, thread the bolt into the nut in a clockwise direction, screwing in just until the bolt feels resistance and the rings are held in place. Repeat for all bolts and then gradually move from bolt to bolt, tightening each bolt a quarter of a turn each time until tight. You can also use a torque wrench for this process, tightening to the recommended torque printed on the bolts.
Re-fit the chainset, making sure to thread the axle through the chain.
Give the bike a pedal and shift through the gears to check all is working correctly. If you’ve changed the size of your outer chainring, you may need to adjust the height of the front derailleur to get the smoothest possible shift – here’s how to set up your front derailleur.
Share this article

- Terms & Conditions
- Subscribe to our magazines
- Manage preferences

- Stores Stores
Chain Replacement And Repair

- Forum Listing
- Marketplace
- Advanced Search
ISO Bosch Performance CX chainring lock ring tool
- Add to quote
Check your toolbox first. One of them requires the "Bosch specific--which I think is also Rotor/Rohloff-sized--tool, but the other newer ones seem to have smaller lockrings (which are the same size as the old 8-point Truvativ/FSA tools). I don't recall the specified torque being blisteringly tight. If you have a hook spanner (Hozan, for example), it should fit well enough to tighten it in the interim.
on your first ride? take it to the shop you got it from!
As a general rule I don't let bike shops touch my bikes. Thanks to everyone that posted in this thread with help in finding the right tool &/or helpful information. =sParty
Park Tool CWP-7 and Park Tool BBT-18, 36mm socket. The lock ring is left hand thread, torque to 25-30nm.
I have the same bike and have the same issue I just got the tool in the mail and plan to do the same thing with the thredlocker did it do the trick for you?
Yes -- worked a charm. I got the right tool and the chainring hasn't backed off since locktiting it. However I did have to retighten my NDS crank recently (I'd locktited that, too.) Just have to keep an eye on these things, I guess. =sParty
So many fasteners were loose on my 2021 Rail 7, I loosened everything I had a socket for and torqued them to spec. As for the lockring, I torqued it and safety wired it. With the crank arms, I torqued them, and torqued them again after each of the next few rides (without loosening them). All's been well for 600+ miles.
^^^ Aviation?
- ?
- 15.6M posts
- 523.3K members
Top Contributors this Month
- Search forums
- EMTB Systems
Bosch Gen 4 - How to change the chainring?
- Thread starter GrahamPaul
- Start date Mar 10, 2020
- Jul 20, 2020
E*POWAH Elite World Champion
You are doing everything right, it is a self extracting system and it is a normal thread. You have just had a monkey torque it up to 10000 nm. Mine was the same, thought I was going to break it while undoing.
Paul Mac said: You have just had a monkey torque it up to 10000 nm. Mine was the same, thought I was going to break it while undoing. Click to expand...
Active member
Can you borrow an impact driver.....the battery DeWalt ones for example ?
- Thread starter
Strap the other crank to the chain stay so that you can use both hands on your breaker bar? Saves on skinned knuckles too...
Like a Boss
sandyman44 said: thanks, that is what I was afraid of. if it was a wheel nut on the car, I'd use a 2 foot breaker bar as the wrench and stand on the end (holding the bonnet or roof for stability). Achieving the same leverage on a bike is a lot more difficult. any tips? need to stop the crank moving as well as increasing the wrench leverage. I tried adapting my 1/2" drive 2 foot breaker bar down to 8mm hex, but ended up with about a 10cm long stack with 4 joins from one adapter to the next, to get the size down, did not feel stable... Click to expand...
E*POWAH Master
sandyman44 said: can anyone give any tips as to how to get the cranks off bosch gen4 ebike? I have a scott genius e-ride 2020. The website spec says the cranks are SRAM X1. they are certainly SRAM. I want to change the chainring (currently has SRAM direct mount boost 34T) to a smaller 30T. I have bought raceface NW 30T, together with FSA 104BCD bosch gen4 boost spider. These look like they will be the right fit. I've also bought the unior chainring locknut tool, which again looks like it will be the right fit. however I am defeated at the first obstacle. Can't get the cranks off. only need to remove the drive side, to change the ring. There is an outer retaining bolt with a 10mm hex . this (re)moves easily. through this there is another bolt with 8mm hex hole. This doesn't move at all. my understanding is that they make a self-extracting pair, I should leave the outer bolt in place, turn the inner one, the crank will self extract. however, inner doesn't move AT ALL, with or without the outer bolt. I have an 8mm hex wrench about the same length as crank, pushed into the inner bolts hole. It fits nicely. I am putting one hand on the end of the crank, other hand on the end of the wrench with the two opposed at 180 degrees horizontally, as much weight as I can get down through them, nothing moves at all. My understanding is that the inner bolt should be a "normal " thread so I am trying to move it anti-clockwise. is there some special secret or is it just about leverage / torque? I've never had a crank that works like this before so I am trying to work it out without breaking it. many crank removal youtube tutorials of course but none of them seem to be for SRAM cranks with an bosch gen4. pics with and without the outer bolt below View attachment 36273 View attachment 36274 Click to expand...
- Jul 21, 2020
HORSPWR said: You're not supposed to remove the outer bolt. You undo the inner bolt and when it backs out it comes up against the outer bolt and then draws the crank off the spindle, it acts like its own puller. You just need more force like a breaker bar with an allen key socket. Click to expand...
sandyman44 said: yep, I was pretty sure that was how it worked, just wanted to see if it was that. as there is no definitive manual for this exact setup that I can find. I've got some 1/2" drive hex bits on order now, so I can connect them directly to my breaker bar, waiting for those to turn up before trying again. I do have a ryobi one+ impact driver so I may also try that, although probably will need to buy a longer hex bit to get it to reach in. despite having multiple tool sets you never seem to have the right one! hadn't thought to try power tools always a bit wary of that on a bike. I have mashed screw heads with this tool before, needs a lot of pressure to stop the bit bouncing out. can't believe need to do this much mechanical engineering just to remove a crank! Click to expand...
- Jul 27, 2020
HORSPWR said: Don't worry, next time it'll probably fall off...when you're riding it ? Click to expand...
sandyman44 said: I did the job with the 2ft breaker bar and a 1/2" hex-end socket set ALLEN KEY / HEX BIT SOCKET SET US PRO TOOLS 1/2" Drive 4mm to 17mm 3383 | eBay . Bike propped in corner against wall so it can't go forwards, right foot on right pedal, full weight, then transfer 1/2 weight to left foot on breaker bar parallel with the chainstay. couple of pumps with the left leg and the torque did the job. chainring locknut was comparatively easy to remove. the unior 1671.2/4 is a perfect fit for that job and way cheaper than the bosch branded tool. got mine from germany, none of the uk shops had one. I now have new ring and spider fitted. I put 50NM on the crank extraction bolt when refitting. now need to remove some links from the chain now as dropping 4T on the ring leaves it too long, not ridden it yet. chainline is about 2 mm further out than the factory sram chainring, which is perhaps due to the racefact ring having these threaded holes with standoff, I may have been able to go with the non-boost version of this spider. View attachment 36749 View attachment 36750 Click to expand...
- Jul 28, 2020
HORSPWR said: That should make chainring changes easier next time! Click to expand...

Like a Boss said: Are folks even bothering about the o-ring, or omitting it altogether? Click to expand...
deertrackdoctor
- Nov 17, 2021
thanks guys this post was helpful . I down graded my drive train to Micro shift advent X .I got 1200km from chain and cassette without paying attention to chain wear . Fot info i managed to Purchase the unior lock ting tool and the e thirteen chainting in the UK from Tredz .I hope that info helps someone in the future . Ive purchased a chain wear guide this time so hope to get more than 1200km out the new cassette by chainging chain at proper time . cant complain as replacement cost of cassette and chain is only £65 .Ive no regrets selling the 12 speed drive train when new and fitting 10 speed micro shift advent x . I can live with new cassette and couoke of chains every 2000km
- Nov 28, 2021
sandyman44 said: I did the job with the 2ft breaker bar and a 1/2" hex-end socket set ALLEN KEY / HEX BIT SOCKET SET US PRO TOOLS 1/2" Drive 4mm to 17mm 3383 | eBay . Bike propped in corner against wall so it can't go forwards, right foot on right pedal, full weight, then transfer 1/2 weight to left foot on breaker bar parallel with the chainstay. couple of pumps with the left leg and the torque did the job. chainring locknut was comparatively easy to remove. the unior 1671.2/4 is a perfect fit for that job and way cheaper than the bosch branded tool. got mine from germany, none of the uk shops had one. I now have new ring and spider fitted. I put 50NM on the crank extraction bolt when refitting. now need to remove some links from the chain now as dropping 4T on the ring leaves it too long, not ridden it yet. chainline is about 2 mm further out than the factory sram chainring, which is perhaps due to the racefact ring having these threaded holes with standoff, I may have been able to go with the non-boost version of this spider. Click to expand...
Singletrackmind
- Oct 30, 2023
Has anyone who has changed the chainring on a Gen 4 motor noticed an aluminum washer between the motor and the chainring? Had a the new Sram Transmission installed on my bike and lockring used to fasten the front chainring to the motor kept coming loose. Noticed it was barely grabbing any threads and after purchasing a new lockring, took front chainring off before installing and noticed an aluminum washer between the chainring and motor. Removed the washer and now the lockring is held on by more threads and seems to be very secure. Went on a neighborhood ride and lockring has not loosened. Maybe stock chainring requires a washer? Any insight would be greatly appreciated.
My Whyte e160rs is a boost offset and I don’t think it has an aluminium washer there. There is a thin rubber O ring.
Depends what chain ring you took off. If it was the sram one, it has a thick washer bonded to it from new. In use the bond breaks and when you take the chain ring off it leaves the washer behind. If it was a e13 chain ring, some come with a washer to make the chain ring a boost fitment.
- Nov 20, 2023
Singletrackmind said: Has anyone who has changed the chainring on a Gen 4 motor noticed an aluminum washer between the motor and the chainring? Had a the new Sram Transmission installed on my bike and lockring used to fasten the front chainring to the motor kept coming loose. Noticed it was barely grabbing any threads and after purchasing a new lockring, took front chainring off before installing and noticed an aluminum washer between the chainring and motor. Removed the washer and now the lockring is held on by more threads and seems to be very secure. Went on a neighborhood ride and lockring has not loosened. Maybe stock chainring requires a washer? Any insight would be greatly appreciated. Click to expand...
- Nov 21, 2023
slorider said: Did you ever figure out what this washer was? I have a Trek Rails and found the same washer. I can barely get the locking ring back on with the washer. Did you just leave the washer off? Click to expand...
Similar threads
- May 6, 2021
- Jan 17, 2022
- Mar 21, 2020
- Feb 7, 2021
- Aug 10, 2023
EMTB Forums
The World's largest electric mountain bike community.
Latest articles
Time for a new helmet – Sweet Protection Primer Mips
- Yesterday at 12:02 PM
- Comments: 1
2025 Merida eOne-Sixty 675 review
- Aug 30, 2024
- Reaction score: 5
- Gates CDX Bosch Gen 4 Belt Drive Chainring
We’ll make this a great experience
It’s our mission to provide you with world-class hospitality every time you visit us online or in-store. We’ll always take care of you. It’s the Trek way.
Awesome free shipping options
All accessory orders over $49 ship to your home for free, and all accessory orders ship free to your local retailer for in-store pickup.
30-day Unconditional Guarantee
If for any reason you’re not 100% happy with your online order from trekbikes.com, you can return it in like-new condition within 30 days. No questions asked.
More options

- Visit Our Blog about Russia to know more about Russian sights, history
- Check out our Russian cities and regions guides
- Follow us on Twitter and Facebook to better understand Russia
- Info about getting Russian visa , the main airports , how to rent an apartment
- Our Expert answers your questions about Russia, some tips about sending flowers

Russian regions
- Amur oblast
- Buryat republic
- Chukotka okrug
- Jewish autonomous oblast
- Kamchatka krai
- Khabarovsk krai
- Magadan oblast
- Primorye krai
- Sakha republic
- Sakhalin oblast
- Zabaikalsky krai
- Map of Russia
- All cities and regions
- Blog about Russia
- News from Russia
- How to get a visa
- Flights to Russia
- Russian hotels
- Renting apartments
- Russian currency
- FIFA World Cup 2018
- Submit an article
- Flowers to Russia
- Ask our Expert
Primorsky Krai, Russia
The capital city of Primorye krai: Vladivostok .
Primorsky Krai - Overview
Primorsky Krai (informally Primorye ) is a federal subject of Russia located in the south-eastern part of the country, in the south of the Far East, part of the Far Eastern Federal District. Vladivostok is the capital city of the region.
The population of Primorsky Krai is about 1,863,000 (2022), the area - 164,673 sq. km.
Primorye krai flag
Primorye krai coat of arms.

Primorye krai map, Russia
Primorye krai latest news and posts from our blog:.
20 September, 2017 / Vladivostok - the view from above .
23 July, 2015 / Gamov lighthouse - the easternmost lighthouse in Russia .
24 February, 2014 / Abandoned shelter-base for Soviet submarines .
11 September, 2012 / These tanks are not afraid to go under the water .
28 April, 2012 / First demonstration flights of new Russian combat helicopters .
More posts..
News, notes and thoughts:
18 August, 2011 / A shark attacked a 16-year-old youth in Russia's Primorye region, officials said, a day after a man lost his hands in a similar shark attack unprecedented for the region. What is wrong with the sharks all over the world?
9 January, 2011 / A bear apparently wounded by hunters broke into a school in the Primorye Territory in Russia's Far East, police said Sunday. Yeah, bears walking the streets of Russian cities.
History of Primorsky Krai
The first people settled in the region more than 30 thousand years ago. According to ancient legends, the coastal line was densely inhabited. In the Middle Ages, there were three empires on the territory of Primorye, which successively replaced each other: Bohai (698-926), Jin (1115-1234), Eastern Xia (1215-1233).
In the early 13th century, the territory of East Asia suffered the Mongol invasion. This led to the fall of the empire of Jin, but some provinces in the east preserved independence and formed an independent state known as Eastern Xia. In 1233, after another invasion this state ceased to exist too.
After that, the region was in ruins and attracted people persecuted in surrounding countries (bandits, adventurers, political dissidents). The first documented Russian presence in the region dates back to the summer of 1655, when the northern Primorye was visited by Russian Cossacks under the command of Onuphrius Stepanov.
In the middle of the 19th century, the Russian Empire began to strengthen its position in the north-west coast of the Pacific Ocean. In 1856, Primorskaya oblast was formed from the coastal parts of Eastern Siberia and Kamchatka. The territory of present Primorye was incorporated into the Russian state on the basis of Aigun (1858) and Beijing (1860) peace treaties that legalized the border between Russia and China.
More historical facts…
Since then, the southern part of Primorye took its current shape. In 1860, Vladivostok was founded as a military post. Russian migration in the region began. In 1899, the Oriental Institute was opened in Vladivostok - the first higher educational institution in Eastern Siberia and the Far East, and one of the oldest in East Asia.
Further strengthening of Russian positions in the Far East was limited by the small size of the Russian population and remoteness from populated parts of the empire. Regular communication between St. Petersburg and Vladivostok was established after the completion of the Trans-Siberian Railway in 1903.
From 1861 to 1917, about 250,000 peasants arrived in Primorye and founded 342 settlements. In 1917, the population of Primorye amounted to 307,000 people. By the mid-1920s, the local population reached 600,000 people. In the 1930s, forced industrialization and collectivization began which led to another wave of migration. The migration was both voluntary and forced (prisoners).
In 1937-1938, about 200,000 people of Korean and Chinese nationalities were forcibly deported from the region. Until the end of the 1980s, as a result of ethnic deportations, the Chinese and Koreans disappeared from the national composition of the population of Primorye.
In the summer of 1938, on the southern boundary of Primorye, in the area of Lake Khasan, there were military clashes between Manchukuo (a puppet state under Japanese control) and the Soviet Union. After two weeks of fighting, the USSR was able to repel the aggression. On October 20, 1938, Primorsky Krai with the capital in Vladivostok was formed.
After the end of the Second World War, Primorsky Krai continued to develop as a major industrial and agricultural region of the Far East also specializing in the extraction of natural resources. Rail and sea transport played a significant role in the local economy. Migration from the European part of Russia and Siberia continued, which led to an increase of population of the region from 1,381,000 people in 1959 to 1,978,000 in 1979.
With the collapse of the Soviet Union, the region’s economy went into decline, reverse migration in the European part of Russia began. At the beginning of the 21st century, the social and economic situation in Primorsky Krai improved.
Beautiful nature of Primorsky Krai

On the coast in Primorsky Krai
Author: Andrej Serbskij

Hilly landscape of Primorsky Krai
Author: Kazakov Igor

Primorye scenery
Author: Viktor Koblov
Primorsky Krai - Features
Primorsky Krai is located in the south of the Far East, in the south-eastern part of the Russian Federation. It is bordered by Khabarovsk Krai in the north, China in the west, North Korea in the south-west, and is washed by the Japan Sea in the south and east. The largest cities are Vladivostok (601,300), Ussuriysk (172,000), Nakhodka (140,200), Artyom (104,500).
The maximum length of Primorsky Krai (from the mouth of the Tumannaya River to the source of the Samarga River) is about 900 km, the maximum width (from the valley of the Ussuri River to the coast of the Sea of Japan) - about 280 km. The highest peak is Mount Anik (1,933 meters) located in the north-easton of the region, near the border with Khabarovsk krai.
The climate of Primorye is temperate monsoon. Winters are dry and cold with sunny weather; springs are long, cool, with frequent changes of temperature; summers are warm and humid; autumns as a rule are warm and dry.
The main peculiarity - lots of precipitation and fog in summer. Summer is the period of typhoons. The average temperature in July is about plus 17-21 degrees Celsius, in January - minus 8-23 degrees Celsius.
Primorsky Krai - Economy
A number of large and unique deposits of various minerals have been discovered in Primorye. This region has the most powerful mining industry in the Far East of Russia. There are about 100 coal deposits (2.4 billion tons), 30 deposits of tin, 15 deposits of complex ores containing zinc, lead, copper, and silver. Gold deposits are located both in the south of the region and in the north.
The largest in Russia deposit of boron is located near the town of Dalnegorsk. Several phosphorite deposits are discovered on the shelf of the Sea of Japan. There are also several small oil fields, large deposits of germanium. Mountain rivers have significant hydropower potential. Diverse forests cover about 80% of the territory.
Primorsky Krai is the most developed region in the Russian Far East due to its favorable geographic location and abundance of various natural resources. The local economy is based on such industries as mining, timber, fisheries, trade, shipbuilding and repairing.
Primorye has a relatively well-developed transportation network. The main traffic artery is the eastern section of the Trans-Siberian Railway. Due to its proximity to Japan and the Republic of Korea (imports of relatively cheap used cars), Primorsky Krai occupies the first place in Russia in the number of vehicles in the population.
The seaports of Primorsky Krai play an important role in the economy of Russia. The largest container terminals in the Russian Far East are located here. Regional and international air flights are carried out from Vladivostok International Airport.
Attractions of Primorsky Krai
Primorsky Krai is known for its rich flora and fauna, the variety of landscapes, the warm sea in the south, springs with healing water. All this creates favorable conditions for tourism development.
In Primorye, there are more than 500 unique natural sites (lakes, waterfalls, ancient extinct volcanoes, caves, bays). There are six nature reserves and three national parks:
- Far East Marine Reserve in the Gulf of Peter the Great,
- “Kedrovaya Pad” Reserve,
- Lazovsky Reserve,
- Sikhote-Alin Reserve included in the UNESCO World Heritage List,
- Ussuri Nature Reserve,
- Khanka Reserve,
- “The Call of the Tiger”,
- “Udege Legend”,
- “The Land of the Leopard”.
The following places of interest are also noteworthy:
- The Rope Park in Andreevka - a sports-tourist trail that includes elements of sports tourism and mountaineering,
- Shanduyskie lakes - mountain lakes located in the north of Primorye,
- “Black Sand” beach located near the village of Zarubino in Aleut Bay - an interesting beach with volcanic black sand, which is considered to be curative,
- The lighthouse on the southern tip of Gamov Peninsula. Gamov Peninsula is the pearl of Primorye and the Far East.
Primorye krai of Russia photos
Landscapes of primorsky krai.

On the shore of the Sea of Japan in Primorsky Krai
Author: Konstantin Tkachenko

Primorsky Krai scenery

Small river in Primorye
Author: Melnitsky Stanislav
Primorsky Krai views

Forest in Primorsky Krai

Primorye landscape

Village in Primorsky Krai
Author: Roman Mikulchik
The comments of our visitors
So has the problem of Customs and Border controls been sorted out. The Area has a good future if red tape does not stifle the economics of trade (and survival). Francis
- Currently 2.84/5
Rating: 2.8 /5 (201 votes cast)

IMAGES
VIDEO
COMMENTS
Lay down enough miles and your bike's chainring will eventually need a refresh. Here is how you can replace or repair your bike's chainring from home.
Video tutorial demonstrates how to replace chainrings on a regular 5-bolt, 3-chainring sprocket system.
In this video, we show you how to remove the crankset, remove old chainrings, replace the chainrings and reinstall the crankset.
Changing your bike's chainrings is a relatively simple task and requires just a couple of tools. Daniel Lloyd shows you how to do it in the latest of our Mai...
In today's maintenance video we will be replacing a direct mount chain ring. The same principle applies to all brands and direct mount systems. Watch now to ...
To replace a mountain bike chainring, begin by securing the bike to a stand, release the chain tension, disconnect and remove the chain, loosen the pinch bolts, and remove the crank bolts. Then remove the left and right crankarms and loosen the chainring bolts and chainrings. Then clean and lubricate the crank and other components, install the ...
To replace a chainring, you don't necessarily have to remove the chainset, but the job is easier to do off of the bike. We go through the process in this video on how to change a pressfit bottom ...
How to change chainrings - video. Replace bike chainrings with our easy step-by-step guide.
Type 1. Chain joined with special replacement pin. On this chain a special pin is inserted that takes the place of a stock pin. This is the way modern Shimano and Campagnolo chains work. The special replacement pin (sometimes 2) is supplied with the new chain so look for it and don't lose it when you open the package.
Hi all. I have a 2021 Rail 9 and am wanting to refresh the above parts. Do I need GX cassette. Also what about the chainring and chain? Thanks.
ISO Bosch Performance CX chainring lock ring tool. My 2021 Trek Rail's chainring came loose after one ride. The lock ring simply backed off, leaving the chainring wobbly. It was oily & gunky so I cleaned it up with spray contact cleaner, applied blue LocTite liberally and tightened it up with a drift & hammer (delicately).
A standard 20-spline BB tool and chainwhip are needed to remove the chainring. Retailers will need the TQ Service Dongle 5289577 and the TQ Dealer Service Tool software which can be downloaded at TQ's dealer portal.
Learn how to change you front chainring and get an update on my diet progression!Please like and subscribe to my channel. Chapters0:00 - Intro0:15 - Symptoms...
This toolset helps install and remove e*thirteen BB's (except BB92), chainring/spider lockrings, and cassette lockrings.
The PRO Quick Link Removal Tool is a tool designed for opening a quick-link in a chain. The PRO Quick Link Chain Removal Tool opens quick-links within a bicycle chain. The steel construction and ergonomic grip allows you to exert the pressure needed to remove even quick-links which have been installed for a long period of time.
chainring locknut was comparatively easy to remove. the unior 1671.2/4 is a perfect fit for that job and way cheaper than the bosch branded tool. got mine from germany, none of the uk shops had one.
Primorsky Krai, bordered by China (Jilin and Heilongjiang), North Korea (Rason) and Khabarovsk Krai, and the relatively warm—although freezing in winter—waters of the Sea of Japan, is the southeasternmost region of Russia, located between the 42° and 48° north latitude and 130° and 139° east longitude.
Vladivostok - Overview Vladivostok is a large city and seaport located in the Far East of Russia; political, cultural, scientific, educational, and economic center of the region; the administrative center of Primorsky Krai and the Far Eastern Federal District.
It's the Trek way. Awesome free shipping options All accessory orders over $49 ship to your home for free, and all accessory orders ship free to your local retailer for in-store pickup.
Sikhote-Alin Nature Reserve. Area: an area of 390,184 hectares (4,016 km²) and 2,900 hectares offshore. Location: the northern part of Primorsky Krai. The Sikhote-Alin Nature Reserve was founded in 1935. The reserve was originally established to protect sable populations that were on the verge of extinction.
Primorsky Krai - Overview Primorsky Krai (informally Primorye) is a federal subject of Russia located in the south-eastern part of the country, in the south of the Far East, part of the Far Eastern Federal District. Vladivostok is the capital city of the region.