

All Interactive Maps and Locations

Presenting: The Travel Medallion
Presenting: The Travel Medallion! is a Side Adventure quest in The Legend of Zelda: Tears of the Kingdom. While the Fast Travel Medallion as originally a DLC item in Breath of the Wild, you'll be able to access it free of charge in TotK, but only after completing certain quests.
- Prerequisite Quests:
- Camera Work in the Depths
- A Mystery in the Depths
- Hateno Village Research Lab
How to Start the Travel Medallion Quests
When speaking to Robbie at Lookout Landing, you'll learn that he was the main architect of the Purah Pad (though he did not get to put his name on it), and has a host of other features he'd like to upgrade the pad with, when he has the time.
While you can find the necessary component to complete with quest early, you won't be able to officially hand in the prototype item to get fixed until you've done some other legwork. This includes taking on the first Depths main quest after you complete Crisis at Hyrule Castle - Find Captain Hoz . The next Depths main quest, A Mystery in the Depths , can only be undertaken after you have completed at least one of the Regional Phenomena main quests in one of the four major regions of Hyrule.

Until that time, Robbie will remain in Lookout Landing, telling you he cannot return to his lab in Hateno until he's helped Josha with research in the Depths. However, after you gain the Autobuild ability from the second quest in the Depths and fix his broken hot air balloon, you can speak to him to initiate the Hateno Village Research Lab quest, and go find his lab in Hateno, far to the southeast.

Hateno is located in eastern Necluda, just below the Lanayru Mountain, and has a nearby shrine above the town called the Zanmik Shrine that you can fast travel to once activated.

The lab itself is located high on the hill to the east of town, requiring a good bit of walking.

Once you reach the top, speak to Robbie and he'll start the upgrades for the Purah Pad by installing a Shrine Sensor (you can't skip ahead to the Travel Medallion), which will involve you finding a shrine in a cave back down the hill.
Finding the Travel Medallion Prototype

Once you complete the testing on the Shrine Sensor, Robbie will give you a choice of upgrading the Sensor, or working to install two other features: the Hero's Path Mode and the Travel Medallion.
For the Travel Medallion, he won't be able to install it until he has the Travel Medallion Prototype, but it was left behind at his other research lab up in Akkala to the far northeast tip of the region.

If you haven't been there before, you'll need to take the road east from Woodland Stable and north past Lanayru Great Spring and Zora's Domain up the cliffs to Akkala, then take the right path down below the bridge and to Tarrey Town and towards East Akkala Stable, where this a fast travel spot nearby at Jochi-iu Shrine .

As you head up the long path past the stable to the lab, you'll find the place has been trashed and covered in Yiga signs, which isn't a great look. Try to interact with the door to the lab, and you'll be ambushed by two Yiga Assassins.

Fight carefully, as they can deal a lot of damage if you're still early in your adventure and don't have a lot of hearts. Try to rushdown the smaller one first by watching where he will teleport to next and ambush him. If he casts a spell, he'll drop down from above. For the bigger assassin, watch for his Earthwake technique to cause a gust of air you can paraglide up from then snipe him on the way down.

Once they've been defeated, head inside and you can rescue a clothing worker to get a piece of Yiga Armor. The real prize is located on a chest on the right side of the room - the Travel Medallion Prototype.

Bring this back to Robbie (who has helpfully activated a fast travel spot at his lab), and he will install the Travel Medallion to the Purah Pad, which allows you to select the medallion in your Key Items to drop a fast travel point wherever you like (with few exceptions if terrain is unstable).
How to Upgrade the Travel Medallion

Once installed, Robbie will remark that he can continue to upgrade the Travel Medallion, increase the number of gates - or spots you can drop at one time. However, in order to do so, you'll need to uncover the map-data locations by unlocking more Skyview Towers across Hyrule.
To get more charges for the Travel Medallion, you'll need the following amount of locations mapped:
Up Next: Walkthrough
Top guide sections.
- Walkthrough
- List of Side Quests and Side Adventures
- All Shrine Locations and Solutions
- Armor Sets and Locations
Was this guide helpful?

The Legend of Zelda: Tears of the Kingdom Walkthrough & Guides Wiki
- Main Quests
- Side Quests
- Side Adventures
- Tips & Tricks
- Interactive Map
Presenting: The Travel Medallion Walkthrough and How to Unlock

▲ Get Pristine Weapons from the depths or an amiibo ! △ All 1000 Koroks | All 4 Great Fairies ▲ All 81 Addison Signs | All 147 Caves | All 58 Wells △ Starter Tips: Farm Rupees | Starting Armor ▲ Advanced Tips: Best Weapons | Best Armor | Best Food

List of Contents
- How to Unlock
- Location and Rewards
- How to Complete
What is the Travel Medallion For?
- Related Guides
How to Unlock Presenting: The Travel Medallion
Complete hateno village research lab.

Complete Hateno Village Research Lab side adventure. Talk to Robbie again and choose the Travel Medallion when he asks which upgrade you want.
Hateno Village Research Lab Walkthrough
Part of Robbie Side Adventure Arc
Presenting: The Travel Medallion is a part of Robbie Side Adventure Arc. It's one of the Side Adventures that gets unlocked after finishing the Hateno Village Research Lab ! Robbie Side Adventures
Presenting: The Travel Medallion Location and Rewards
East necluda - hateno ancient tech lab.

The exact coordinates for this quest on the map are 3780, -2123, 0251 .
East Necluda Region Map
How to Complete Presenting: The Travel Medallion
Proceed to the area marked by robbie.

Robbie will mark a location in the northeastern part of Akkala Highlands. Proceed there to find the Akkala Ancient Tech Lab.
Defeat the Enemies Occupying the Akkala Ancient Tech Lab

Upon arriving, if you try to open the door, you will be greeted by enemies occupying the Ancient Tech Lab. Defeat them to get access inside.
Get the Travel Medallion Prototype

Open the chest found on the first floor of the Ancient Tech Lab to get the Travel Medallion Prototype.
Travel back to Hateno Ancient Tech Lab

Once you get the Travel Medallion Prototype, travel back to Hateno Ancient Tech Lab. Make sure to use the travel gate set by Robbie to make the journey faster.
Speak with Robbie to get the Travel Medallion

You'll be able to get the first Travel Medallion after talking with Robbie. Next, he will ask you to map 10 and then 15 regions in total to get the second and third Travel Medallion, respectively. If you have already mapped the 15 regions prior to this, simply talk to Robbie once again to get the last two Travel Medallions.
Get the Second and Third Travel Medallions

Once you have accomplished the tasks, return back to Robbie. It is recommended to map 15 regions before returning to save time going back and forth.
Setting up Fast Travel Gates

The Travel Medallion allows you to set up a travel gate at your current location. This is useful to quickly travel to your favorite place or a location you constantly return to.
You can access the Travel Medallion through your inventory under the Key Items tab.
The Legend of Zelda: Tears of the Kingdom Related Guides

List of All Walkthroughs
List of all side adventures.

We at Game8 thank you for your support.
In order for us to make the best articles possible, share your corrections, opinions, and thoughts about 「Presenting: The Travel Medallion Walkthrough and How to Unlock | Zelda: Tears of the Kingdom (TotK)」 with us!
When reporting a problem, please be as specific as possible in providing details such as what conditions the problem occurred under and what kind of effects it had.
Do you want to send this information?
Walkthrough Menu
- TotK Wiki Top
Walkthroughs
Tips and tricks.
- Beginner's Guide
New Features
- How to Confuse Enemies
- How to Cure Gloom
- How to Blind Enemies
Combat Guides
- Flurry Rush, Sneakstrike, and Deal Critical Damage
- Weapon Modifiers Explained
- How to Raise Defense
- Passive Abilities for Weapons Explained
- How to Upgrade Armor
- How to Defeat Shielded Enemies
- How to Throw Items and Materials
- How to Repair Weapons
- How to Get Earthwake Technique
- How to Increase Weapon Durability
- How to Parry
- How to Sneakstrike
- How to Perfect Dodge and Flurry Rush
- Stealth Mechanics Explained
Exploration Guides
- How to Get Cold Resistance
- How to Dive
- How to Shield Surf
- How to Break Cracked Rocks
- How to Use Minecarts
- How to Chop Down and Use Fallen Trees
- How to Cross the Freezing Water
- Fast Travel Guide: How to Warp
- Weather Effects and How to Change the Weather
- How to Get Heat Resistance
- How to Make an Axe
- How to Tame Wild Horses
- What to Do During a Thunderstorm
- How to Pass Time
- How to Light Up Dark Areas
- How to Get Epona
- How to Check Coordinates
- How to Climb Efficiently
- How to Break Wooden Boxes
- How to Make a Fire
- How to Make a Raft
- How to Make a Hover Bike
- How to Use Rocket Shields
General Tips and Tricks
- Zonai Dispenser Guide
- How to Get the Paraglider and All Paraglider Designs
- How to Expand Inventory
- Pony Points Guide
- How to Increase Health and Stamina
- Best Settings to Use
- How to Swap Hearts for Stamina
- amiibo Unlocks and List of Compatible amiibo
- Blood Moon Explained
- Missables and One-Time Events Guide
- Where to Find Wild Greens
- Whistle Effects and How to Use
- How to Farm Crops
- How to Heal
- Post Game Content Guide
- Kochi Dye Shop Guide: How to Recolor Armor
- Ending Explained: How to Watch the True Ending
- List of Unlockables
- How to Get Ganon's Horse
Farming Guides
- How to Farm Arrows
- Bubbul Gem Guide
- How to Get More Energy Cells
- Early Game Rupee Farming
- How to Farm Weapons
- Dragon Part Farming Guide
- How to Get Pristine Weapons
Notable Item Location Guides
- How to Get the Travel Medallion
- How to Get the Champion's Leathers Early
- How to Get the Hylian Shield Early
- How to Restore the Master Sword
- How to Get the Classic Green Tunic
- How to Get Ring Garland
- Misko's Treasure Locations
- How to Get Monster Medals
Puzzle Solution Guides
- How to Solve the Water Temple Spinning Tower
- Where to Find King Dorephan
- How to Solve the Gerudo Light Puzzle
- Voe and You Class Solutions
Map Location Guides
- All Stable Locations
- All Sage's Will Locations
- How to Get to Hyrule Castle
- How to Get to Lost Woods and Enter Korok Forest
- Great Fairy Locations and How to Unlock
- How to Find the Light Dragon: Location and Drops
- How to Find Farosh: Location and Drops
- How to Find Naydra: Location and Drops
- How to Find Dinraal: Location and Drops
- Satori Cherry Blossom Tree Locations and Guide
- How to Reach Abandoned Hebra Mine
- How to Unlock Royal Hidden Passage
- All Addison Sign Locations
- How to Get into Gerudo Secret Club
- All Coliseum Locations and Rewards
- Koltin Locations and List of Rewards
- Satori (King of the Mountain) Locations
- Where to Find Dondons
- All Forge Construct Locations
- How to Get to Toto Lake
- All Goddess Statue Locations
Tier List Guides
- Best Early Game Armor
- Best Armor Sets (Equipment)
- Best Weapons and Shields
- Best Horses
- Best Equipment for Exploration
- Best Fuse Materials and Weapon Combinations
- Best Modes of Travel
Glitches and Exploits
- List of Glitches and Exploits
- How to Duplicate Weapons, Bows, and Shields
- How to Duplicate Materials
- Can You Pet the Dogs?
- What Transfers Over From Breath of the Wild?
- Should You Play BotW First?
- What Happens When You Die?
- How Does Autosave Work?
- What Happened to Link's House?
- Do Materials Respawn?
- How to Change the Difficulty
- How to Lower and Raise Hylian Hood
- When Do Shops Restock?
- Is There a Master Mode?
- All Abilities and How to Unlock
Zonai Arm Abilities
Purah pad abilities.
- Travel Medallion
- Shrine Sensor
- Hero's Path Mode
Sage's Abilities
- Vow of Tulin
- Vow of Riju
- Vow of Sidon
- Vow of Yunobo
- Interactive Map of Hyrule and All Locations
- Hyrule Surface Map and Regions
- Hyrule Sky Map and Regions
- Hyrule Depths Map and Regions
- Korok Seed Map and How to Use
- All 147 Caves
- All 58 Wells
- All Lightroot Locations and Maps
- All Chasm Locations and Maps
- List of Towns and Settlements
- All Tower Locations
- Lookout Landing Tower
- Hyrule Field Tower
- Gerudo Highlands Tower
- Lindor's Brow Tower
- Rospro Pass Tower
- Pikida Stonegrove Tower
- Thyphlo Ruins Tower
- Eldin Canyon Tower
- Ulri Mountain Tower
- Rabella Wetlands Tower
- Sahasra Slope Tower
- Popla Foothills Tower
- Gerudo Canyon Tower
- Upland Zorana Tower
- Mount Lanayru Tower
- List of All Shrines
- All 31 Shrine Quests
Great Sky Island Shrines
- Ukouh Shrine
- In-isa Shrine
- Gutanbac Shrine
- Nachoyah Shrine
Hyrule Field Shrines
- Ren-Iz Shrine
- Tsutsu-um Shrine
- Riogok Shrine
- Kamizun Shrine
- Sepapa Shrine
- Taki-Ihaban Shrine
- Ishodag Shrine
- Teniten Shrine
- Tajikats Shrine
- Yamiyo Shrine
- Kyononis Shrine
- Jiosin Shrine
- Jojon Shrine
- Serutabomac Shrine
- Tenmaten Shrine
- Sonapan Shrine
- Usazum Shrine
- Kyokugon Shrine
- Tadarok Shrine
- En-oma Shrine
- Susuyai Shrine
- Mayachin Shrine
- Makurukis Shrine
- Runakit Shrine
- Sinakawak Shrine
- Jinodok Shrine
Tabantha Shrines
- Oromuwak Shrine
- Gatakis Shrine
- Nouda Shrine
- Wao-os Shrine
- Iun-orok Shrine
- Turakawak Shrine
- Gasas Shrine
- Mayausiy Shrine
- Ikatak Shrine
- Ga-ahisas Shrine
- Ganos Shrine
- Taunhiy Shrine
Hebra Shrines
- Sahirow Shrine
- Rutafu-um Shrine
- Otak Shrine
- Eutoum Shrine
- Sisuran Shrine
- Oshozan-u Shrine
- Mayaotaki Shrine
- Tauyosipun Shrine
- Orochium Shrine
- Ijo-o Shrine
- Tenbez Shrine
- Taninoud Shrine
- Mayaumekis Shrine
- Kahatanaum Shrine
Great Hyrule Forest Shrines
- Sakunbomar Shrine
- Pupunke Shrine
- Ninjis Shrine
- Musanokir Shrine
- Kikakin Shrine
- Kiuyoyou Shrine
- Ekochiu Shrine
- Mayam Shrine
- Simosiwak Shrine
Akkala Shrines
- Rasiwak Shrine
- Jochi-iu Shrine
- Igashuk Shrine
- Sinatanika Shrine
- Rasitakiwak Shrine
- Jochi-ihiga Shrine
- Gatanisis Shrine
- Domizuin Shrine
- Kamatukis Shrine
- Gemimik Shrine
- Gikaku Shrine
- Mogisari Shrine
- Natak Shrine
Eldin Shrines
- Kisinona Shrine
- Minetak Shrine
- Mayak Shrine
- Sibajitak Shrine
- Sikukuu Shrine
- Timawak Shrine
- Mayachideg Shrine
- Sitsum Shrine
- Marakuguc Shrine
- Kadaunar Shrine
- Moshapin Shrine
- Jiotak Shrine
- Kimayat Shrine
- Isisim Shrine
- Momosik Shrine
Lanayru Shrines
- Ihen-a Shrine
- Mogawak Shrine
- Jonsau Shrine
- Maoikes Shrine
- Joniu Shrine
- Apogek Shrine
- Yomizuk Shrine
- Kurakat Shrine
- Morok Shrine
- O-ogim Shrine
- Jikais Shrine
- Tukarok Shrine
- Zakusu Shrine
- Igoshon Shrine
- Mayanas Shrine
- Jirutagumac Shrine
- Sihajog Shrine
Necluda Shrines
- Susub Shrine
- Zanmik Shrine
- Jochisiu Shrine
- Jogou Shrine
- Anedamimik Shrine
- Tokiy Shrine
- Utojis Shrine
- Sifumim Shrine
- Bamitok Shrine
- Marari-in Shrine
- Eshos Shrine
- Makasura Shrine
- Mayahisik Shrine
- Joju-u-u Shrine
- Josiu Shrine
- Ukoojisi Shrine
- Kumamayn Shrine
- Yansamin Shrine
Faron Shrines
- Jiukoum Shrine
- Ishokin Shrine
- Utsushok Shrine
- Joku-u Shrine
- Joku-usin Shrine
Gerudo Shrines
- Soryotanog Shrine
- Mayatat Shrine
- Miryotanog Shrine
- Suariwak Shrine
- Otutsum Shrine
- Mayamats Shrine
- Rakakudaj Shrine
- Irasak Shrine
- Karahatag Shrine
- Chichim Shrine
- Siwakama Shrine
- Motsusis Shrine
- Kitawak Shrine
- Turakamik Shrine
- Rotsumamu Shrine
- Siyamotsus Shrine
- Mayasiar Shrine
- Rakashog Shrine
- Kudanisar Shrine
- List of All Bosses and Minibosses
- Master Kohga
- Marbled Gohma
- Sludge Like
- Queen Gibdo
- Seized Construct
- Phantom Ganon
- Demon King Ganondorf and Demon Dragon
- Obsidian Frox
- Flame Gleeok
- Thunder Gleeok
- Frost Gleeok
- King Gleeok
- Flux Construct
- Flux Construct II
- Flux Construct III
- Stone Talus
- Stone Talus (Luminous)
- Battle Talus
- All Weapons and Equipment
- List of All One-Handed Weapons
- List of All Two-Handed Weapons
- List of All Spears
- List of All Bows
- List of All Shields
- All Champion Weapons
- List of amiibo Weapons
- List of All Armor
- List of All Headgear
- List of All Body Armor
- List of All Legwear
Temples and Dungeons
- All Temple Locations and Dungeon Guides
- Wind Temple
- Lightning Temple
- Fire Temple
- Water Temple
- Fifth Temple
- List of All Items
- List of All Materials
- List of All Zonai Devices
- List of All Key Items
- Basic Cooking Guide
- Advanced Cooking: Adding Buffs
- List of Cooked Dishes and Recipes
- List of Roasted Dishes and Recipes
- List of Frozen Dishes and Recipes
- List of Elixirs and Recipes
- All Monsters and Enemies
- Gloom Hands
- All Yiga Schematics and Schema Stones
- New and Returning Characters
- Latest News and Updates
- Ver. 1.2.0 Update Patch Notes
- New Zelda and Ganondorf amiibo
- Ver. 1.1.2 Update Patch Notes
- Release Date Guide
- Pre-Order Bonuses
- Will There Be DLC?
- Story Summary and Timeline
- Easter Eggs and Secrets
- New Features & Gameplay
- Will the Champions Appear?
- Is the Hookshot a Useable Item?
- Will There Be a Demo?
- Multiplayer Features
- List of Official Trailers
- Why Is the Master Sword Broken?
- How Long to Beat
- 3/28 Gameplay Trailer Analysis
- TOTK Edition Switch OLED
- Four New Abilities Introduced
- Sky Islands Explored
- Who are the Zonai?
- 4/13 Final Trailer Analysis
- Where is Daruk's Successor?
- Is Demise Returning?
- All Voice Actors Cast
- Is TOTK the Last Zelda Game?
- Preload Date and Guide
- Collector's Edition Differences
- How to Get TOTK Cheaper
- Hands-On Previews: Everything We Learned
- Where to Pre-Order Guidebook
- Tears of the Kingdom 1.1 Patch Notes
- Are Hearty Durians Still in the Game?
- What Happened to the Divine Beasts?
- Where is Kass?
- Message Boards
- Game Help & Questions (8)
- Discussion & Review Board (6)
- Fan Theory Sharing Board (7)
Other Zelda Wikis
- Breath of the Wild
- Link's Awakening
- Hyrule Warriors: Age of Calamity
- Skyward Sword HD
Japanese Wiki (日本語版)
- ティアーズオブザキングダム攻略
- 1 Release Date: When Does the Brea...
- 2 How to Get the Evil Spirit Set: ...
- 3 Great Hyrule Forest Depths Regio...
- 4 How to Get Feathered Spear: Stat...
- 5 Walnot Mountain Cave Bubbulfrog ...
- We could not find the message board you were looking for.
Gaming News

Game8's Indie Spotlight

RAID Shadow Legends Promo Codes Give $100 Worth of Bonuse...

Nintendo Announces New Indie World Showcase

Hades 2 "Early Early Access" Sign Ups Open for a Phase Ca...
More Gaming News
Popular Games

Genshin Impact Walkthrough & Guides Wiki

Honkai: Star Rail Walkthrough & Guides Wiki

FF7 Rebirth Walkthrough & Guides Wiki

Persona 3 Reload Walkthrough & Guides Wiki

Palworld Walkthrough & Guides Wiki

Pokemon Scarlet and Violet (SV) Walkthrough & Guides Wiki

Monster Hunter Rise: Sunbreak Walkthrough & Guides Wiki

Unicorn Overlord Walkthrough & Guides Wiki

Pokemon UNITE Walkthrough & Guides Wiki

Fire Emblem Heroes (FEH) Walkthrough & Guides Wiki
Recommended Games

Elden Ring Walkthrough & Guides Wiki

Hyrule Warriors: Age of Calamity Walkthrough & Guides Wiki

New Pokemon Snap Walkthrough & Guides Wiki

Pokemon Legends: Arceus Walkthrough & Guides Wiki

Super Smash Bros. Ultimate Walkthrough & Guides Wiki

FF7 Remake Walkthrough & Guides Wiki

The Legend of Zelda: Breath of the Wild Walkthrough & Guides Wiki
All rights reserved
© Nintendo. The Legend of Zelda and Nintendo Switch are trademarks of Nintendo. The copyrights of videos of games used in our content and other intellectual property rights belong to the provider of the game. The contents we provide on this site were created personally by members of the Game8 editorial department. We refuse the right to reuse or repost content taken without our permission such as data or images to other sites.
- Popular Articles

- Breath of the Wild
- Tri Force Heroes
- A Link Between Worlds
- Skyward Sword
- Spirit Tracks
- Phantom Hourglass
- Twilight Princess
- The Minish Cap
- The Wind Waker
- Oracle of Ages
- Oracle of Seasons
- Majora’s Mask
- Ocarina of Time
- Link’s Awakening
- A Link to the Past
- The Adventure of Link
- The Legend of Zelda
- Fan Content
- Nintendo News
- Artists of Legend
- Best Zelda Ever
- Caption Contest
- Fan Fiction Friday
- Hyrule Compendium
- Inspired By Zelda
- Photoshop Contest
- The Champions’ Cast
- Zelda Warfare
- Zelda Runners

- Daily Debate
- All Original Content
- Diversity in Zelda
- Game Review
- Legendary Pictures
- The Zelda Cast
- Tier Force Heroes
- Facebook (Dungeon)
- Facebook (Informer)
Presenting: The Travel Medallion!
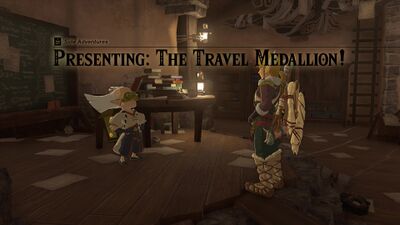
Presenting: The Travel Medallion! is a Side Adventure in Tears of the Kingdom .
- 2 Requirements
- 3 Walkthrough
- 4 Adventure Log
- 6 References
With Robbie returns to the Hateno Ancient Tech Lab , he has several upgrades he wants to make to the Purah Pad even after installing the sensor . Installing Travel Medallions requires the Travel Medallion Prototype from the Akkala Ancient Tech Lab , however, which has been taken over by the Yiga Clan .
When Link drives out the Yiga, he can collect the prototype and return to the Hateno Village lab, where Robbie upgrades and installs it. He can also install a second medallion with map data for ten Skyview Tower regions, and a third with data for all fifteen regions. Once all three medallions have been installed, the quest is complete.
Requirements
To unlock the mission, Link will first need to complete the Hateno Village Research Lab and gain the Sensor ability.
Walkthrough
- After completing the Hateno Village Research Lab quest, speak with Robbie and ask about the Travel Medallion to begin the quest. Robbie will task Link with traveling to the Akkala Ancient Tech Lab to grab the Prototype needed to upgrade the Purah Pad .
- When Link approaches the Akkala Ancient Tech Lab, he'll be confronted by a Yiga Blademaster and a Yiga Footsoldier . After defeating them, inside he'll find Konba , a Hylian who had been kidnapped by the Yiga and force to make Yiga clothing. He will give Link the Yiga Armor for the Infiltrating the Yiga Clan quest.
- Link can open the treasure chest here to get the Travel Medallion Prototype.
- Take the prototype to Robbie, who upgrades it to a functional Travel Medallion .
- After obtaining map data for ten regions using their Skyview Towers , Robbie will give Link a second travel medallion.
- After completing the surface map (fifteen regions in total), Link is given a third and final travel medallion by Robbie.
Adventure Log

Speak with Robbie to begin the quest.
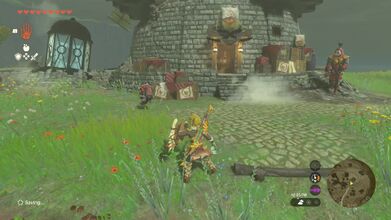
Fight the Yiga Footsoldier and Yiga Blademaster
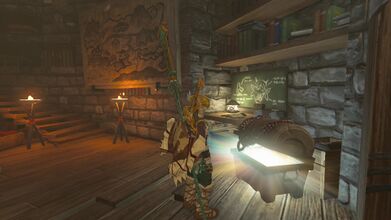
Open the chest at the Akkala Ancient Tech Lab to get the Travel Medallion Prototype
- Tears of the Kingdom Side Adventures
Navigation menu
- Patch Notes
- Hardware and Tech
- PC Invasion Staff
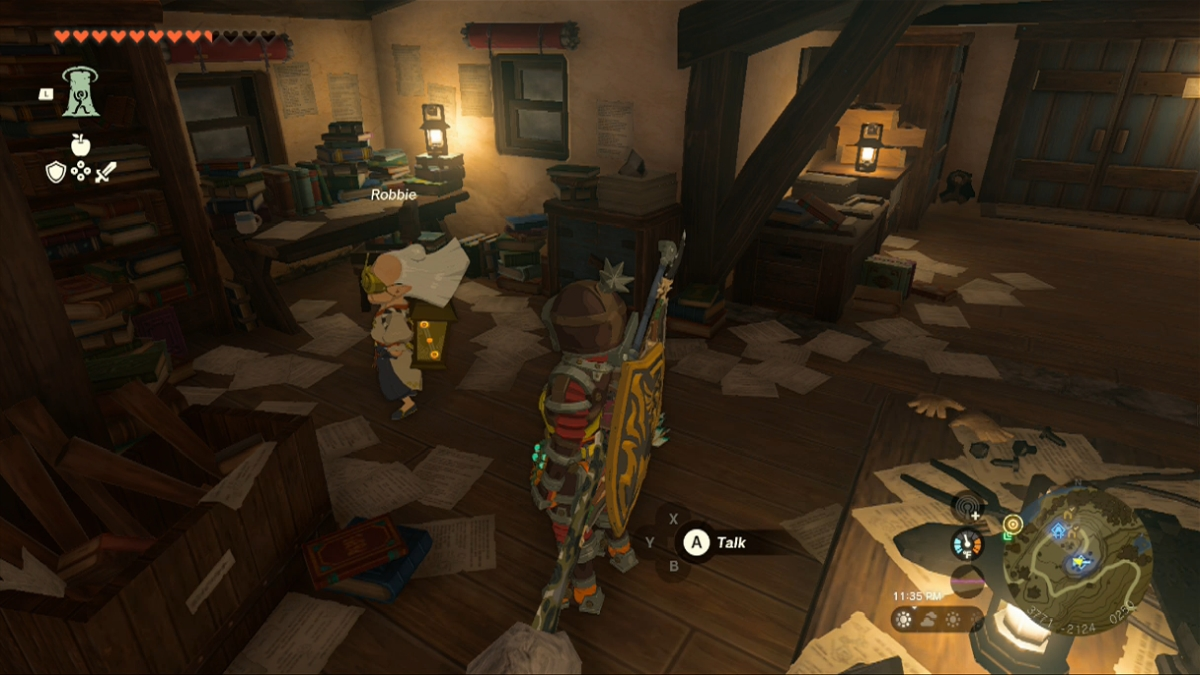
How to get and use the Travel Medallion in Tears of the Kingdom (TotK)
Hyrule as seen in The Legend of Zelda: Tears of the Kingdom is an enormous place. Often, you can warp quickly around it by using activated shrines and towers to fast travel. However, there sometimes are remote locations you have reason to visit regularly. That’s when a particular upgrade comes in handy. Here is our guide explaining how to get and use the Travel Medallion in The Legend of Zelda: Tears of the Kingdom .
Tears of the Kingdom – how to get and use the Travel Medallion
The Travel Medallion is a handy item you can use to warp directly to the location of your choosing, even if you haven’t found a nearby shrine or skytower to activate. Normally, you might have to hike a long distance, which can be tedious or dangerous. If you have the medallion, however, you can save yourself that hassle. To get the Travel Medallion, complete a task for Robbie at the Hateno Research Lab.
To use the Travel Medallion, access it from the Key Items menu and place one at your current location. You can then warp to that point whenever you like.
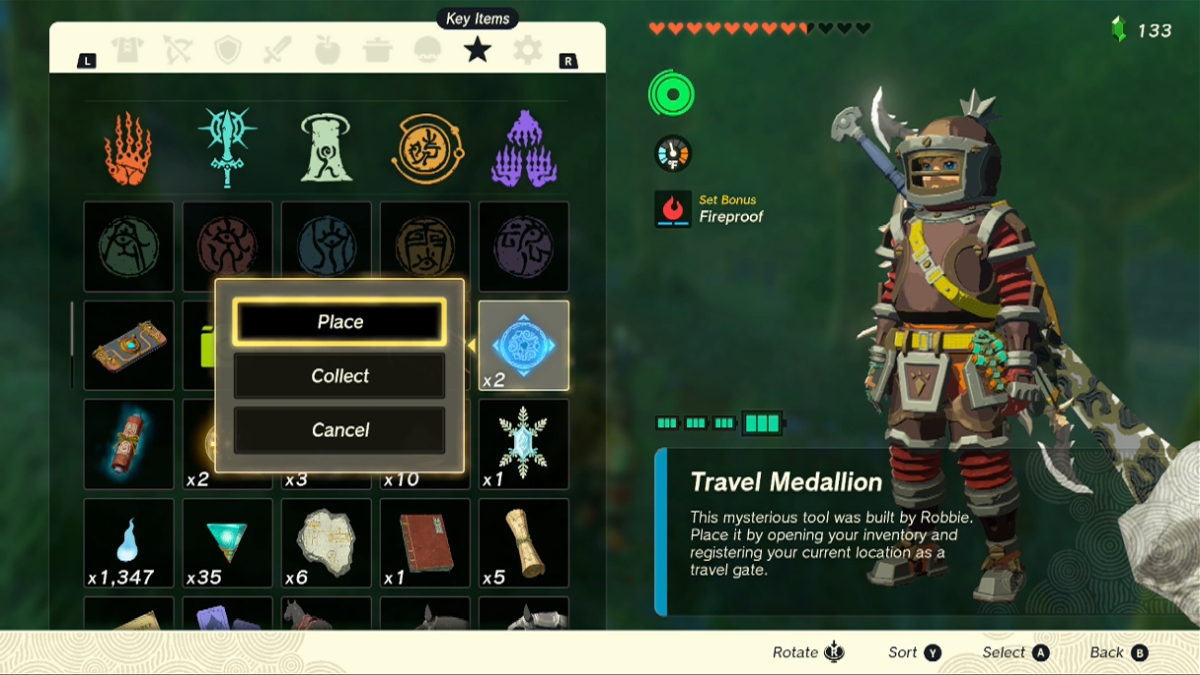
Screenshot by PC Invasion
When you first meet Robbie , he shares a room with Josha in Lookout Landing . The two researchers present quests early in the game, as you discover how to get the Autobuild ability . After you complete that objective and deal with Robbie a bit more, he takes off to his research center.
Find Robbie at the Hateno Ancient Tech Lab on the hill outside Hateno Village , which is north of the Necluda Sea in the southeast (check our guide telling where to find Hateno Village if you need further assistance).
When you talk to Robbie at the Hateno Ancient Tech Lab, ask him about the Travel Medallion. He sends you to clear out the Ancient Tech Lab in the Deep Akkala region (it’s located a short distance south of the world map’s northeastern corner). Once you defeat the Yiga Clan members that have taken over the lab, open the treasure chest they guarded to find the Travel Medallion Prototype . Take it back to Robbie, who gets it working for you.
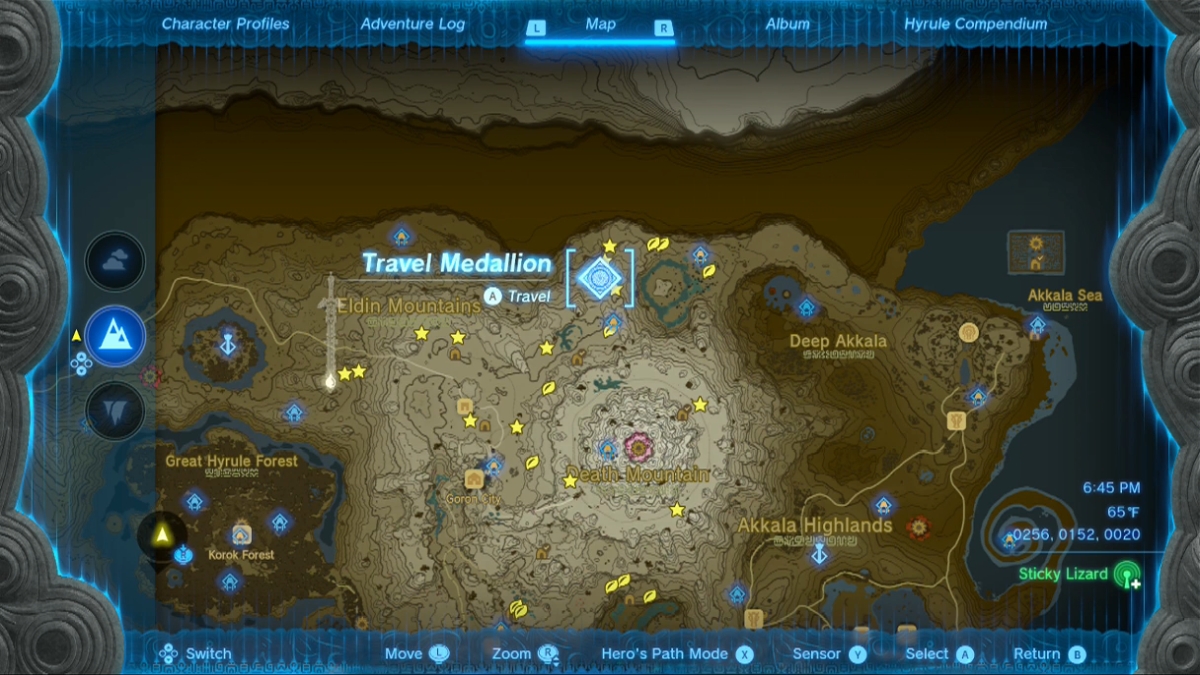
By default, you can use the Travel Medallion to set one convenient fast travel point. As you activate skytowers and review more of the world map, Robbie upgrades the Travel Medallion. This grants you as many as three uses. By the time I met him, I had already activated every skytower, so I didn’t have to wait.
I suggest placing a Travel Medallion north of Death Mountain , near where you can find four Rock Octoroks . They offer you a way to repair weapons and shields . Once you venture into the Depths to meet Ganondorf , you might also set a medallion near the point of no return, so you can conveniently return once you have supplies. A third use might be to set one somewhere near a remote location where you like to farm rare items. If you ever decide you don’t like where one is placed, visit its location and retrieve it to use it elsewhere. Travel Medallions can prove quite handy.
The Legend of Zelda: Tears of the Kingdom is available on the Nintendo Switch.
The Legend Of Zelda: Tears Of The Kingdom - How To Get The Travel Medallion
The Travel Medallion is a helpful item in The Legend Of Zelda: Tears of the Kingdom. It lets you create custom teleport points, here's how to get it.
Quick Links
How to start the travel medallion quest line, where to find the travel medallion, how to upgrade the travel medallion.
The Travel Medallion returns in The Legend of Zelda: Tears of the Kingdom , but it's not a DLC-locked item this time around. There is a quest chain involving Robbie that lets you access this Key Item, allowing you to create your own fast travel spots.
Related: The Legend Of Zelda: Tears Of The Kingdom - Satori Cherry Blossom Trees Guide
You can grab the Travel Medallion from Robbie after you complete his first quest and unlock the Photo mode on your Purah Pad. When you first unlock the Travel Medallion, it can create one fast travel point. This can be further upgraded by Robbie two more times, giving you a total of three custom fast-travel points that can be placed wherever you want.
When you first get to Lookout Landing, you want to continue along the main quest until you unlock the one called Regional Phenomena.
With this unlocked, you should be able to talk to Robbie and Josha. Upon talking to them, you should begin a quest called Camera Work in the Depths.
This quest requires you to dive into a chasm and explore the depths, unlocking the Photo mode in the Purah Pad in the process. Complete Josha and Robbie's request to photograph statues in the Depths and return to them.
With that done, you must complete the follow-up quest called A Mystery in the Depths, which unlocks the Autobuild function. With Autobuild unlocked, return to Lookout Landing and repair the makeshift balloon transporter.
Robbie will mention he is moving back to Hateno Village, taking up residence in the Hateno Ancient Tech Lab, and that you should look for him there.
To continue his quest, this should be your next destination. Take your time, or beeline directly there.
When Robbie moves to Hateno Village, make your way over there and visit the lab on the top of the hill. Here Robbie will talk to you about upgrading your Purah Pad as well as unlocking the Shrine Locator for you.
One such upgrade Robbie provides is the Travel Medallion, which he explains is currently elsewhere. After you ask him about it, he will tell you to go to the Akkala Region north of Hateno Village, specifically to the Akkala Ancient Tech Lab.
Travel to the Akkala Region and go to the Ancient Tech Lab, just up the road from the East Akkala Stables. When you arrive, knock on the door to trigger a Yiga Clan ambush.
Defeat these knuckleheads, and you'll be able to go inside the lab. When you enter, head for the chest to the right that holds the Travel Medallion.
You should talk to the man on the left side of the room to obtain a piece of the Yiga Clan armour set , the Yiga Armour.
With the prototype in hand, travel back to Robbie in Hateno Ancient Tech Lab . Talk to him about the Travel Medallion Prototype, and he will reward you with a functioning Travel Medallion.
Now you can use the Travel Medallion to place custom fast-travel points . To do this, select it from your Key Items and use it wherever you want. This will create a gate you can now return to or replace at any time.
You can upgrade the Travel Medallion two more times, giving you a total of three custom fast-travel points. These fast-travel points can be placed anywhere in the overworld, even in the Depths.
When you place the Travel Medallion, you can remove your previously-set fast-travel point by selecting it in the Key Items menu and clicking Collect.
This will bring up your Map and you can choose which ones to remove.
To upgrade the medallion, Robbie asks you to give him ten map-data locations and return to him. When Robbie says map-data locations, he's referring to activating Skyview Towers.
This means each time you reveal an area on the map will count towards it. Revealing and using all 15 Skyview Towers will let you upgrade the Travel Medallion again, giving it three charges.
NEXT: The Legend Of Zelda: Tears Of The Kingdom – How To Get Diamonds
DualShockers
The legend of zelda: tears of the kingdom - how to unlock the travel medallion.
TTravel Medallion in Zelda: Tears Of The Kingdom makes fast travel a lot easier. Well, here's how you can unlock these in the game.
Quick Links
How to obtain the travel medallion, how to unlock the other two travel medallions, how to use the travel medallion.
The Kingdom of Hyrule is massive. With the new addition of the Sky Islands and The Depths within The Legend of Zelda: Tears of the Kingdom , it can take forever to cross long distances on the map. Even with fast travel locations, sometimes, there is somewhere you wish you could get to quicker.
RELATED: The Legend Of Zelda: Tears Of The Kingdom - How To Exchange Heart Containers For Stamina Vessels
One way that you can solve this dilemma is by unlocking the Travel Medallions. These will allow you to place them down anywhere (the surface, The Depths, or the Sky Islands) and fast travel to them at any time.
If you want to obtain the Travel Medallion, first, you will need to obtain the quest "Hateno Village Research Lab" from Robbie at Lookout Landing . He will ask you to meet him at his old lab in Hateno Village.
Once there, speak to Robbie, and he will tell you about the Travel Medallion. It allows you to place it anywhere and fast travel to it later. However, he cannot help you. His prototype for the Travel Medallion is back at the Akkala Research Lab . The only problem is that it has been taken over by the Yiga Clan.
Traveling to the area and walking up the path to the Akkala Research Lab can be dangerous. There are a lot of Monsters that you will cross along your journey.
Once you reach the research lab, you will see signs everywhere saying it is now a Yiga Clan hideout. Once you walk up to the front door and interact with it, you will be ambushed by two Yiga Clan members . Remember, if they disappear, look for the red glowing area. This indicates where they will appear next.
After defeating them, you will find a chest inside the research lab; open it up to obtain the Travel Medallion Prototype. You can also find the Yiga Clan Armor in this location.
With the Travel Medallion Prototype in hand, you're ready to head back to the Hateno Village Research Lab and report back to Robbie.
RELATED: The Legend Of Zelda: Tears Of The Kingdom – How To Get The Dark Armor Set & The Depths Armor Set
Once you return to Robbie, he will mention that he believes he can upgrade your Travel Medallion to feature two more. However, he needs you to do him a favor first.
In order to obtain your second Travel Medallion, you must visit 10 of the Skyview Towers around Hyrule . These are the large towers that act as fast-travel locations and allow you to fill in your map. If you want your third Travel Medallion, you must find all of these Skyview Towers.
Once you have completed that, Robbie will be surprised. He will go ahead and upgrade your Travel Medallion.
After you have obtained your Travel Medallion, you can use it right away to mark any place as a fast travel location.
All you need to do is go to the Key Items portion of your inventory . Once there, find the Travel Medallions and select them. It will then ask you if you would like to place them. Once they are placed, you'll have a new fast-travel location!
NEXT: The Legend of Zelda: Tears Of The Kingdom - How To Get Biggoron's Sword

The Legend of Zelda: Tears of the Kingdom - Presenting: The Travel Medallion! Side Adventure Walkthrough
June 1, 2023 Golden Toast The Legend of Zelda: Tears of the Kingdom 0
Presenting: The Travel Medallion! Side Adventure Walkthrough for The Legend of Zelda: Tears of the Kingdom (Zelda: TotK)
This page contains a walkthrough and guide for Presenting: The Travel Medallion! for The Legend of Zelda Tears of the Kingdom (TotK) , including side quest or side adventure availability, side quest client, mission location, how to unlock, rewards, and an in-depth guide on how to clear it.
Please note that we are still updating this page and more information will be added later.
Presenting: The Travel Medallion! Overview
The Legend of Zelda: Tears of the Kingdom All Side Adventures List
Presenting: The Travel Medallion! Walkthrough
Presenting: the travel medallion strategy guide, defeat the yiga blademaster and yiga footsoldier.
After speaking with Robbie and obtaining the information about the Purah Pad upgrade, you need to head to the Akkala Ancient Tech Lab to get the upgrade, but you need to fight with the Yiga Blademaster and Yiga Footsoldier.
Link will also meet Konba, and he will give the Yiga Armor.
Open the treasure chest
The Treasure Chest has the Travel Medallion Prototype inside and this is the upgrade for the Purah Pad. After getting it, report back to Robbie.
Other Quests

Main Quests

Side Quests

Side Adventures


Shrine Quests
The legend of zelda: tears of the kingdom recommended article list.

The Legend of Zelda Series
- the legend of zelda tears of the kingdom
Leave a Reply Cancel reply
Be the first to comment.
© 2016 Samurai Gamers
GameWith uses cookies and IP addresses. By using our site you agree to our privacy policy .
- All Weapons
- Best Recipes
- Master Sword
TotK | Travel Medallion Guide: How To Get & Locations To Place | Zelda Tears Of The Kingdom

- Main Quest Walkthrough Guide
- Best Weapons List & How To Get
- Effective Way To Farm Rupees
Travel Medallion Guide for Zelda Tears Of The Kingdom (TotK). See how to get, where to place, best locations, money farming, and how to increase the Travel Medallions!
Table of Contents
- How To Get The Travel Medallion
- Best Location To Place
- How To Increase
Travel Medallion - How To Get
Complete "presenting: the travel medallion".

The Travel Medallion can be obtained from Robbie upon completing the Side Adventure "Presenting: The Travel Medallion!". Note that the quest "Hateno Village Research Lab" must be cleared to trigger the "Presenting; The Travel Medallion".
Beware Of The Battle With Yiga Clan

In the adventure, Presenting: The Travel Medallion!, you are required to go to the Akkala Ancient Tech Lab and have a battle with the Yiga Clan. These enemies deal high damage so make sure to bring some powerful weapons and recovery items!
Recommended Locations To Place Travel Medallion
Necluda sky archipelago (fairy island) (recommended).

The island in the Necluda Sky Archipelago (above East Necluda) is an area in which you can find several useful items for your exploration, such as Fairy, Tireless Frog, Fleet-Lotus, and Hearty Bass. These materials respawn after a certain period of time, allowing you to get them frequently.
How To Go To Necluda Sky Archipelago
Gerudo's colossal fossil.

Gerudo's Colossal Fossil is located behind the Lightning Temple. Gerudo's Colossal has not only fairies like the Fairy Island but also many useful items for exploration/combat such as Bomb Flower and Brightbloom.
Tarrey Town (Break-a-Part Shop)
The Break-a-Part Shop in Tarrey Town allows you to disassemble Fused items (Unfuse) without losing materials, which is why it is recommended to place a Travel Medallion for repairing Champions' weapons.
In front Of Bear+Bokoblin (North Of Sikukuu Shrine)
Bokoblins riding bears appear at the northern part of Sikukuu Shrine. You can get as much Raw Meat as you want by defeating only the bears , so it is recommended that you place a Travel Medallion here for money farming.
Earn Money Using Travel Medallion
How to use travel medallion, place the travel medallion from key items.

To use the Travel Medallion, open the "Key Items" from the Inventory by pressing the + button, and then select the Travel Medallion. Upon selecting "Place", you may set the Travel Medallion to where you are currently standing
Travel To The Place From The Map

When you want to travel to the Travel Medallion location, simply select it on the map and fast travel to there like the Shrine or Skyview Tower.
Collect The Travel Medallion To Remove It

When you want to remove the Travel Medallion, just move the cursor on the map and then select "Collect". The Medallion you collect can be placed on another location.
How To Increase Travel Medallion
Increases upon unlocking skyview tower.

The number of Travel Medallions increases with the number of Skyview Towers that you have unlocked. The number that can be increased is up to 3. Talk to Robbie after unlocking Skyview Towers in each area.
Tears of the Kingdom Related Articles

Useful Articles From Beginning To Endgame
Link's new abilities, things to know, purah pad - uses & abilities, equipment related, farming & cooking, horse related, map related, zonai related, combat, skills, and controls, system and others.
- vote voted votes
Your feedbacks will be checked by our staffs and will be attended to accordingly. Please be advised that we may not reply to every individual feedbacks.
By clicking Submit you are agreeing to the Terms of Use. *Offensive, insulting or inappropriate use of forum may lead to ban/restriction. To avoid griefing, you will not be able to post or report for the first %d hours upon visiting this forum for the first time.
Looks like nobody posted here yet...
- Genshin | 4.6 Update Banner & Release Date
- Genshin | Arlecchino Release Date Guide
- Palworld | Breeding Combos Calculator
- Palworld | Bellanoir - How to Get and Breed
- Palworld | Bellanoir Libero - How to Get and Breed
Copyright © Nintendo. All Rights Reserved.

- Tears of The Kingdom Wiki Guide
- All Main Quest Guides
- Great Sky Island Guide
- Find Princess Zelda
- The Closed Door
- To the Kingdom of Hyrule
- Crisis at Hyrule Castle (1st)
- Regional Phenomena
- Impa And The Geoglyphs
- Tulin of Rito Vilage
- Camera Work In The Depths
- A Mystery In The Depths
- Yunobo of Goron City
- Sidon of the Zora
- Sludge-Covered Statue
- Restoring the Zora Armor
- The Broken Slate
- Clues To The Sky
- Riju of Gerudo Town
- Dragon's Tears
- Crisis at Hyrule Castle (2nd)
- Find the Fifth Sage Walkthrough Guide
- Guidance From Ages Past
- Left-Leg Depot Walkthrough
- Left-Arm Depot Walkthrough
- Right-Leg Depot Walkthrough
- Right-Arm Depot Walkthrough
- Trail Of The Master Sword
- Recovering the Hero's Sword
- Destroy Ganondorf
- How To Unlock True Ending
- Post Game Guide
- Presenting: The Travel Medallion
- Presenting: Hero's Path Mode
- Presenting: Sensor +
- Filling Out Compendium
- Hestu's Concerns
- Potential Princess Sighting
- Zelda's Golden Horse
- Princess Zelda Kidnapped?!
- The Blocked Well
- The Beckoning Woman
- The Flute Player's Plan
- Serenade To The Great Fairy
- Gourmets Gone Missing
- The All-Clucking Cucco
- The Beast and the Princess
- An Eerie Voice
- The Missing Farm Tools
- White Goats Gone Missing
- For Our Princess!
- Serenade to Kaysa
- The Hornist's Dramatic Escape
- Serenade to Mija
- Honey, Bee Mine
- Serenade to Cotera
- Mattison's Independence
- A Call From The Depths
- Who Goes There?
- A Deal with the Statue
- The Hunt For Bubbul Gems!
- The Owl Protected By Dragons
- The Corridor Between Two Dragons
- Team Cece? Team Reede?
- A Letter to Koyin
- A New Signature Food
- Cece's Secret
- Master Kohga of the Yiga Clan
- All Temple Walkthrough
- Wind Temple
- Water Temple
- Fire Temple
- Lightning Temple
- Marbled Gohma
- Queen Gibdo
- Phantom Ganon
- Seized Construct
- Sludge Like
- Ukouh Shrine
- In-isa Shrine
- Gutanbac Shrine
- Skyview Tower List
- Lindor's Brow Skyview Tower
- Rospro Pass Skyview Tower
- Pikida Stonegrove Skyview Tower
- Thyphlo Ruins Skyview Tower
- Sahasra Slope Skyview Tower
- Upland Zorana Skyview Tower
- Ulri Mountain Skyview Tower
- Eldin Canyon Skyview Tower
- Popla Foothills Skyview Tower
- Rabella Wetlands Skyview Tower
- Mount Lanayru Skyview Tower
- Hyrule Field Skyview Tower
- Gerudo Canyon Skyview Tower
- Gerudo Highland Skyview Tower
- Hyrule Interactive Map
- Depths Map - Lightroot
- How To Complete Map 100%
- Korok Seeds Locations
- Shrine Quest List
- Create Your Own Memo Map
- Boss Map - All Locations
- Chasm Map - All Locations
- Old Map - Treasures & Rewards
- Misko's Treasure Locations - Map Tool
- Ancient Observation Deck Locations
- Mine Locations - Map
- All Coliseum List
- Horned Statue Location
- How To Buy A House
- Well Locations List
- Rock Octorok & Effect of Weapon
- Stable Locations
- Shadow Soldier Locations
- Addison's Hudson Signs
- Sage's Will Locations
- Forge Construct Locations
- Schematic Locations
- Great Fairy Locations
- Goddess Statue Locations
- Geoglyphs(Dragon's Tears)
- Memories List Location
- Poe Location
- Bargainer Statue
- Malanya Spring
- Hyrule Compendium
- Tarrey Town
- Lurelin Village
- Kakariko Village
- Kara Kara Bazaar
- Underground of Lookout Landing
- Gerudo Town
- Eventide Island
- Lucky Clover Gazette
- Zora's Domain
- Death Mountain
- Hyrule Castle
- Hateno Village
- Bedrock Bistro
- Korok Forest
- Woodland Stable
- Thunderhead Isles
- Rito Village
- YunoboCo HQ
- Forgotten Temple
- Link's House
- Gerudo Secret Club
- Stone Talus
- Battle Talus
- Frost Talus
- Igneo Talus
- Flux Construct
- Silver Lynel
- Gloom Hands
- White Dragon
- Flux Construct Core
- Weather Guide
- How To Cross River & Sail
- How To Recover Hearts
- How To Use Cart
- Get To Sky Island
- How To Get Dragon Materials
- How To Use Garden
- Early Game Guide
- Tips, Tricks and Life Hacks
- Heart Container & Stamina Vessel
- Inventory Expansion
- How To Cook
- How To Cross Iron Bars
- Paraglider Guide
- Spicy Recipes
- Hearty Foods
- Stamina Food
- Gloom Resistance Food
- Attack Up Food
- Defense Up Foods
- Heat Resistance Foods
- Hearty Mushroom Skewer
- Hearty Fish Skewer
- Hearty Fried Wild Greens
- Shock Resistance
- Slip Resistance
- Fireproof Resistance
- Cold Resistance
- Heat Resistance
- How To Cure Gloom
- Lightning Protection
- How To Break Wooden Boxes
- How To Catch Fish
- Remove Black Sludge
- Catch Dandelion Seeds
- Blood Moon Guide
- Traveling Guide
- Satori Guide
- Campfire Guide
- How To Get & Upgrade Sage
- How To Pass Time
- How To Find Koltin
- How To Find King Dorephan
- Camera Guide
- Hero's Path Mode
- Shrine Sensor
- Travel Medallion
- Battle Tips & Controls
- Construct Controls Guide
- How To Create An Updraft
- Shield Guide
- How To Defeat Shielded Enemies
- How To Flurry Rush
- How To Sneakstrike
- How To Whistle
- Horse Guide
- Register A Horse
- Reroll A Horse
- How To Get Epona
- How To Use Towing Harness
- Arrows Farming
- Rupee Farming
- How To Mine Ores
- How To Open Purple Chests
- How To Farm Fairies
- List of all Weapons
- Best Armor and Weapon
- Best Weapon
- Hylian Shield
- Savage Lynel Bow
- Savage Lynel Shield
- Royal Guard's Claymore
- Zora Longsword
- Royal Halberd
- Wing Shield
- Geoglyphs & Dragon's Tears
- Repair Broken Weapon
- Reroll Weapon Effects
- Upgrade Armor
- How To Make An Axe
- Best Locations To Collect Weapons
- Champions Weapons
- Armor Set Effects List
- All Zonai Devices List
- Zonai Gacha
- How To Farm Zonaite
- Zonai Charge
- How To Get Crystallized Charge
- How To Get Huge Crystallized Charge
- Large Zonaite - How To Get & Use
- How To Upgrade Battery
- Balloon Guide
- Spring Guide
- Rocket Guide
- Battery Guide
- Portable Pot Guide
- Flame Emitter Guide
- Shock Emitter Guide
- Frost Emitter Guide
- Beam Emitter Guide
- Steering Stick Guide
- Time Bomb Guide
- Cannon Guide
- Hover Stone Guide
- Big Wheel Guide
- Small Wheel Guide
- Hydrant Guide
- Light Guide
- Stake Guide
- Stabilizer Guide
- Homing Cart Guide
- Construct Head Guide
- How To Make A Rocket Shield
- How To Make A Hover Bike
- New Features
- Should You Play BotW?
- Downloadable Contents (DLC)
- Patch Updates
- How To Save
- Required Storage
- Can You Play Multi-Mode?
- Kingdom Edition
- Collector's Edition
- Death Penalty
- Best Settings
- How To Transfer Horses
- Help Center
- Terms of Use
- Privacy Policy
- GameWith(日本語)
Follow Polygon online:
- Follow Polygon on Facebook
- Follow Polygon on Youtube
- Follow Polygon on Instagram
Site search
- Dragon’s Dogma 2
- FF7 Rebirth
- Zelda: Tears of the Kingdom
- Baldur’s Gate 3
- PlayStation
- Dungeons & Dragons
- Magic: The Gathering
- Board Games
- All Tabletop
- All Entertainment
- What to Watch
- What to Play
- Buyer’s Guides
- Really Bad Chess
- All Puzzles
Filed under:
- The Legend of Zelda: Breath of the Wild guide and walkthrough
Zelda Breath of the Wild guide: How to find the Travel Medallion in the Master Trials DLC
EX Teleportation Rumors! side quest, Lomei Labyrinth Island and Tu Ka'loh shrine
Share this story
- Share this on Facebook
- Share this on Reddit
- Share All sharing options
Share All sharing options for: Zelda Breath of the Wild guide: How to find the Travel Medallion in the Master Trials DLC
/cdn.vox-cdn.com/uploads/chorus_image/image/55525689/travel_medallion.0.jpg)
The Master Trials DLC brings the Travel Medallion and its associated “ EX Teleportation Rumors! ” side quest into The Legend of Zelda: Breath of the Wild . The Travel Medallion lets you create an ad hock fast travel location wherever you’re standing. You can leave, then come right back without needing to find a nearby shrine or tower.
You can only have one Travel Medallion fast travel location at a time, so you’ll have to be a little careful about how you use it. Put differently, creating a second point will erase the first one.
The EX Teleportation Rumors! side quest
When you boot up Breath of the Wild after installing The Master Trials DLC, you’ll receive the EX Teleportation Rumors!” side quest. Its text says:
Rumor has it there's a tool that allows you to instantly travel to wherever you've placed it. Apparently South Akkala Stable has a copy of Super Rumor Mill EX, which details some rumors about this rare item…
Shockingly, the first thing you need to do is travel to South Akkala Stable.
How to find the Travel Medallion: South Akkala Stable
:no_upscale()/cdn.vox-cdn.com/uploads/chorus_asset/file/8778679/Travel_Medallion_Screen_Shot_6_30_17__10.13_AM.jpg)
Travel to South Akkala Stable, in northeastern Hyrule. The closest warp point is Ze Kasho shrine . Enter the stable, and look for a book on a table. Read it, and you’ll find a new waypoint in the EX Teleportation Rumors! side quest. The quest’s text then changes to:
You read Super Rumor Mill EX: Volume 2! According to this special issue, there are rumors of an item that lets you instantly travel to a location of your choosing. The treasure chest containing this item is supposedly located in northeast Akkala, hidden beneath a labyrinth. If you believe the rumors, try to find the labyrinth and locate the treasure chest!
:no_upscale()/cdn.vox-cdn.com/uploads/chorus_asset/file/8778745/Travel_Medallion_Screen_Shot_6_30_17__10.22_AM.jpg)
The text refers to Lomei Labyrinth Island , an island off the coast at the far northeast of Hyrule. Beyond The Master Trials , both the Trail of the Labyrinth shrine quest and Tu Ka'loh shrine (the closest warp point) appear there.
If you haven’t completed the Trail of the Labyrinth shrine quest and Tu Ka'loh shrine , check out our guides, which will help you navigate the maze.
How to find the Travel Medallion: Lomei Labyrinth Island
The path ahead of you is filled with Guardians. Since you’re in the area, make the trip to the Akkala Ancient Tech Lab to purchase the Ancient Armor , which provides damage reduction against Breath of the Wild ’s mechanical foes. Of course, if you already have it, equip and consider upgrading it. And while you’re there, it’s a good idea to buy some Ancient Arrows , which kill guardians with one headshot eyeshot.
Just in front of Tu Ka'loh shrine , you’ll see an updraft streaming up from a hole in the ground. Jump down into it.
After you land, directly in front if you on a little podium, you’ll find a treasure chest with the Diamond Circlet , which decreases damage from Guardians. It’s a fine thing to have here, considering that you’re surrounded by Guardians, and as soon as you open the chest, four of them will take aim at you.
Equip the Ancient Armor , Guardian weapons or the Master Sword (check out our Master Sword guide if you don’t have it yet), the Hylian Shield (it deflects Guardian lasers, and you can get it easily with our Hylian Shield guide ) and any Ancient Arrows you have in your inventory to fight the mechanized beasts.
You don’t have to fight them all, but you can’t avoid some of them. Use the room’s pillars and Guardians as cover to block the Guardians’ lasers. But beware: some deactivated Guardians aren’t actually deactivated, and they may spring to life when you approach.
We fought all of the Guardians and looted the deactivated ones, because this room is a cornucopia of Ancient Gears , Ancient Springs , Ancient Screws and Ancient Shafts — and you can never have too many of those.
The treasure chest (marked with an “EX”) containing the Travel Medallion is on the side of the room opposite the updraft, sitting against the wall. Opening it will complete the “ EX Teleportation Rumors! ” side quest.
The next level of puzzles.
Take a break from your day by playing a puzzle or two! We’ve got SpellTower, Typeshift, crosswords, and more.
Sign up for the newsletter Patch Notes
A weekly roundup of the best things from Polygon
Just one more thing!
Please check your email to find a confirmation email, and follow the steps to confirm your humanity.
Oops. Something went wrong. Please enter a valid email and try again.

Who is Miquella in Elden Ring anyway?
Get RollerCoaster Tycoon classic on Steam for just $5

Hades 2 is giving fans their first chance to get their hands on the game

GameStop is having a buy 2, get 1 free sale on all pre-owned games including new releases

The Elden Ring DLC statuettes make a pre-order extra tempting

Overwatch 2’s mythic skin prices revealed to be (unsurprisingly) very expensive
Zelda TOTK Travel Medallion: How to Get All 3 Fast Travel Beacons
The Legend of Zelda: TOTK has a way to let Link fast travel wherever he wants – at least once they’ve unlocked the Travel Medallion.
Place down this mysterious device and you’ll be able to freely teleport over to that location. But with a little know-how, you’ll be able to place up to 3 Travel Medallions anywhere you choose in Hyrule!
How to Get the Travel Medallion in Zelda: TOTK
Before claiming the Travel Medallion in Tears of the Kingdom, players need to unlock the Shrines of Light Sensor for their Purah Pad .
After that, you’ll be able to get the first Travel Medallion from Robbie by following these steps:
- Head back to the Hateno Ancient Tech Lab (Coordinates: 3780, -2123, 0251).
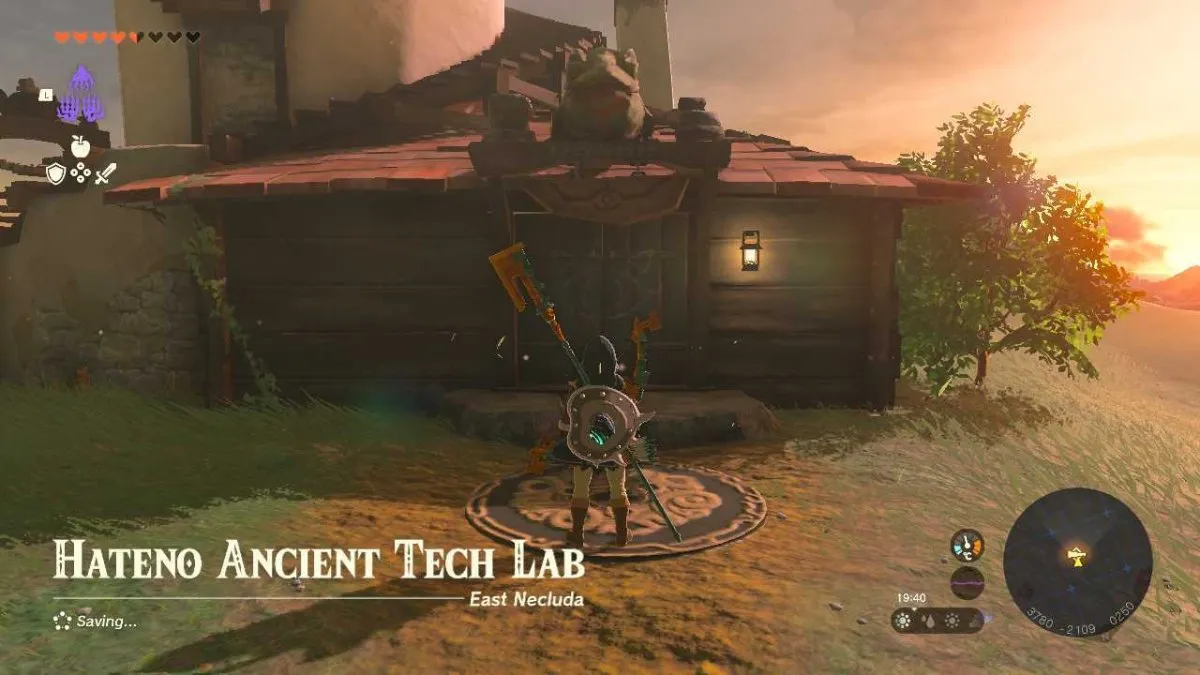
- Talk to Robbie and ask him about the Travel Medallion upgrade.
- Robbie will tell Link to travel to the Akkala Ancient Tech Lab to the northeast (Coordinates: 4519, 3163, 0247) to retrieve the Travel Medallion Prototype.
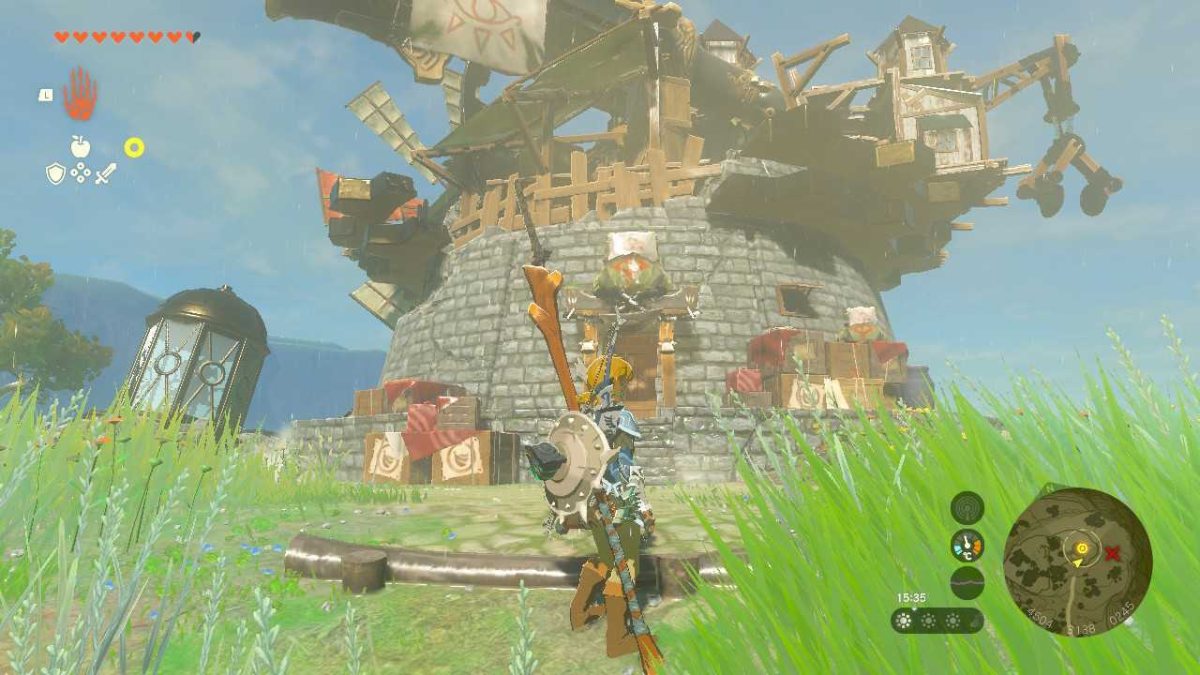
- Once you interact with the Tech Lab door, two members of the Yiga Clan will appear – one large and heavy-hitting, the other small and speedy.
- Defeat both enemies to gain access to the Akkala Ancient Tech Lab.
- Inside you’ll find a tailor who will give you the Yiga Armor. You’ll also find a chest with the Travel Medallion Prototype inside it.
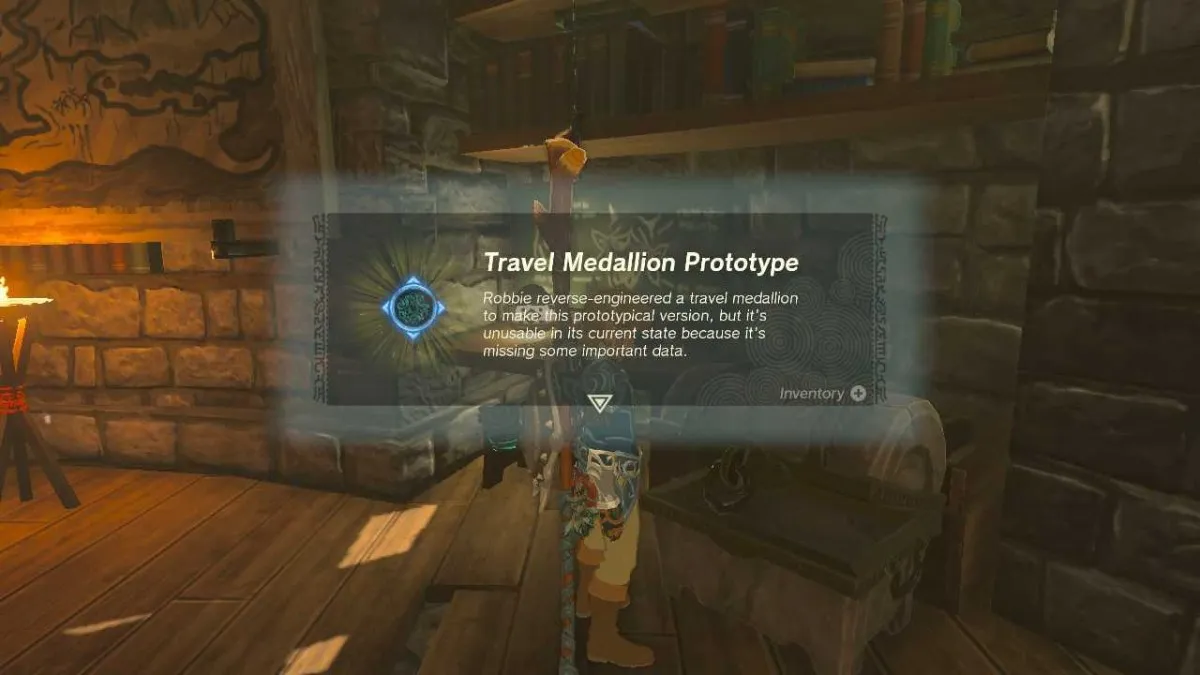
- Fast travel back to the Hateno Ancient Tech Lab and give the Prototype to Robbie.
- You’ll then permanently unlock the Travel Medallion upgrade.
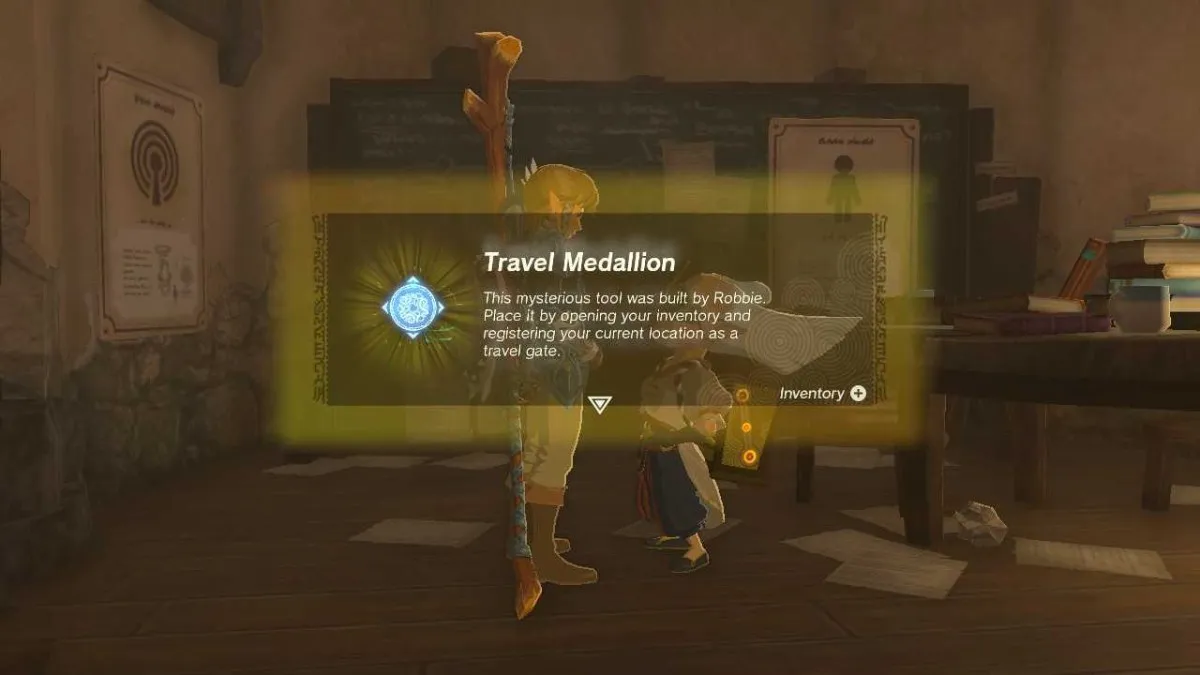
How to Get More Travel Medallions in Zelda: TOTK
Link can unlock up to 2 more Travel Medallions for a grand total of 3 custom fast travel points by finding all of Tears of the Kingdom’s Skyview Towers .
Talk to Robbie after registering 10 Skyview Tower locations to collect a second Travel Medallion.
To get the final Travel Medallion, Link will need to talk to Robbie once more after visiting all 15 Skyview Towers on the Hyrule map.
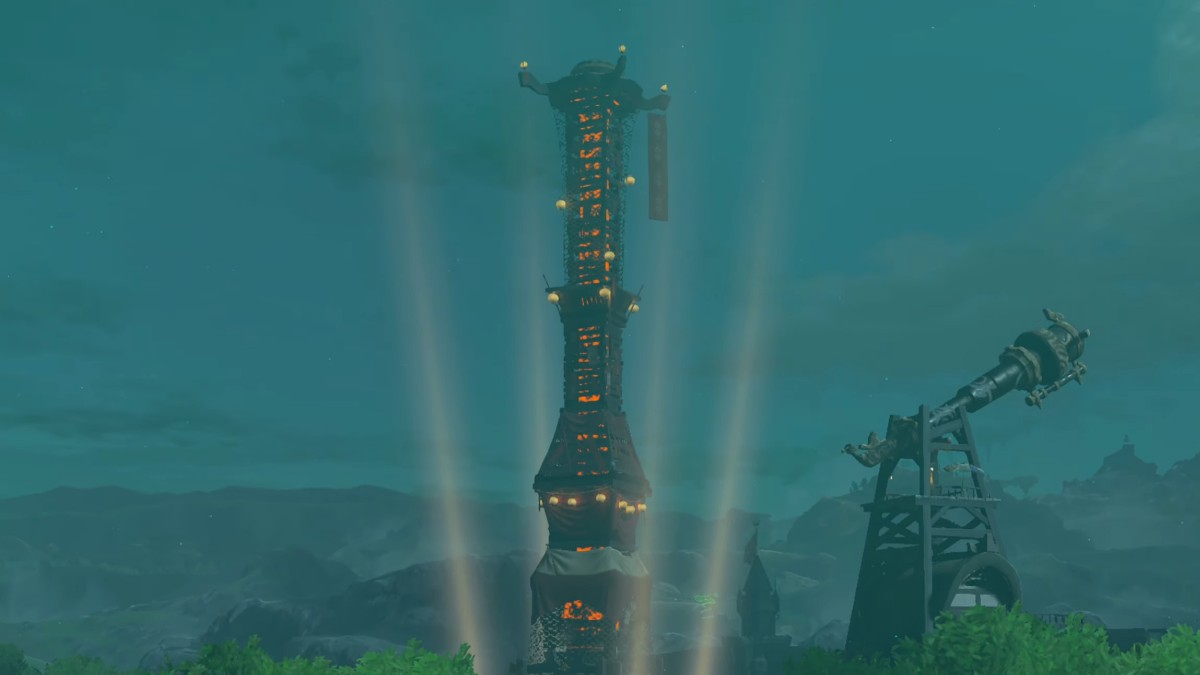
At that point, you’ll have access to 3 Medallions, allowing Link to instantly transport himself to 3 custom locations of your choosing.
And thankfully, they can be picked up again once placed, allowing you to reset each point’s location.
How to Use Travel Medallions in TOTK
To place down a Travel Medallion, simply open your inventory with the + button, use R to tab over to Key Items, and select the item in your inventory .
Hit ‘ Place ‘ and the Travel Medallion will appear at your feet, registering that location as a fast travel point. You can only place Medallions in areas you’re already standing.
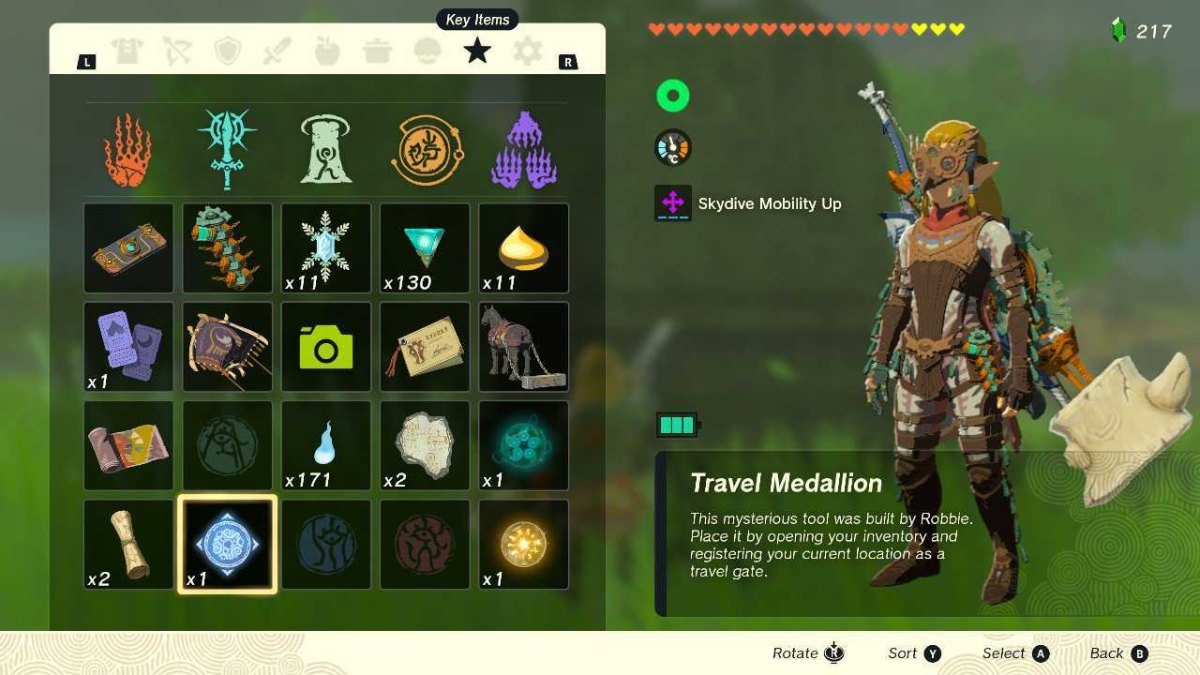
The Travel Medallion will then be marked on your map, which you can check with the – button.
Selecting it will let you fast travel to that location as many times as you desire.
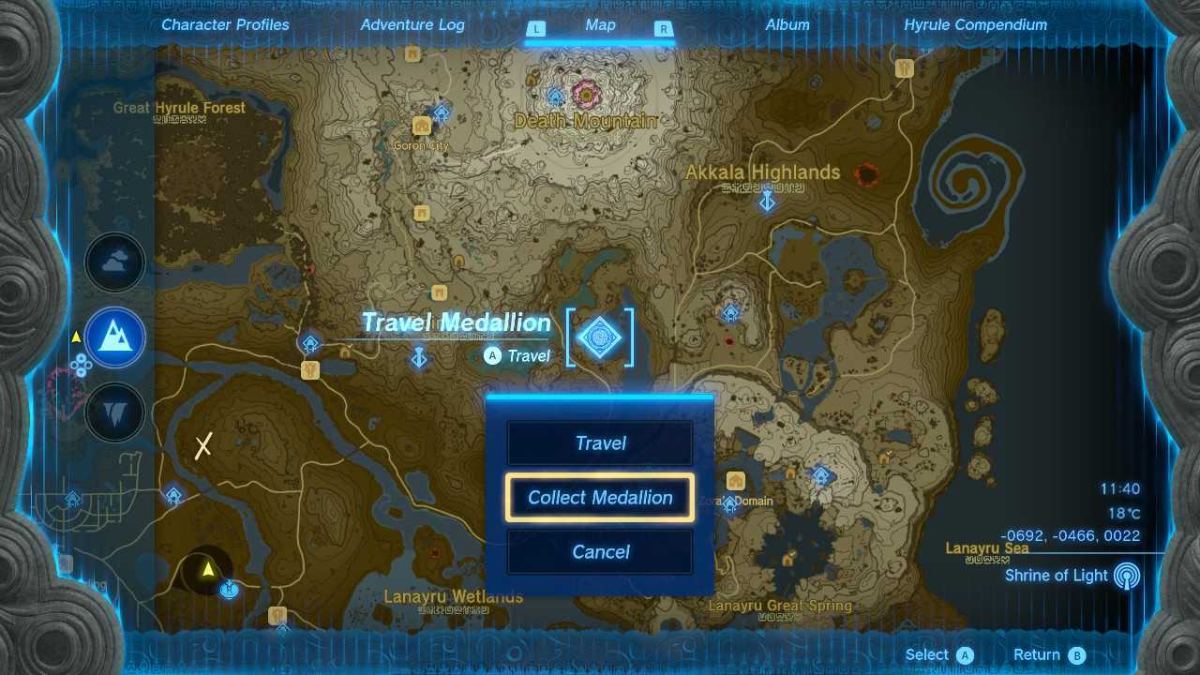
If you want to claim the Travel Medallion back to place it somewhere new, simply find on the map and choose Collect Medallion. You don’t need to be present at the Medallion’s location to collect it, thankfully.
Alternatively, you can find the Travel Medallion in your Key Items once again, and choose to collect it from there.
Zelda: Tears of the Kingdom - How to Get the Travel Medallion Prototype (& How it Works)
Help Link teleport anywhere on the map with this guide to finding the Travel Medallion in Tears of the Kingdom.
Quick Links
How to begin robbie's questline in tears of the kingdom, where to find the travel medallion prototype in tears of the kingdom, how to use and upgrade the travel medallion.
Originally added through Breath of the Wild's expansion pass, the Travel Medallion allowed players to place a single fast-travel waypoint anywhere on the map, which Link could return to anytime. In The Legend of Zelda: Tears of the Kingdom , the medallion has been worked into one of the main side plots.
In order to get the improved Travel Medallion, Link will first have to locate the Travel Medallion Prototype and return it to Robbie, Breath of the Wild 's wacky ancient tech aficionado. This guide will explain how Link can find the prototype and get his hands on one of Tears of the Kingdom 's most useful tools.
RELATED: Zelda: Tears Of The Kingdom - Great Vehicles You Can Make From Scratch
Before he can get his hands on the Travel Medallion Prototype, Link must complete the previous steps in Robbie's questline. To find Robbie, Link must have access to Lookout Landing, available as soon as he descends from the Great Sky Island. Here he will meet Josha, one of Purah's researchers. Working with Josha will eventually lead Link to Robbie's questline.
Robbie's first quest will find Link descending to the Depths, where he will unlock Tears of the Kingdom 's Camera feature . Once that is complete, Robbie will head to the Hateno Ancient Tech Lab (3779, -2123, 0251), just north of Hateno Village.
Here he will offer Link three upgrades to the Purah Pad: Sensor+, Hero's Path Mode, and the Travel Medallion . The first two tasks can be done quickly, especially if players fill their compendium on their own. The Travel Medallion, however, will require Link to complete a slightly bigger quest.
If Robbie does not leave Lookout Landing, Link may need to complete at least one of the four main temples to trigger his exit. The Rito Village quest from "Regional Phenomena" is the most common starting place.
Robbie tells Link he cannot upgrade the Purah Pad until he gets the Travel Medallion Prototype from the Akkala Ancient Tech Lab . The lab is found in the northeastern corner of the map, and Robbie explains that dangerous trespassers have taken it over.
The Akkala Ancient Tech Lab is found at the following coordinates: 4505, 3144, 0245. Technically, Link can head to the lab any time after receiving the "Presenting: The Travel Medallion!" mission. There are several Skyview Towers between Hateno and Akkala, and though it will make it easier for Link to know where he is going, it is not required.
When Link arrives at the tower and attempts to open the door, he'll be met with a Yiga Blademaster and a Yiga Foot Soldier. Once they are dealt with, Link can head inside. Here he'll find a man in Cece apparel , who is startled by Link's approach. His name is Konba, and he has apparently been making the Yiga's outfits, of which he gives Link his own Yiga Amor chest piece.
In the corner of the room, Link will find a stone chest. Open the chest to receive the Travel Medallion Prototype. Return the prototype to Robbie and let him upgrade the Purah Pad.
RELATED: The Legend Of Zelda: Tears Of The Kingdom Proves Why Delays Are A Necessary Evil
To use the Travel Medallion, Link simply needs to choose the place he'd like to travel to, and enter the Key Items menu. Look for the Travel Medallion in the menu, hover over it, and select 'Place.' A blue travel gate will show up below Link, as well as on the map. Link will now be able to fast-travel to this location like any other waypoint.
How to Upgrade the Travel Medallion
When Link first acquires the Travel Medallion, Robbie tells Link that he'll be able to increase the number of travel gates that he can use. He informs Link the upgrade can be performed twice, once when Link acquires ten map data points and again when he acquires 15. This will bring the total number of gates to three.
Map data is acquired each time Link brings a Skyview Tower on . Once he has completed the required amount, simply return to Robbie and he'll perform the upgrade.
The Legend of Zelda: Tears of the Kingdom is available now for the Nintendo Switch.
- Baldur's Gate 3
- Dreamlight Valley
- Lethal Company
- Monopoly Go
- Jujutsu Chronicles
- UGC Limited
- Call of Duty
- Legend of Zelda
- Ethics Policy
- Privacy Policy
- Review Policy

How to Use Travel Medallions to Respawn at Custom Locations in Zelda Tears of the Kingdom
If you played Breath of the Wild’s DLC, you might remember the Travel Medallion item that allowed you to instantly warp to places of your choosing. Tears of the Kingdom has the same item, but you don’t get them automatically. You must complete some quests first to get the medallions. Here is everything you need to know about how to use travel medallions to respawn at custom locations in Zelda Tears of the Kingdom.
How to Get Travel Medallions in Zelda Tears of the Kingdom
There are a few things you have to do before you can actually get travel medallions to use. You have to be at the point in the game where you have made it to Lookout Landing and get the Purah Pad camera and sensor .
Once you have your Purah Pad upgraded to use those, Robbie in Hateno Village will direct you to where his old lab was in the Akkala Highlands. If you played Tears of the Kingdom, this was the Ancient Tech Lab in the far northeast of the map.
Enter the lab and head downstairs. One of the chests will contain a travel medallion prototype.
Take this prototype back to Robbie, and he will give you three travel medallions to use.
How to Use Travel Medallions in Zelda Tears of the Kingdom
Using the travel medallions is very simple. All you have to do is open your inventory to the key items page. From here, you can select the medallion and place it nearly anywhere in the game.
A glowing blue circle will appear on the ground where you placed the medallion. This is where you will spawn to later on.
When you are ready to fast travel to that spot, simply open your map and select the location of the medallion on the map. Link will warp there instantly.
Travel medallions are just one of the ways to fast travel in the game . They can be used an infinite amount of times, so be sure to remove them when you no longer need to warp to an area so you can place it somewhere else.
That’s all you need to know about how to use travel medallions to respawn at custom locations in Zelda Tears of the Kingdom. Be sure to check out our numerous guides on Tears of the Kingdom starting with the tips and tricks below.

Where To Find The Travel Medallion - Zelda Breath Of The Wild DLC Guide
GameSpot may receive revenue from affiliate and advertising partnerships for sharing this content and from purchases through links.
Make traveling easier.
By Kallie Plagge on July 5, 2017 at 11:57AM PDT
The Legend of Zelda: Breath of the Wild's first DLC, titled The Master Trials, is finally out, and it comes with a useful item known as the Travel Medallion, which allows you to create your own fast-travel point. This should come as good news for players who have been yearning for a quick and easy way to access a specific location that would be difficult to go back and forth from. While the game offers clues to help you find the Travel Medallion, you can head straight there if you're privy to where it's located.
The medallion is located in a treasure chest somewhere in Lomei Labyrinth Island. To find the chest more easily, use your Sheikah Sensor to track treasure chests and enable Magnesis to spot them.
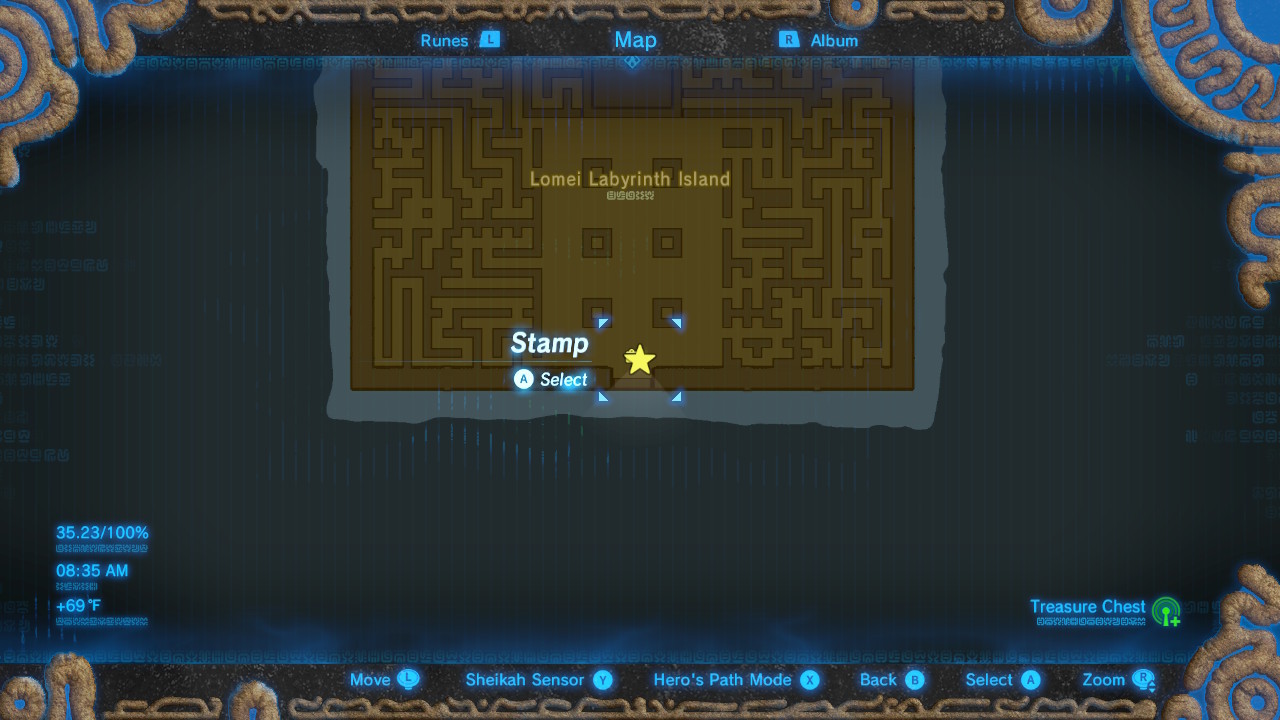
Location: The chest is located in an underground cavern on Lomei Labyrinth Island. You'll need to jump down a shaft with an air current flowing upward through it. If you've completed the Tu Ka'loh Shrine, fast travel to it, and you'll find the shaft right in front of the shrine. The chest is along the southern wall of the cavern. The area is filled with Guardians both active and dormant, so be sure to pack Ancient Arrows or master the art of parrying before you enter.
To use the Travel Medallion, go to the location you'd like to set as your custom fast travel point, select the Medallion in your Key Items pouch, and choose "place."
The Master Trials DLC is one of two DLC packs included in the Breath of the Wild Expansion Pass, which is available for $20 on the Nintendo Eshop. For more on The Master Trials DLC content, check out our roundup detailing where to find all the new armor sets and items . And be sure to follow all our Zelda guides and videos for more on the DLC.
Got a news tip or want to contact us directly? Email [email protected]
- Leave Blank
Kallie Plagge
Kallie Plagge was GameSpot's reviews editor from August 2018 to March 2021. She loves Pokemon, inventory management, and Grunt Birthday Party.
- @inkydojikko
The Legend of Zelda: Breath of the Wild
Get the latest news and videos for this game daily, no spam, no fuss.
By signing up, you agree to the our Terms of Use and acknowledge the data practices in our Privacy Policy .
We'll begin emailing you updates about %gameName%.
Use your keyboard!
Log in to comment

Uncover York’s Rich Heritage with the York Travel Medallion: Hidden Gems and Cultural Significance
Uncover York’s rich heritage with the York Travel Medallion: Hidden Gems and Cultural Significance. Embark on a journey to discover the captivating story behind the prestigious York Travel Medallion, a symbol of the city’s historical significance and cultural richness. This article offers valuable insights and recommendations for visitors, blending past and present to create an enchanting experience. From its intricate craftsmanship to its deep-rooted significance in York’s heritage, join us as we delve into the captivating world of the York Travel Medallion and uncover hidden gems along the way.

Key Takeaways:
- The York Travel Medallion is a feature in the game “The Legend of Zelda: Breath of the Wild” and “Tears of the Kingdom” that allows players to warp to specific locations in the game.
- In the “Tears of the Kingdom” DLC, players can obtain the Travel Medallion for free after completing certain quests.
- In the base game “Breath of the Wild”, players can find the Travel Medallion on Lomei Labyrinth Island, which is filled with Guardians.
- The Travel Medallion serves as an instant teleporter to specific locations in the game.
- York, England is a scenic city known for its art galleries and historic sites.
- The Travel Medallion is also available in the “Tears of the Kingdom” DLC, where players can obtain three medallions by upgrading the Purah Pad.
Table of Contents
York Travel Medallion
York, England, a city steeped in history and brimming with cultural treasures, is a destination that captures the imagination of travelers from around the world. And hidden within its walls lies a unique artifact that allows visitors to uncover the rich heritage of York in the most enchanting way – the York Travel Medallion . This exquisite medallion is not just a piece of jewelry; it holds the key to unlocking hidden gems and experiencing the cultural significance of this captivating city.
Unveiling the Craftsmanship
Crafted with meticulous attention to detail, the York Travel Medallion showcases the artistry and skill of the local artisans. Each medallion is a testament to the city’s rich history and heritage, bearing intricate designs that reflect York’s unique charm. From delicate engravings that depict historic landmarks to ornate symbols that capture the essence of the city, this medallion is a miniature work of art that encapsulates the spirit of York.
A Journey Through Time
With the York Travel Medallion in hand, adventurers can embark on a journey through time, guided by the medallion’s mystic powers. Just as in the game “The Legend of Zelda: Breath of the Wild,” where players use the Travel Medallion to warp to specific locations, the York Travel Medallion serves as a portal that transports visitors to York’s most iconic and historically significant sites. As you touch the medallion and close your eyes, you’ll be whisked away to medieval streets, ancient Roman ruins, and towering cathedrals that stand as testaments to the city’s illustrious past.
Discover Hidden Gems
One of the greatest charms of the York Travel Medallion is its ability to reveal hidden gems to those who possess it. As you follow its guiding light, you’ll stumble upon lesser-known corners of the city, tucked away from the bustling crowds. From quaint tearooms that serve delectable scones to atmospheric bookshops brimming with literary treasures, these hidden gems offer a glimpse into the soul of York, away from the well-trodden tourist paths.
Immerse in Cultural Significance
The York Travel Medallion , with its deep-rooted connection to York’s heritage, allows visitors to immerse themselves in the city’s cultural significance. Stroll through the York Minster, a stunning cathedral dating back to the 7th century, and marvel at its breathtaking Gothic architecture. Step into the Jorvik Viking Centre and be transported back in time to the Viking era, experiencing the sights, sounds, and smells of York’s Viking past. With the York Travel Medallion , every corner of the city becomes a living museum, inviting you to understand and embrace the cultural tapestry that defines York.
Practical Tips for Visitors
For those planning to journey to York and embark on their own medallion-guided adventure, here are a few practical tips to make the most of your experience:
Obtaining the Medallion : The York Travel Medallion can be acquired from select artisans and specialty stores in the city. Look for reputable sellers or visit the local craft markets, where you can witness the master artisans at work and choose a medallion that speaks to you.
Using the Medallion : To activate the medallion’s powers, gently hold it in your palm and focus your intention on the specific place you wish to discover. The medallion will guide you through the winding streets and hidden alleyways, ensuring you don’t miss a single treasure along the way.
Exploring Beyond the Famous Sites : While attractions like the York Minster and Clifford’s Tower are must-visit destinations, don’t be afraid to venture off the beaten path. Let the medallion lead you to charming neighborhoods, local markets, and lesser-known historic sites that offer a more intimate connection with the city.
Engage with the Local Community : York’s locals are known for their warm hospitality and love for their city. Strike up conversations, ask for recommendations, and immerse yourself in the friendly atmosphere. The medallion’s hidden gems extend beyond physical places; the connections you make with the locals will add depth and vibrancy to your experience.
In the bustling city of York, the York Travel Medallion shines as a beacon, illuminating the hidden treasures and cultural riches that lie beneath the surface. As you embark on your medallion-guided adventure, prepare to be captivated by the city’s fascinating history, enchanted by its charming streets, and transported to a world where past and present seamlessly intertwine. Let the York Travel Medallion be your guide and unlock the secrets of this extraordinary city.
Here are some captivating sentences with active internal links:
Check out the latest updates from the travel state gove here to stay informed about travel regulations and guidelines.
Experience the ultimate convenience and style with the Graco Fastaction Fold Click Connect Jogger Travel here . Explore the best travel gear that suits your active lifestyle.
Looking for affordable and exciting getaways? Discover the Westgate Cruise and Travel $49 Getaways here and start planning your next adventure.
Ready for your next travel nursing assignment? Explore the numerous opportunities and benefits offered by Cynet Travel Nursing here . Take the leap and elevate your nursing career.
Seek assistance from our friendly customer service team at Super Travel. Contact us at our dedicated phone line here for any travel-related queries or concerns.
3. Significance and Symbolism of the Medallion in York
The York Travel Medallion holds a deep and profound significance in the history and culture of York. This small yet powerful artifact is more than just a decorative piece; it is a symbol of heritage, tradition, and connection to the city’s rich past. By understanding the significance and symbolism of the medallion, visitors can truly appreciate its value and experience a deeper connection to York.
Symbolism of Medallions:
Medallions have been used as symbols in various cultures throughout history, each with its own unique meanings and representations. In Greek mythology, medallions were tokens of favor from the gods, signifying blessings or protection. The ancient Chinese culture associated medallions with happiness, good luck, and longevity. Native American tribes crafted medallions with intricate designs and symbols, representing tribal identity, spirituality, and achievements.
Materials and Designs:
The design and materials of medallions vary based on culture and their intended use. Ancient Egyptian medallions, for example, were often made of precious metals like gold and adorned with intricate engravings and gemstones. The craftsmanship and materials used in creating the York Travel Medallion reflect the rich history and artistry of the city.
History and Role:
Medallions have a long history of being used as symbols of honor, achievement, or membership. In ancient times, they were frequently awarded to military personnel or individuals who had accomplished notable feats. Medallions also played an essential role in ancient civilizations, serving various purposes from religious to military uses. They were considered talismans or amulets, believed to bring protection and good fortune to the wearer.
Religious Significance:
Furthermore, medallions hold great significance in many religious traditions worldwide. Whether it’s Christianity, Buddhism, or other faiths, medallions are used symbolically to represent particular beliefs or aspects of faith. They act as tangible reminders of one’s spiritual connection and serve as objects of devotion and reverence.
Through its history, symbolism, and cultural importance, the York Travel Medallion offers visitors a glimpse into the stories and traditions that have shaped the city. It serves as a tangible link to York’s past and an emblem of its enduring heritage.
Key Takeaways: – Medallions have symbolic meanings in various cultures, representing favor, happiness, spirituality, and achievements. – The design and materials of medallions vary, with ancient examples crafted from precious metals and adorned with intricate engravings and gemstones. – Throughout history, medallions have been awarded as symbols of honor, achievement, or membership, playing roles in ancient civilizations and religions. – The York Travel Medallion embodies the deep significance and symbolism associated with medallions, connecting visitors to the rich history and culture of York.
Image sources: – Bing Images – Sketch Blog
References: 1. Eden Bengals 2. Five Medallions and Their Meanings | National Jeweler 3. Medallion (architecture) – Wikipedia
4. Practical Uses and Benefits of the Medallion for Travelers
Whether you’re an avid traveler or a casual explorer, the York Travel Medallion offers a range of practical uses and benefits that enhance your journey through the fascinating city of York. Let’s dive into how this unique artifact can elevate your travel experience.
Ease of Navigation
The York Travel Medallion acts as a powerful portal, allowing you to effortlessly navigate through the diverse landscapes of York. By registering specific locations as travel gates, you can quickly and conveniently warp back to those spots whenever you desire. No more worrying about getting lost or spending precious time retracing your steps – with the medallion, you can smoothly explore the city with ease.
Efficient Time Management
With its ability to warp you to desired locations, the York Travel Medallion facilitates efficient time management during your travels. Whether you have limited time to spend in York or simply want to maximize your itinerary, the medallion helps you save valuable minutes that would otherwise be spent on tedious commutes. Spend more time immersing yourself in the captivating history, culture, and hidden gems of this enchanting city.
Access to Hidden Gems
York is renowned for its rich heritage and historical significance, but there are also numerous lesser-known corners waiting to be discovered. The York Travel Medallion serves as a key to unlocking these hidden treasures, transporting you to off-the-beaten-path destinations that might be overlooked by other travelers. Immerse yourself in the authentic local experiences, uncover hidden gems, and create lasting memories beyond the famous sites.
Enhanced Cultural Immersion
Immersing yourself in the local culture is an essential aspect of any enriching travel experience. The York Travel Medallion allows you to do just that by providing access to culturally significant locations. Explore ancient landmarks, visit traditional markets, and engage with the local community to gain a deeper understanding of York’s vibrant heritage. The medallion acts as a bridge, connecting you to the very soul of the city.
Flexibility and Customization
The York Travel Medallion offers flexibility and customization, empowering you to shape your travel experience according to your preferences. By registering multiple travel gates, you can create a customized itinerary that suits your interests and allows for seamless transitions between different areas of York. Tailor your journey to discover the aspects of the city that resonate with you most, whether it’s indulging in culinary delights, delving into historical narratives, or simply wandering through picturesque streets.
Points and Miles Rewards
Not only does the York Travel Medallion enhance your travel experience, but it also rewards you for your adventures. By booking flights, hotel stays, or car rentals through the medallion, you earn valuable points and miles that can be redeemed for future travel. This unique feature adds an extra layer of incentive to utilize the medallion and experience everything York has to offer.
Key Takeaways: – The York Travel Medallion simplifies navigation and saves time during your travels. – It grants access to hidden gems and off-the-beaten-path destinations in York. – By using the medallion, you can immerse yourself in the rich cultural heritage of the city. – Customize your travel experience by registering multiple travel gates. – Earn points and miles by booking travel services through the medallion.
Sources: – How to Use Travel Medallion: A Step-by-Step Guide to Maximizing Your Travel Medallion – Breath of the Wild Guides – How to get the Traveler Medallion DLC gear
5. Recommendations and Tips for Visitors Exploring York with the Medallion
York’s rich heritage and cultural significance are brought to life through the use of the York Travel Medallion. This unique artifact serves as a portal to uncover hidden gems and explore the city’s most iconic sites. Here are some recommendations and tips for visitors looking to make the most of their experience with the medallion:
1. Obtain Your York Travel Medallion from Select Artisans
To fully immerse yourself in York’s heritage, start by obtaining a York Travel Medallion from select artisans in the city. These skilled craftsmen create each medallion with meticulous attention to detail, showcasing the local artistry and skill. By obtaining a medallion, you not only gain a tangible link to the city’s history but also support the local artisans who keep these traditions alive.
2. Activate the Medallion’s Powers
Once you have your York Travel Medallion, it’s essential to activate its powers. The medallion serves as a tool for navigation and exploration, allowing you to quickly warp to desired locations within the city. To activate the medallion, simply hold it in your hand, close your eyes, and envision your destination. As you open your eyes, you’ll find yourself transported to your chosen location, ready to embark on your York adventure.
3. Explore Beyond Famous Sites
While York is renowned for its famous attractions such as York Minster and the JORVIK Viking Centre, don’t limit yourself to these well-known spots. The York Travel Medallion unlocks access to hidden gems and off-the-beaten-path destinations that are often overlooked by tourists. Venture into the lesser-known corners of the city, where you’ll discover charming streets, tranquil gardens, and fascinating historical sites waiting to be explored.
4. Engage with the Local Community
To truly understand York’s cultural significance, take the opportunity to engage with the local community. Strike up conversations with residents, visit local shops and markets, and attend community events. The medallion serves as a symbol of connection to York’s rich past, and by immersing yourself in the local community, you’ll gain a deeper appreciation for the city’s heritage.
5. Customize Your Travel Experience
One of the advantages of using the York Travel Medallion is the flexibility and customization it offers. Tailor your travel experience according to your interests and preferences. Whether you’re a history enthusiast, an art lover, or a foodie, the medallion can guide you to culturally significant locations that align with your passions. Let the medallion be your personal tour guide, leading you to experiences that resonate with you.
- Obtain your York Travel Medallion from select artisans in the city to support local craftsmanship and gain a tangible link to York’s history.
- Activate the medallion’s powers by holding it and envisioning your desired destination, allowing you to warp to different locations within the city.
- Explore beyond the famous sites of York with the medallion, unlocking access to hidden gems and lesser-known corners of the city.
- Engage with the local community to gain a deeper understanding of York’s cultural significance and connect with its rich heritage.
- Customize your travel experience with the medallion, tailoring it to your interests and passions to make the most of your time in York.
Sources: – Visit York – Tracy’s Travels in Time

Q1: What is the York Travel Medallion?
A1: The York Travel Medallion is a feature in the game “The Legend of Zelda: Breath of the Wild” and its “Tears of the Kingdom” DLC. It allows players to warp to specific locations within the game.
Q2: How can I obtain the York Travel Medallion?
A2: In the base game “Breath of the Wild,” players can find the Travel Medallion on Lomei Labyrinth Island, which is filled with Guardians. In the “Tears of the Kingdom” DLC, players can obtain the Travel Medallion for free after completing certain quests.
Q3: What can I use the York Travel Medallion for?
A3: The Travel Medallion acts as an instant teleporter to specific locations in the game. Once obtained, players can register their current location as a travel gate by placing the medallion in their pouch. They can then use the medallion to warp back to that location whenever they want.
Q4: How many York Travel Medallions can I have?
A4: The number of Travel Medallions that players can have increases with the number of Skyview Towers they have unlocked, up to a maximum of three. Players can talk to a character named Robbie after unlocking each tower to increase the number of medallions they can have.
Q5: How can I maximize the benefits of the York Travel Medallion?
A5: To maximize the benefits of the Travel Medallion, players can refer to a step-by-step guide provided on tffn.net. Additionally, there is a YouTube video available that explains how to get and use the Traveler Medallion in The Legend of Zelda: Breath of the Wild.

Author description olor sit amet, consectetur adipiscing elit. Sed pulvinar ligula augue, quis bibendum tellus scelerisque venenatis. Pellentesque porta nisi mi. In hac habitasse platea dictumst. Etiam risus elit, molestie
Unlock Savings with WKU Travel Voucher: Your Guide to Budget-Friendly Adventures
Unveiling octopath traveler 2’s devilishly delicious dish: a culinary journey.

IMAGES
VIDEO
COMMENTS
Presenting: The Travel Medallion! is a Side Adventure quest in The Legend of Zelda: Tears of the Kingdom. ... you'll need to uncover the map-data locations by unlocking more Skyview Towers across ...
You'll need to blow up the rocks to get in. The entrance to the cave is at coordinates (3741, -2085, 0208). We used a bomb flower to get it — stand back! Head into the cave and glide down the ...
Presenting: The Travel Medallion is a Side Adventure in The Legend of Zelda: Tears of the Kingdom (TotK) that is found in Hateno Ancient Tech Lab. Read on to learn how to unlock Presenting: The Travel Medallion, its location and rewards, as well as how to complete this Side Adventure!
Purah Pad Upgrade + 3 Travel Medallion, Camera in Tears of the Kingdom. In this video i will show you how to upgrade fast travel with Travel Medallion in TOT...
The Zelda: Tears of the Kingdom Travel Medallions can be found under the key items tab of your inventory screen. When selected, you can choose to place one on the exact spot where Link is standing ...
Once 10 regions have been mapped, a second travel medallion can be activated. The travel medallion is accessible from your Key Items. 4: You can now use two travel medallions to instantly return to any location you have set. The pad can hold one more travel medallion. Once 15 regions have been mapped, a third travel medallion can be activated.
To get the Travel Medallion, complete a task for Robbie at the Hateno Research Lab. To use the Travel Medallion, access it from the Key Items menu and place one at your current location. You can ...
Travel to the Akkala Region and go to the Ancient Tech Lab, just up the road from the East Akkala Stables. When you arrive, knock on the door to trigger a Yiga Clan ambush. Defeat these knuckleheads, and you'll be able to go inside the lab. When you enter, head for the chest to the right that holds the Travel Medallion.
How To Obtain The Travel Medallion. If you want to obtain the Travel Medallion, first, you will need to obtain the quest "Hateno Village Research Lab" from Robbie at Lookout Landing. He will ask ...
To get Travel Medallions, you need to complete both Camera Work in the Depths and A Mystery In The Depths.The latter you can only get after completing at least one Regional Phenomena quest. Once ...
The Travel Medallion is one of the most useful features of the Pura Pad in Tears of the Kingdom, as it allows you to place a warp point anywhere on the map, ...
This page contains a walkthrough and guide for Presenting: The Travel Medallion! for The Legend of Zelda Tears of the Kingdom (TotK), including side quest or side adventure availability, side quest client, mission location, how to unlock, rewards, and an in-depth guide on how to clear it. The Legend of Zelda: Tears of the Kingdom (2023) was released last May 12, 2023, and is now playable on ...
The Travel Medallion can be obtained from Robbie upon completing the Side Adventure "Presenting: The Travel Medallion!". Note that the quest "Hateno Village Research Lab" must be cleared to trigger the "Presenting; The Travel Medallion". Beware Of The Battle With Yiga Clan
How to find the Travel Medallion: South Akkala Stable. Travel to South Akkala Stable, in northeastern Hyrule. The closest warp point is Ze Kasho shrine. Enter the stable, and look for a book on a ...
How to Get More Travel Medallions in Zelda: TOTK. Link can unlock up to 2 more Travel Medallions for a grand total of 3 custom fast travel points by finding all of Tears of the Kingdom's Skyview Towers.. Talk to Robbie after registering 10 Skyview Tower locations to collect a second Travel Medallion.. To get the final Travel Medallion, Link will need to talk to Robbie once more after ...
Zelda ToTK Travel Medallion Location video shows you how to get the Traveller's Medallion, which allows you to teleport to any place you've already visited.?...
To use the Travel Medallion, Link simply needs to choose the place he'd like to travel to, and enter the Key Items menu. Look for the Travel Medallion in the menu, hover over it, and select 'Place ...
When you are ready to fast travel to that spot, simply open your map and select the location of the medallion on the map. Link will warp there instantly. Travel medallions are just one of the ways ...
one of the three gleeok locations in the corners of the sky bc they're a pain in the ass to get to. near the dondons bc that area in general is kinda annoying to reach. at tarrey town for convenience. u can also just keep one available at all time to use as u please. 2.
The Legend of Zelda: Breath of the Wild. $37.89 at Amazon. GameSpot may get a commission from retail offers. The Legend of Zelda: Breath of the Wild's first DLC, titled The Master Trials, is ...
Tired of being a second rate Link? Wonder how to get the best out of Zelda Tears Of The Kingdom? Wonder no more! In this video, we'll show you how to get 3 c...
The York Travel Medallion is a feature in the game "The Legend of Zelda: Breath of the Wild" and "Tears of the Kingdom" that allows players to warp to specific locations in the game. In the "Tears of the Kingdom" DLC, players can obtain the Travel Medallion for free after completing certain quests.
#tearsofthekingdom #thelegendofzelda #gaming